Table of Contents
Advertisement
Advertisement
Table of Contents

Subscribe to Our Youtube Channel
Related Manuals for VTech CS5211


Summary of Contents for VTech CS5211
- Page 1 User’s manual w w w.v t e c h p h o n e s . c o m Models: CS5211/ CS5212...
- Page 2 46 of this manual. This manual has all the feature operations and troubleshooting necessary to install and operate your new VTech telephone. Please review this manual thoroughly to ensure proper installation and operation of this innovative and feature rich VTech product. For support, shopping, and everything new at VTech, visit our website at www.vtechphones.com.
-
Page 3: Table Of Contents
Table of contents Getting started . . . . . . . . . . . . . . . . . . . . . . . . . 1 Volume . - Page 4 Table of contents Edit a speed dial entry ....25 Precautions for users of implanted cardiac pacemakers ....47 Reassign speed dial locations .
-
Page 5: Getting Started
Getting started Parts checklist Your telephone contains the following items. Save your sales receipt and original packaging in the event warranty service is necessary. Handset Telephone Telephone base Battery compartment Battery Telephone User’s manual cover power adapter base line cord To purchase a replacement battery or power adapter, visit our website at www.vtechphones.com or call 1 (800) 595-9511. -
Page 6: Telephone Base Installation
Getting started Telephone base installation Install the telephone base as shown below. Make sure that the electrical outlet is not controlled by a wall switch. If you subscribe to digital subscriber line (DSL) high-speed Internet service through your telephone line, you must install a DSL filter between the telephone line cord and telephone wall jack. -
Page 7: Wall Mounting
Getting started Wall mounting Your telephone comes ready for tabletop use. If you prefer to mount your telephone on the wall (optional), it is designed to mount on a standard telephone wall plate. You can mount the telephone base on the wall by positioning it so the mounting studs fit into the corresponding holes at the back of the telephone base. -
Page 8: Battery Installation
Getting started Battery installation Install the battery as shown below. If the battery compartment cover is on the handset, press on the indentation and slide the cover down to remove. Plug the battery connector securely into the socket inside the handset battery compartment, matching the color-coded label. -
Page 9: Battery Charging
Getting started Battery charging Once you have installed the battery, the screen indicates the battery status (see the table below). If necessary, place the handset in the telephone base to charge the battery. For best performance, keep the handset in the telephone base when not in use. -
Page 10: Handset Layout
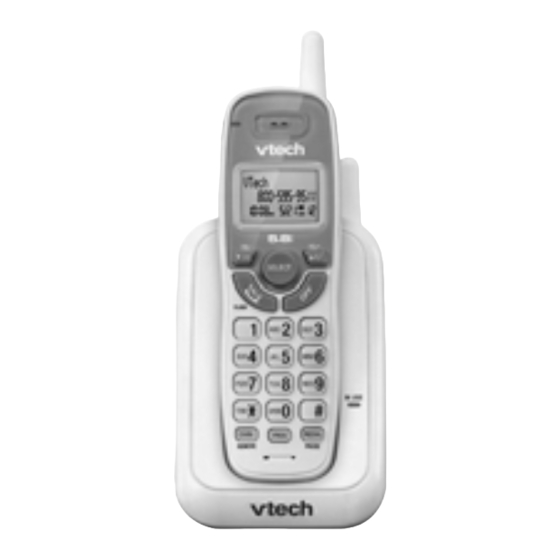
Getting started Handset layout CHARGE light On when the handset is charging in the telephone base (page 4). CID/VOL- Press to review the call log when the telephone is not in use (page 29). Press and hold to adjust the ringer volume when the telephone is not in use (page 10). During a call, press to decrease the listening volume. - Page 11 Getting started Handset layout SELECT Press to store a programming option or a directory entry. /VOL+ Press to review the directory when the telephone is not in use (page 21). Press and hold to adjust the ringer volume when the telephone is not in use (page 11). During a call, press to increase the listening volume.
-
Page 12: Telephone Base Layout
Getting started Telephone base layout /FIND HANDSET Press to page the handset (page 17). IN USE light On when the handset is in use. -
Page 13: Telephone Settings
Telephone settings Set date and time If you subscribe to caller ID service from your telephone service provider, the date and time are set automatically with the next incoming call. If you do not have caller ID service, you can set the date and time manually. To set the date and time: Press PROG when the handset is not in use. -
Page 14: Ringer
Telephone settings Ringer You can select the ringer tone. To change the handset ringer tone: Press PROG when the handset is not in use. CID/ until the screen displays RINGER: and the current setting. Press SELECT and Press VOL- VOL+ the current setting flashes. -
Page 15: Dial Mode
Telephone settings Ringer volume (continued) When the handset is not in use, press and hold CID/ until the screen displays RINGER VOL: VOL- VOL+ and the current setting. The current setting flashes. /VOL- or /VOL+ to adjust ringer volume from OFF, LOW or HI. You hear a sample of the selected Press volume level as you scroll through the choices. -
Page 16: Clear Voicemail
Telephone settings Clear voicemail If you subscribe to voicemail service offered by your telephone service provider, NEW VOICEMAIL and displayed on the handset when you have new voicemail messages. Contact your telephone service provider for more information and assistance about using your voicemail service. After you have listened to all new voicemail messages, the indicators on the handset turn off automatically. -
Page 17: Home Area Code
Telephone settings Home area code If you dial local calls using only seven digits (area code not required), you can program your home area code so that when you receive a call within your local area, the telephone number is automatically stored without the area code in the call log. -
Page 18: Lcd Language
Telephone settings LCD language The LCD language is preset to English. You can select English, French or Spanish to be used in all screen displays. To select a language: Press PROG when the handset is not in use. CID/ until the screen displays LANGUAGE, then press SELECT. Press VOL- VOL+... -
Page 19: Telephone Operation
Telephone operation Make a call • Press and then use the dialing keys (0-9) to dial the telephone number. FLASH Predial a call • Enter the telephone number using the dialing keys (0-9), then press to dial. FLASH Answer a call , SELECT, CHAN/ , PROG, REDIAL or any dialing keys (0-9, •... -
Page 20: Temporary Ringer Silencing
Telephone operation Temporary ringer silencing • Press OFF to temporarily silence the ringer of the handset without disconnecting the call while the telephone is ringing. The next call rings normally at the preset volume. Channel Press CHAN/ • to switch to a clearer channel while on a call. REMOVE Call waiting When you subscribe to call waiting service from your telephone service provider, you hear an alert tone if there is... -
Page 21: Find Handset
Telephone operation Find handset This feature helps you find the misplaced handset. To start paging: Press /FIND HANDSET on the telephone base when the telephone is not in use. The handset rings and shows ** PAGING ** on its screen. To end paging: /FIND HANDSET again on the telephone base. -
Page 22: Redial List
Telephone operation Redial list The telephone stores the five most recently dialed telephone numbers in the redial list. When there are already five entries, the oldest entry is deleted to make room for the new entry. Entries are shown in reverse chronological order. -
Page 23: Directory
Telephone operation Directory The directory can store up to 20 entries (including nine speed dial entries). Each entry may consist of a number up to 24 digits and a name up to 15 characters. Store a directory entry Press PROG when the handset is not in use. The screen displays DIRECTORY. -
Page 24: Character Chart
Telephone operation Character chart Use the dialing keys and the chart below to enter a name (up to 15 characters). An error tone sounds if you try to enter more than 15 characters. Each press of a particular key causes the characters to be displayed in the following order: Characters by number of key presses Dial key... -
Page 25: Review The Directory
Telephone operation Review the directory Entries are sorted alphabetically. To review the directory: Press when the handset is not in use. The screen displays DIRECTORY. VOL+ Press CID/ to browse. VOL- VOL+ -OR- CID/ Press the dialing key for the first letter of the name you want to search. If necessary, press VOL- to select the desired entry. -
Page 26: Dial A Number From The Directory
Telephone operation Dial a number from the directory Search for the desired entry in the directory (see Review the directory or Alphabetical search on page 21). When the desired entry appears, press to dial. FLASH Edit a directory entry Search for the desired entry in the directory (see Review the directory or Alphabetical search on page 21). When the desired entry appears, press SELECT and EDIT flashes. -
Page 27: Delete A Directory Entry
Telephone operation Delete a directory entry Search for the desired entry in the directory (see Review the directory or Alphabetical search on page 21). When the desired entry appears, press SELECT and then press CID/ VOL- SPEED EDIT DEL until DEL flashes. VOL+ 8005959511 Press SELECT and the screen shows ERASE NO YES and the number. -
Page 28: Speed Dial
Telephone operation Speed dial Your can store up to nine telephone numbers with names (up to 15 characters and 24 digits in each location) in the speed dial locations you assign in the handset. Store a speed dial entry Press PROG when the handset is not in use. CID/ until the screen displays SPEED DIAL Press... -
Page 29: Dial A Speed Dial Number
Telephone operation Dial a speed dial number Press and hold a speed dial location key (1-9) of the desired entry when the handset is not in use. Press to dial the displayed number. FLASH Edit a speed dial entry Press and hold the speed dial location key (1-9) of the desired entry when the handset is not in use. When the screen shows the entry, press SELECT and EDIT flashes. -
Page 30: Reassign Speed Dial Locations
Telephone operation Reassign speed dial locations Press and hold the speed dial location key (1-9) of the desired entry when the handset is not in use. When the screen shows the desired entry, press SELECT. Press CID/ VOL- SPEED EDIT DEL until SPEED flashes. -
Page 31: About Caller Id
Telephone operation About caller ID This product supports caller ID services provided by most telephone service providers. Depending on your service subscription, you may see the caller’s number, or the caller’s name and number that are sent by the telephone service provider after the first or second ring. -
Page 32: Caller Id History
Telephone operation Caller ID history Caller’s VTECH name 800-595-9511 Caller’s telephone New call log indicator 12:45 12/25 number and location in the call log Time of call Date of call If you subscribe to caller ID service provided by your telephone service provider, information about each caller appears after the first or second ring. -
Page 33: Missed Calls Indicator
Telephone operation Missed calls indicator When there are calls that have not been reviewed in the call log, the handset shows XX MISSED CALLS XX MISSED CALLS. Each time you review a call log entry marked NEW, the number of missed calls decreases by one. -
Page 34: View Dialing Options
Telephone operation View dialing options Although the call log entries received have 10 digits (the area code plus the seven-digit 800-595-9511 number), in some areas, you may dial only the seven digits, or a 1 plus the seven digits, or a 1-800-595-9511 1 plus the area code plus the seven digits. -
Page 35: Save A Call Log Entry To The Directory
Press to select the desired entry. If you wish to change how VOL- VOL+ VTECH the number is saved, press # repeatedly until the desired option displays. See 800-595-9511 View dialing options on page 30. Press SELECT and then press CID/ until PROGRAM flashes. -
Page 36: Delete From The Call Log
Telephone operation Delete from the call log Delete an entry: CID/ Press when the telephone is not in use. VOL- CID/ Press to select the desired entry. VOL- VOL+ Press /REMOVE to confirm. You will hear a confirmation tone. CHAN Delete all entries: Press and hold /REMOVE when the telephone is not in use. -
Page 37: Call Log Display Screen Messages
Telephone operation Call log display screen messages Displays When The caller is blocking the name information. PRIVATE NAME PRIVATE NUMBER The caller is blocking the telephone number information. PRIVATE CALLER The caller is blocking the name and number information. UNKNOWN NAME This caller’s name is unavailable. -
Page 38: Appendix
Appendix Screen display messages The battery needs to be recharged. LOW BATTERY There are no call log entries. CID EMPTY The cordless handset is searching for the telephone base. CONNECTING... There are no directory entries. DIRECTORY EMPTY The directory is full. MEMORY FULL There are calls that have not been reviewed in the call log. -
Page 39: Handset Screen Icons
Appendix Handset screen icons Flashes when the battery is low and needs charging. New voicemail received from the telephone service provider. New missed call(s) in call log. Handset and telephone base indicators Handset light CHARGE On when the handset is charging in the telephone base. Telephone base light IN USE On when the handset is in use. -
Page 40: Battery
Appendix Battery It takes up to 16 hours for the battery to be fully charged . When it is fully charged, you can expect the following performance: Operation Operating time While in use (talking*) Five hours While not in use (standby**) Six days *Operating times vary depending on your actual use and the age of the battery. -
Page 41: Troubleshooting
Appendix Troubleshooting If you have difficulty with your telephone, please try the suggestions below. For customer service, visit our website at www.vtechphones.com or call 1 (800) 595-9511. In Canada, go to www.vtechcanada.com or dial 1 (800) 267-7377. My telephone does not work at all . •... - Page 42 Appendix I cannot dial out . • First, try all the above suggestions. • Make sure there is a dial tone before dialing. It is normal if the handset takes a second or two to synchronize with the telephone before producing a dial tone. Wait an extra second before dialing. •...
- Page 43 Appendix The CHARGE light is off . • Clean the charging contacts on the handset and telephone base each month with a pencil eraser or a dry non-abrasive fabric. • Make sure the power adapter and telephone line cord are plugged in correctly and securely. •...
- Page 44 Appendix My handset beeps and is not performing normally . • Make sure the power cord is securely plugged into the telephone base. Plug the telephone base into a different working electrical outlet not controlled by a wall switch. • Move the handset closer to the telephone base.
- Page 45 Appendix • The location of your telephone base can impact the performance of your cordless phone. For better reception, install the telephone base in a centralized location within your home or office, away from walls or other obstructions. In many environments, elevating the telephone base improves overall performance.
- Page 46 Appendix The telephone does not receive caller ID or the telephone does not show caller ID during call waiting . • Make sure you subscribe to caller ID with call waiting features provided by your telephone service provider. • The caller may not be calling from an area which supports caller ID. •...
- Page 47 Appendix NEW VOICEMAIL and show on the handset and I don’t know why . Your telephone has voicemail indication feature. If NEW VOICEMAIL and • appear on the handset, your telephone has received a signal from your telephone service provider that you have a voicemail message waiting for you to retrieve from them.
- Page 48 Appendix Common cure for electronic equipment • If the telephone is not responding normally, put the cordless handset in the telephone base. If it does not respond, try the following (in the order listed): - Disconnect the power to the telephone base. - Disconnect the battery on the cordless handset.
-
Page 49: Important Safety Instructions
Appendix Important safety instructions When using your telephone equipment, basic safety precautions should always be followed to reduce the risk of fire, electric shock and injury, including the following: Read and understand all instructions. Follow all warnings and instructions marked on the product. Unplug this product from the wall outlet before cleaning. -
Page 50: Save These Instructions
Appendix Important safety instructions (continued) Unplug this product from the wall outlet and refer servicing to an authorized service facility under the following conditions: When the power supply cord or plug is damaged or frayed. If liquid has been spilled onto the product. If the product has been exposed to rain or water. -
Page 51: Precautions For Users Of Implanted Cardiac Pacemakers
Appendix Precautions for users of implanted cardiac pacemakers Cardiac pacemakers (applies only to digital cordless telephones): Wireless Technology Research, LLC (WTR), an independent research entity, led a multidisciplinary evaluation of the interference between portable wireless telephones and implanted cardiac pacemakers. Supported by the U.S. Food and Drug Administration, WTR recommends to physicians that: Pacemaker patients •... -
Page 52: Maintenance
Appendix Maintenance Taking care of your telephone Your cordless telephone contains sophisticated electronic parts, so it must be treated with care. Avoid rough treatment Place the handset down gently. Save the original packing materials to protect your telephone if you ever need to ship it. Avoid water Your telephone can be damaged if it gets wet. -
Page 53: About Cordless Telephones
Appendix About cordless telephones • Privacy: The same features that make a cordless telephone convenient create some limitations. Telephone calls are transmitted between the telephone base and the cordless handset by radio waves, so there is a possibility that the cordless telephone conversations could be intercepted by radio receiving equipment within range of the cordless handset. -
Page 54: The Rbrc ® Seal
VTech product service centers. Please call 1 (800) 8 BATTERY for information on Ni-MH battery recycling and disposal bans/ restrictions in your area. VTech’s involvement in this program is part of its commitment to protecting our environment and conserving natural resources. -
Page 55: Warranty
What does this limited warranty cover? The manufacturer of this VTech Product warrants to the holder of a valid proof of purchase (“Consumer” or “you”) that the Product and all accessories provided in the sales package (“Product”) are free from defects in material and workmanship, pursuant to the following terms and conditions, when installed and used normally and in accordance with the Product operating instructions. - Page 56 Transportation, delivery or handling charges are prepaid. VTech assumes no risk for damage or loss of the Product in transit. If the Product failure is not covered by this limited warranty, or proof of purchase does not meet the terms of this limited warranty, VTech will notify you and will request that you authorize the cost of repair prior to any further repair activity.
- Page 57 Some states/provinces do not allow limitations on how long an implied warranty lasts, so the above limitation may not apply to you. In no event shall VTech be liable for any indirect, special, incidental, consequential, or similar damages (including, but not limited to lost profits or revenue, inability to use the Product or other associated equipment, the cost of substitute equipment, and claims by third parties) resulting from the use of this Product.
-
Page 58: Fcc, Acta And Ic Regulations
Appendix FCC, ACTA and IC regulations FCC Part 15 This equipment has been tested and found to comply with the requirements for a Class B digital device under Part 15 of the Federal Communications Commission (FCC) rules. These requirements are intended to provide reasonable protection against harmful interference in a residential installation. This equipment generates, uses and can radiate radio frequency energy and, if not installed and used in accordance with the instructions, may cause harmful interference to radio communications. - Page 59 Appendix FCC, ACTA and IC regulations (continued) The plug and jack used to connect this equipment to premises wiring and the telephone network must comply with applicable Part 68 rules and technical requirements adopted by ACTA. A compliant telephone cord and modular plug is provided with this product. It is designed to be connected to a compatible modular jack that is also compliant.
- Page 60 Appendix FCC, ACTA and IC regulations (continued) Industry Canada Operation is subject to the following two conditions: (1) this device may not cause harmful interference, and (2) this device must accept any interference, including interference that may cause undesired operation. The term ‘’IC:‘’...
-
Page 61: Technical Specifications
Appendix Technical specifications Frequency control Crystal controlled PLL synthesizer Transmit frequency Handset: 5857.20-5865.90 MHz Telephone base: 912.75-917.10MHz Channels Nominal effective range Maximum power allowed by FCC and IC. Actual operating range may vary according to environmental conditions at the time of use. Size Handset: 2.00 X 1.24 X 7.49 in (50.7 X 31.5 X 190.2 mm) Telephone base: 3.54 X 3.56 X 5.74 in (90.0 X 90.3 X 145.8 mm) -
Page 62: Index
Index About caller ID 27 Date and time 9 Handset layout 6, 7 Handset light 35 About cordless telephones 49 Delete a directory entry 23 Handset screen icons 35 Alphabetical search 21 Delete a redial entry 18 Home area code 13 Answer a call 15 Delete a speed dial entry 26 Delete from the call log 32... - Page 63 Index Operating range 47 Safety instructions 45, 46 Wall mounting 3 Save a call log entry to Warranty 51, 52, 53 the directory 31 Screen display messages 34 Pacemaker patients 47 Screen icons 35 Paging handset 17 Speed dial 24 Parts checklist 1 Store a directory entry 19 Phonebook 19...
- Page 64 A member of THE VTECH GROUP OF COMPANIES. Distributed in the U.S.A. by VTech Communications, Inc., Beaverton, Oregon 97008 Distributed in Canada by VTech Technologies Canada, Ltd., Richmond, B.C. V6W 1L5 Copyright © 2010 for VTECH TELECOMMUNICATIONS LTD. Printed in China.
Need help?
Do you have a question about the CS5211 and is the answer not in the manual?
Questions and answers