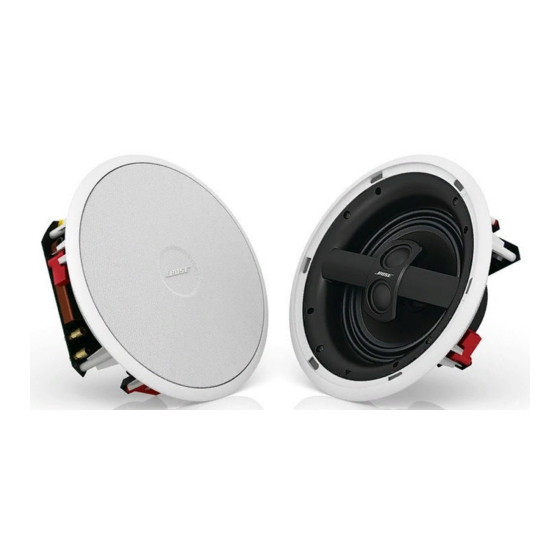
Bose Virtually Invisible 791 Installation Manual
Installation guide
Hide thumbs
Also See for Virtually Invisible 791:
- Installation manual (35 pages) ,
- Installation manual (23 pages)
Table of Contents
Advertisement
Advertisement
Table of Contents

Summary of Contents for Bose Virtually Invisible 791
- Page 1 ® IRTUALLY NVISIBLE SPEAKERS Installation Guide Installationsvejledning Installationsanleitung Guía de instalación Asennusopas Notice d’installation Telepítési útmutató Guida di installazione Gebruikershandleiding Podręcznik instalacji Installationsanvisning...
-
Page 2: Important Safety Instructions
_____________________ ____________________ Dealer name: ___________________________________________ Dealer phone: ___________________________________________ Purchase date: ___________________________________________ We suggest you keep your sales receipt and warranty card together with this owner’s guide. VIRTUALLY INVISIBLE is a registered trademark of Bose Corporation in the U.S. and other countries. -
Page 3: Table Of Contents
English TAB 2 TAB 3 TAB 4 TAB 5 TAB 6 TAB 7 TAB 8 VERVIEW AND ONTENTS Basic steps to installation REPARATION Before you begin......The instructions on the pages that follow will help you Unpacking . -
Page 4: Preparation
If any part of the speaker pair appears damaged, do not use it. Notify Bose or your authorized Bose dealer immediately. For Bose contact information, refer to the address list included in the carton. -
Page 5: Selecting Speaker Cable
English TAB 2 TAB 3 TAB 4 TAB 5 TAB 6 TAB 7 TAB 8 REPARATION Selecting speaker cable Preparing the cable wires Speaker cable consists of two insulated wires. The If your cables are not yet installed, use these guidelines insulation around one wire is marked (striped, collared, for choosing and using speaker cable. -
Page 6: Placement Guidelines
TAB 8 TAB 7 TAB 6 TAB 5 TAB 4 TAB 3 TAB 2 English REPARATION Placement guidelines Placing speakers for stereo sound Position these two speakers: Orienting and placing these identical speakers is critical – one on the left and one on the right at the front of to their performance. -
Page 7: Placing Speakers For Home Theater
English TAB 2 TAB 3 TAB 4 TAB 5 TAB 6 TAB 7 TAB 8 REPARATION Placing speakers for home theater Front of your home theater room Although these speakers are sold in pairs, you can use Minimum Minimum several pairs for home theater enjoyment. (.6 m) (.6 m) •... -
Page 8: Installation
TAB 8 TAB 7 TAB 6 TAB 5 TAB 4 TAB 3 TAB 2 English NSTALLATION Preparing the ceiling Using the template 1. Center the template on the spot where you want the center of the speaker grille. Be sure you have read and understand all of the safety and preparation information on these pages so you can 2. -
Page 9: Cutting The Speaker Hole
English TAB 2 TAB 3 TAB 4 TAB 5 TAB 6 TAB 7 TAB 8 NSTALLATION Cutting the speaker hole Getting the wire ready Be sure to cut carefully to make the hole as regular as When your speaker cable is within reach of the hole you possible. -
Page 10: Connecting The Speaker
TAB 8 TAB 7 TAB 6 TAB 5 TAB 4 TAB 3 TAB 2 English NSTALLATION Connecting the speaker Finishing the installation As you connect the wires, be careful to match the It is important to have all of your equipment ready and polarity of each wire to the proper terminal, as within easy reach to complete this procedure. - Page 11 English TAB 2 TAB 3 TAB 4 TAB 5 TAB 6 TAB 7 TAB 8 NSTALLATION IMPORTANT CONSIDERATIONS: 2. Tighten one of the four clamp screws until you can feel the frame press firmly against the ceiling. You can use a square-head or phillips-head screwdriver to tighten the screws on the speaker clamps.
-
Page 12: Testing Each Speaker
Note: If you find it difficult to twist the grille, use rubber gloves or place a piece of non-slip material over the grille to improve your grip. 5. Rotate the Bose logo, as needed, to adjust it for your room layout. -
Page 13: Reference
Painting is optional 2. Stroke across a piece of paper to reduce the amount and Bose cannot be responsible for the quality of of paint on the brush. When you can see individual adhesion or finish of non-factory-applied paints. -
Page 14: Painting The Frame
TAB 8 TAB 7 TAB 6 TAB 5 TAB 4 TAB 3 TAB 2 English EFERENCE Painting the frame Using a spray technique Latex or oil-based architectural paint requires thinning Before you begin, protect working parts of the speaker for use with a siphon-feed spray gun. Set the spray by inserting the template/paint shield that came in the gun at 30 psi (2.1 bar) for application in a 3- to 5-in. -
Page 15: Troubleshooting
• Disconnect the cord from the speaker in question and reconnect it to another speaker. – If the performance is now fine, the problem lies in the original speaker. Contact your authorized Bose dealer, who will arrange for service. Or, to contact Bose directly, refer to the address list included in the carton. -
Page 16: Customer Service
The kit includes installa- tion instructions. For further information or to order accessories, contact your Bose dealer. Or, to call Bose directly, refer to the address list included in the carton. - Page 17 ©2009 Bose Corporation, The Mountain, Framingham, MA 01701-9168 USA AM321052 Rev.01...


Need help?
Do you have a question about the Virtually Invisible 791 and is the answer not in the manual?
Questions and answers