NETGEAR WNDR3700v3 Setup Manual
N600 wireless dual band gigabit router
Hide thumbs
Also See for WNDR3700v3:
- Installation manual (2 pages) ,
- Installationshandbuch (44 pages) ,
- Installationsanleitung (2 pages)

Related Manuals for NETGEAR WNDR3700v3


Summary of Contents for NETGEAR WNDR3700v3
- Page 1 N600 Wireless Dual Band Gigabit Router WNDR3700v3 Setup Manual NETGEAR, Inc. 350 E. Plumeria Drive San Jose, CA 95134 USA May 2011 208-10774-02 v1.0...
- Page 2 In the interest of improving internal design, operational function, and/or reliability, NETGEAR reserves the right to make changes to the products described in this document without notice. NETGEAR does not assume any liability that may occur due to the use or application of the product(s) or circuit layout(s) described herein.
-
Page 3: Table Of Contents
Contents N600 Wireless Dual Band Gigabit Router WNDR3700v3 Setup Manual Getting to Know Your Wireless Router................1 Unpacking Your New Wireless Router ................1 Hardware Features ......................2 Front Panel ........................3 Back Panel ........................5 Router Label ........................ 6 Positioning Your Wireless Router .................. - Page 4 Checking the Internet Service Connection ..............30 Obtaining an Internet IP Address ................30 Troubleshooting PPPoE .................... 31 Troubleshooting Internet Browsing ................32 Troubleshooting Connectivity Using the Ping Utility ............32 Testing the Path from a PC to Your Router .............. 32 Testing the Path from a PC to the Internet ..............
-
Page 5: Getting To Know Your Wireless Router
– A link to the online User Manual If any of the parts are incorrect, missing, or damaged, contact your NETGEAR dealer. Keep the carton, including the original packing materials, in case you need to return the product for repair. -
Page 6: Hardware Features
To prepare your router for installation: Carefully remove the protective film from the top of your router. Set up your N600 wireless gigabit router by aligning the arrow on the base with the arrow on the back of the case, and sliding the router onto the base. Reset Factory Settings... -
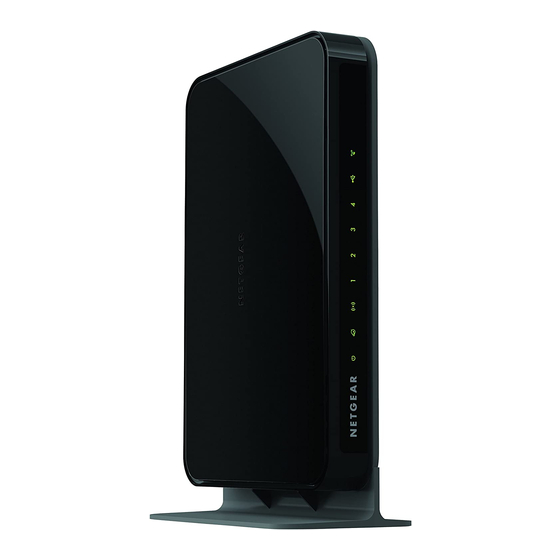
Page 7: Front Panel
Front Panel Figure 2 The front panel has nine status lights that you can use to monitor and verify various conditions. There are also two switch buttons on the right (or at the top if the router is in its stand). The status lights are described in Table 1, and the switch buttons in... - Page 8 Table 1. Status Light Descriptions (continued) Item Function Activity Description No USB device is connected, or the “Safely Remove Hardware” button has been pressed and it is now safe to remove the attached USB device. Solid Green The USB device has been accepted by the Router and is ready to be used.
-
Page 9: Back Panel
Back Panel The rear panel of the WNDR3700v3 router contains the items in the list that follows the figure. Figure 3 The back of the N600 wireless gigabit router includes: A USB 2.0 port (backward compatible to USB 1.0/1.1) for attaching a USB storage device. -
Page 10: Router Label
Router Label View the label on the bottom of the N600 wireless gigabit router to identify the security PIN, serial number, port connectors, status lights, and default login information. Figure 4 Positioning Your Wireless Router The N600 wireless gigabit router lets you access your network from virtually anywhere within the operating range of your wireless network. -
Page 11: Installing Your Wireless Router
Installing Your Wireless Router To help you set up your router and get on the Internet quickly, the Resource CD contains a Smart Wizard™. The Smart Wizard walks you through the steps required to connect your router and PC(s); configure your internet settings; configure your wireless settings; and enable wireless security for your network. -
Page 12: Updating Your Router Firmware
Updating Your Router Firmware NETGEAR is always improving the operability and features included with your router. To make it easy for you to receive the best, most up-to-date features of your router, NETGEAR provides a variety of methods for updating your product. -
Page 13: Installing Your Wireless Router Using Smart Wizard
For cable modem service, that you use the computer you first used to set up your Internet service. The NETGEAR Smart Wizard takes you through the procedure to connect your router and PC(s). It then helps you to configure your wireless settings and enable wireless security for your network. - Page 14 Follow the instructions and prompts to complete the installation. The Smart Wizard guides you through installing your router, connecting your router to the Internet, configuring your wireless network settings, and selecting the optimum security protection for your network. If you choose not to select a security option during installation, you can always access the router’s user interface later to select a security option (see “Setting Your SSID and Wireless Security Manually”...
-
Page 15: Installing Your Wireless Router Manually (Advanced And Linux Users)
Installing Your Wireless Router Manually (Advanced and Linux Users) Before installing and connecting your router manually, review the list below and make sure that you have all of the necessary information. • A DSL or cable service connection to an Internet Service Provider (ISP). •... - Page 16 Disconnect the cable from the modem (2). You will connect it to the router later. Locate the Ethernet cable that came with the NETGEAR product. Securely insert that Ethernet cable into your modem and into the Internet port of the N600 wireless gigabit router (3).
- Page 17 Figure 6 Locate the cable you removed from the modem in step 2. Securely insert that cable (4) into a LAN port on the router such as LAN port 1. Figure 7 Your network cables are connected, and you are ready to start your network. It is important that you start your network in the correct sequence.
-
Page 18: Verifying Your Connection
First, plug in and turn on the cable or DSL modem (if your modem has a backup battery, plug it back in). Wait 2 minutes. Now, plug the power cord into your N600 wireless gigabit router and into a power outlet. Wait 1 minute. -
Page 19: Setting Up Your Router For Internet Access
• LAN. At least one LAN light (4) should be lit. Green indicates that your computer is communicating at 1 Gbps; amber indicates 10/100 Mbps. If a LAN light is not lit, check that the Ethernet cable from the computer to the router is securely attached at both ends, and that the computer is turned on. - Page 20 A login window such as the one in the following figure displays: Figure 10 For security reasons, the router has its own user name and password. When prompted, enter admin for the router user name and password for the router password, both in lowercase letters.
- Page 21 From the main menu, select Setup Wizard. The Setup Wizard screen displays. Figure 11 Select No to set up the connection yourself. Click Next and the Basic Settings screen will display. Enter the required information for your ISP connection in the appropriate fields. If you need assistance, follow the Basic Settings Help screens on the router interface or see the online User Manual for this N600 wireless gigabit router.
- Page 22 • Contact your ISP to verify that you have the correct configuration information. • Read “Troubleshooting” on page If problems persist, register your NETGEAR product and contact NETGEAR Technical Support. Installing Your Wireless Router Manually (Advanced and Linux Users)
-
Page 23: Configuring Your Wireless Network
After installing your router, you must log into the router to complete your wireless setup. When you log in to the browser, you will be prompted to check for firmware updates from the NETGEAR update server. Accessing Your Router After Installation and Checking for New Firmware The Smart Wizard only appears when you run the CD. -
Page 24: Configuring Your Wireless Settings And Security Options
For a wireless connection, the router and each wireless computer must use the same SSID, also called the wireless network name, and the same wireless security. NETGEAR strongly recommends that you use wireless security. Indoors, computers can connect over wireless networks at a range of several hundred feet. - Page 25 Leave the wireless mode set to the default setting of Up to 145Mbps for 2.4GHz. Select security options for the 2.4GHz wireless network. The wireless Security Options are set to None by default. NETGEAR strongly recommends that you use wireless security. You can select a different Security Option and a different passphrase for each wireless network.
- Page 26 Leave the wireless mode set to the default setting of Up to 300Mbps for 5GHz. Select security options for the 5 GHz wireless network. The wireless Security Options are set to None by default. NETGEAR strongly recommends that you use wireless security. You can select a different Security Option and a different passphrase for each wireless network.
-
Page 27: Using Push 'N' Connect (Wps) To Configure Your Wireless Network
Open the networking utility of the device you want to connect to that supports WPS. Push the N600 wireless gigabit router’s WPS button, then release. The WPS LED will start to blink. 1. For a list of other Wi-Fi-certified products available from NETGEAR, go to http://www.wi-fi.org Configuring Your Wireless Network... -
Page 28: Testing Basic Wireless Connectivity
Microsoft Internet Explorer or Firefox. If you are planning a mixed network of WPS capable devices and non-WPS capable devices, NETGEAR suggests that you set up your wireless network and security settings manually first, and use WPS only for adding additional WPS capable devices. - Page 29 Note your SSID name. If you used WPS to establish a connection with other devices, the SSID will now be a randomly selected name. The SSID of any wireless adapters or wireless devices connected to your router must match the SSID you configured in the N600 wireless gigabit router. If they do not match, you will not get a wireless connection.
-
Page 30: Troubleshooting
Troubleshooting This chapter gives information about troubleshooting your N600 wireless gigabit router. You can find help with the following problems: • “Basic Setup Checklist” on page 26 • “Checking Basic Router Functions” on page 27 • “Troubleshooting Login Problems” on page 29 •... -
Page 31: Checking Basic Router Functions
Make sure that the network settings of the computer are correct: Verify that your LAN-connected computers are configured to obtain an IP address automatically through DHCP. For help with this, see the documentation for your computer or “Related Documents” on page Verify whether the MAC address is needed. - Page 32 • Make sure that the power cord is properly connected to your router and that the power adapter is properly connected to a functioning power outlet. • Check that you are using the power adapter supplied by NETGEAR for this product.
-
Page 33: Troubleshooting Login Problems
Table 3. Troubleshooting the router’s LED behavior (continued) Internet light stays When the router is turned on, the Internet light turns amber for about 70 seconds amber. and then turns green. If the light does not turn green, the router has a problem. If the Internet light is still amber 2 minutes after turning on power to the router: 1. -
Page 34: Checking The Internet Service Connection
• Make sure that your browser has Java, JavaScript, or ActiveX enabled. If you are using Internet Explorer, click Refresh to be sure that the Java applet is loaded. Try closing the browser and starting it again. Checking the Internet Service Connection If your router is unable to access the Internet, check that the Internet connection is working, and then check that the N600 wireless gigabit router can get an Internet address. -
Page 35: Troubleshooting Pppoe
If your router is unable to obtain an IP address from the your service provider, the problem might be one of the following: • Your service provider might require a login. Ask your service provider whether they require PPP over Ethernet (PPPoE) login. •... -
Page 36: Troubleshooting Internet Browsing
Troubleshooting Internet Browsing If your N600 wireless gigabit router can obtain an IP address but your computer is unable to load any Web pages from the Internet, check the following. • Your computer might not recognize any DNS server addresses. A DNS server is a host on the Internet that translates Internet names (such as www addresses) to numeric IP addresses. -
Page 37: Testing The Path From A Pc To The Internet
To ping the wireless router: From the Windows toolbar, click Start and select Run. In the field provided, type Ping followed by the address of the router, as in this example: ping www.routerlogin.net ping 192.168.1.1 Click OK. You should see a message like this one: Pinging 192.168.1.1 with 32 bytes of data If the path is working, you see this message: Reply from 192.168.1.1: bytes=32 time=NN ms TTL=xxx... - Page 38 If the path is functioning correctly, replies as in the previous section are displayed. If you do not receive replies: • Check that your PC has the IP address of your router listed as the default gateway. If the IP configuration of your PC is assigned by DHCP, this information is not visible in your PC’s Network Control Panel.
-
Page 39: Technical Specifications
Technical Specifications Default Configuration Settings This section provides factory default settings and technical specifications for the WNDR3700v3 N600 Wireless Dual Band Gigabit Router . Table 4. Wireless Router Default Configuration Settings Feature Default Setting Smart Wizard Enabled Router Login Router Login URL http://www. - Page 40 Internet) Outbound (communications going out to Enabled (all) the Internet) Wireless Wireless Communication Enabled Name (2.4GHz b/g/n SSID) NETGEAR Name (5Ghz a/n SSID) NETGEAR-5G Security Disabled Broadcast SSID Enabled Country/Region United States in the US, otherwise varies by region...
- Page 41 Table 4. Wireless Router Default Configuration Settings (continued) Feature Default Setting Physical Specifications Dimensions 218 x 160 x 35 mm (8.6 x 6.3 x 1.4 in) Weight 0.45 kg (1.1 lb) Environmental Specifications Operating temperature 0 to 40 C (32º to 104º F) Operating humidity 90% maximum relative humidity, noncondensing Electromagnetic Emissions...
-
Page 42: Restoring The Default Password And Configuration Settings
Table 4. Wireless Router Default Configuration Settings (continued) Feature Default Setting Operating Frequency Ranges (5G) 5.18–5.24 + 5.745–5.825 GHz (US) 5.18–5.24 GHz (Europe ETSI) 802.11 Security 40-bit (also called 64-bit) and 128-bit WEP, WPA- PSK and WPA2-PSK. Restoring the Default Password and Configuration Settings You can restore the factory default configuration settings that reset the router’s user name to admin, the password to password, and the IP address to 192.168.1.1. -
Page 43: Related Documents
Related Documents This table provides links to reference documents that you can use to gain a more complete understanding of the technologies used in your NETGEAR product. Table 5. Document Link TCP/IP Networking http://documentation.netgear.com/reference/enu/tcpip/index.htm Basics Preparing Your Network http://documentation.netgear.com/reference/enu/wsdhcp/index.htm Glossary http://documentation.netgear.com/reference/enu/glossary/index.htm... -
Page 44: Registration And Certifications
Registration and Certifications Product Registration, Support, and Documentation Register your product at http://www.NETGEAR.com/register You must register before you can use our telephone support service. Product updates and Web support are always available by going to http://www.netgear.com/support Setup documentation is available on the CD, on the support website, and on the documentation website...
Need help?
Do you have a question about the WNDR3700v3 and is the answer not in the manual?
Questions and answers