Table of Contents
Advertisement
Advertisement
Table of Contents
Troubleshooting

Related Manuals for Dual XDVD270


Summary of Contents for Dual XDVD270
- Page 1 XDVD270 OWNER’S MANUAL Mobile DVD Player with two 7" TFT LCD Monitors...
-
Page 2: Table Of Contents
It cannot play DVD software encoded for other region areas than the region areas for which it has been designed. The XDVD270 will play discs labeled “region 1” or “all”. DVD region codes: 1 - USA, Canada... -
Page 3: Package Contents
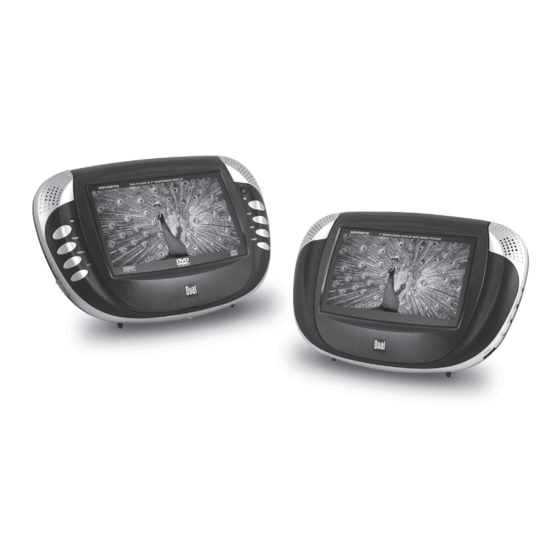
XDVD270 PREPARATION Package Contents Please carefully unpack both units, and inspect all contents. The XDVD270 includes the following items: XDVD270 DVD Player with 7" Monitor XDVD270 7" Monitor with Media Storage Remote Control x 1 AC Adapter x 1 DC Adapter x 1... -
Page 4: Safety Information/Precautions
XDVD270 Safety Information CAUTION: Use of controls or adjustments or performance of procedures other than those specified herein may result in hazardous radiation exposure. 1. Read All Instructions - All safety and operating instructions should be read before attempting to operate this product. -
Page 5: Safety Precautions
This device complies with part 15 of the FCC rules and regulations. Operation is subject to the following two conditions: 1) This device may not cause harmful interference, and 2) This device must accept any interference received, including interference that may cause undesired operation. XDVD270 PREPARATION Safety Precautions... -
Page 7: Control Locations - External Monitor
XDVD270 OPERATION Control Locations - External Monitor... -
Page 8: Control Locations - Remote
Power Display Title Zoom Search Slow Audio 4-Way - Up Menu Enter 4-Way - Left 4-Way - Down Cancel Key #2 Key #1 Key #6 Key #5 Key #9 Key #0 Angle Subtitle Play Pause Stop Chapter/Track Down Chapter/Track Up Fast Reverse Fast Forward Setup... -
Page 9: Connections - Communication Cable/Power
Connections - Data Cable /Power 1. Connecting the Main Unit to the External Monitor Note: Power off the XDVD270 main unit and any other A/V equipment before connecting the XDVD270 external monitor or making any external Audio or Video connections. -
Page 10: Connections - External Audio/Video
XDVD270 Connections - External Audio/Video A/V Int/Ext (Internal/External Switch) Audio Connections (Optional) Audio Out (Main Unit Only) Audio In Video Connections (Optional) Video Out (Main Unit Only) Video In OPERATION The A/V INT EXT switch selects between internal and external audio/video sources. -
Page 11: Quick-Start Guide
Power Off Automatic Power Off Using the Remote Control XDVD270 Slide the OPEN button to the right and gently lift the lid. The lid opens to a maximum 90 degrees. Do not open it any further - as severe damage to the unit may occur. -
Page 12: Dvd Setup Menu
XDVD270 General Operation - DVD Setup Menu Access DVD Setup Menu Exit Setup Menu General Setup Page TV Display Angle Mark OSD Lang (On Screen Display) Language Captions (Closed Caption) Screen Saver OPERATION Using the remote, press SETUP to access DVD setup menu. - Page 13 Press or to select LT/RT or Stereo. Audio Setup Press or to select Audio Setup and ENTER to select. Dual Mono Press or to select Stereo, L-Mono, R-Mono, Mix-Mono. Video Setup Page Press or to select Video Setup Page and ENTER to select.
- Page 14 XDVD270 General Operation - DVD Setup Menu Preference Page Audio (DVD Title) Subtitle (Language) Disc Menu (Language) Parental (Control) Default (Restore Factory Settings) Password Setup Page Change Password OPERATION Press or to select Preference Page and ENTER to select.
-
Page 15: Dvd Operation
XDVD270 OPERATION General Operation - DVD Inserting a disc Open lid; insert disc making sure it snaps securely on the spindle mount. Close lid. Power On Press POWER on the main unit for more than 2 seconds to turn the unit on. - Page 16 XDVD270 General Operation - DVD Fast Forward and Reverse Step (frame-by-frame) Slow Zoom Repeat Repeat A-B Main Menu (Root) Title Menu OPERATION Press I or I from the main unit for more than 2 seconds to fast forward or fast reverse in 2x; 4x; 8x; 16x; 32x modes.
- Page 17 Direct Chapter Access Direct Search Mode Program Mode Cancel Program Play Display Status DVD Compatibility XDVD270 General Operation - DVD Press AUDIO while playing to switch between available languages. Press SUBTITLE while playing to switch between available subtitle languages. Press ANGLE while playing to switch between available viewing angles.
-
Page 18: Cd Operation
XDVD270 General Operation - CD Play Stop Full Stop Pause Track Select Fast Forward and Reverse Track Repeat Repeat A-B Display Status CD-R/RW Compatibility OPERATION In general, audio discs will play automatically when inserted or the power is turned on. -
Page 19: Using The Headrest Mounts
The headrest mounts provide the convenience of mounting the main unit and the external monitor to the back of a vehicle’s headrest without any tools or modifications. Note: Power off the XDVD270 main unit and disconnect any external connections before attaching the headrest mounts. Slip main unit and/or external monitor into either side of the car mount. -
Page 20: Troubleshooting
Dual Electronics Corp. agrees, at our option, for 90 days from the date of original purchase, to repair any defect in material or workmanship or... -
Page 21: Troubleshooting
The remote control does not work properly Unit displays "Wrong Region" XDVD270 Connect the AC adapter into the wall outlet securely. Connect the DC adapter into the vehicle cigarette outlet securely. Press the POWER button on the main unit for more than 2 seconds. -
Page 22: Specifications
XDVD270 Specifications DVD Player Monitor General OPERATION Signal-to-noise: >94db Dynamic range: >95db Harmonic distortion: Frequency response: Channel separation @1kHz: D/A converter: 24 Bit Sampling frequencies: Electronic Shock Protection: Panel size: 7” (177.8 mm) diagonal measurement Format: Widescreen 16:9 View area: 6.07”... - Page 23 XDVD270 OPERATION Notes Copyright Notes This product incorporates copyright protection technology that is protected by method claims of certain U.S. patents and other intellectual property rights owned by Macrovision Corporation and other rights owners. Use of this copyright protection technology must be authorized by Macrovision Corporation, and is intended for home and other limited viewing uses only unless otherwise authorized by Macrovision Corporation.
- Page 24 ©2005 Dual Electronics Corp. NSA0805-V01...
Need help?
Do you have a question about the XDVD270 and is the answer not in the manual?
Questions and answers