
Related Manuals for LG WM2240CW


Summary of Contents for LG WM2240CW
-
Page 1: Washing Machine
OWNER’S MANUAL WASHING MACHINE Please read this manual carefully before operating your washing machine and retain it for future reference. WM2240C* www.lg.com P/NO : MFL62526862... -
Page 2: Table Of Contents
Disposal ............6 Congratulations on your purchase PARTS AND FEATURES Special Features ............. 7 and welcome to the LG family. Key Parts and Components ........8 Your new LG washing machine INSTALLATION INSTRUCTIONS Choose the Proper Location ........9 combines the most advanced Clearances ............. -
Page 3: Important Safety Instructions
I M P O RTA N T S A F E T Y I N S T R U C T I O N S READ ALL INSTRUCTIONS BEFORE USE wWARNING For your safety, the information in this manual must be followed to minimize the risk of fire or explosion, electric shock, or to prevent property damage, personal injury, or loss of life. -
Page 4: Basic Safety Precautions
I M P O RTA N T S A F E T Y I N S T R U C T I O N S READ ALL INSTRUCTIONS BEFORE USE wWARNING For your safety, the information in this manual must be followed to minimize the risk of fire or explosion, electric shock, or to prevent property damage, personal injury, or loss of life. -
Page 5: Safety Instructions For Installation
I M P O RTA N T S A F E T Y I N S T R U C T I O N S READ ALL INSTRUCTIONS BEFORE USE wWARNING For your safety, the information in this manual must be followed to minimize the risk of fire or explosion, electric shock, or to prevent property damage, personal injury, or loss of life. -
Page 6: Safety Instructions For Use, Care And Cleaning, And And Disposal
I M P O RTA N T S A F E T Y I N S T R U C T I O N S READ ALL INSTRUCTIONS BEFORE USE wWARNING For your safety, the information in this manual must be followed to minimize the risk of fire or explosion, electric shock, or to prevent property damage, personal injury, or loss of life. -
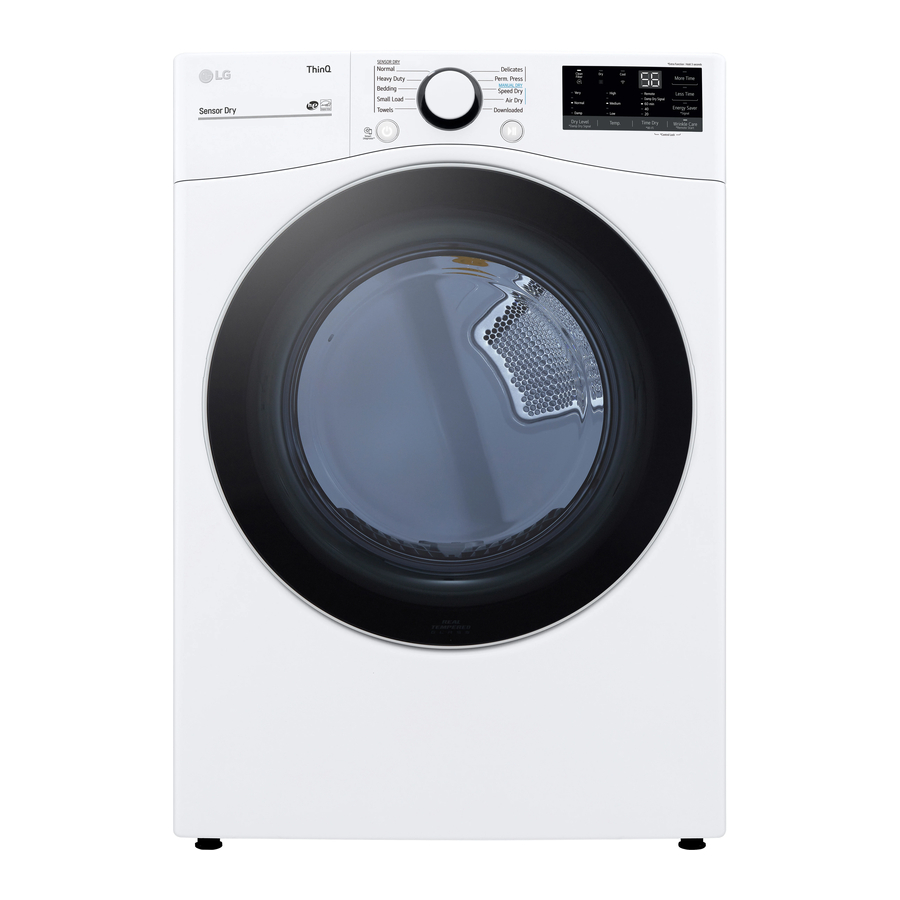
Page 7: Parts And Features
PA RT S A N D F E AT U R E S SPECIAL FEATURES DETERGENT DISPENSER DRAWER This four-compartment drawer provides separate dispensers for prewash and main wash detergent, liquid bleach, and liquid fabric softener. EASY-ACCESS LOCkING DOOR Extra-large door locks during operation and features a delay to prevent the door from being opened until the washer interior has cooled and the water level has lowered. -
Page 8: Key Parts And Components
PA RT S A N D F E AT U R E S kEY PARTS AND COMPONENTS In addition to the special features and components outlined in the Special Features section, there are several other important components that are referenced in this manual. LARGE-CAPACITY STAINLESS STEEL DRUM The large capacity stainless steel drum offers extreme durability and is tilted to improve... -
Page 9: Installation Instructions
I N S TA L L AT I O N I N S T R U C T I O N S CLEARANCES CHOOSE THE PROPER LOCATION wWARNING ⁄ ” • Washer is heavy! Two or more people (57 cm) are required when moving and unpacking the washer. -
Page 10: Flooring
I N S TA L L AT I O N I N S T R U C T I O N S FLOORING INSTALLATIONS WITH OPTIONAL PEDESTAL BASE OR STACkING kIT • To minimize noise and vibration, the washer MUST be installed on a solidly constructed floor. See the NOTE below. -
Page 11: Unpacking And Removing Shipping Bolts
I N S TA L L AT I O N I N S T R U C T I O N S UNPACkING AND REMOVING SHIPPING BOLTS When removing the washer from the carton base, be sure to remove the foam tub support in the middle of the carton base. -
Page 12: Connecting The Water Lines
I N S TA L L AT I O N I N S T R U C T I O N S ConneCting the Water Lines Rubber Seal Rubber Seal Cold Water Water Water Inlet Inlet Inlet Water hose Water Hose (To water inlet (to tap) on the washing... -
Page 13: Leveling The Washer
I N S TA L L AT I O N I N S T R U C T I O N S LEVELING THE WASHER The drum of your new washer spins at very high NOTE: To make sure that the washer is speeds, up to 1,200 RPM. -
Page 14: How To Use
H O W TO U S E CONTROL PANEL FEATURES POWER ON/OFF BUTTON CYCLE SETTINGS BUTTONS Press to turn the washer ON. Press again to Use these buttons to adjust the desired cycle turn the washer OFF. options for the selected cycle. NOTE: Pressing the ON/OFF button during a cycle will cancel that cycle and any load settings will be lost. -
Page 15: Operating The Washer
H O W TO U S E OPERATING THE WASHER Once you have loaded the washer and added laundry products (detergent, bleach, and/or fabric softener): Press the ON/OFF button to turn on the Press the START/PAUSE button to begin washer. The lights around the the cycle. -
Page 16: Cycle Guide
H O W TO U S E CYCLE GUIDE The cycle guide below shows the options and recommended fabric types for each cycle. = Available option WASH PRE- QUICK WATER STAIN EXTRA RINSE+ CyCLE FABRIC TyPE SPIN SPEED SOIL LEVEL TEMP. -
Page 17: Sorting Wash Loads
H O W TO U S E SORTING WASH LOADS Fabric Care Labels • Large items should not be more than half of the total wash load. Most articles of clothing feature fabric care labels • The drum should not be tightly packed with that include instructions for proper care. -
Page 18: Selecting Detergent
H O W TO U S E SELECTING DETERGENT ABOUT THE DISPENSER IMPORTANT: Your washer is designed for The automatic dispenser consists of four use with only High-Efficiency (HE) detergents. compartments which hold: HE detergents are formulated specifically for • Liquid chlorine bleach. front-load washers and contain suds-reducing •... -
Page 19: Loading The Dispenser
H O W TO U S E LOADING THE DISPENSER Pre-wash Detergent Compartment Liquid Bleach Compartment Add liquid or powdered detergent to this This compartment holds liquid chlorine bleach, compartment when using the pre-wash option. which will be dispensed automatically at the Always use HE (High-Efficiency) detergent with proper time during the wash cycle. -
Page 20: The Time And Status Display
H O W TO U S E THE TIME AND STATUS DISPLAY The time and status display shows the cycle progress and estimated time remaining, cycle options, and other status messages for your washer. ESTIMATED TIME REMAINING CYCLE COMPLETION INDICATOR When the START/PAUSE button is pressed, This portion of the display shows which the washer automatically detects the wash... -
Page 21: Cycle Setting Buttons
H O W TO U S E CYCLE SETTING BUTTONS SOIL LEVEL Each cycle has preset settings that are selected automatically. You may also customize the settings Adjusts the selected cycle to allow using the cycle setting buttons. Press the button more time for heavily soiled clothes for that setting until the indicator light for the or less time for lightly soiled clothes. -
Page 22: Cycle Options Buttons
H O W TO U S E CYCLE OPTIONS BUTTONS Your washing machine features several additional cycle options to customize cycles to meet your individual needs. Certain buttons also feature a special function (see the following page for details) that can be activated by pressing and holding that button for 3 seconds. To Add Cycle Options to a Cycle: DELAY WASH Turn on the washer and turn the cycle... -
Page 23: Special Functions
H O W TO U S E CYCLE OPTIONS BUTTONS SPECIAL FUNCTIONS (cont.) Selecting Cycle Options with the OPTION Certain buttons also activate special functions, Button including CHILD LOCK. Press the OPTION button to add one of the following options to a cycle. Pressing the button repeatedly will cycle through CHILD LOCk the options. -
Page 24: Care And Cleaning
C A R E A N D C L E A N I N G REGULAR CLEANING wWARNING: • Unplug the washer before cleaning to avoid the risk of electric shock. Failure to follow this warning can cause serious injury, fire, electrical shock, or death. •... -
Page 25: Cleaning The Washer
C A R E A N D C L E A N I N G REGULAR CLEANING CLEANING THE WASHER (CONT.) Storing the Washer Cleaning the Dispenser If the washer will not be used for an extended The dispenser should be cleaned periodically period of time and is in an area that could be to remove buildup from detergent and other exposed to freezing temperatures:... -
Page 26: Maintenance
MAINTENANCE Cleaning the water inlet filters IMPORTANT: Use ONLY the inlet hoses provided by LG with this laundry product. Aftermarket If the washer detects that water is not entering hoses are not guaranteed to fit or function the dispenser, an error message will show on the correctly. -
Page 27: Cleaning The Drain Pump Filter
C A R E A N D C L E A N I N G MAINTENANCE (cont.) Cleaning the Drain Pump Filter Lint and other objects may accumulate and clog the drain pump filter. If the washer fails to drain properly, unplug the washer and allow the water to cool, if necessary, before proceeding. -
Page 28: Troubleshooting
T RO U B L E S H O OT I N G NORMAL SOUNDS YOU MAY HEAR The following sounds may be heard while the washer is operating. They are normal. Humming or gurgling: Clicking: Drain pump pumping water from the washer at Door lock relay when the door locks and unlocks. - Page 29 T RO U B L E S H O OT I N G BEFORE CALLING FOR SERVICE (cont.) Problem Possible Causes Solutions • Drain hose is bent, pinched, • Make sure the drain hose is free of clogs, kinks, etc., Water in the washer or clogged.
- Page 30 T RO U B L E S H O OT I N G BEFORE CALLING FOR SERVICE (cont.) Problem Possible Causes Solutions • Washer not unloaded • Always remove items from the washer as soon as the Wrinkling promptly. cycle is complete. •...
-
Page 31: Using Smartdiagnosis
192lb ( 87kg ) Max. Spin Speed 1200RPM OPTIONAL ACCESSORIES For these and other LG products, contact your local LG dealer, or visit our Web site at www.lg.com. Pedestal Stacking kit Give your LG washer and dryer a boost with matching If space is at a premium, use this kit to securely 14 inch high pedestals. -
Page 32: Warranty
LG WASHING MACHINE LIMITED WARRANTy - USA Your LG Washing Machine will be repaired or replaced, at LG’s option, if it proves to be defective in material or workman- ship under normal use, during the warranty period (“Warranty Period”) set forth below, effective from the date (“Date of Pur- chase”) of original consumer purchase of the product. - Page 34 N OT E...
- Page 35 N OT E...
- Page 36 MANUAL DE PROPIETARIO LAVADORA Lea este manual con cuidado antes de utilizar la lavadora y guárdelo para futuras consultas. WM2240C* www.lg.com...
- Page 37 Instrucciones de seguridad para la utilización, cuidado y limpieza, y la eliminación ....... 6 Felicitaciones por su compra PIEZAS Y CARACTERÍSTICAS y bienvenido a la familia LG. Características especiales........7 Piezas y componentes clave ........8 Su nueva lavadora LG combina INSTRUCCIONES DE INSTALACIÓN...
-
Page 38: Instrucciones Importantes De Seguridad
I N S T RU C C I O N E S I M P O RTA N T E S D E S E G U R I DA D LEA TODAS LAS INSTRUCCIONES ANTES DE USAR wADVERTENCIA Por su seguridad, debe seguir la información indicada en este manual para minimizar el riesgo de incendio o explosión, descarga eléctrica, o para prevenir daños a la propiedad, lesiones personales o muerte. -
Page 39: Precauciones Básicas De Seguridad
I N S T RU C C I O N E S I M P O RTA N T E S D E S E G U R I DA D LEA TODAS LAS INSTRUCCIONES ANTES DE USAR wADVERTENCIA Por su seguridad, se debe seguir la información indicada en este manual para minimizar el riesgo de incendio o explosión, descarga eléctrica, o para prevenir daños a la propiedad, lesiones personales, o muerte. -
Page 40: Instrucciones De Seguridad Para La Instalación
I N S T RU C C I O N E S I M P O RTA N T E S D E S E G U R I DA D LEA TODAS LAS INSTRUCCIONES ANTES DE USAR wADVERTENCIA Por su seguridad, se debe seguir la información indicada en este manual para minimizar el riesgo de incendio o explosión, descarga eléctrica, o para prevenir daños a la propiedad, lesiones personales o muerte. -
Page 41: Instrucciones De Seguridad Para La Utilización, Cuidadoy Limpieza, Y La Eliminación
I N S T RU C C I O N E S I M P O RTA N T E S D E S E G U R I DA D LEA TODAS LAS INSTRUCCIONES ANTES DE USAR wADVERTENCIA Por su seguridad, se debe seguir la información indicada en este manual para minimizar el riesgo de incendio o explosión, descarga eléctrica, o para prevenir daños a la propiedad, lesiones personales o muerte. -
Page 42: Piezas Y Características
P I E Z A S Y C A R AC T E R Í S T I C A S CARACTERÍSTICAS ESPECIALES CAjÓN DE DEPÓSITO DE DETERGENTE Este cajón de cuatro secciones provee depósitos separados para el prelavado y detergente principal de lavado, así... -
Page 43: Piezas Y Componentes Clave
P I E Z A S Y C A R AC T E R Í S T I C A S PIEZAS Y COMPONENTES CLAVE Además de los componentes y las características descritos en la sección de Características especiales, hay varios componentes importantes adicionales a los cuales se hace referencia en este manual. -
Page 44: Instrucciones De Instalación
I N S T R U C C I O N E S D E I N S TA L AC I Ó N ESCOjA EL LUGAR ADECUADO ESPACIOS DE INSTALACIÓN wADVERTENCIA • La lavadora es pesada. Se necesitan dos ⁄... -
Page 45: Tipo De Piso
I N S T R U C C I O N E S D E I N S TA L AC I Ó N TIPO DE PISO INSTALACIONES CON LA BASE PEDESTAL O KIT DE APILADO OPCIONALES • Para minimizar el ruido y vibración, se DEBE instalar la lavadora en un piso sólidamente IMPORTANTE: Si se encuentra instalando la construido. -
Page 46: Desembalaje Y Retiro De Los Pernos De Embalaje
I N S T R U C C I O N E S D E I N S TA L AC I Ó N DESEMBALAjE Y RETIRO DE LOS PERNOS DE EMBALAjE Al retirar la lavadora de la base de cartón, asegúrese de quitar el soporte de tambor de espuma colocado en la mitad de la base de cartón. -
Page 47: Conexión De Las Tuberías De Agua
I N S T R U C C I O N E S D E I N S TA L AC I Ó N Conexión de las tuberías de agua Sello de Entrada Sello de caucho Entrada de agua caucho Water de agua caliente... -
Page 48: Conexión De La Tubería De Drenaje
I N S T R U C C I O N E S D E I N S TA L AC I Ó N CONEXIÓN DE LA TUBERÍA DE DRENAjE Opción 2: Tina de lavadero • La manguera de drenaje siempre debe estar asegurada adecuadamente. -
Page 49: Nivelación De La Lavadora
I N S T R U C C I O N E S D E I N S TA L AC I Ó N NIVELACIÓN DE LA LAVADORA El tambor de su nueva lavadora centrifuga a NOTA: Para asegurar que la lavadora está velocidades muy altas, de hasta 1,200 r.p.m. -
Page 50: Cómo Usar
C Ó M O U S A R CARACTERÍSTICAS DEL PANEL DE CONTROL BOTÓN DE ENCENDIDO/APAGADO BOTONES DE PROGRAMACIÓN DE CICLOS Apriete el botón para ENCENDER la lavadora. Apriete nuevamente para APAGAR la Utilice estos botones para seleccionar las lavadora. opciones de ciclo deseadas para el ciclo seleccionado. -
Page 51: Funcionamiento De La Lavadora
C Ó M O U S A R FUNCIONAMIENTO DE LA LAVADORA Una vez que ha cargado la lavadora y añadido los productos de lavado (detergente, blanqueador y/o suavizante): Apriete el botón de ENCENDIDO/APAGADO Apriete el botón de INICIO/PAUSA para para encender la lavadora. -
Page 52: Guía De Ciclos
C Ó M O U S A R GUÍA DE CICLOS La guía de ciclos indicada más abajo muestra las opciones y tipos de telas recomendadas para cada ciclo. = Opción disponible TEMPERATURA VELOCIDAD NIVEL DE PREL- CICLO AgUA CICLO PARA ENjUAgUE ENgUAjE CICLO... -
Page 53: Clasificación De Las Cargas De Lavado
C Ó M O U S A R CLASIFICACIÓN DE LAS CARGAS DE LAVADO Etiquetas de cuidado de las telas • Las prendas grandes no deberán ser más de la mitad de la carga de lavado total. La mayoría de las prendas de vestir tienen etiquetas de cuidado de las telas para lograr •... -
Page 54: Selección De Detergente
C Ó M O U S A R SELECCIÓN DE DETERGENTE DETALLES SOBRE EL DEPÓSITO IMPORTANTE: Su lavadora esta diseñada para El cajón de suministro automático consiste en usarse exclusivamente con detergentes de alta 4 compartimentos que almacenan: eficiencia (HE). Los detergentes de alta eficiencia •... -
Page 55: Carga Del Depósito
C Ó M O U S A R CARGA DEL DEPÓSITO Compartimiento de detergente Compartimiento de para prelavado blanqueador líquido Agregue el detergente líquido o en polvo a este Este compartimiento alberga blanqueador líquido, compartimiento cuando se usa la opción de que se suministrará... -
Page 56: La Pantalla De Hora Y Estado
C Ó M O U S A R LA PANTALLA DE HORA Y ESTADO La pantalla de hora y estado muestra el progreso del ciclo y el tiempo restante estimado, opciones de ciclos y otros mensajes del estado actual de su lavadora. ESTIMATED TIME REMAINING (TIEMPO IDICADOR DE COMPLETACIÓN DE RESTANTE ESTIMADO) -
Page 57: Botones De Ajuste De Ciclo
C Ó M O U S A R BOTONES DE AjUSTE DE CICLO SOIL LEVEL (Nivel de suciedad) Cada ciclo tiene ajustes preprogramables que se seleccionan automáticamente. También puede Ajusta el ciclo seleccionado para personalizar los ajustes utilizando los botones de permitir más tiempo de lavado para programación de ciclos. -
Page 58: Botones De Opción De Ciclo
C Ó M O U S A R BOTONES DE OPCIÓN DE CICLO Su lavadora dispone de varias opciones de ciclo adicionales, las cuales personalizan los ciclos para cumplir con sus necesidades individuales. Ciertos botones de opción también incorporan una función especial (vea la siguiente página para obtener mayor información) que puede activarse apretando y manteniendo apretado ese botón de opción por 3 segundos. -
Page 59: Funciones Especiales
C Ó M O U S A R BOTONES DE OPCIÓN DE CICLO FUNCIONES ESPECIALES (cont.) CÓMO SELECIONAR OPCIONES DE CICLO Los botones de funcion tambien activan CON EL BOTÓN OPTION (OPCIÓN) funciones especiales, incluyendo CHILD LOCK(cerr.nin). Apriete y mantenga apretado el Presione el botón OPTION (opción) para boton de opcion marcado con la funcion especial agregar una de las siguientes opciones a... -
Page 60: Limpieza Del Exterior
C Ó M O U S A R LIMPIEZA REGULAR wADVERTENCIA: • Desenchufe la lavadora antes de limpiar la misma para evitar el riesgo de descargas eléctricas. Si no se cumple con esta advertencia se podrán producir heridas graves, incendios, descargas eléctricas o muerte. •... -
Page 61: Cuidados Y Limpieza
C U I DA D O S Y L I M P I E Z A LIMPIEZA REGULAR LIMPIEZA DE LA LAVADORA (cont.) Limpieza del depósito Almacenamiento de la lavadora Si no se utilizará la lavadora por un período prolongado Se debe limpiar el depósito periódicamente para de tiempo y se encuentra en un área que puede estar eliminar la acumulación de detergente y otros... -
Page 62: Mantenimiento
Póngase en contacto con el Departamento de Atención al Cliente de LG o llame a un técnico de mantenimiento calificado de LG. Filtro de entrada Cierre ambas llaves de agua completamente. - Page 63 C U I DA D O S Y L I M P I E Z A MANTENIMIENTO (cont.) Limpieza del filtro de la bomba de drenaje Se pueden acumular pelusas y otros objetos y taponar el filtro de la bomba de drenaje. Si la lavadora no drena adecuadamente, desconéctela y deje enfriar el agua, de ser necesario, antes de continuar.
-
Page 64: Resolución De Problemas
R E S O L U C I Ó N D E P RO B L E M A S SONIDOS NORMALES QUE PODRÍA ESCUCHAR Se pueden escuchar los siguientes sonidos mientras la lavadora se encuentra en funcionamiento. Son normales. Chasquido: Zumbido o gorgoteo: El seguro de la compuerta se vuelve a colocar... - Page 65 R E S O L U C I Ó N D E P RO B L E M A S ANTES DE LLAMAR A MANTENIMIENTO (cont.) Problema Causas posibles Soluciones • La manguera de drenaje está • Asegúrese de que la manguera de drenaje esté libre de El agua en la lavadora doblada, apretada o taponada.
- Page 66 R E S O L U C I Ó N D E P RO B L E M A S ANTES DE LLAMAR A MANTENIMIENTO (cont.) Problema Causas posibles Soluciones • No ha descargado la lavadora • Siempre remueva artículos de la lavadora tan pronto Prendas arrugadas con rapidez.
-
Page 67: Utilización Del Diagnósticointeligente
Velocidad de 1200 r.p.m centrifugado máx. ACCESORIOS OPCIONALES Para estos y otros productos LG, llame a su distribuidor LG local, o visite nuestro sitio Web en www.lg.com. Pedestal Kit de apilado Incremente el desempeño de su lavadora LG con los Si no se dispone de espacio, utilice este kit para pedestales de 35,5 centímetros (14 pulgadas) de alto... - Page 68 NÚMEROS DE CENTROS INFORMACIÓN DE CLIENTE PARA CONTACTAR A Lg ELECTRONICS POR CORREO: LG Customer Información Center P. O. Box 240007 201 James Record Road Huntsville, Alabama 35824 ATTN: CIC...
- Page 69 NOTA...
- Page 70 NOTA...
- Page 71 NOTA...
- Page 72 MANUEL D'UTILISATION MACHINE À LAVER Avant d’utiliser votre machine à laver (laveuse), lisez attentivement ce manuel d'utilisation et conservez-le pour vous y référer ultérieurement. WM2240C* www.lg.com...
- Page 73 Félicitations pour votre achat et Précautions de sécurité pour l’installation ..... 5 Précautions de sécurité pour l’utilisation, l’entretien bienvenue dans la famille LG. et le nettoyage, et la mise au rebut ......6 PIÈCES ET CARACTÉRISTIQUES Votre nouvelle machine à laver Caractéristiques spéciales ........
-
Page 74: Instructions Importantes De Sécurité
I N S T R U C T I O N S I M P O RTA N T E S D E S É C U R I T É LISEZ TOUTES LES DIRECTIVES AVANT D’UTILISER L’APPAREIL wAVERTISSEMENT Pour votre sécurité, vous devez suivre l’information contenue dans ce manuel afin de réduire les risques d’incendie et d’explosion, de choc électrique ainsi que pour éviter les dommages matériels, les blessures corporelles ou un décès. -
Page 75: Précautions De Sécurité De Base
I N S T R U C T I O N S I M P O RTA N T E S D E S É C U R I T É LISEZ TOUTES LES DIRECTIVES AVANT D’UTILISER L’APPAREIL wAVERTISSEMENT Pour votre sécurité, vous devez suivre l’information contenue dans ce manuel afin de réduire les risques d’incendie et d’explosion, de choc électrique ainsi que pour éviter les dommages matériels, les blessures corporelles ou un décès. -
Page 76: Précautions De Sécurité Pour L'installation
I N S T R U C T I O N S I M P O RTA N T E S D E S É C U R I T É LISEZ TOUTES LES DIRECTIVES AVANT D’UTILISER L’APPAREIL wAVERTISSEMENT Pour votre sécurité, vous devez suivre l’information contenue dans ce manuel afin de réduire les risques d’incendie et d’explosion, de choc électrique ainsi que pour éviter les dommages matériels, les blessures corporelles ou un décès. -
Page 77: Précautions De Sécurité Pour L'utilisation, L'entretien Et Le Nettoyage, Et La Mise Au Rebut
I N S T R U C T I O N S I M P O RTA N T E S D E S É C U R I T É LISEZ TOUTES LES DIRECTIVES AVANT D’UTILISER L’APPAREIL wAVERTISSEMENT Pour votre sécurité, vous devez suivre l’information contenue dans ce manuel afin de réduire les risques d’incendie et d’explosion, de choc électrique ainsi que pour éviter les dommages matériels, les blessures corporelles ou un décès. -
Page 78: Pièces Et Caractéristiques
P I È C E S E T C A R AC T É R I S T I Q U E S CARACTÉRISTIQUES SPÉCIALES TIROIR À DISTRIbUTEUR DE DÉTERGENT Ce tiroir à quatre compartiments offre quatre distributeurs distincts pour le détergent du prélavage et lavage principal, le javellisant et l’assouplissant. -
Page 79: Composantes Et Pièces Principales
Admission d’eau nettoyante. Durant les cycles de VAPEUR à chaude et froide haute efficacité de LG, la buse à vapeur injecte de la vapeur chaude dans les tissus pour éliminer les taches tenaces en douceur. PIEDS DE NIVELEMENT... -
Page 80: Instructions D'installation
I N S T R U C T I O N S D ’ I N S TA L L AT I O CHOISIR LE bON EMPLACEMENT DÉGAGEMENTS wAVERTISSEMENT • la machine à laver est lourde! Deux personnes ⁄ ou plus sont nécessaires lorsque vous déballez (57 cm) et déplacez la machine à... -
Page 81: Revêtement De Sol
I N S T R U C T I O N S D ’ I N S TA L L AT I O REVÊTEMENT DE SOL INSTALLATIONS AVEC PIÉDESTAL OU TROUSSE D’EMPILAGE EN OPTION • Pour minimiser le bruit et la vibration, la machine à... -
Page 82: Déballage Et Retrait Des Boulons D'expédition
I N S T R U C T I O N S D ’ I N S TA L L AT I O DÉbALLAGE ET RETRAIT DES bOULONS D’ExPÉDITIONT Lorsque vous retirerez la machine à laver de sa boîte, assurez-vous de retirer le support de mousse du milieu de la base de carton. -
Page 83: Raccordement Des Conduites D'eau
I N S T R U C T I O N S D ’ I N S TA L L AT I O RACCORDEMENT DES CONDUITES D’EAU Joint en Joint en tcaoutchouc Prise caoutchouc Prise d’eau Water chaude d’eau Inlet froide Tuyau d’eau Tuyau d’eau... -
Page 84: Raccordement Du Tuyau De Vidange
I N S T R U C T I O N S D ’ I N S TA L L AT I O RACCORDEMENT DU TUYAU DE VIDANGE Option 2 : bac à lessive • Le tuyau de vidange doit toujours être solidement fixé. -
Page 85: Mise À Niveau De La Machine À Laver
I N S T R U C T I O N S D ’ I N S TA L L AT I O MISE À NIVEAU DE LA MACHINE À LAVER Le tambour de votre nouvelle machine à laver rEMarQuE : Pour vous assurer que la machine tourne à... -
Page 86: Mode D'emploi
M O D E D ’ E M P LO I CARACTÉRISTIQUES DU PANNEAU DE COMMANDE bOUTON DE MISE EN MARCHE/ARRÊT bOUTONS DE RÉGLAGE DU CYCLE Appuyez pour mettre en marche la machine Utilisez ces boutons pour sélectionner les à laver. Appuyez de nouveau pour arrêter la options de cycle désirées pour le cycle que vous machine à... -
Page 87: Utilisation De La Machine À Laver
M O D E D ’ E M P LO I UTILISATION DE LA MACHINE À LAVER Une fois la machine à laver chargée et les produits de lessive ajoutés (détergent, javellisant et/ou assouplisseur) : Appuyez sur le bouton MARCHE/ARRÊT Appuyez sur le bouton MARCHE/PAUSE pour mettre en marche la ma- pour démarrer le cycle. - Page 88 M O D E D ’ E M P LO I GUÍA DE CICLOS Le guide de cycle ci-dessous montre les options et les types de tissus recommandés pour chaque cycle. = Opción disponible Préla tEMPératurE CyClE aJout CyClE DE rINçagE rINçagE CyClE...
-
Page 89: Triage Des Brassées
M O D E D ’ E M P LO I TRIAGE DES bRASSÉES Étiquettes d’entretien des tissus • Les grands articles ne doivent pas composer plus de la moitié de la brassée totale. La plupart des vêtements possèdent des étiquettes d’entretien des tissus qui affichent les •... -
Page 90: Sélection Du Détergent
M O D E D ’ E M P LO I SÉLECTION DU DÉTERGENT À PROPOS DU DISTRIbUTEUR IMPortaNt : Votre laver est conçu pour Le distributeur automatique est constitué de utilisation avec des détergents haute efficacité quatre compartiments qui conservent : uniquement. -
Page 91: Chargement Du Distributeur
M O D E D ’ E M P LO I CHARGEMENT DU DISTRIbUTEUR Compartiment à détergent de Compartiment à javellisant liquide prélavage Ce compartiment contient l’eau de Javel chlorée, qui sera distribuée automatiquement au bon Ajoutez du détergent liquide ou en poudre à ce moment durant le cycle de lavage. -
Page 92: Afficheur Del
M O D E D ’ E M P LO I AFFICHEUR DEL L’affichage DEL montre les réglages, le TEMPS RESTANT ENV. options et les messages d’état pour la machine à laver. Lorsque la machine à laver est allumée, l’affichage est éclairé. ESTIMATED TIME REMAINING (TEMPS INDICATEUR DE CYCLE TERMINÉ... -
Page 93: Boutons De Configuration De Cycle
M O D E D ’ E M P LO I bOUTONS DE CONFIGURATION DE CYCLE SOIL LEVEL (SALETÉ) Chaque cycle possède des réglages préprogrammés qui se sélectionnent Ajuste le cycle sélectionné pour permettre automatiquement. Vous pouvez également davantage de temps pour les vêtements personnaliser les réglages à... -
Page 94: Boutons De Fonctions Spéciales
M O D E D ’ E M P LO I bOUTONS DE FONCTIONS SPÉCIALES Votre machine à laver vous offre plusieurs options de cycle supplémentaires pour personnaliser les cycles et ainsi satisfaire vos besoins individuels. Certains boutons d’options comportent également une fonction spéciale (consultez la page suivante pour les détails) qui peut être actionnée en appuyant et en maintenant ce bouton d’option pendant 3 secondes. - Page 95 M O D E D ’ E M P LO I bOUTONS DE FONCTIONS SPECIAL FUNCTIONS SPÉCIALES (cont.) SÉL ECTION DES OPTIONS DE CYCLE AVEC Ces boutons de fonction spéciaux vous LE bOUTON OPTION permettent de sélectionner des fonctions supplémentaires: CHILD LOCK (verrouillage pour Appuyez sur le bouton OPTION pour enfants).
-
Page 96: Entretien Et Nettoyage
E N T R E T I E N E T N E T TOYAG E NETTOYAGE ORDINAIRE wAVERTISSEMENT : • Débranchez votre machine à laver avant de la nettoyer pour éviter le risque d’électrocution. Tout nonrespect de cet avertissement peut entraîner des blessures graves, un incendie, une électrocution ou la mort. •... -
Page 97: Nettoyage De La Machine Àlaver
E N T R E T I E N E T N E T TOYAG E LIMPIEZA REGULAR NETTOYAGE DE LA MACHINE À (cont.) LAVER Entreposage de la machine à laver Nettoyage du distributeur Si la machine à laver ne sera pas utilisée pendant Le distributeur doit être périodiquement nettoyé... -
Page 98: Entretien
être nettoyés ou qu’ils sont endommagés, ne faites PAS fonctionner la machine à laver sans les filtres d’admission. Contactez le service à la clientèle de LG ou un centre de service LG qualifié. Filtro de entrada Fermez complètement les deux robinets. - Page 99 E N T R E T I E N E T N E T TOYAG E ENTRETIEN (suite) Nettoyer le filtre de la pompe de vidange De la peluche et d’autres corps étrangers pourraient s’y accumuler et obstruer le filtre de la pompe de vidange.
-
Page 100: Dépannage
D É PA N N AG E SONS NORMAUx QUE VOUS POURRIEZ ENTENDRE Les sons suivants peuvent se faire entendre lorsque la machine à laver est en fonction. Ils sont normaux. Vrombissement ou gargouillis : Cliquetis : Eau de la pompe de vidange s’écoulant de la Relais du verrou de porte lorsque la porte se machine à... - Page 101 D É PA N N AG E AVANT D’APPELER LE SERVICE (suite) Problèmes Causes possibles Solutions • Le tuyau de vidange est plié, • Assurez-vous que le tuyau de vidange n’est pas la machine à laver se pincé, ou obstrué. obstrué, tordu ou pincé...
- Page 102 D É PA N N AG E AVANT D’APPELER LE SERVICE (suite) Problèmes Causes possibles Solutions l’afficheur montre : • Brassée trop petite. • Ajoutez 1 ou 2 articles similaires pour aider à équilibrer la brassée. • Brassée déséquilibrée. • La machine à laver possède •...
-
Page 103: Utilisation De Smartdiagnosis Mc
Vitesse d’essorage maximale 1200 tours/min ACCESSOIRES EN OPTION Pour ces produits LG et les autres, contactez votre détaillant LG local ou visitez notre site Internet au www.lg.com. Piédestal Trousse d’empilage Donnez à votre machine à laver et sécheuse LG un coup Si l’espace est restreint, utilisez cette trousse pour... - Page 104 GARANTIE LIMITÉE DE LA LAVEUSE LG - Canada GARANTIE : Si votre machine à laver� LG (le « produit ») s'avère défectueuse en raison d'un défaut de matériau ou de fabrication lors d'une utilisation normale à domicile, pendant la période de garantie spécifiée ci-après, LG Canada réparera ou remplacera à sa discrétion le produit sur réception de la preuve d'achat originale fournie par le détaillant.
- Page 105 N OTE S R E M A R QU ES •...
- Page 106 N OTE S R E M A R QU ES •...
- Page 107 This product qualifies for ENERGY STAR in the LG Customer Information Center “factory default (Home Use)” setting. Changing the factory default settings or enabling other 1-800-243-0000 features may increase power consumption that could exceed the limits necessary to quality for ENERGY STAR.
Need help?
Do you have a question about the WM2240CW and is the answer not in the manual?
Questions and answers