Table of Contents
Advertisement
Quick Links
Download this manual
See also:
User Manual
Advertisement
Table of Contents

Related Manuals for Binatone F350 - EDITION 5


Summary of Contents for Binatone F350 - EDITION 5
- Page 1 User Guide F350 edition www.binatonegps.com Binatone Navigation software...
-
Page 2: Important
This is quite normal for products of this type. You can check the number of satellite signals that the unit is receiving and the strength of those signals by viewing the GPS Receiver. Unpacking your Binatone Navigation System In the box you will find ·GPS navigation device ·Car mounting kit... -
Page 3: Safety
America, who are responsible for its availability and accuracy. Any changes in GPS availability and accuracy, or in environmental conditions, may impact the operation of you Binatone Personal Navigation Device (PND). Using Your PND in the Car When using your PND while driving it is essential that you drive with due care and attention. -
Page 4: Table Of Contents
CONTENTS CONTENTS Important………………………………………………………………………. In the Box ……….………………………………………………………... Safety …………………………………………………………………………… 02 The Global Positioning System …………………………………………… 02 Using Your PND in the Car .…………………………………………….. 02 Prohibited Areas .…………………………………………………….…… 02 Battery..…………………………………………………………………….. 02 Contents .………………………………………………………………………. 03 Quick Start Guide …………………………………………………………… Position of the Controls ………………………………………………… Charging the Battery ……………………………………………………. - Page 5 CONTENTS NAVIGATION 1. Introduction.……………………………………………………………………. 15 1.1 GPS connection.………………………………………………………… 15 2. Getting Started...………………………………………………………………… 16 3. Navigational Map Screens.…………………………………………………….. 17 3.1 Free Navigation………………………………………………………….. 17 3.2 Route Navigation………………………………………………………… 18 4. Browsing the Map………………………………………………………………. 19 5. Navigation……………………………………………………………………….. 19 5.1 Free navigation…………………………………………………………... 19 5.2 Route Navigation………………………………………………………… 19 6.
- Page 6 CONTENTS 8.11 Brightness………………………………………………………………. 34 8.12 Calibration………………………………………………………….…… 34 9. Route Plan………………………………………………………………..…… 34 9.1 Navigating………………………………………………………….…….. 34 9.2 Waypoints…………………………………………………………….….. 35 9.3 Simulate…………………………………………………………….……. 35 9.4 Route Options……………………………………………………….…… 36 10. Route Navigation Menu………………………………………………….…… 36 10.1 Route Plan……………………………………………………………… 36 10.2 Detour…………………………………………………………………… 36 10.3 Cancel Route…………………………………………………………… 37 10.4 Go to……………………………………………………………………..
-
Page 7: Quick Start Guide
QUICK START GUIDE Quick Start Guide Please make sure that you read all of the information contained within this user guide before operating this unit. If you experience any problems, please go through the user guide before contacting the customer helpline. Position of the controls 1. -
Page 8: Charging The Battery
QUICK START GUIDE Charging the Battery Before using your GPS device for the first time, we recommend that you charge the unit for 5 hours via the mains/car charger, or until the charge light turns green. Plug the mains/car charger into the USB socket. -
Page 9: Turning The Sat Nav Unit On/Off
QUICK START GUIDE Turning the Sat Nav Unit On/Off Press and hold the On/Off button on the top of the unit for around 3 seconds, the unit will power up and display the Menu screen. Press and hold the On/Off button for around 3 seconds during operation, the unit will show the following display, Turning the Sat Nav Unit Off or... -
Page 10: Windscreen Holder Installation
QUICK START GUIDE Windscreen Holder Installation The car mount has a suction pad that fits to the windscreen or a flat area on the dashboard. A. Fitting to windscreen Pull the lever away from the suction pad. Place the pad on the widescreen and push the lever towards the pad until it clicks into place. -
Page 11: Getting Started
MAIN MENU Starting Up Press the On/Off button on the top until the following screens are displayed, When you press MENU, the following screens will be displayed:... -
Page 12: Settings
MAIN MENU Settings NOTE: You do not need to enter the SETTINGS menu before you start to navigate. If you press on the SETTINGS icon the following screen is displayed. To exit this page or exit any subsequent page, press the at the bottom of the screen. -
Page 13: Multi-Media
MAIN MENU Language Press ”Language” to change the language. Use the keys to scroll between further language options. Select the language you desire from the available options so that it is highlighted white. Then press to confirm and exit. About The About page contains information about your operating system software version. -
Page 14: Document Viewer
MAIN MENU 4) Click on SDMMC folder to open it and then click on a picture or a further folder. To continue searching or to load a photo it into the viewer. To go back through the menu structure press the option “...” The following screen will be shown: Button function list of Picture Files: 1. -
Page 15: Gps Receiver
MAIN MENU Button function list of Document Files: 1. Return : Press this to return back to the list of pictures on the unit. 2. Page number : This shows the number of the current page and the total number of pages in the document. -
Page 16: Navigation
NAVIGATION 1 Introduction You have chosen a cutting-edge navigation system. Congratulations! Please enjoy using it. This navigation system leads you straight to your destination, whether you are travelling by car or on foot. You can navigate and plan your route with an easy-to-use and intuitive interface, just by using your finger. -
Page 17: Getting Started
“Don’t show this statement again”. You will now be shown the Binatone screen, which shows the progress of the loading software on the yellow bar at the bottom. -
Page 18: Navigational Map Screens
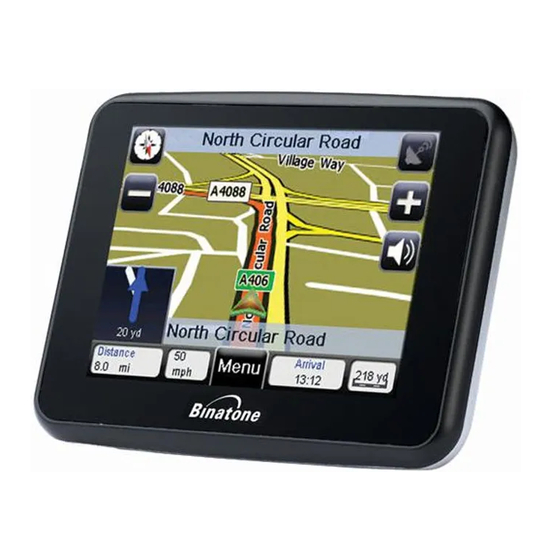
NAVIGATION 3 Navigational Map Screens The navigational map screens will be the most frequently used screens. The two navigation screens are free navigation and route navigation and are shown below. Though the screens look very similar there are some differences. 3.1 Free Navigation 1 Compass –... -
Page 19: Route Navigation
NAVIGATION 3.2 Route Navigation 11 Speed limit– Shown when you exceed the speed limit of the current road, if switched on via the settings (see page 30). 12 Turn indicator – Shows a graphical representation of the next manoeuvre and the distance to the manoeuvre. -
Page 20: Browsing The Map
NAVIGATION 4 Browsing the Map When in Free Navigation or Route Navigation it is possible to browse the map so that you can look at parts of the map which are currently not shown. To move the map around use the stylus (if provided) or your finger to press and hold on a point on the map, then drag the map in the opposite direction you want to look at. -
Page 21: Entering An Address/Postcode
NAVIGATION 6.1 Entering an Address/Postcode One of the most commonly used methods for inputting a destination into the unit, tap Address the screen will change to show the following. This screen shows a list of any previously used cities/towns. You will also be able to enter a new city name as well as changing the country you wish to search within. - Page 22 NAVIGATION (number keyboard) to enter a space. to delete an incorrect letter. to change between numbers and letters (number keyboard only). to change the keyboard language if available, you can now access the languages special characters by tapping as above. (see page 28 for how to select keyboard language).
-
Page 23: Searching For A Poi (Point Of Interest)
NAVIGATION Tap on the Crossroad field to select a point where another road joins the entered road. The screen will change to show a list of all joining roads, use the keys to move through the list until you see the correct road. Select the desired road and tap double tap to confirm. -
Page 24: Poi In City
NAVIGATION Scroll through the list using the keys till you find the POI you are looking for. Select the item so that it is highlighted orange then tap or double tap the item to confirm. You will be taken to the Route Plan screen (see page 35). Alternatively you can tap in the white box at the top of the screen. -
Page 25: Selecting An Entry From The Address Book
NAVIGATION Scroll through the list of POI until you find the one you are looking for and then tap or double tap to confirm. You will be taken to the Route Plan screen (see page 35). Note; When you carry out a search for a particular name of a POI. The unit will search from a larger distance around your current position, than it did from the original search. -
Page 26: Selecting A Point On The Map
NAVIGATION to delete the currently selected address book entry. Warning: you will not be asked to confirm the deletion, so make sure that you wish to carry out this operation before tapping. 6.5 Selecting a Point on the Map This option allows you to move around the map and to select a location which you want to use as your destination. -
Page 27: To Navigate Directly Home
NAVIGATION to change between Degrees:minutes:seconds and Decimal formats. to delete any incorrect characters. to go back to the Search Menu screen. to confirm the entered co-ordinates. The screen will then change to show the Route Plan screen (see page 35). 6.7 To Navigate Directly Home Tapping Go Home will directly navigate you to your set home address without having to tap any other... -
Page 28: Motorway Sign Post
NAVIGATION Note: You can toggle the map between 2D and 3D modes quickly, by tapping on the compass in the top right of the navigation screen. 7.3 Motorway Sign Post When switched on this option does two things. Firstly when driving down major roads and motorways, it will show information about the approaching junctions. -
Page 29: Voice Guidance
NAVIGATION 7.4 Voice Guidance This option allows you to activate or deactivate the voice guidance. When deactivated the unit will no longer give spoken voice directions during navigation. When activated the box will be shown with a tick. to confirm the change. 7.5 Auto Zoom Allows you to activate or deactivate the auto zoom feature. -
Page 30: Language
NAVIGATION 8.1 Language Tap to open the language selection screen. You can choose from 10 different languages. When a language is selected not only will it affect the text on the screen, but will also change the language of the spoken voice directions. to scroll back and forth between each page. -
Page 31: Address Book
NAVIGATION the option which is currently not selected. It is recommended that you start recording after your route has been planned or when you are in Free Navigation and you have a valid GPS signal, and you should stop recording once you have reached your destination. This will prevent the unit from continually recording while you are not driving and it will also divide each journey into a separate trace record. -
Page 32: Add An Entry
NAVIGATION Once you have added a location to the address book you can enter further information about that location. To enter further information tap on the white box next to the field name, the screen will change to show a keyboard which allows you to enter information. -
Page 33: Delete An Entry
NAVIGATION To delete an entry from the address book, select the entry so that it is highlighted orange and tap , the entry will be deleted from the address book. Warning: you will not be asked to confirm the deletion, so make sure that you wish to carry out this operation before tapping. -
Page 34: Miles/Kilometre
NAVIGATION your current speed, your current altitude above sea level and your current position in Longitude and latitude. Included with this information is the number of satellites which you are currently locked on to. The right half of the screen shows the position of these satellites in the sky. Each satellite will be shown by a coloured circle;... -
Page 35: Brightness
NAVIGATION Tapping will change the screen to the brightness setting screen. There are 5 settings available and are shown as bars, with an arrow indicating the currently selected level. Use the keys to set the required level, the brightness will be reflected in the screen as the change is made. Once set tap to confirm the selection and return to the settings screen. -
Page 36: Simulate
NAVIGATION You can add up to two additional destinations before you begin navigating, these additional destinations are know as waypoints. When the unit calculates the route it will navigate you to each waypoint first before continuing on to your final destination. This is handy if you are planning a trip were you would like to stop off on the way to take in sights or simply just for a break/fuel. -
Page 37: Route Navigation Menu
NAVIGATION Shortest Route - When selected the unit will calculate a route which covers the shortest distance. Quickest Route - When selected the unit will calculate a route which has the shortest travel time. Avoid Toll Roads - When selected the unit will calculate a route which does not use toll roads. -
Page 38: Route Information
NAVIGATION Tapping this option will automatically cancel the route and take you to the Search menu (see page 20). Were you will be able to enter a new destination to navigate too. 10.5 Route Information Tapping this option will detail the route in text format and contains useful information about the route you have planned on a new screen. -
Page 39: Frequently Asked Questions
TECHNICAL SPECIFICATIONS Frequently asked questions I can’t find an address. Please make sure you have correctly spelt your entry. If you do not know how an address is spelt correctly, simply enter the parts of the address, you know of sure (e.g., “ond”, “Leic”... -
Page 40: Technical Specifications
TECHNICAL SPECIFICATIONS Technical Specifications Atlas IV or V 500 MHz Operating System Microsoft WinCE.NET 6.0 Core Version Built-in GPS high sensitivity receiver (64 Antenna channels) Memory 64MB SDRAM Built-in Display 3.5″colour TFT touch screen Weight 0.115 kg Touch Input Method Expansion Slot MicroSD card Speaker Built-in... -
Page 41: Ec Declaration Of Conformity
TECHNICAL SPECIFICATIONS BINATONE TELECOM PLC 1 Apsley Way London NW2 7HF,United Kingdom. Tel: +44(0) 20 8955 2700 Fax: +44(0) 20 8344 8877 e-mail: binatoneuk@binatonetelecom.co.u ________________________________________ EC Declaration of Conformity We the manufacturer / Importer : Binatone Telecom Plc 1 Apsley Way London NW2 7HF, United Kingdom.
Need help?
Do you have a question about the F350 - EDITION 5 and is the answer not in the manual?
Questions and answers