
Subscribe to Our Youtube Channel
Related Manuals for ALPATEC DH 25 EC


Summary of Contents for ALPATEC DH 25 EC
- Page 1 DH_25EC:notice DH_25EC 15/11/07 18:54 Page 1 NOTICE D’UTILISATION DH 25 EC DÉSHUMIDIFICATEUR DEHUMIDIFIER...
- Page 2 F R A N Ç A I S F R A N Ç A I S ALPATEC vous félicite d’avoir choisi ce produit et vous remercie de votre confiance. Pour votre confort et votre sécurité, votre article a été vérifié à toutes les étapes de sa fabrication et a passé...
- Page 3 notice DH_25EC:notice DH_25EC 15/11/07 18:54 Page 3 • Ne pas utiliser d’aérosols (insecticides, peinture) ou tout autre produit inflammable à proximité de l’appareil pour éviter de déformer les parties plastiques ou de provoquer des dommages électriques. • Par souci d’efficacité, veiller à laisser un espace libre d’au moins 20 cm autour de l’appareil. •...
-
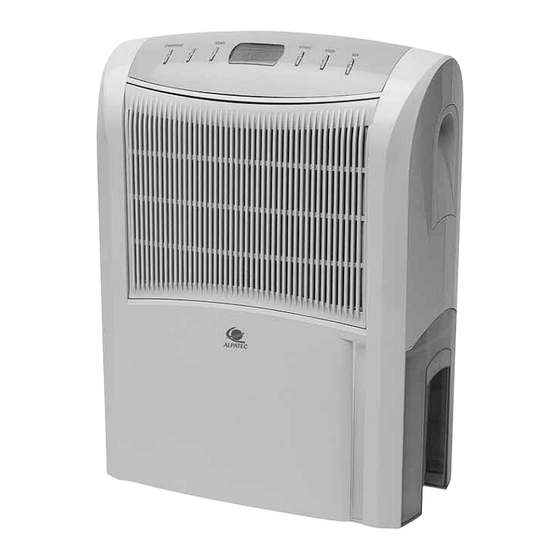
Page 4: Description De L'appareil
notice DH_25EC:notice DH_25EC 15/11/07 18:54 Page 4 DESCRIPTION DE L’APPAREIL AVANT 1. Panneau de contrôle 2. Entrée d’air / Filtres 3. Fenêtre de niveau d’eau 4. Poignée 5. Bac à eau ARRIÈRE 6. Volet de la sortie d’air 7. Sortie d’air 8. - Page 5 notice DH_25EC:notice DH_25EC 15/11/07 18:54 Page 5 TABLEAU DE COMMANDES 12. Chauffage Touche inactive 14. Programmation 15. Ecran de contrôle 16. Vitesse de ventilation 17. Mode 18. Marche / Arrêt ECRAN DE CONTROLE A. Taux d’humidité sélectionné B. Humidité ambiante C.
-
Page 6: Mise En Marche
notice DH_25EC:notice DH_25EC 15/11/07 18:54 Page 6 UTILISATION MISE EN MARCHE. - Brancher l’appareil. - Appuyer sur le bouton M / A (18), l’appareil se met à fonctionner en mode déshumidification continue. - Utiliser le bouton Mode (17) pour sélectionner le taux d’hygrométrie désiré ou le mode déshumidification continue. - Page 7 notice DH_25EC:notice DH_25EC 15/11/07 18:54 Page 7 DRAINAGE PERMANENT. - Si le déshumidificateur est utilisé dans des ambiances très humides, il peut être plus pratique d’utiliser la fonction drainage permanent. - Pour cela, éteindre et débrancher l’appareil. - Retirer l’opercule situé à l’arrière de l’appareil (9) : pour cela casser les 4 attaches. Attention, cette opération est irréversible.
-
Page 8: Maintenance
notice DH_25EC:notice DH_25EC 15/11/07 18:54 Page 8 MAINTENANCE - Veillez à débrancher l’appareil avant toute opération de maintenance. - Pour nettoyer l’extérieur de l’appareil, utiliser un chiffon doux et sec. - Ne jamais utiliser de détergent, d’abrasif ou de solvant. - Pour nettoyer le filtre à... - Page 9 notice DH_25EC:notice DH_25EC 15/11/07 18:54 Page 9 PANNES En cas de mauvais fonctionnement et avant de faire appel à un réparateur agréé, merci de contrôler les points suivants : Problème Cause possible L’appareil ne fonctionne pas. 1. est-il branché ? 2.
- Page 10 notice DH_25EC:notice DH_25EC 15/11/07 18:54 Page 10...
-
Page 11: Special Recommendations
E N G L I S H E N G L I S H For your comfort and safety, ALPATEC has checked all the steps of manufacturing. The products have been made for you to enjoy their design and easiness to use. - Page 12 notice DH_25EC:notice DH_25EC 15/11/07 18:54 Page 12 • Do not place the appliance on its side or back / front in storage or transport. If unit has been transported allow to stand for 2 hours before switching the unit on. •...
-
Page 13: Parts List
notice DH_25EC:notice DH_25EC 15/11/07 18:54 Page 13 PARTS LIST FRONT 1. Control panel 2. Air inlet / Filters 3. Water level window 4. Handle 5. Water tank REAR 6. Cover of the air outlet 7. Air outlet 8. Rear plate 9. -
Page 14: Control Panel
notice DH_25EC:notice DH_25EC 15/11/07 18:54 Page 14 CONTROL PANEL 12. heat Blank touch 14. timer 15. display window 16. fan speed 17. Mode 18. ON / OFF DISPLAY WINDOW A. Humidity display B. Ambient humidity C. Compressor light indicator and water full indicator D. - Page 15 notice DH_25EC:notice DH_25EC 15/11/07 18:54 Page 15 OPERATION INSTRUCTION STARTING. - Plug the unit. - Press button ON / OFF (18), the unit start working in continuous mode. - Press button mode (17) to select the humidity rate (or continuous mode). You can select 50%, 60%, 70% or 80%.
-
Page 16: Continuous Drainage
notice DH_25EC:notice DH_25EC 15/11/07 18:54 Page 16 CONTINUOUS DRAINAGE. - If you use the appliance in a very high humidity level, it may be more convenient to use continuous drainage. - Stop and unplug the appliance. - Remove the mask hole at the rear of the unit (9) : break the 4 clamp. Caution : this action is irreversi- ble !(pictures 1, 2 and 3) - Remove the water tank, insert the water tube inside the hole and place it around the buzzard of water exit (in front of the hole inside the appliance, reachable by the water tank position. - Page 17 notice DH_25EC:notice DH_25EC 15/11/07 18:54 Page 17 MAINTENANCE - First always unplug the appliance. - Use a soft and dry cloth to clean the body. - Never use detergent, chemical product or cleansing solution. - To clean the washable filter, use a vacuum cleaner or tap it smoothly. If the filter is very dirty, use warm water with soap, rinses and dry before you replace the filter.
-
Page 18: Troubleshooting
notice DH_25EC:notice DH_25EC 15/11/07 18:54 Page 18 TROUBLE SHOOTING Before asking for repair service, please check: PROBLEM POSSIBLE CAUSE The unit does not operate. 1. Is it plugged in? 2. Is it started 3. Is the ambient temperature between 5°C and 35°C? 4. - Page 19 notice DH_25EC:notice DH_25EC 15/11/07 18:54 Page 19...
- Page 20 notice DH_25EC:notice DH_25EC 15/11/07 18:54 Page 20 Indications relatives à la protection de l’environnement Au terme de sa durée de vie, ce produit ne doit pas être éliminé avec les ordures ménagères mais doit être remis à un point de collecte destiné au recyclage des appareils électriques et électroniques. Le symbole figurant sur le produit, la notice d’utilisation ou l’emballage vous indique cela.
Need help?
Do you have a question about the DH 25 EC and is the answer not in the manual?
Questions and answers