Rocket APPARTAMENTO, APPARTAMENTO TCA Manual
- User manual (28 pages) ,
- User and maintenance manual (37 pages) ,
- User and maintenance manual (200 pages)
Advertisement
- 1 INTRODUCTION
- 2 UNPACKING
- 3 DESCRIPTION OF THE MACHINE
- 4 INSTALLATION
- 5 START-UP
- 6 MACHINE OPERATION
- 7 PROGRAMMING
- 8 MAINTENANCE
- 9 ALARMS AND FAULTS
-
10
Troubleshooting
- 10.1 The machine does not start
- 10.2 No coffee or steam dispensing
- 10.3 The machine does not heat
- 10.4 Irregular steam dispensing
- 10.5 Extraction is too slow
- 10.6 Water leaking from the portafilter
- 10.7 Espresso is too cold
- 10.8 Water underneath the machine
- 10.9 Espresso tastes bitter
- 10.10 Espresso tastes sour
- 10.11 Espresso is watery and thin
- 10.12 Espresso is bubbly
- 11 Documents / Resources
INTRODUCTION
 BEFORE PERFORMING ANY OPERATION ON THE MACHINE, THE USER MUST CAREFULLY READ THE INSTRUCTIONS CONTAINED IN THIS PUBLICATION AND FOLLOW THEM THROUGHOUT THE INTERVENTIONS. IF IN DOUBT ON THE CORRECT INTERPRETATION OF THE INSTRUCTIONS, CONTACT OUR ASSISTANCE SERVICE FOR THE NECESSARY CLARIFICATIONS.
Symbols and terminology used in the manual
 |  this symbol indicates information or procedures which, if not carefully followed, may cause serious personal injuries. Potential source of injury or harm to health. |
| |  The instructions accompanied by this symbol contain information, requirements or procedures, which can cause damage or malfunctions, if not carried out correctly. |
 |  UNDER The guidelines indicating this symbol contain information on particularly impor- MAINTENANCE tant topics and failure to comply with them may render the warranty null and void. |
 | CAREFULLY READ the instruction manual before commissioning. |
 |  machine connected to the electrical mains! |
 | Disconnect the power supply before performing any maintenance. |
 | hot contact parts! |
 | Wear protective gloves. |
 | OPERATOR: this symbol indicates information or procedures concerning the user of the machine. Procedures within the competence of the person in charge of machine operation, use and routine maintenance. |

QUALIFIED TECHNICIAN: this symbol indicates information or procedures regarding special maintenance (electrical/mechanical) for a qualified person authorised by the manufacturer
General information
This manual is an essential part of the APPARTAMENTO product; therefore, it is crucial that you read the enclosed warnings and precautions carefully before operating the machine. In particular, pay attention to the safety instructions during installation, comi missioning, use and cleaning. Please keep this user manual in a safe location where it may be available to all users of the machine.
The coffee machine description provided below is of a general nature and may, therefore, not include all details on the various components. The official language chosen by the manufacturer is Italian. This manual reflects the state of the machine at the time of supply. APPARTAMENTO reserves the right to make, at any time, all the changes it deems appropriate to mass production and update the related manuals without the obligation to update previous production and manuals, as well as inform users of previously supplied machines.
THE MANUFACTURER SHALL NOT BE LIABLE FOR ANY DAMAGE CAUSED TO PEOPLE OR PROPERTY DUE TO:
- Improper use of the machine.
- Use by unsuitable personnel (unauthorised and/or untrained).
- Power supply defects.
- Lack of maintenance on machine components.
- Changes to the machine not authorised by the manufacturer.
- Use of non-original spare parts.
- Replacement of components supplied with the machine with other components having different technical specifications from those in the project.
- Failure to comply with these instructions.
- Failure to comply with the safety regulations.
TRANSPORT AND HANDLING
When handling the machine, take the necessary precautions to prevent it from falling, damaging people, animals and things, as well as the machine itself. Do not carry out this operation by yourself. It is recommended to have two people handle the appliance.
When handling the machine in the packaging, be sure to follow the wording "THIS WAY UP" (identified by the symbol  ) on the packaging.
Do not overturn the machine during handling. Handle with care. The manufacturer cannot be held responsible for damage caused by incorrect handling or by not complying with the indications provided.
Safety warnings
IMPORTANT PRECAUTIONS
- Read all instructions
- Do not leave the packing elements (plastic bags, expanded polystyrene, nails, cardboard, etc.) within the reach of children, as these elements are potential sources of danger.
- Install the machine on a flat, water repellent surface (laminate, steel, ceramic, etc.) away from heat sources (oven, cooking stove, fireplace, etc.) and in conditions in which the temperature cannot drop below 5°C. Keep warm.
- Do not use outdoors.
- For domestic use only
- Do not leave the machine exposed to environmental elements or place it in damp rooms.
- Do not obstruct the grids and do not cover with cloths, etc.
- Keep the packed machine in a dry place, not exposed to environmental elements and in conditions in which the temperature does not go below 5°C.
- Do not place heavy items on the package.
- I n an emergency, such as fire, unusual noise, overheating, etc., take immediate action by disconnecting the power.
- T he installation and repair must conform to the codes and local electrical safety regulations.
- Do not let the power cable hang over the edge of the table or counter or touch hot surfaces.
- T he APPARTAMENTO machine must be installed after reading and understanding this publication
- T his machine is only safe when it has been correctly connected to an efficient earthing system.
- A lways connect the plug to the appliance first, then plug the power cable into the wall socket. To disconnect, set the switch to OFF, then remove the plug from the wall socket.
- C heck to see that the data on the rating plate corresponds to that of the main electrical mains to which the machine will be connected. Before connecting the machine to the electrical mains, make sure that the voltage, frequency and power of the machine correspond to those of the local electrical mains. The electrical data are indicated on the machine rating plate.
- W e do not recommend the use of accessories such as adaptors, multiboards or extension cords not recommended by the appliance manufacturer as they may cause injuries, fires or electric shocks.
- D o not use this machine if the cable, plug or any other part is damaged or if the machine malfunctions. Return the machine to the nearest authorised service facility for examination, repair or adjustment.
![]()
The power cable must not be replaced by the user. - T his machine has been designed for the sole purpose of producing coffee and dispensing steam and hot water for beverages. All other uses are inappropriate and dangerous. The manufacturer shall not be held responsible for any damage caused by inappropriate use.
- To protect against electric shocks when using any electrical appliance including the APPARTAMENTO machine:
- Do not immerse the machine itself, cable and plugs in water or other liquid and do not let the machine's internal parts get in contact with liquid.
- Make sure the power cable is not stretched or pulled.
- Do not use the machine with wet hands or feet.
- Do not allow children or untrained persons to use the machine.
- Do not operate the machine with bare feet.
- Place a circuit breaker at the electrical mains feeding the machine.
- Do not spill liquids on top of the machine.
- The machine should not be exposed to elements such as sunlight, rain, snow, extreme temperatures etc
- Avoid any spillage of water on electrical connections.
- A lways use ROCKET certified and manufactured spare parts and accessories.
- B efore carrying out any cleaning or maintenance, switch off the machine using the machine's power switch, disconnect the machine from the mains and wait for its temperature to drop.
- T his appliance is intended for domestic use.
- I f the machine operates in a faulty manner or stops working, turn it off immediately and disconnect it from the electrical supply. Do not attempt to repair it but contact an authorized and qualified APPARTAMENTO technician. Any repair must be performed by the manufacturer or by an authorized dealer using only original parts.
- W hen the machine is not used for long periods of time it must be stored at a temperature above zero (0°C / 32°F). This will prevent the hydraulic system from freezing, which could damage the internal pipes and boiler.
- T he machine must be used with drinking water. Use a water softener if water from the local mains has a high mineral content. A build-up of mineral deposit may restrict the flow of water within the hydraulic systems causing damage to the machine and risking personal injuries. Conversely, highly "pure" waters may interfere with the electronic signals read by the machine for both boiler level and water tank level indications. Use filtered water.
- The appliance must not be used by persons (including children) with reduced physical, sensory or mental capabilities, or lack of experience and knowledge, unless they have received supervision or instruction concerning use of the appliance from a person responsible for their safety.
- K eep the appliance and relevant cable out of reach of children.
- Children must not play with the appliance.
- Do not pull the power cable to disconnect the appliance from the power supply.
- To ensure correct operation and efficiency of the machine, it is required to follow the manufacturer's instructions, carrying out cleaning and routine maintenance operations.
- D uring machine operation some parts reach high temperatures, such as the dispensing units, the portafilters and the steam wands (indicate the photo with the figures?). Pay attention not to touch or put your hands under these parts when using them, to prevent scalds or burns. Always use appropriate knobs and handles for operation.
- Install the portafilter by inserting it into the head of the unit and turning the handle from left to right. The portafilter is inserted correctly once it is firmly inside the head of the unit and the handle is positioned at 90 degrees to the front of the machine
- Never remove (disengage/release) the portafilter while dispensing coffee. Burns could occur if the portafilter is removed during dispensing cycles.
- Pay close attention to the surfaces of the heating elements as they are subject to residual heat even after use.
- Do not use the device for any other use than its intended one.
- The coffee machine must not be stored in a closed place (cabinet, etc.) when in use.
- This appliance is intended for use in domestic or small catering environments such as:
- Kitchen areas for staff in shops, offices and other workplaces.
- Agritourism establishments with a common room for kitchen use.
- By customers in hotels, motels and other residential environments.
- Bed and breakfasts and the like.
KEEP THESE INSTRUCTIONS
UNPACKING

Before proceeding, the machine installation personnel must read these instructions and, in particular, the previous sections regarding general information and safety requirements.
Contents of the packaging
The machine is supplied fully assembled (with the exception of the accessories contained in the special boxes - fig. 2.1).

The machine data are indicated on the "CE" marking plate applied under the machine (fig. 2.2).

The packed machine must be protected in a sheltered and moisture-free premises until it is installed in a suitable environment. After removing the packaging, it is required to verify that the various components are in perfect condition and that there are no traces of tampering, damaged parts, etc. It will also be necessary to check that the machine is complete with all its parts, any accessories and technical documentation as per the transport documentation.
Before proceeding with the installation, in case anomalies are found in the checks on delivery, report the findings to the manufacturer.
The packaging elements (plastic bags, expanded polystyrene, nails, cartons, etc...) must not be left within the reach of children as they are potential sources of danger. These elements must be disposed of in accordance with the local regulations in force
DESCRIPTION OF THE MACHINE
Intended use
The machine has been designed and built to be used to prepare espresso coffee and hot drinks. Any other use is to be considered unsuitable and therefore dangerous.
The manufacturer cannot be held responsible for any damage caused to people or things due to unsuitable, erroneous or irrational use of the machine The operator must always follow the indications contained in this manual. In the case of a failure or if the machine is not working properly, switch it off and do not attempt any direct repair. Contact the service centre.

Technical specifications
| mod. APPARTAMENTO | mod. APPARTAMENTO TCA |
|
|
|
|
|
|
|
|
|
|
|
|
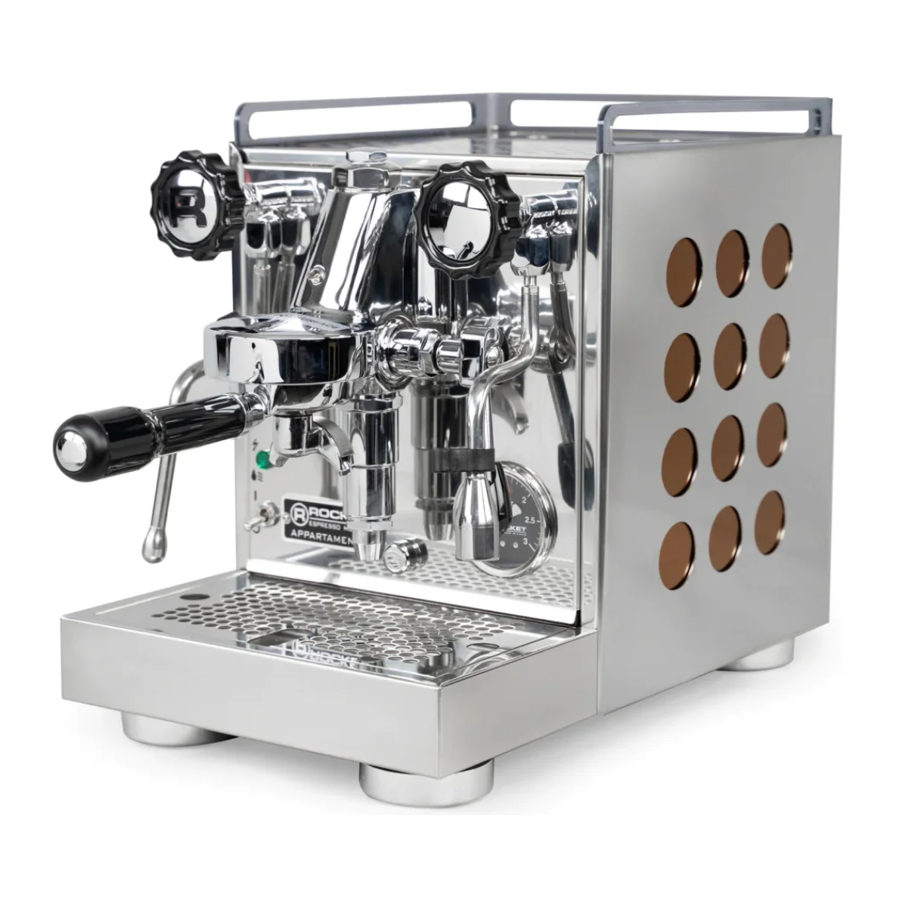
Main parts mod. APPARTAMENTO

- ON / OFF:
"O" = OFF
"I" = ON - Control indicators
- C offee dispensing knob
- Steam dispensing knob
- Steam wand
- Pressure gauge
- Portafilter
- Water tank holder chamber
- Cup warmer
- Cup warmer grid + tray
- Eco Mode button
- Hot water dispensing knob
- Hot water wand
- Wand kit handle
Main parts mod. APPARTAMENTO TCA

- ON / OFF:
"O" = OFF
"I" = ON - Control indicators
- C offee dispensing control lever
- Steam dispensing knob
- Steam wand
- Pressure gauge
- Portafilter
- Water tank holder chamber
- Cup warmer
- Cup warmer grid + tray
- Hot water dispensing knob
- Hot water wand
- Wand kit handle
Accessories
The machine is supplied complete with a wide series of accessories (fig._3.4). The first box contains the following parts and accessories:

- Portafilter - single
- Portafilter - double
- Tamper
- Blind filter
- Dispensing head cleaning brush.
- Display window (only for APPARTA- MENTO)
- Cup frame.
- Instruction Manual
- Microfiber cloth
Technical data
Voltage
- Please refer to the technical data plate on the machine.
Power
- Please refer to the technical data plate on the machine.
Temperature
- The machine must not be operated with temperatures under 5°C and over 36°C.
Water
- The machine must be operated with soft, clean drinking water. If the local water mains has a high mineral content, use a water softener. The water hardness must be between 4 - 7 °f (French) / 2 - 4 °d
(German). A build-up of mineral deposit may restrict the flow of water within the hydraulic systems causing damage to the machine and risking personal injuries.
Boiler capacity
- 1.8 litres
INSTALLATION
The machine must only be installed in places where it is easy to use and access. The support surface must be levelled, dry, smooth, stable and at such a height that the base is at least 100/105 cm approx. above the ground. (fig._4.1)

Do not use or install where water jets are used. In order to ensure normal operation, the machine must be installed in areas where MACHINE the room temperature is between +5°C and +36°C and humidity does not exceed 70%. UNDER MAINTENANCE Ensure that there is an open area of at least 10 cm on each side and behind the machine to allow adequate ventilation and facilitate its use and the performance of any maintenance operations. (fig._4.2)

If the machine is wet or very damp, wait until it is completely dry before installing or using it.
Filling the water tank
Make sure to use water with a degree of hardness suitable for this type of machine. The machine has to operate with clean soft drinking water. Never attempt to operate the machine with water of a hardness other than. Lift the tank chamber cover (1 fig. 4.4) and fill with water up to the "MAX" level indicated (about 1,9 L). The manufacturer recommends inserting a softener bag (2) in the water tank.
Pay attention to only pour water into the MAINTENANCE water tank, use a funnel if required. (to remove the tank for cleaning see chap. Maintenance). Reposition the cover of the water tank chamber.

Check the package for validity of the softener used (quantity of litres)
Electrical power supply
Before connecting the machine ensure that the identification label data comply with those of the local electric mains. The earthing system must be carried out in accordance with the provisions of current legislation.
Connect the power cable. (fig._4.4)

Place any excess cable on the worktop, so that it cannot be pulled by children or cause tripping.
If the power cable is damaged it is to be replaced by the manufacturer or by their technical assistance service or by a person with equivalent qualification, in order to prevent any risks.
START-UP
We assume the machine has been installed correctly.
- Make sure that the lever is positioned vertically (OFF - fig._5.6)
- Turn the On/Off switch (1 - fig._5.1) from position "O" to "I". After switching it on you get:
APPARTAMENTO model: the indicator light (2 - fig._5.1) lights up steady green.
APPARTAMENTO TCA model: the indicator light (2) is blue when switched on and turns white when the machine is running.

- Open the steam knob (3 - fig._5.2) to start MACHINE filling the boiler with water.


APPARTAMENTO model: you should hear the sound of the pump. APPARTAMENTO TCA model: you should hear the sound of the pump and the indicator light (2 - fig._5.1) will flash with a BLUE light. When the boiler is correctly filled with water, the pump stops (the noise stops).
- Then close the steam knob.


The boiler heating begins. Wait for the boiler pressure gauge (4 - fig._5.3) to indicate approximately 1 bar.
- Open the steam knob (3 - fig._5.4) for 5 seconds to allow some steam to come out.

![danger]() This operation is highly important as it eliminates any vacuum inside the boiler which may cause milk to be sucked into the boiler once steam dispensing has begun. Close the steam knob again.
This operation is highly important as it eliminates any vacuum inside the boiler which may cause milk to be sucked into the boiler once steam dispensing has begun. Close the steam knob again.

- Wait for the boiler pressure gauge (4 - fig._5.3) to reach 1 bar again.
- Fully raise the coffee dispensing control lever (4 - fig._5.5). Drain a cup of hot water from the infuser unit head (5).


This operation must only be performed once at first use.
- Lower the coffee dispensing lever completely to stop the water flow (fig._5.6)


- The machine is now ready for use
![information]() Allow a heating time of 15-18 minutes so that the head of the unit is fully heated: the quality of the espresso will be greatly improved with a hot unit and portafilter inserted.
Allow a heating time of 15-18 minutes so that the head of the unit is fully heated: the quality of the espresso will be greatly improved with a hot unit and portafilter inserted.
MACHINE OPERATION
Make sure that the machine is ready for full safety operation as described in the previous chapters
The portafilter unit heats up when the machine is ready. Pay attention
It is recommended to perform a first water dispensing without coffee with a new portafilter or on first use. This operation is recommended to eliminate any processing residues
- Install the portafilter by inserting it into the unit head and rotate the portafilter handle from left to right. The portafilter is inserted properly once it is firmly inside the unit head and the handle is positioned at 90 degrees from the front of the machine (fig._6.1)


- Now raise the coffee dispensing control lever to start the water flow through the portafilter. (fig_6.2)


- It is important to leave the portafilter hooked in the unit head when not in use. The portafilter must remain heated for an optimal brew process. It will also prevent the seal inside the unit head from drying out prematurely.
Coffee preparation
- Choose the portafilter for the preparation of one or two cups in a single dispensing (fig._6.3).


- Fill with ground coffee and press (fig._6.4), removing any coffee residues on the edge of the filter


- Hook the portafilter to the dispensing unit and place the cup(s) under the coffee dispensing spout.


- Start dispensing by raising the coffee dispensing control lever. To stop dispensing, lower the lever again. On the TCA model, the LED flashes white during the dispensing phase and returns to steady when dispensing is finished (fig._6.5).
![caution]() The maximum duration of a single dispensing is 100 seconds. After this time, dispensing stops automatically even if the user has not closed the lever.
The maximum duration of a single dispensing is 100 seconds. After this time, dispensing stops automatically even if the user has not closed the lever.
![information]() Dispensing has priority over filling: if dispensing is requested i while the machine is filling water, filling is temporarily suspended and dispensing begins regularly. It is possible to dispense even when the boiler level has not yet been reached.
Dispensing has priority over filling: if dispensing is requested i while the machine is filling water, filling is temporarily suspended and dispensing begins regularly. It is possible to dispense even when the boiler level has not yet been reached.
- Remove the portafilter to empty and clean it and then hook it up again (fig_6.6)


Steam dispensing
With the machine switched on and pressure gauge in pressure steam can be dispensed from the steam wand. Take a jug and place the steam wand into the drink and open the steam tap (3 - fig_6.7)

Once the desired dispensing is complete, close the tap and remove the jug. Clean the wand with a damp cloth. Dispense steam for a few seconds and then clean again with a damp cloth (fig_6.8)

The jet of steam may cause burns. To avoid burns, use the small plastic handle to move the steam wand.
For best results: store milk at ≤ 5°C (≤ 41°F)
Water dispensing
To dispense hot water, open the corresponding tap (1 fig._6.9) and release the required amount of water into a cup or container. To stop the hot water supply, close the tap itself.
the water is very hot. Take care to avoid possible burns

ECO mode
With ECO mode enabled:
The machine APPARTAMENTO goes into standby mode after 60 minutes of inactivity.
The machine, APPARTAMENTO TCA, goes into standby after 30 minutes.
When the machine is in standby, all heaters are off and delivery is not possible. The machine exits standby by operating the dispensing lever.
On the APPARTAMENTO model, the ECO-ON mode is activated by pressing the button below the machine (fig_6.10), while on the APPARTAMENTO TCA model it is activated during programming.

The machine is supplied from the factory with the ECO mode activated.
PROGRAMMING
The machine, which is being tested, has already undergone basic programming and is therefore ready for use. The user can vary certain machine parameters by entering the 'programming' mode and operating the coffee dispensing lever (1 - fig_7.1) and indicator light. (2)

The user-modifiable parameters are as follows:
- Boiler pressure (red).
- ECO MODE of the machine (green).
Access to programming
To access programming, the user must proceed as follows:
- Turn off the machine by turning the selector switch to the OFF position
![]()
- Raising the coffee dispensing lever
![]()
- Switch on the machine
![]()
- When the indicator light changes colour (yellow) lower the dispensing lever 2 (within 3 seconds). The machine is now i n p r o g r a m m i n g mode
![]()
- To switch from one parameter to another, confirm the previous one by holding the lever up for 3 seconds (waiting for the light to go on) and only then lower it.
![]()
- Each parameter is identified by an indicator colour and its number of flashes determines the setting value as described in the table below
![]()


Programming parameters
| Editable parameter | LED colour | Status selectable | Command |
| Boiler pressure adjustment | RED | Low | No. 1 flash |
| Medium (default) | No. 2 flashes | ||
| High | No. 3 flashes | ||
| Very high | No. 4 flashes | ||
| Stand-By | GREEN | Not active | No. 1 flash |
| Active (after 30 minutes) | No. 2 flashes |
Saving a programming parameter
- After identifying the number of flashes corresponding to a certain parameter, lift the dispensing lever, holding it in position for 3 seconds, until the light remains steady.
![]()
- Confirmation that the parameter has been saved is confirmed by the steady LED light. Lower the dispensing lever to move to the next parameter.
![]()


Example of MEDIUM BOILER PRES- SURE setting.
- Enter the programming mode, the light is flashing once in RED colour indicating the LOW Boiler Pressure setting.
- Raise and lower the lever, the RED light will flash twice, indicating the MEDIUM Boiler Pressure setting.
- Keep the dispensing lever raised until the steady RED light is displayed.
- Steady RED light confirms that the parameter has been saved. Lower the lever to move on to the next parameter.
To exit programming, restart the machine by pressing the main switch.
Changing the status of a parameter
- To switch between states of a parameter (number of flashes) quickly (within 3 seconds) raise and lower the dispensing lever.
![]()

Parameter reset (Factory Reset)
By means of this procedure it is possible to delete all set parameters and restore the original factory setting. This function should be used in those cases where errors or unwanted variations have been introduced, choosing to reset everything and return to the initial conditions.
This procedure is carried out as described below.
- From Machine OFF, switch the machine ON with the unit lever in the dispensing position (contact closed); the machine does not perform any action but waits for a few seconds for a sequence from the operator.
![]()
- Keep the lever in the dispensing contact position. After a few seconds, if the lever has always remained in the same position, the machine turns on the yellow light (as for normal programming) for 5 seconds until the flashing green light appears.
![]()


- If, within 3 seconds of the green light coming on, the lever is returned to rest, a factory parameter reset (default) is implemented, indicated by the permanence of the steady green light. If, on the other hand, the lever is left in the dispensing position, after the 3-second time limit has elapsed, the green indicator light will remain flashing without performing a parameter reset, waiting for a Poweroff.
![]()
- Switch off the machine and if the reset procedure is not implemented, return the lever to the home position anyway.
![]()


MAINTENANCE

Maintenance operations must be carried out when the machine is off and cold. Some particular operations must be performed when the machine is operating.
Do not clean the machine by using metal or abrasive devices, such as steel wool, metal brushes, needles, etc. or general detergents (alcohol, solvents, etc.) When necessary, use special detergents for coffee machines that can be purchased in specialised service centres.
Keeping your machine clean will prolong its life and produce better espresso beverages.
Cleaning the steam wand
- Clean the steam wand after every use by wiping with a damp cloth. Turn the steam wand on to release condensation and milk residue.
- If the steam jets become clogged with the powdered milk, unscrew the nozzle and unlock/clean with a paper clip (fig._8.1).


Cleaning the dispensing head
BACKFLUSHING
- Remove the filter basket from the portafilter and fit the blind filter (A - fig_8.2).

- While the brew water is flowing loosely insert the portafilter into the unit head, rotating the portafilter back and forth (B - fig_8.2). Keep emptying the blind basket of hot water until the water runs clear.
- Backflush the unit head every day.

DISPENSING UNIT HEAD
- Every week, after backflushing, add a small amount of espresso cleaning detergent to the blind basket. Dissolve the detergent in hot water and insert the portafilter into the unit head. This detergent is available from every authorised dealer.
- Open and close the unit dispensing for about 10 seconds. Repeat several times.
REMOVING THE SPRAYER, DIFFUSER AND HEAD GASKET
- Using a small slotted screwdriver, pry the inner edge of the sprayer (1) and remove it together with the gasket (2) as shown in fig_8.3.

- With the same screwdriver, unscrew the diffuser (3) from the head (fig_8.4).


- Scrub the inside of the unit head with the unit cleaning brush supplied (fig_8.5).


- Using a damp cloth, clean the area where the portafilter connects to the unit head.
- Soak the metal parts that have been removed in a solution made from 2 teaspoons of espresso cleaning detergent and hot water. Soak for 10 minutes. Rinse thoroughly, clean and reassemble.
- Screw the head diffuser back on respecting the order shown in figure 8.6. Lastly, insert and hook the sprayer with its gasket
If the elements of the head are worn or damaged, replace them. These items are consumables. Contact your authorised ROCKET dealer.


Cleaning the portafilter
PORTAFILTER
- Remove the filter basket from the portafilter handle using a small screwdriver or the under-side of the blind basket (fig._8.7).

- Wipe the inside of the basket and portafilter clean with a damp cloth.
- If the coffee oils have built up, soak the metal end of the portafilter and basket in the same detergent solution as the brass shower foil described above.
- Rinse thoroughly, dry and reassemble.

Cleaning the water tank
Periodically remove and clean the water tank with warm soapy water. To remove the tank, lift the cover (1 - fig._8.8) and extract the tank (2) using the handle: perform an upward movement.

When reinserting the tank, be sure to firmly press down so that the bottom tank tap is fully engaged. Use fresh, filtered water to fill the tank. Do not use distilled water.
Cleaning the drip tray
- Remove the grid and the tray and wash with warm soapy water. Rinse and dry. (fig._8.9)


- First reassemble the tray, making sure that it is placed and inserted (with horizontal movement) until it reaches the "stop", after "hooking" has taken place (a magnetic click at the end of the stroke should be heard - fig._8.10)
![]()
If the tray is only left resting and not fully inserted, the water coming out of the group and from the drain flows into the front part of the base and could come out of the machine.


Descaling
- ROCKET does not recommend removing limescale from the espresso machine. Contact an authorised ROCKET centre for descaling.
![]()
![information]() Many of the chemicals used to descale espresso machines are particularly aggressive. These chemicals can cause internal corrosion of hard metals used in the construction of the machine.
Many of the chemicals used to descale espresso machines are particularly aggressive. These chemicals can cause internal corrosion of hard metals used in the construction of the machine.![danger]() Additionally, it is very difficult to remove all the descaling solution from the machine once the procedure is completed.
Additionally, it is very difficult to remove all the descaling solution from the machine once the procedure is completed.- Check the quality of the water you use in the machine, always using filtered water. Distilled water may lack the necessary conductivity required for various electronic functions needed in the operation of the machine.

Boiler water replacement
It is recommended to change the water in the boiler periodically, at least once a month or, in the case of frequent use, every fortnight. Read all the steps described below carefully before performing the operation; if in doubt, contact the ROCKET service centre for clarification and support.
This operation must be carried out with the machine just turned off with hot water and the boiler pressurised (fig._5.4).
To carry out the boiler water change procedure, simply open the water nozzle (fig._8.11), repeating the operation twice.

ALARMS AND FAULTS
Alarms
The machine has a colour LED indicator on the front panel. During normal operation (dispensing and standby) the LED is fixed white.
Other conditions are signalled by different combinations of colours and flashes:
| mod. APPARTAMENTO TCA | ||
| Alarm | Cause | Solution |
| Flashing MAGENTA light | Alarm empty tank | Fill the tank with water |
| GREEN flashing light | ECO mode (stand-by) active | Raise and lower the dispensing lever to reactivate the machine |
| Flashing YELLOW Dispensing light | timeout | Lower the dispensing lever, if the problem persists contact ROCKET Service |
| RED light with 2 flashes | Boiler heating timeout | Switch the machine off and on again if the problem persists contact ROCKET Service |
| RED light with 3 flashes | Boiler level timeout | Contact ROCKET Service |
| RED light with 4 flashes | Pressure sensor or boiler NTC failure | Reset the parameter , if the problem persists please contact ROCKET Service |
| APPARTAMENTO model | ||
| Alarm | Cause | Solution |
| Indicator light 0.5" ON/ 0.5" OFF x 3 times and 2" OFF | Boiler load | Contact ROCKET Service |
| Indicator light 3" ON + 3" OFF | Dispensing | Lower the dispensing lever, if the problem persists contact ROCKET Service |
| Indicator light 0.5" ON + 4.5" OFF | Economy | Raise and lower the lever |
| Indicator light 0.5" ON + 0.5" OFF | Empty tank | Filling the tank |
Troubleshooting
The machine does not start
- Check that the main switch is in the ON position.
- Check that the plug is inserted.
No coffee or steam dispensing
- Check that water is present in the tank.
- Check that the coffee and steam controls have been activated before dispensing.
The machine does not heat
- Contact the technical assistance
Irregular steam dispensing
- Make sure the sprayer holes are clean
Extraction is too slow
- Check that the filter basket is not too full (too much coffee).
- Check that the grind is not too fine.
- Check that the shower foil is not blocked: it may need to be back-flushed or be removed and cleaned
- Check the spout of the handle is not blocked. If it is dirty with rancid coffee oil, it will need to be soaked in an espresso head cleaning solution.
Water leaking from the portafilter
- Check the head gaskets. If visibly worn, they will need to be replaced.
- Ensure the portafilters are kept in place on the head whenever the machine is not in use, as this will help to protect the seals.
Espresso is too cold
- Check that the cups are hot enough. Cups can be heated by pouring hot water into them, and then discarding it, before starting the extraction.
- Too much water may have been drawn from the unit head. Let the machine rest and limit the amount of water drawn from it between extractions to ensure the machine remains at temperature.
Water underneath the machine
- Check that the tray is inserted correctly
- Check that the drain tray has been emptied
The machine appears to be off but the switch is in the ON position
- Check that the Eco mode function is active by operating the coffee control.
- Switch the machine off and on again from the main switch (see 1 - fig. 3.2 - 3.3)
Espresso tastes bitter
- Extraction may be too slow. Check that the grinding is not too fine. Correct the grinding and make it coarser.
- The machine may be dirty. Backflush again and clean the unit head. Clean the portafilters and filter baskets.
Espresso tastes sour
- Extraction may be too fast. Check that the grinding is not too coarse. Correct the grinding and make it finer.
Espresso is watery and thin
- Extraction may be too fast. If so, the cream will be pale. Check that the grinding is not too coarse. Correct the grinding and make it finer.
Espresso is bubbly
- The water in the machine may be too hot. Let some water flow from the unit head. Perform another extraction.
- The coffee may be too fresh.
Low or no pressure from the steam wand
- It may be due to excessive use of the unit head. Excessive use of the steam wand. Give the machine time to recover pressure.
- The steam wand may be clogged with dry milk. Remove the nozzle and clean it as indicated.
Milk is thin and bubbly
- Ensure the milk is diluted gradually. If air is introduced too quickly, large bubbles will form.
- Make sure that the steam comes out with the right pressure and that there are no blocked nozzles.
- It may be due to using reheated milk. Try again with fresh milk.
For any type of problem not specifically indicated on this page, turn off the machine by pressing the main switch, disconnect the plug and contact our technical assistance.
Inactivity
For prolonged machine inactivity, it is required to carry out certain preventive operations:
- disconnect the machine electrically.
- unload all portafilters.
- wash all the parts in contact with foodstuffs.
- clean all the internal and external surfaces of the machine with a cloth.
- protect the outside with a cellophane film or bag.
- store in dry sheltered rooms with temperatures no lower than 1°C.
Documents / ResourcesDownload manual
Here you can download full pdf version of manual, it may contain additional safety instructions, warranty information, FCC rules, etc.
Advertisement


Need help?
Do you have a question about the APPARTAMENTO and is the answer not in the manual?
Questions and answers