Advertisement
Quick Links
INSTRUCTION GUIDE
SILVERADO/SIERRA
2019-CURRENT (4th Generation)
PREPARE A CLEAN WORK AREA.
WE RECOMMEND A MINIMUM OF 2 PEOPLE FOR ASSEMBLY AND
4 PEOPLE FOR INSTALLATION.
ENSURE THE REQUIRED TOOLS ARE PRESENT AND ALL HARDWARE
CONTENTS ARE ACCOUNTED FOR.
NEVER USE ACETONE OR THINNERS ON PAINTED PARTS.
READ THROUGH THE ENTIRE INSTRUCTION GUIDE BEFORE STARTING THIS
PROCEDURE AND FOLLOW THE STEPS CAREFULLY TO AVOID ANY DAMAGE
TO THE COMPONENTS OR THE VEHICLE.
SMARTCAP.COM
SUPPORT.NA@SMARTCAP.COM - NORTH AMERICA
SUPPORT.SA@SMARTCAP.COM - REST OF WORLD
I-SHEET-NA-S3
Advertisement

Related Manuals for SMARTCAP EV0104-MB


Summarization of Contents
General Information and Preparation
Preparation and Safety Guidelines
Essential pre-installation checks, recommendations, and safety warnings.
Tools and Components
Tools Required for Installation
List of necessary tools for assembling and installing the SmartCap.
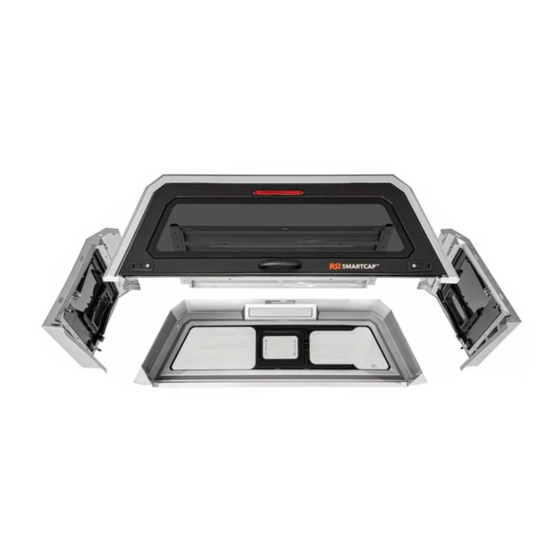
SmartCap Components Overview
Identification of the main SmartCap panels and parts.
Assembly Hardware Details
Fitment Kit Hardware
Details of bolts, washers, and clamps included in the fitment kit.
Roof Panel Hardware
Specific nuts and washers for attaching panels to the roof.
Initial Panel Handling and Setup
Panel Inspection and Damage Check
Crucial step to inspect panels for damage before assembly begins.
Preparing the Work Area
Setting up the assembly area using provided cardboard and stiffeners.
Roof Panel Assembly
Aligning Roof Panels
Instructions for aligning roof panels on the stiffeners.
Installing Fastener Blocks
Attaching fastener blocks to roof panels with specified torque.
Fastener Block Preparation
Preparing Roof Panel Fasteners
Removing and saving lock nuts and washers from roof bolts.
Disassembling Fastener Blocks
Taking apart fastener blocks for assembly readiness.
Attaching the Right Panel
Positioning the Right Panel
Locating and bringing the right panel to the work area.
Connecting Right Panel Tabs
Inserting panel tabs into roof panel slots and tapping for fit.
Front Flange and Right Panel Securing
Securing Right Panel to Roof
Hand tightening nuts and washers to secure the right panel.
Positioning the Front Flange
Locating and bringing the front flange to the work area.
Left Panel Attachment
Attaching Front Flange to Side Panels
Hand tightening fastener blocks to support the front flange.
Positioning the Left Panel
Locating and bringing the left panel to the work area.
Left Panel Securing
Attaching Left Panel Tabs
Inserting left panel tabs into roof panel slots and tapping for fit.
Securing Left Panel to Roof
Hand tightening nuts and washers to secure the left panel.
Front and Rear Flange Installation
Securing Front Flange
Installing hardware along the front flange, aligning panels.
Positioning the Rear Flange
Locating and bringing the rear flange to the work area.
Rear Flange Installation
Positioning the Rear Flange
Placing the rear flange as shown in the diagram.
Securing Rear Flange
Installing hardware along the rear flange, aligning panels.
Final Tightening of Hardware
Torqueing All Fasteners
Tightening all hardware using a torque wrench to the specified setting.
D-Rubber Installation - Part 1
Preparing Rear Flange for D-Rubber
Ensuring the bottom edge is clean and bending retention tabs.
Trimming and Gluing D-Rubber
Trimming D-rubber and applying gel super glue for bonding.
D-Rubber Installation - Part 2
Securing D-Rubber Tabs
Inserting and bonding retention tabs into D-rubber for a tight seal.
Aligning and Gluing D-Rubber
Aligning D-rubber along edges and applying glue at corners.
Final D-Rubber Trim and Seal
Trimming excess D-rubber and reinforcing corners with glue.
Vehicle Installation Preparation
Installation Hardware Overview
Identification of rubber pads, mounting clamps, and seal tape.
Installation Safety Precautions
Important safety reminders for lifting and handling the SmartCap.
Bed Preparation and Pad Installation
Installing Rubber Pads
Placing thick rubber pads inside the D-rubber at indicated locations.
Applying Foam Seal Tape
Adding foam seal tape to the front edge of the truck bed if needed.
SmartCap Placement on Vehicle
Lifting and Placing the SmartCap
Instructions for lifting the SmartCap onto the truck bed with four people.
Positioning and Alignment Checks
Verifying the SmartCap is properly positioned and centered on the bed.
D-Rubber Fitment Verification
Checking the D-rubber fitment and ensuring the lip is tucked correctly.
Tailgate Seal Adjustment
Installing Corner Seal Strips
Trimming and placing thin rubber pad strips in rear corners for compression.
Verifying Tailgate Operation
Checking that the D-rubber lip rubs the tailgate smoothly.
Mounting Clamp Installation
Positioning Rubber Pads
Placing thin rubber pads next to gussets on the sides of the cap.
Attaching Mounting Clamps
Installing and tightening mounting clamps with a torque wrench.
Third Brake Light Installation Guide
Third Brake Light Components
Listing of harnesses and accessories for the third brake light.
Third Brake Light Safety and Testing
Safety precautions and testing procedures for the brake light installation.
Connecting the T-Harness
Locating Vehicle Connector
Finding the grey connector under the dashboard in the driver's foot well.
Connecting T-Harness to Vehicle
Plugging the T-harness male connector into the vehicle's female connector.
Securing T-Harness Connection
Connecting the vehicle's dummy connector to the T-harness and securing it.
Wiring Harness Routing - Interior
Removing Door Sill Trim
Carefully prying off the driver side door sill trim plate.
Connecting Connector Harness
Plugging the connector harness into the 3-pin plug of the T-harness.
Routing Harnesses Internally
Tucking and routing harnesses under the foot well kick panel.
Wiring Harness Routing - Exterior to Interior
Locating Floor Grommet
Finding the rubber grommet in the metal floor underneath the carpet.
Passing Harness Through Grommet
Routing the connector harness through the carpet and the floor grommet.
Wiring Harness Routing - Undercarriage
Securing Harness Through Grommet
Pulling the harness down and applying sealant for protection.
Routing Along Frame Rail
Routing the harness over the driver side frame rail.
Securing Harness to Frame
Securing the harness along the outside of the frame with cable ties.
Wiring Harness Routing - Rear
Routing Over Rear Wheel Well
Routing the connector harness up and over the rear wheel well.
Securing Harness at Wheel Well
Routing the harness down over the rear wheel well and securing it.
Removing Taillight Assembly
Removing the bolts holding the driver side taillight assembly.
Wiring Harness to Taillight Cavity
Routing Harness to Cavity
Routing the connector harness up towards the taillight cavity.
Exiting Harness at Bed Side
Pulling the harness out through the taillight cavity and bed side hole.
Connecting Third Brake Light Harness
Disconnecting Extension Harness
Locating and disconnecting the third brake light extension harness.
Connecting Harnesses
Connecting the 2-pin plug to the third brake light harness.
Securing Harness with Cable Tie
Applying a cable tie base and securing the connector harness.
Final Steps and Testing
Reinstalling Taillight Assembly
Reinstalling the taillight assembly and bundling extra harness length.
Testing Brake Lights and Signals
Verifying proper function of brake lights and turn signals after installation.
Need help?
Do you have a question about the EV0104-MB and is the answer not in the manual?
Questions and answers