Advertisement
Quick Links
PLEASE CONTACT MOEN FIRST
For Installation Help, Missing or Replacement Parts
(USA) 1-800-BUY-MOEN (1-800-289-6636) www.moen.com
(Canada) 1-800-465-6130 www.moen.ca
POR FAVOR, CONTÁCTESE PRIMERO CON MOEN
Para obtener ayuda de instalación, piezas faltantes o de
recambio
(Costa Este) 011 52 (800) 718-4345 www.moen.com.mx
VEUILLEZ D'ABORD CONTACTER MOEN
En cas de problèmes avec l'installation, ou pour obtenir
toute pièce manquante ou de rechange
(Canada) 1-800-465-6130 www.moen.ca
HELPFUL TOOLS
For safety and ease of faucet replacement, Moen
recommends the use of these helpful tools.
HERRAMIENTAS ÚTILES
Para que el cambio de la llave sea fácil y seguro, Moen
le recomienda usar estas útiles herramientas.
OUTILS UTILES
Par mesure de sécurité et pour faciliter l'installation,
Moen suggère l'utilisation des outils suivants.
Adjustable Wrench
Safety Glasses
Llave ajustable
Gafas de seguridad
Clé ajustable
Lunettes de sécurité
Sealant
Sellador
Mastic
Thread Seal Tape
Cinta para sellar roscas
Ruban pour joints filetés
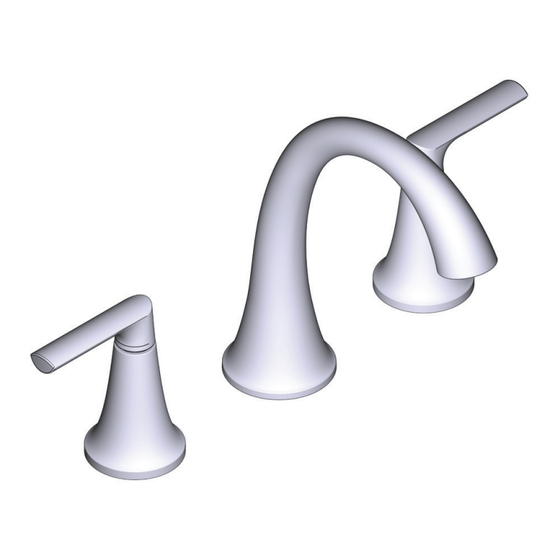
TWO-HANDLE WIDESPREAD
LAVATORY FAUCET
LLAVE DE LAVABO DE DOS MANIJAS
ROBINET DE LAVABO
À DEUX POIGNÉES ÉLOIGNÉES
Image is for reference only
(Style varies by model)
La imagen es sólo como referencia
(El estilo varía por le modelo)
Cette image n' est offerte qu'à titre indicatif
seulement
(Le style varie selon le modèle)
Record Purchased Model Number:
Registro del número de modelo comprado:
Consigner ici le numéro du modèle acheté :
_______________________
(Save instruction sheet for future reference)
(Guarde la hoja de instrucciones para futura referencia)
(Garder ces directives pour référence ultérieure)
Register Online:
Regístrese en línea:
S'enregistrer en ligne :
www.moen.com/product-registration
INS10185E - 8/24
Advertisement

Related Manuals for Moen Gibson TV6142


Summarization of Contents
Moen Product Support and Resources
Contact Information and Support Numbers
Provides essential phone numbers and websites for Moen customer support in the USA and Canada.
Helpful Tools for Installation
Lists recommended tools for safe and easy faucet replacement.
Faucet Parts and Installation Guidelines
Comprehensive Parts List
Details and identifies all components included in the faucet package.
Installation Dimensions and Safety Precautions
Covers critical hole size requirements and tips for safe removal of old faucets.
Icon Legend
Explains the meaning of icons used in the manual.
Drainage System Components
Drain Parts Identification
Lists all parts for the drain assembly, including drain bodies and nuts.
Drain Type Specific Parts
Details parts specific to Drain Type A and Drain Type B installations.
Spout and Handle Installation
Spout Base Lubrication and Sealing
Instructions for applying silicone lubricant and sealant to the spout base before installation.
Lift Rod and Cap Assembly
Guides on how to install the lift rod through the spout cap and into the spout body.
Mounting the Faucet to the Sink Deck
Mounting Bracket and Plate Installation
Details installing the mounting bracket and plate based on sink deck thickness.
Securing the Mounting Bracket
Instructions for using the mounting tool and nut to tighten the faucet securely.
Valve Body and Washer Assembly Steps
Mounting Washer Orientation and Sealant Application
Ensures correct washer placement and sealant application for proper installation.
Valve Body Insertion and Mounting Ring Prep
Guides on inserting valve bodies and preparing the mounting ring with screws.
Connecting Water Lines and Hoses
Mounting Ring Installation on Valve Body
Details sliding the mounting washer and ring onto the valve body and hand-tightening.
Quick Connect Hose Attachment
Instructions for connecting the quick connect hose to the waterway tube and testing its engagement.
Handle Installation and Drain Type A Setup
Attaching Faucet Handles
Instructions for installing the faucet handles onto the valve bodies.
Securing the Faucet to the Deck
Guides on holding the handle lever and tightening the faucet base to the sink deck.
Drain Type A Initial Installation Steps
Details cleaning the opening and placing the drain body with gasket for Type A.
Drain Installation: Type A and Type B Procedures
Drain Type A: Cone Gasket and Plug Installation
Covers installing the cone gasket, drain nut, and push-down drain plug for Type A.
Drain Type B: Waste Seat Preparation and Insertion
Guides on cleaning, applying sealant, and inserting the waste seat for Type B.
Drain Type B Assembly and Lift Rod Configuration
Drain Body and Waste Seat Connection
Details assembling the drain body to the waste seat and tightening by hand.
Lift Rod Installation and Adjustment
Guides on installing lift rod components and connecting the lift rod to the strap.
Drain Type B Final Assembly Steps
Pivot Rod Orientation and Drain Nut Tightening
Ensures correct pivot rod opening alignment and final tightening of drain components.
Pivot Rod Installation Options
Explains two methods for pivot rod installation and tightening its nut.
Connecting Supply Lines and Pivot Rod Adjustment
Pivot Rod and Clip Assembly Procedure
Guides on pushing down the pivot rod, clipping, and sliding it through strap holes.
Flexible Supply Line Connections
Details attaching supply lines to valve bodies and stops, and tightening them.
Finalizing Connections and Flushing Preparation
Securing Supply Lines and Turning On Water
Instructions to tighten supply lines and turn on the water to complete installation.
Aerator Removal for Flushing
Guides on removing the aerator using the tool or by hand for the flushing process.
Faucet Flushing and Aerator Reinstallation
Performing the Faucet Flush Procedure
Instructions to run water for 15 seconds to flush debris from the faucet.
Reinstalling the Aerator Securely
Guides on reattaching the aerator by hand or with the tool for a secure fit.
Moen Limited Lifetime Warranty
Warranty Coverage and Exclusions
Details the warranty period, what is covered, and any exclusions for product defects.
Warranty Claim Process
Provides instructions on how to submit a warranty claim, including contact information and proof of purchase.
Need help?
Do you have a question about the Gibson TV6142 and is the answer not in the manual?
Questions and answers