Table of Contents
Advertisement
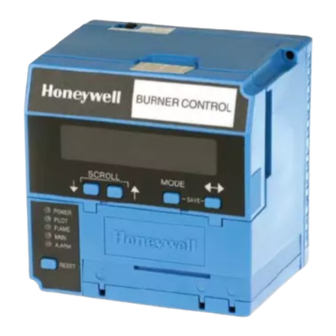
RM7890A/B
7800 SERIES Relay Modules
APPLICATION
The Honeywell RM7890A/B Relay Modules are
microprocessor based integrated burner controls for
automatically fired, gas only (if Valve Proving feature is
going to be used), single burner on/off applications. The
RM7890A/B System consists of a relay module, subbase,
and amplifier. Options include keyboard display module
(KDM) and remote display mounting.
Functions the RM7890 provides include automatic on/off
burner sequencing, flame supervision, system status
indication, system or self-diagnostics and
troubleshooting.
This document covers the following 7800 Series Relay
Modules:
RM7890A1056
RM7890B1048
RM7890A2056
RM7890B2048
RM7890A/B Relay Modules offer the following additional
features:
• Preignition Interlock Input
• Selectable Intermittent/Interrupted Pilot Function (full
pilot flame and main flame establishing periods apply if
interrupted pilot feature selected).
• Run/Test Switch for interrupted pilot setup.
• Blinkum fault annunciation on safety shutdown (power
LED blinks a fault code.
• Built-in features set up only using the S7800A1142
display.
• Valve Proving System.
The Valve Proving System feature provides a systematic
way of testing the valve seat integrity to assure the valves
are indeed in the closed state when the system is in
Standby.
Content
APPLICATION ....................................... ......................................... 1
....................................... ......................................... 2
........................................... ......................................... 2
................................... ......................................... 6
V
........................ ......................................... 10
PRINCIPAL TECHNICAL FEATURES ..................................... 14
............................................... ......................................... 14
SETTINGS AND ADJUSTMENTS ... ......................................... 15
At commissioning time, the Valve Proving System may be
scheduled to occur at one of five different times:
1. Never-Device default as received; valve proving
2. Before-Valve proving after standby and safe start
3. After-Valve proving occurs after the Run state
4. Both-Valve proving occurs at both times Before and
5. Split-The downstream (high pressure) seat test is
The following assumptions apply when using the
RM7890A/B Valve Proving testing:
INLET
1 CAUTION: VALVE ENERGIZING TIMING IS BASED ON VALVE OPENING
Fig. 1. Valve Proving System-simplified diagram.
S
I
NITIAL
P
ILOT
I
H
OT
I
GNITION
19
S
AFETY
T
SAFETY AND SECURITY.................... ......................................... 27
SIL
3
Capable
INSTALLATION INSTRUCTIONS
does not occur.
check, prior to ignition trials.
before the device goes to Standby.
After noted above.
performed at the Before time and the upstream (low
pressure) seat test is performed during the After
time.
MV1
VP
SW.
1
TIMES OF 13 SECONDS MAXIMUM.
− FOR VALVES WITH TIMINGS GREATER THAN 13
SECONDS - A BYPASS SOLENOID (RATED AS A SAFETY
SHUTOFF VALVE) VALVE (1/4", 120 VAC) IS REQUIRED TO
OBTAIN THE PROPER TEST PRESSURES.
− THE BYPASS VALVE WILL BE WIRED IN PARALLEL TO THE
VALVE IT IS BYPASSING (TERMINAL 9 FOR MV1 OR
TERMINAL 17 FOR MV2).
C
................................. ......................................... 16
..................... ......................................... 17
........................ ......................................... 19
S
R
T
(A
PARK
ESPONSE
EST
................................. ......................................... 21
MV2
OUTLET
M22660B
U
P
)18
SING A
ILOT
R
).................... 19
ODS
U
D
LL
LTRAVIOLET
ETECTORS
)....................... 20
32-00205-01
)
Advertisement
Table of Contents

Related Manuals for Honeywell RM7890A1056


Summarization of Contents
Application Overview
RM7890A/B Relay Module Description
Describes the Honeywell RM7890A/B relay modules for automatically fired, gas only, single burner applications.
System Features
Highlights functions like burner sequencing, flame supervision, and system diagnostics.
Installation Instructions
Valve Proving System Setup
Details the setup and assumptions for the Valve Proving System testing.
Technical Specifications
Electrical Ratings
Details voltage, frequency, power dissipation, and total connected load ratings.
Environmental Ratings
Specifies operating and storage temperature, humidity, and vibration limits.
Product Approvals
Lists the certifications and approvals for the RM7890A/B modules.
Product Installation Guidelines
Pre-Installation Warnings
Highlights critical safety warnings for fire, explosion, and electrical hazards before installation.
Wiring Requirements
Provides essential information and compliance requirements for wiring the modules.
Installation and Mounting Procedures
Location and Environmental Factors
Considers humidity, vibration, and weather for installation location.
Subbase Mounting Steps
Provides guidance on selecting a location and mounting the wiring subbase.
Module and Subbase Compatibility
Compatibility by Series
Details compatibility between 1000/2000 Series relay modules and subbases.
Software Revision Compatibility
Explains compatibility based on the relay module's software revision level.
Electrical Wiring Procedures
Wiring Safety Precautions
Emphasizes electrical shock hazards and disconnecting power before wiring.
Wire Routing and Compliance
Provides guidelines for routing wires and ensuring compliance with electrical codes.
Wire Size and Type Recommendations
Lists recommended wire sizes and part numbers for various connections.
Maximum Wire Lengths
Specifies the maximum permissible lengths for different types of wiring.
Grounding Practices
Earth Grounding
Details requirements for earth grounding the subbase and relay module for safety.
Signal Grounding
Explains how to properly ground signal wires for KDM and Data ControlBus modules.
Terminal Identification and Ratings
Terminal Number and Description
Lists terminal numbers, their descriptions, and associated voltage/current ratings.
Final Wiring and Static Checkout
Pre-Checkout Safety and Equipment
Critical safety warnings and recommended equipment for checkout procedures.
Wiring Verification and Checkout Steps
Ensures correct wiring and outlines general instructions for performing static checkout tests.
Static Checkout Tests
Test Procedures and Abnormal Operation
Details specific static checkout tests, normal operation, and steps for abnormal results.
Safety and Equipment Handling
Emphasizes explosion hazards and equipment damage warnings during testing.
Mounting the RM7890 Relay Module
Vertical and Horizontal Mounting
Describes proper mounting orientation and enclosure requirements for the relay module.
Clearance and Connection Considerations
Details required clearance for servicing and proper alignment for connections.
Mounting Other System Components
Component Mounting Specifications
Refers to applicable specifications for mounting other system components.
Valve Proving System
Valve Proving System Purpose
Explains the system's role in testing valve seat integrity and leak detection.
Valve Proving Test Timing Options
Details the five selectable times for the Valve Proving System test.
Valve Proving Function Operation
Describes how the system monitors pressure between shutoff valves.
Pressure Switch Selection
Selecting the Correct Pressure Switch
Guides the user on choosing a Honeywell pressure switch based on system pressure.
Pressure Switch Installation and Adjustment
Installation and Adjustment Procedures
Details the steps for installing and adjusting the selected pressure switch.
Setup of Valve Proving Function
Worksheet and KDM Requirement
Explains the need for a worksheet and KDM for setting up the Valve Proving Function.
Setup of Valve Proving Function (Continued)
Entering Setup and Password
Guides through accessing the setup menu and entering the password.
Setting Valve Proving Test Time
Details how to set the duration for the Valve Proving Test using the KDM.
Selecting Valve Proving Timing
Explains how to choose when the Valve Proving test occurs (Never, Before, After, etc.).
Confirming Valve Proving Setup
Acknowledging and Confirming Settings
Steps to acknowledge test location and confirm selected Valve Proving settings.
Finalizing Setup and Resetting Module
Procedure to finalize the setup by resetting the relay module and viewing status.
Principal Technical Features
Safety Shutdown Conditions
Lists conditions that cause safety shutdown (lockout) in the relay module.
System Operation
Initiate Sequence Details
Describes the initial sequence entry and conditions for voltage/frequency fluctuations.
Settings and Adjustments
Selectable Site-Configurable Jumpers
Explains the function and configuration of site-configurable jumpers for safety.
Ignition Trial Procedures
Pilot Flame Establishing Period (PFEP)
Details the PFEP, including pilot valve and ignition transformer energization.
Main Flame Establishing Period
Describes energizing main valves and pilot valve de-energization after pilot ignition.
System Checkout
Pre-Checkout Safety Precautions
Critical safety warnings for explosion and electrical hazards before starting checkout.
Equipment Recommendations
Lists recommended equipment such as KDM and volt-ohmmeter for checkout.
Preliminary Inspection Steps
Basic inspections to perform to avoid common problems before detailed checkout.
Initial Lightoff Checks
Preliminary Inspection for Pilots
Checks to perform immediately after preliminary inspection for pilot systems.
Proved Pilot System Ignition
Steps to verify pilot ignition, flame signal, and main burner lightoff.
Ignition and Pilot Adjustments
Guidance on adjusting ignition electrodes, spark gap, and pilot pressure.
Pilot Turndown Test
Purpose and Detector Cleaning
Verifies main burner ignition by smallest acceptable pilot flame and cleans detectors.
Pilot Pressure Adjustment and Verification
Tests pilot pressure, flame signal, and main burner ignition at minimum pilot settings.
Ignition Interference Test
Measuring Flame Signal Interference
Checks for differences in flame signal when ignition and pilot are on/off.
Eliminating Ignition Interference
Provides steps to correct ignition interference issues, including grounding and wiring.
Hot Refractory Tests
Hot Refractory Saturation Test
Tests for decreased flame signal due to hot refractory saturation.
Hot Refractory Hold-in Test
Checks for delayed flame failure response or prevented restart due to hot refractory.
Ignition Spark Response Test
Testing Spark Actuation of Flame LED
Ensures ignition spark does not falsely trigger the FLAME LED.
Response to Other Ultraviolet Sources
Checking for False Flame Detection
Tests for false flame detection from sources like fluorescent bulbs and daylight.
Flame Signal With Hot Combustion Chamber
Measuring Flame Signal Under Hot Conditions
Measures flame signal after burner operation to check for proper response.
Flame Detector Temperature and Sighting
Addresses issues like detector temperature and realignment for optimal signal.
Safety Shutdown Tests
Preignition Interlock During Standby
Tests shutdown when a Preignition Interlock opens during the STANDBY period.
Flame Detection During STANDBY/PREPURGE
Tests shutdown for flame detection outside normal parameters during STANDBY or PREPURGE.
Pilot and Main Flame Failure Tests
Tests for safety shutdowns due to pilot or main flame failure during various sequence stages.
Safety Shutdown Test Scenarios
Preignition Interlock After Standby
Tests shutdown if Preignition Interlock opens after initial STANDBY period.
Loss of Flame During RUN
Tests safety shutdown for flame loss during the RUN period.
Troubleshooting Guide
Interpreting Blinking Fault Codes
Explains how to identify faults using fast and slow blinking LED patterns.
Using KDM for Diagnostics
Utilizes KDM sequence status messages and diagnostic information for fault finding.
Diagnostic and History Data
Accessing diagnostic and historical data for detailed troubleshooting.
Blinking Fault Codes and Troubleshooting
Code 1-1: Low AC Line Voltage
Troubleshooting steps for low AC line voltage issues detected by the module.
Code 1-2: AC Quality Problem
Troubleshooting excessive noise or device dropout related to AC power quality.
Code 2-1: Unexpected Flame Signal
Diagnosing unexpected flame sensed during STANDBY or PURGE.
Code 2-2: Flame Signal Absent
Troubleshooting no-flame time present at end of Pilot or during RUN.
Blinking Fault Codes and Troubleshooting (Continued)
Code 2-3: Flame Signal Overrange
Troubleshooting when the flame signal value is too high to be valid.
Code 3-1: Running/Interlock Switch Problem
Diagnosing lockout or interlock faults during the prepurge sequence.
Code 3-2: Lockout Interlock On Standby
Troubleshooting lockout due to an interlock being on improperly during standby.
Code 3-3: VPS in Improper State
Diagnosing Valve Proving Switch faults during VPS test.
Blinking Fault Codes and Troubleshooting (Continued)
Code 4-1: Purge Card Problem
Troubleshooting issues related to the purge card or its timing configuration.
Code 4-2: Wiring Problem/Internal Fault
Diagnosing wiring faults where pilot, main valve, or ignition should be off.
Code 4-3: Flame Amplifier Problem
Troubleshooting issues where flame is not sensed or is sensed incorrectly.
Code 4-4: Configuration Jumper Problem
Diagnosing faults due to configuration jumpers differing from the startup sample.
Appendix A: Valve Proving Test Calculations
Valve Proving Test Purpose and Diagram
Explains the purpose of the valve proving test and provides a typical valve train diagram.
Valve Proving Test Time Calculation
Provides formulas and steps to calculate the required Valve Proving Test Time.
Valve Proving Test Worksheet
Worksheet Example and Calculations
Provides an example worksheet and calculation for valve train volume and test time.
V1 Upstream Valve Volumes
Table listing upstream valve volumes for various Honeywell valve models.
V2 Downstream Valve Volumes
Table listing downstream valve volumes for various Honeywell valve models.
Safety and Security Measures
Physical Device Protection
Recommends securing the device in an enclosed cabinet to prevent unauthorized access.
Modbus & DDL Interface Security
Advises physical protection for DDL and Modbus lines due to lack of built-in security.
License Agreement
States that copying and reverse engineering are prohibited by law.
For More Information
Honeywell Thermal Solutions Family
Lists Honeywell product families and provides contact information for sales engineers.
Honeywell Process Solutions Contact
Provides contact details for Honeywell Thermal Solutions (HTS).
Need help?
Do you have a question about the RM7890A1056 and is the answer not in the manual?
Questions and answers