Table of Contents
Advertisement
Quick Links
Digital
Video Camera
Recorder
Operating Instructions
Before operating the unit, please read this manual thoroughly, and retain
it for future reference.
Owner's Record
The model and serial numbers are located on the bottom. Record the
serial number in the space provided below. Refer to these numbers
whenever you call upon your Sony dealer regarding this product.
Model No.
Serial No.
DCR-IP5/IP7/IP7BT
©2001 Sony Corporation
3-069-933-11 (1)
Model No. AC-
Serial No.
Advertisement
Table of Contents

Related Manuals for Sony MICROMV DCR-IP7BT


Summarization of Contents
Operating Instructions
Owner's Record
Record model and serial numbers for future reference and dealer inquiries.
Main Features
Capturing Images on Computer
Transfer images from camcorder to computer using cables and software.
Internet Access via Bluetooth
Use camcorder's Bluetooth for internet access, email, and web browsing.
Introduction to Basic Operations
Turning On and Selecting Modes
Step-by-step guide on powering on the camcorder and selecting operational modes.
Using the Control Button
Navigate menus and execute functions using the camcorder's control button.
Using the FN Screen
Access and use the "FN" (Function) screen for various settings and operations.
Quick Start Guide
Connecting Power Cord
Instructions for connecting the camcorder's power adapter and cord.
Inserting Cassette
Step-by-step guide on inserting the MICROMV cassette into the camcorder.
Recording a Picture
Basic steps for recording video, including lens cap removal and starting recording.
Monitoring Playback on LCD
View recorded footage on the camcorder's LCD screen, including rewinding and playback.
Preparing the Power Supply
Installing Battery Pack
Instructions for inserting and removing the battery pack from the camcorder.
Charging the Battery Pack
Guide on how to charge the camcorder's InfoLITHIUM battery pack using the AC adapter.
Connecting to Wall Outlet
Instructions for powering the camcorder directly from a wall outlet using the AC adapter.
Inserting a Cassette
Ejecting the Cassette
Procedure for safely removing the MICROMV cassette from the camcorder.
Recording Basics
Recording a Picture
Step-by-step guide on how to record video footage using the camcorder.
Using the Zoom Feature
Use the camcorder's optical and digital zoom functions for framing shots.
Shooting Backlit Subjects
Use backlight compensation to improve exposure for backlit subjects.
Self-Timer Recording
Use the self-timer to record images with a delay, allowing the photographer to be in the frame.
Playback Basics
Playing Back a Tape
Step-by-step instructions for playing back recorded video from a tape.
Using Data Code Function
Display recorded date, time, and settings (data code) for playback.
Various Playback Modes
Details on different playback options like pause, fast forward, rewind, and slow speed.
Advanced Recording Operations
Tape Photo Recording
Capture still images from video and record them onto a tape.
Using Wide Mode
Record in 16:9 widescreen format for compatible TVs.
Using Fader Function
Apply fade-in and fade-out effects to video recordings for smooth transitions.
Picture Effects
Apply digital picture effects like Sepia, B&W, and Mosaic to recorded images.
Digital Effects
Apply various digital effects like STILL, FLASH, LUMI, TRAIL, and OLD MOVIE.
PROGRAM AE Function
Use automatic exposure modes like Spotlight, Soft Portrait, and Landscape.
Manual White Balance Adjustment
Manually set white balance for accurate color reproduction in different lighting.
Manual Exposure Adjustment
Manually adjust exposure for optimal brightness and detail in various shooting conditions.
Manual Focusing
Manually adjust focus when autofocus is ineffective or for creative control.
Advanced Playback Operations
Playback with Picture Effects
Apply digital picture effects during playback to enhance recorded scenes.
Multi-Picture Search
Display and play back multiple recorded scenes as thumbnails for quick searching.
Title Search
Use titles to search and locate specific recorded segments on the tape.
Date Search
Locate recorded footage by searching for specific dates on the tape.
Photo Search
Search for and play back still images recorded on the tape.
Editing
Dubbing a Tape
Copy video content from the camcorder to a VCR or another recorder.
Recording a Program
Record external video signals onto the camcorder using an A/V cable.
Superimposing a Title
Add text titles to recorded video footage during recording or playback.
Making Custom Titles
Create and store custom text titles to be superimposed on videos.
The MICRO Cassette Memory
Labeling a Cassette
Add a custom label to a MICROMV cassette, stored in memory.
Deleting All Cassette Memory Data
Erase all recorded data, including titles and labels, from the cassette memory.
Customizing Your Camcorder
Changing Menu Settings
Modify various camcorder settings via the menu system for personalized operation.
“Memory Stick” Operations
Using a “Memory Stick” – Introduction
Overview of using Memory Sticks for recording and playback, including file formats.
Inserting/Ejecting a “Memory Stick”
Instructions for inserting and safely removing a Memory Stick from the camcorder.
Using On-Screen Buttons
Operate the camcorder using on-screen buttons in memory modes.
Selecting Still Image Quality
Choose image quality settings for recording still images on a Memory Stick.
Setting Moving Picture Quality
Select quality settings for recording moving pictures onto a Memory Stick.
Recording Still Images on “Memory Stick”
Guide to recording still images onto a Memory Stick, including continuous and self-timer modes.
Recording Image from Tape as Still Image
Capture still images from tape footage and save them onto a Memory Stick.
Recording Moving Pictures on “Memory Stick”s
Record MPEG movie files with sound onto a Memory Stick.
Recording Picture from Tape as Moving Picture
Record moving pictures from tape footage onto a Memory Stick.
Superimposing Still Image – MEMORY MIX
Superimpose a still image from Memory Stick onto a moving picture during recording.
Copying Still Images – Photo Save
Copy still images from tape to a Memory Stick sequentially.
Viewing Still Image – Memory Photo Playback
Play back still images stored on a Memory Stick.
Playing Back Six Images (Index Screen)
Display multiple still images simultaneously in an index grid for easier selection.
Viewing Moving Picture – MPEG Movie Playback
Play back MPEG movie files recorded on a Memory Stick.
Dubbing Memory Stick Images onto Tape
Copy still images or titles from Memory Stick to a tape.
Enlarging Still Images – Memory PB ZOOM
Enlarge still images recorded on a Memory Stick for closer viewing.
Playing Back Images – SLIDE SHOW
Automatically play back images in sequence as a slide show.
Preventing Accidental Erasure – Image Protection
Protect selected images on a Memory Stick from accidental deletion.
Deleting Images
Remove specific or all unprotected images from a Memory Stick.
Writing a Print Mark – PRINT MARK
Specify recorded still images for printing by adding marks.
Connecting with a Computer
Viewing Tape Images Using Computer
Connect camcorder to computer for viewing and editing tape-recorded images.
Viewing Memory Stick Images Using Computer
View images stored on a Memory Stick using a computer.
Installing the USB Driver
Step-by-step guide to install the necessary USB driver for computer connection.
Uninstalling/Installing USB Driver
Procedures to remove and install the correct USB driver.
Viewing Images (Windows Users)
How Windows users view still and moving images from Memory Stick on computer.
Unplugging USB / Ejecting Memory Stick
Safe procedures for disconnecting camcorder or ejecting Memory Stick from computer.
Image File Storage Destinations
Folder and file naming conventions for images stored on the Memory Stick.
Network Operation
Accessing the Network
Connect to internet and use network functions like email via Bluetooth.
Troubleshooting
Types of Trouble and Solutions
Guide to diagnosing and resolving common camcorder issues.
Self-Diagnosis Display
Five-Digit Display Codes
Interpreting camcorder self-diagnosis codes for troubleshooting.
Warning Indicators and Messages
Warning Indicators
Describes various warning symbols and indicators that may appear on the screen.
Warning Messages
Lists and explains common warning messages displayed by the camcorder.
Additional Information
Usable Cassettes
Specifies compatible cassettes and explains copyright signals.
About InfoLITHIUM Battery Pack
Info on InfoLITHIUM battery, features, charging, and effective use.
Storing Battery Pack
Proper methods for storing the InfoLITHIUM battery pack to maintain functionality.
Battery Life
Explanation of battery lifespan, factors affecting it, and replacement.
About i.LINK
Explanation of the i.LINK interface, capabilities, and connection methods.
i.LINK Functions on Unit
Details how the i.LINK jack is used for dubbing and connecting to other equipment.
Required i.LINK Cable
Specifies the type of i.LINK cable needed for camcorder connection.
Using Camcorder Abroad
Information on international use, AC adapter compatibility, and TV system differences.
Setting Clock by Time Difference
Set camcorder's clock to local time based on time zone differences.
Maintenance and Precautions
Moisture Condensation
Explains how moisture condensation affects camcorder and how to prevent/deal with it.
Cleaning the Video Head
Instructions for cleaning video heads to ensure optimal picture quality.
Cleaning LCD Screen
How to clean the camcorder's LCD screen and viewfinder.
Charging Built-in Battery
Detailed instructions on charging the camcorder's internal rechargeable battery.
General Precautions
General safety guidelines and precautions for operating the camcorder, handling tapes, and cleaning.
AC Power Adapter Care
Care and usage instructions for the AC power adapter to ensure safe and proper operation.
Lens Care and Storage
Guidelines for cleaning and storing the camcorder's lens to maintain image quality.
Battery Pack Precautions
Precautions and notes regarding the use and care of the battery pack.
Quick Reference
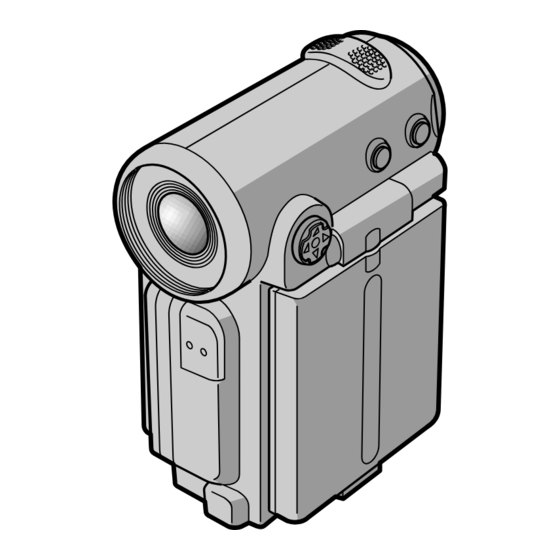
Identifying Camcorder Parts
Diagrams and descriptions identifying all external buttons and components of the camcorder.
Identifying Remote Commander Buttons
Identification of Remote Commander buttons and their functions.
Preparing Remote Commander
Instructions for inserting batteries and preparing the remote commander for use.
Operation Indicators Explained
Explanation of various operational indicators displayed on the LCD screen and viewfinder.
Need help?
Do you have a question about the MICROMV DCR-IP7BT and is the answer not in the manual?
Questions and answers