Harman Kardon AVR 1700 Owner's Manual
Owners manual
Hide thumbs
Also See for AVR 1700:
- Quick setup manual (141 pages) ,
- Service manual (97 pages) ,
- Service manual (114 pages)
Table of Contents
Advertisement
Advertisement
Table of Contents
Troubleshooting

Related Manuals for Harman Kardon AVR 1700


Summary of Contents for Harman Kardon AVR 1700
- Page 1 AVR 1700, AVR 170, AVR 170/230C Audio/video receiver Owner’s Manual...
-
Page 2: Table Of Contents
Table of Contents IntroductIon Set up the AVr SupplIed AcceSSorIeS turn on the AVr ImportAnt SAfety InformAtIon uSIng the on-Screen menu SyStem plAce the AVr confIgure the AVr for your SpeAkerS front-pAnel controlS ASSIgn the AVr Input connectorS reAr-pAnel connectorS Set up the network SyStem remote control functIonS AddItIonAl Source Setup menu ItemS... -
Page 3: Introduction
® Verify Line Voltage Before Use for more than fifty years, the harman kardon mission has been to share a passion for music the AVr 1700 has been designed for use with 120-volt alternating current (Ac). the and entertainment, using leading-edge technology to achieve premium performance. -
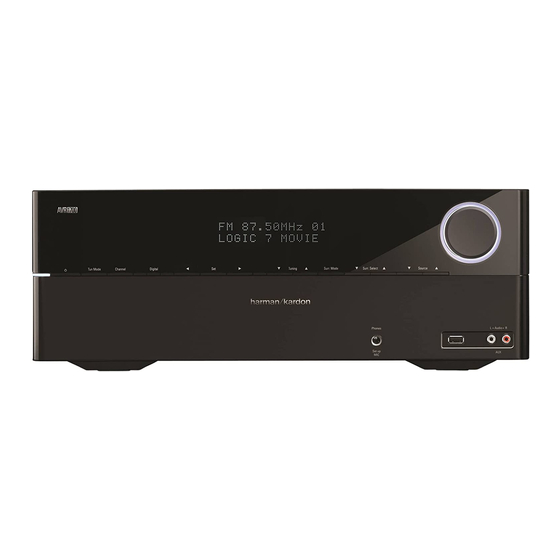
Page 4: Front-Panel Controls
Front-Panel Controls Front-Panel Controls channel Source Select level control buttons button power Indicator/ message Surround mode Volume power button Sensor button display Select buttons knob tuning mode button/ left/right up/down buttons/ headphone Jack/ Aux Analog rdS button buttons tuning buttons EzSet/EQ Mic Audio Input connector... - Page 5 If a short circuit for the EzSet/EQ procedure described in Configure the AVR for Your Speakers, on is not found, bring the unit to an authorized Harman Kardon service center for page 17.
-
Page 6: Rear-Panel Connectors
Rear-Panel Connectors Rear-Panel Connectors hdmI monitor out digital Audio network connector Input connectors connector rS-232 radio Antenna hdmI Input connector connectors connectors Analog Audio Ir In & composite main power Ac Input Input/output trigger out Video Input Switch connector connectors connectors connectors Subwoofer... - Page 7 Rear-Panel Connectors, continued Rear-Panel Connectors, continued Notes on using the HDMI Monitor Out connector: Radio Antenna connectors: connect the included Am and fm antennas to their • When connecting a DVI-equipped display to the HDMI Monitor Out connector, use respective terminals for radio reception. an hdmI-to-dVI adapter and make a separate audio connection.
-
Page 8: System Remote Control Functions
Station entry button clear button tuning mode button memory button preset Station up/down buttons tuning up/down buttons disc Skip button (AVr 1700) rdS button (AVr 170) night mode button macro buttons display dimmer button track Skip up/down buttons transport control buttons... - Page 9 • Max: Loud passages in the program are reduced more in volume. volume levels by ear. Disc Skip button (AVR 1700): this button is used with some optical disc changers to Channel Volume Adjust button: press this button to activate the individual channel- skip to the next disc.
-
Page 10: Introduction To Home Theater
Introduction to Home Theater and Place Your Speakers Introduction to Home Theater Place Your Speakers This introductory section will help you to familiarize yourself with some basic concepts determine the locations for your system’s speakers according to their manufacturer’s unique to multichannel surround-sound AVrs, which will make it easier for you to set directions and the layout of your listening room. -
Page 11: Types Of Home Theater System Connections
Types of Home Theater System Connections Types of Home Theater System Connections Subwoofer Connections the subwoofer is a speaker dedicated to reproducing only the low (bass) frequencies, there are different types of audio and video connections used to connect the AVr to your which require more power. -
Page 12: Video Connections
Types of Home Theater System Connections, continued USB/iPod Port Digital Audio Connections – Optical optical digital audio connectors are normally covered by a shutter to protect them from the AVr can play audio files from an Apple ioS ® device connected to the uSb/ipod port, dust. -
Page 13: Making Connections
Making Connections Making Connections Connect Your TV or Video Display HDMI Monitor Out connector If your tV has an hdmI connector and you have hdmI or component video source CAUTION: Before making any connections to the AVR, ensure that the AVR’s AC devices, use an hdmI cable (not included) to connect your tV to the AVr’s hdmI monitor cord is unplugged from the AVR and the AC outlet. - Page 14 Making Connections, continued HDMI devices Optical digital audio devices If any of your source devices have hdmI connectors, using those connectors will provide If your non-hdmI source devices have optical digital outputs, connect them to the AVr’s the best possible video and audio performance quality. Since the hdmI cable carries optical digital Audio connectors.
-
Page 15: Connect To Your Home Network
If you place the AVr inside a cabinet or facing away from the listener so that the AVr’s Ir sensor is not within line-of-sight of the remote control, connect an external Ir receiver, such as the harman kardon he 1000 (available separately) to the AVr’s Ir In connector. Analog recording device... -
Page 16: Connect To Ac Power
Making Connections, continued, and Set Up the Remote Control Connect to AC Power 1. turn on the source device you want to program the remote to control. 2. look up the code numbers for the device in tables A10 – A17 in the Appendix. write all connect the Ac power cord to the AVr’s Ac Input connector and then to a working Ac the applicable code numbers in a convenient place. -
Page 17: Set Up The Avr
(“+” and “–” wires touching). If none is found, bring the unit to an authorized Harman Kardon service center for inspection and repair before NOTE: If you have only used a composite video connection to your TV, the OSD using it again. -
Page 18: Assign The Avr Input Connectors
Set Up the AVR, continued 8. Select “5.1.” 6. Select “Audio In” and use the left/right arrow buttons to select the audio input connector you want to assign to the Source button. 9. the test will begin. make sure that the room is quiet while the test noise is playing through the speakers. -
Page 19: Additional Source Setup Menu Items
Operating Your AVR Operating Your AVR c) when you have finished, select “Apply & Save,” and press the ok button. the AVr will enter the Standby mode. when you turn the AVr back on, it will attempt to connect to the network again, using the settings you manually entered. If the AVr cannot now that you have installed your components and completed a basic configuration, you connect to the network using the manual settings, contact your ISp or network are ready to begin enjoying your home theater system. -
Page 20: Listening To Fm And Am Radio
Operating Your AVR, continued Listening to FM and AM Radio Listening to an iPod/iPhone/iPad Device Select the radio source. use the tuning up/down buttons to tune a station, which will be when a compatible ipod, iphone or ipad is connected to the AVr’s uSb/ipod port, you shown on the front-panel display and the tV screen. -
Page 21: Listening To Media Via Your Home Network
Operating Your AVR, continued Playing files on a USB device To share media on PCs: 1. Insert the uSb drive into the AVr’s front-panel uSb port. 1. open windows media player. IMPORTANT: Do not connect a personal computer or peripheral to the USB port. USB 2. -
Page 22: Listening To Media Via Airplay
Operating Your AVR, continued, and Advanced Functions Listening to Media via AirPlay use the up/down and ok buttons to select Surround mode. the Surround mode menu will appear: If you have connected the AVr to a network router that has wi-fi ®... -
Page 23: Advanced Functions
Advanced Functions, continued Advanced Functions the first number indicates the number of front channels in the signal: “1” represents a monophonic recording (usually an older program that has been digitally remastered or, more rarely, a modern program for which the director has chosen mono as a special much of the adjusting and configuration your AVr requires is handled automatically, with effect). -
Page 24: Manual Speaker Setup
Advanced Functions, continued Dolby Pro Logic II Music Mode Adjustments Step Two – Measure the Speaker Distances when you select dolby pro logic II as the music surround mode, additional adjustments Ideally, all of your speakers would be placed in a circle, with the listening position at the become available: center. - Page 25 Advanced Functions, continued Crossover Set the Speaker Distances After you return to the manual Setup menu, navigate to the crossover line and press the As described above in Step two, when you measured the distances from each of your ok button to display the crossover menu. speakers to the listening position, your AVr provides an adjustment that compensates for the different distances so that the sound from each speaker will reach the listening position at the proper time.
-
Page 26: System Setup
Support section of the web site or from harman kardon customer service. At that time, access this submenu to install the software upgrade. -
Page 27: Recording
If the AVR does not function correctly after a processor reset, contact an authorized each macro. Harman Kardon service center for assistance. Authorized service centers may be located by visiting our web site at www.harmankardon.com. 3. for the power on command, do not press the power on button. press the mute button instead. -
Page 28: Troubleshooting
• Amplifier is in protection mode due to internal problems • Contact your local Harman Kardon service center no sound from center or surround speakers • Incorrect surround mode • Select a surround mode other than stereo •... -
Page 29: Specifications
Specifications Specifications Audio Section Video Section Stereo power: 100w per channel, television format: ntSc (AVr 1700); two channels driven pAl (AVr 170/AVr 170/230c) @6/8 ohms, Input level/impedance: 1Vp-p/75 ohms 1kHz, <1.0% THD output level/impedance: 1Vp-p/75 ohms multichannel power: 95w per channel, two... -
Page 30: Appendix
Appendix Appendix – Default settings, worksheets, remote product codes Table A1 – Recommended Source Component Connections Device Type AVR Source Default Audio Connection Default Video Connection cable tV, Satellite, hdtV or other device that cable/Sat • HDMI 1 Input • HDMI 1 Input delivers television programs dVd player, blu-ray disc player disc... - Page 31 Appendix Table A5 – Speaker/Channel Settings Front Left Front Right Center Surround Left Surround Right Subwoofer number of Speakers crossover distance channel level Adjust Table A6 – Remote Control Codes Source Selector Connected Device Remote Control Code cable/Sat disc Server game Audio Table A7 –...
- Page 32 Appendix Table A8 – Surround Modes Surround Mode Description Incoming Bitstream or Signal • Dolby Digital 1/0/.0 or .1, 2/0/.0 or .1, 3/0/.0 or .1, dolby digital provides up to five separate main audio channels and a dedicated low-frequency 2/1/.0 or .1, 2/2/.0 or .1, 3/2/.0 or .1 effects (lfe) channel.
- Page 33 Appendix Table A8 – Surround Modes (cont.) Surround Mode Description Incoming Bitstream or Signal • Blu-ray Disc or HD-DVD discs encoded with DTS-HD modes, dtS-hd dtS-hd is a high-definition audio format that complements the high-definition video delivered via hdmI connection found on blu-ray disc and hd-dVd discs.
- Page 34 Appendix refer to the numbered buttons when using the remote control function list...
- Page 35 Appendix Table A9 – Remote Control Function List Button Blu-ray Disc DMC Music Cable Satellite Game TiVo/DVR iPod/USB Name Function Player Server Tuner Tuner power on power on power on power on power on power on/off power on power on power on power on power off...
- Page 36 Setup/Settings Sleep night night mode Subtitle find/Subtitle Subtitle Subtitle d. Skip disc Skip (AVr (AVr 1700); 1700); rdS mode disc Skip Angle play mode rdS (AVr 170) (AVr 170) preset tune 52 preset down Slow rev Zoom down...
- Page 37 Appendix Table A10 – Remote Control Product Codes: TV TV Manufacturer/Brand Setup Code Number TV Manufacturer/Brand Setup Code Number A MARK BRUNS ACER BUSH ADMIRAL BUSH (UK) ADVENT CANDLE AIWA CAPEHART CELLO AKAI 022 020 CENTURION AKAL CENTURY AKURA CETRONIC ALBA AMPRO ANAM...
- Page 38 DYNATRON GRANADA DYNEX GRANADA (UK) ELBE GRUNDIG 076 075 ELCIT ELECTROGRAPH HAIER ELECTROHOME HALL MARK ELEMENT HANNSPREE EMERSON HANSEATIC EMOTION HARMAN KARDON EPSON HIFIVOX ERRES HINARI FENNER HISENSE 075 062 FERGUSON HITACHI FIDELITY FIDELITY (UK) FINHER HUMAX FINLANDIA HYPER FINLUX...
- Page 39 Appendix Table A10 – Remote Control Product Codes: TV (cont.) TV Manufacturer/Brand Setup Code Number TV Manufacturer/Brand Setup Code Number HYTEK KOGAN HYUNDAI KONKA IKASU KORTING KRIESLER 023 022 IMPERIAL INFINITY LEVEL 002 013 INKEL LG (GOLDSTAR) INNO HIT LINSAR INSIGNIA LLOYTRON INTERFUNK...
- Page 40 Appendix Table A10 – Remote Control Product Codes: TV (cont.) TV Manufacturer/Brand Setup Code Number TV Manufacturer/Brand Setup Code Number MINERVA 075 011 PIONEER 024 022 MINTEK POLAROID MISAKI PORTLAND PROLINE MITSUBISHI PROSCAN PROTECH PROTON MURPHY 044 038 QUELLE NATIONAL QUASAR RADIO SHACK NECKERMANN...
- Page 41 Appendix Table A10 – Remote Control Product Codes: TV (cont.) TV Manufacturer/Brand Setup Code Number TV Manufacturer/Brand Setup Code Number SELECO THOMSON SHARP 207 043 THORN SHERWOOD THORN-FERGUSON 099 047 SIEMENS 011 010 tiVo SIGNATURE SINGER SINUDYNE TOSHIBA SOLE TOTEVISION SONY TRISTAR TRIUMPH...
- Page 42 ARCAM ZENITH DIVX BUSH CALIFORNIA AUDIO Table A12 – Remote Control Product Codes: SAT COBY SAT Manufacturer/Brand Setup Code Number DENON DYNEX AIWA AKAI HARMAN KARDON ALBA INSIGNIA ALPHASTAR ALPHASTAR DBS KENWOOD ALPHASTAR DSR AMSTRAD LG (GOLDSTAR) ANKARO LINN ASTRO...
- Page 43 Appendix Table A12 – Remote Control Product Codes: SAT (cont.) SAT Manufacturer/Brand Setup Code Number SAT Manufacturer/Brand Setup Code Number CANAL PLUS (CANAL+) LEMON CHANNEL MASTER LOEWE CHAPARRAL LORENZEN CITOH MACOM DIRECTV MAGNAVOX DISH NETWORK MARANTZ DRAKE MASPRO DX ANTENNA MEMOREX METZ ECHOSTAR...
- Page 44 Appendix Table A12 – Remote Control Product Codes: SAT (cont.) Table A13 – Remote Control Product Codes: Cable SAT Manufacturer/Brand Setup Code Number Cable Manufacturer/Brand Setup Code Number rAdIolA rAdIx Allegro 458 358 AmerIcASt reAlIStIc AmIno SAmSung 322 326 Archer belcor SAtellIte SerVIce bt cAble...
- Page 45 (x-box, xbox360) regAl nyko (pS3) rembrAnt Sony (pS2, pS3) SAgem SAmSung Table A15 – Remote Control Product Codes: Music Server SAtbox Music Server/Brand Setup Code Number 039 026 ScIentIfIc AtlAntA Apple SeAm ASuS SIgnAture beyond Sprucer eScIent (fIrebAll) StArcom hArmAn kArdon...
- Page 46 Appendix Table A15 – Remote Control Product Codes: Music Server (cont.) Table A17 – Remote Control Product Codes: TiVo Music Server/Brand Setup Code Number TiVo/Brand Setup Code Number IomegA tiVo Series2 dt dVr ™ logItech tiVo hd dVr mIcroSoft tiVo hd xl dVr nAIm tiVo Series3 netgeAr...
- Page 47 © 2012 hArmAn International Industries, Incorporated. All rights reserved. harman kardon and logic 7 are trademarks of hArmAn International Industries, Incorporated, registered in the united States and/or other countries. EzSet/EQ is a trademark of HARMAN International Industries, Incorporated. AirPlay, Apple, iPad, iPhone, iPod, iTunes and mac are trademarks of Apple Inc., registered in the u.S.