Table of Contents
Troubleshooting

Related Manuals for Avalla S-770


Summary of Contents for Avalla S-770
- Page 1 Air Conditioners S-80 S-95 S-150 S-200 S-50 S-220 S-290 S-360 S-550 S-770 Read this manual carefully before use and keep it for future reference. Failure to do so may result in injury, property damage and may void the warranty.
-
Page 2: Table Of Contents
Contents S-80, S-95, S-150, S-200, S-290 Quick start guide • Hose connection and setup Parts guide: S-80 Parts guide: S-95 Parts guide: S-150 Parts guide: S-200 Parts guide: S-290 Features and guidance • Settings • Remote Control • Timer function •... - Page 3 • Servicing safety precautions • Connection to the power supply S-550, S-770 Quick start guide • Hose connection and setup Parts guide: S-550 Parts guide: S-770 Features and guidance • Settings • Timer function Remote Control • Remote control display Built-in automatic protections •...
- Page 4 S-80, S-95, S-150, S-200, S-290 S-80 S-95 S-150 S-200 S-290...
-
Page 5: Quick Start Guide
Quick start guide Hose connection and setup Place the unit on a level surface with at least 50cm of free space around it, to allow good air circulation. Allow the unit to stand upright for at least 24 hours after delivery or being stored on its side. Attach the hose connector to one end of the exhaust hose. -
Page 6: Parts Guide
Parts guide: S-80 Control panel Continuous drain outlet Adjustable cool air outlet Air exhaust Filtered air inlet Drain outlet Touch controls Display Lock Lock active Sleep Sleep active Timer Timer active Low speed Down High speed Speed Fan mode Mode Cool mode Power Dehumidifier mode... - Page 7 Parts guide: S-95 Control panel Continuous drain outlet Adjustable cool air outlet Air exhaust Filtered air inlet Drain outlet Touch controls Display Timer Timer active Low speed Down High speed Speed Cool mode Mode Dehumidifier mode Power Fan mode Power on...
-
Page 8: Parts Guide: S-150
Parts guide: S-150 Control panel Continuous drain outlet Adjustable cool air outlet Air exhaust Air inlet with air filter Drain outlet Touch controls Display Lock Lock active Sleep Sleep active Timer Timer active Low speed Down High speed Speed Fan mode Mode Cool mode Power... -
Page 9: Parts Guide: S-200
Parts guide: S-200 Control panel Continuous drain outlet Adjustable cool air outlet Air exhaust Air inlet with air filter Drain outlet Touch controls Display Speed Low speed High speed Down Cooling mode Timer Dehumidifier mode Mode Fan mode Power... -
Page 10: Parts Guide: S-290
Parts guide: S-290 Control panel Continuous drain outlet Adjustable cool air outlet Air exhaust Air inlet with air filter Drain outlet Touch controls Display Timer Low speed Speed High speed Cooling mode Down Dehumidifier mode Lock Fan mode Mode Power... -
Page 11: Features And Guidance
Features and guidance Settings Cooling Mode – lowers the temperature of your room. • Press Mode until the cooling light illuminates. • Press Up / Down to adjust the temperature. • Press Speed until the desired fan speed light illuminates. •... -
Page 12: Remote Control
Remote Control Fan speed - high to low Mode select Sleep active - on/off Celsius / Fahrenheit display Timer - on/off toggle Mode - up/down Power - on/off The remote control doubles up the functions of the control panel for convenient operation at a distance. Timer function The timer has two ways of operating: To turn the air conditioner on (when power is off) -
Page 13: Built-In Automatic Protections
Built-in automatic protections Automatic Defrost When operating at low room temperatures, frost may build up on the evaporator. If this happens, the Power LED will begin blinking and the unit will automatically stop for a short time to carry out its automatic defrosting procedure. -
Page 14: Drainage
Drainage The self-evaporating system (all models excluding S-80) uses the collected water to cool the condenser coils, maximising performance and efficiency. There is no need to empty the drainage tank for this cooling operation except when using the dehumidifier mode or in high humidity conditions as typically the condensate water evaporates into the exhaust outlet. -
Page 15: Troubleshooting
Troubleshooting Issue Cause identification Solution Is the water level indicator Empty the drain pan illuminated? The unit does not operate Operating range: What is the room 5°C - 35°C (A/C) / 15°C - 35°C temperature? (Dehumidifier) Is the air filter clogged? Clean the air filter Clear any obstacle or Is the hose blocked? -
Page 16: Health And Safety
Health and safety General safety instructions • The following must always be observed for safety This appliance is not intended to be used by children. Persons with lack of experience or knowledge, reduced physical, sensory, or mental capabilities, can use this appliance if they have been given supervision or instruction concerning use of the appliance in a safe way and understand the hazards •... -
Page 17: Servicing Safety Precautions
Servicing safety precautions Please carefully follow this guidance when undertaking any servicing on this appliance. Any servicing must be carried out by a suitably qualified and registered individual. Prior to beginning work, safety checks are necessary to ensure that the risk of ignition is minimized. -
Page 18: Connection To The Power Supply
If in doubt, ensure that the entire cable is unwound. Using a coiled extension lead will generate heat which could melt the lead and cause a fire. Avalla Ltd. Unit A 73, Common Road, Chandler’s Ford, Eastleigh, SO53 1HE. United Kingdom Company no. 13477899... - Page 19 S-50, S-220, S-360 S-50 S-220 S-360...
-
Page 20: Quick Start Guide
Quick start guide Hose connection and setup Place the unit on a level surface with at least 50cm of free space around it, to allow good air circulation. Allow the unit to stand upright for at least 24 hours after delivery or being stored on its side. Attach the hose connector to one end of the exhaust hose. -
Page 21: Parts Guide
Parts guide: S-50 Control panel Hot air exhaust Adjustable cool air outlet Drain outlet Filtered air inlet Touch controls Display Sleep active Sleep Timer active Timer Low speed High speed Down Fan mode Speed Cool mode Mode Dehumidifier mode Power Auto mode... -
Page 22: Parts Guide: S-220
Parts guide: S-220 Control panel Hot air exhaust Adjustable cool air outlet Drain outlet Filtered air inlet Touch controls Display Sleep active Sleep Low speed Timer High speed Auto mode Down Cool mode Dehumidifier mode Speed Fan mode Mode Power on Power Lock active Swing... -
Page 23: Parts Guide: S-360
Parts guide: S-360 Control panel Air exhaust Adjustable cool air outlet Drain outlet Filtered air inlet Touch controls Display Sleep active Sleep Timer active Timer Low speed High speed Down Fan mode Speed Cool mode Mode Dehumidifier mode Power Auto mode... -
Page 24: Features And Guidance
Features and guidance Settings Auto Mode - switches between cooling and fan mode. • When the room temperature is above 24 C the unit will switch to Cooling Mode • When the room temperature is below 24 C the unit will switch to Fan Mode Cooling Mode –... -
Page 25: Timer Function
Child Lock (S220) - disables button use when enabled • Press and hold Sleep mode until the lock symbol lights up. • Press and hold again to disable lock feature. Swing Setting (S220) - turns automatic louvres on or off Timer function The timer has two ways of operating: To turn the air conditioner on (when power is off) -
Page 26: Remote Control
Remote Control The remote control doubles up the functions of the control panel for convenient operation at a distance. S-220 S-50 / S-360 Power Mode select Settings - up/down Fan speed Timer - on/off Sleep mode - on/off Swing setting - on/off Specifications S-50 S-220... -
Page 27: Built-In Automatic Protections
Built-in automatic protections Automatic Defrost When operating at low room temperatures, frost may build up on the evaporator. If this happens, the Power LED will begin blinking and the unit will automatically stop for a short time to carry out its automatic defrosting procedure. -
Page 28: Maintenance And Storage
Maintenance and storage Cleaning the air filter Excess dust can cause airflow to become restricted which will reduce efficiency and it can damage to the unit. The filter should be cleaned regularly. • Ensure the unit is switched off and unplugged from the mains power. -
Page 29: Troubleshooting
Troubleshooting Issue Cause identification Solution Is the water level indicator Empty the drain pan illuminated? The unit does not operate Operating range: What is the room 5°C - 35°C (A/C) / 15°C - 35°C temperature? (Dehumidifier) Is the air filter clogged? Clean the air filter Clear any obstacle or Is the hose blocked? -
Page 30: Health And Safety
Health and safety General safety instructions • • The following must always be observed for safety This appliance is not intended to be used by children. Persons with lack of experience or knowledge, reduced physical, sensory, or mental capabilities, can use this appliance if they have been given supervision or instruction concerning use of the appliance in a safe way and understand the hazards •... -
Page 31: Servicing Safety Precautions
Servicing safety precautions Please carefully follow this guidance when undertaking any servicing on this appliance. Any servicing must be carried out by a suitably qualified and registered individual. Prior to beginning work, safety checks are necessary to ensure that the risk of ignition is minimized. -
Page 32: Connection To The Power Supply
If in doubt, ensure that the entire cable is unwound. Using a coiled extension lead will generate heat which could melt the lead and cause a fire. Avalla Ltd. Unit A 73, Common Road, Chandler’s Ford, Eastleigh, SO53 1HE. United Kingdom Company no. 13477899... - Page 33 S-550, S-770 S-550 S-770...
-
Page 34: Quick Start Guide
Quick start guide Hose connection and setup Place the unit on a level surface with at least 50cm of free space around it, to allow good air circulation. Allow the unit to stand upright for at least 24 hours after delivery or being stored on its side. Attach the hose connector to one end of the exhaust hose. -
Page 35: Parts Guide: S-550
Parts guide: S-550 Control panel Air exhaust Adjustable cool air outlet Continuous drain Filtered air inlet Drain outlet Cable tidy Touch controls Display Water full Child lock Timer active Timer Low speed High speed Auto mode Down Cool mode Speed... -
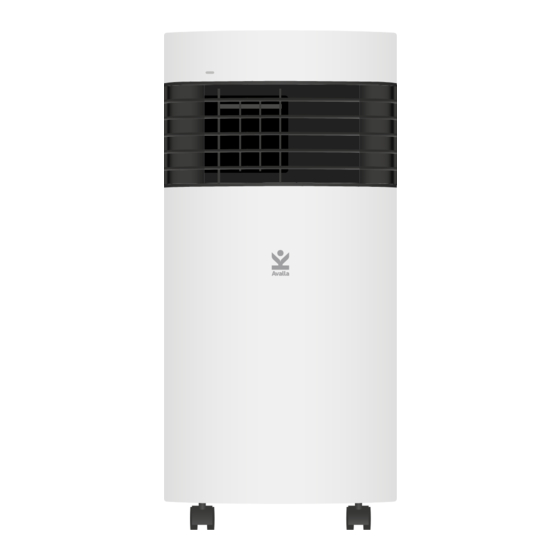
Page 36: Parts Guide: S-770
Parts guide: S-770 Control panel Cable tidy Adjustable cool air outlet Continuous drain Filtered air inlet Drain outlet Air exhaust Touch controls Display Water full Sleep Timer active Timer Low speed Medium speed High speed Down Cool mode Speed Dehumidifier mode Fan mode Mode Sleep active... -
Page 37: Features And Guidance
Press Speed until the desired fan speed light illuminates. Sleep Mode - reduces fan speed and dims the control panel S-550 - Press and hold the Speed button for 3 seconds to enable/ disable sleep mode. S-770 - Press the Sleep button to enable/disable sleep mode. -
Page 38: Timer Function
Child Lock - disables button use when enabled. S-550 - Press and hold the Child lock button for 3 seconds to enable/ disable the child lock. S-770 - Press and hold the Swing and Timer buttons for 3 seconds to enable/disable the child lock. -
Page 39: Remote Control
Remote Control The remote control doubles up the functions of the control panel for convenient operation at a distance. Digital display Mode select Cooling mode Temperature (Up / Down) Swing Timer Display toggle Dehumidifying mode Power Auto mode Fan speed Sleep mode Child lock Temperature units... -
Page 40: Built-In Automatic Protections
Built-in automatic protections Automatic Defrost When operating at low room temperatures, frost may build up on the evaporator. If this happens, the Power LED will begin blinking and the unit will automatically stop for a short time to carry out its automatic defrosting procedure. -
Page 41: Maintenance And Storage
Maintenance and storage Cleaning the air filter Excess dust can cause airflow to become restricted which will reduce efficiency and it can damage to the unit. The filter should be cleaned regularly. • Ensure the unit is switched off and unplugged from the mains power. •... -
Page 42: Troubleshooting
Excessive noise Do you hear a noise like Created by flowing flowing water? refrigerant Error code Excess water level in unit Drain the water tank Specifications S-550 S-770 7000 12000 Circulation 250m3/h 360m3/h Temp’ range 16-32ºC 16-32ºC Power... -
Page 43: Health And Safety
Health and safety General safety instructions • • The following must always be observed for safety This appliance is not intended to be used by children. Persons with lack of experience or knowledge, reduced physical, sensory, or mental capabilities, can use this appliance if they have been given supervision or instruction concerning use of the appliance in a safe way and understand the hazards •... -
Page 44: Servicing Safety Precautions
Servicing safety precautions Please carefully follow this guidance when undertaking any servicing on this appliance. Any servicing must be carried out by a suitably qualified and registered individual. Prior to beginning work, safety checks are necessary to ensure that the risk of ignition is minimized. -
Page 45: Connection To The Power Supply
If in doubt, ensure that the entire cable is unwound. Using a coiled extension lead will generate heat which could melt the lead and cause a fire. Avalla Ltd. Unit A 73, Common Road, Chandler’s Ford, Eastleigh, SO53 1HE. United Kingdom Company no. 13477899...
Need help?
Do you have a question about the S-770 and is the answer not in the manual?
Questions and answers