Table of Contents
Advertisement
Quick Links
3-059-562-12 (1)
Digital
Video Camera
Recorder
Operating Instructions
Before operating the unit, please read this manual thoroughly,
and retain it for future reference.
ИНСТРУКЦИЯ ПО ЭКСПЛУАТАЦИИ
Перед эксплуатацией аппарата внимательно прочтите,
пожалуйста, данное руководство и сохраняйте его для
дальнейших справок.
DCR-TRV620E
DCR-TRV420E/TRV520E/TRV620E
©2000 Sony Corporation
Advertisement
Table of Contents

Related Manuals for Sony Digital 8 DCR-TRV520E


Summarization of Contents
Welcome!
WARNING
Safety warning to prevent fire or shock hazard by not exposing the unit to rain or moisture.
Notice on Supplied AC Power Adaptor for UK
Information regarding the moulded plug and fuse replacement for customers in the UK.
Attention
Note on electromagnetic fields potentially influencing picture and sound.
For Customers in Germany
Information regarding EMC Directive compliance for customers in Germany.
Quick Start Guide
Connecting the Mains Lead
Instructions on how to connect the mains lead to the camcorder and power adaptor.
Inserting a Cassette
Step-by-step guide on how to insert a cassette into the camcorder.
Getting Started
Using this Manual
Guidance on how to read and use the manual for three camcorder models.
Before Using Your Camcorder
Information on using Hi8/Digital8 cassettes and system compatibility.
Step 1 Preparing the Power Supply
Installing the Battery Pack
Instructions for installing and removing the battery pack.
Charging the Battery Pack
Procedure for charging the InfoLITHIUM battery pack and understanding charge indicators.
Connecting to the Mains
Instructions for powering the camcorder using the AC power adaptor.
Step 2 Inserting a Cassette
To Eject a Cassette
Instructions on how to eject a cassette from the camcorder.
To Prevent Accidental Erasure
How to slide the write-protect tab on the cassette to prevent accidental erasure.
Recording – Basics
Recording a Picture
Basic steps for recording a picture, including lens cap removal and power settings.
Adjusting the LCD Screen
How to adjust the LCD screen brightness and orientation for optimal viewing.
Shooting Backlit Subjects – BACK LIGHT
Using the BACK LIGHT function to improve shots with backlighting or bright backgrounds.
Shooting in the Dark – NightShot/Super NightShot
Using NightShot and Super NightShot modes for shooting in low light conditions.
Self-Timer Recording
How to use the self-timer function for recording yourself automatically.
Checking the Recording – END SEARCH / EDITSEARCH / Rec Review
Using buttons to check recorded footage and ensure smooth transitions between scenes.
Playback – Basics
Playing Back a Tape
Instructions for playing back recorded tapes using the LCD screen or viewfinder.
To Display the Screen Indicators – Display Function
How to display or hide screen indicators during playback.
Using the Data Code Function
How to use the data code function to display recording data like date and time.
Various Playback Modes
Overview of different playback modes like pause, fast forward, rewind, and slow playback.
Slow Playback for Tapes Recorded in the Digital8 System
Information on performing slow playback for Digital8 tapes.
Viewing the Recording on TV
If Your TV is Already Connected to a VCR
Connecting the camcorder to a VCR for TV viewing.
If Your TV or VCR is a Monaural Type
Connecting to monaural TVs or VCRs using A/V cables.
If Your TV/VCR Has a 21-Pin Connector (EUROCONNECTOR)
Connecting the camcorder using a 21-pin adaptor.
If Your TV or VCR Has an S Video Jack
Connecting with an S video cable for high-quality pictures.
Using the AV Cordless IR Receiver
Instructions for using an AV cordless IR receiver for easy TV viewing.
To Cancel the Super Laser Link Function
How to turn off the super laser link function.
Advanced Recording Operations
Recording a Still Image on a Tape – Tape Photo Recording
How to record still images on tape, like photographs.
Using the Wide Mode
How to record in the 16:9 wide-screen format for viewing on wide-screen TVs.
Using the Fader Function
How to perform smooth fades for a professional recording appearance.
Using Special Effects – Picture Effect
Applying digital special effects like NEG. ART, SEPIA, B&W, SOLARIZE.
Using Special Effects – Digital Effect
Adding special effects like STILL, FLASH, LUMI., TRAIL, SLOW SHTR, OLD MOVIE.
Using the PROGRAM AE Function
Selecting automatic exposure modes like Spotlight, Sports, Landscape.
Adjusting the Exposure Manually
Manually adjusting exposure for better results in challenging lighting conditions.
Focusing Manually
Manually adjusting focus for precise results when autofocus is ineffective.
Superimposing a Title
How to add titles to your recordings, selecting language, color, size, and position.
Making Your Own Titles
Creating and storing up to two custom titles with up to 20 characters each.
Inserting a Scene
How to insert a new scene into a recorded tape by specifying start and end points.
Advanced Playback Operations
Playing Back a Tape with Picture Effects
Applying picture effects like NEG. ART, SEPIA, B&W, SOLARIZE during playback.
Playing Back a Tape with Digital Effects
Applying digital effects like STILL, FLASH, LUMI., TRAIL during playback.
Enlarging Recorded Images – PB ZOOM
How to enlarge recorded moving and still images using PB ZOOM.
Quickly Locating a Scene Using the Zero Set Memory Function
Automatically stopping playback at a desired scene using the zero set memory function.
Searching a Recording by Date – Date Search
Automatically searching for the point where the recording date changes.
Searching for a Photo – Photo Search/Photo Scan
Searching for still images recorded on tape, individually or in a scan.
Editing
Dubbing a Tape
Instructions for dubbing tapes using A/V connecting cables or i.LINK cables.
Recording Video or TV Programmes
How to record video or TV programs using the A/V connecting cable or i.LINK cable.
Using with Analog Video Unit and PC – Signal Convert Function
Capturing analog video signals and converting them to digital video signals.
Inserting a Scene from a VCR – Insert Editing
How to insert a new scene from a VCR into a recorded tape using insert editing.
Customizing Your Camcorder
Changing the Menu Settings
How to change camcorder settings via the menu system.
Resetting the Date and Time
Procedure for setting the camcorder's clock to the local time.
“Memory Stick” Operations
Using “Memory Stick”–Introduction
Introduction to using Memory Stick for recording still images.
Formatting the Supplied “Memory Stick”
Information on formatting the Memory Stick, noting it's pre-formatted.
“Memory Stick”s Formatted by a Computer
Notes on compatibility of Memory Sticks formatted by computers.
Selecting Image Quality Mode
How to select image quality modes (FINE, STANDARD) for still image recording.
Recording Still Images on “Memory Stick” – Memory Photo Recording
How to record still images onto a Memory Stick, including before operation steps.
Recording Images Continuously
How to record still images continuously and use multi-screen mode.
If the Capacity of the “Memory Stick” Becomes Full
What happens when the Memory Stick runs out of storage space.
Self-Timer Memory Photo Recording
Using the self-timer to record still images on a Memory Stick.
Superimposing a Still Image in the “Memory Stick” on a Moving Image – MEMORY MIX
How to superimpose still images from Memory Stick onto moving images.
Copying Still Images from a Tape – Photo Save
Automatically copying still images from tape to Memory Stick using search function.
Viewing a Still Image – Memory Photo Playback
How to play back still images recorded on a Memory Stick.
Viewing the Recorded Images Using a Personal Computer
How to view Memory Stick images on a computer using PictureGear 4.1 Lite.
Copying the Image Recorded on “Memory Stick” to Tapes
Copying still images or titles from Memory Stick onto Hi8/Digital8 tapes.
Enlarging Recorded Still Images on “Memory Stick”s – Memory PB ZOOM
Enlarging still images recorded on a Memory Stick.
Preventing Accidental Erasure – Image Protection
How to protect selected images to prevent accidental erasure.
Deleting Images
How to delete selected or all images from the Memory Stick.
Writing a Print Mark – PRINT MARK
Specifying recorded still images for printing using DPOF standard.
Additional Information
Digital8 System, Recording and Playback
Explanation of the Digital8 system, usable cassettes, and playback.
Copyright Signal
Information about copyright control signals and recording restrictions.
About i.LINK
Explanation of the i.LINK digital serial interface and its features.
Changing the Lithium Battery in Your Camcorder
Instructions for replacing the lithium battery, including warnings.
Maintenance Information and Precautions
Guidelines for camcorder care, handling tapes, and preventing moisture condensation.
Troubleshooting
A guide to diagnosing and correcting common problems encountered with the camcorder.
Self-Diagnosis Display
Explanation of the camcorder's self-diagnosis function and error codes.
Warning Indicators and Messages
Explanation of various warning indicators and messages displayed on the camcorder.
Quick Reference
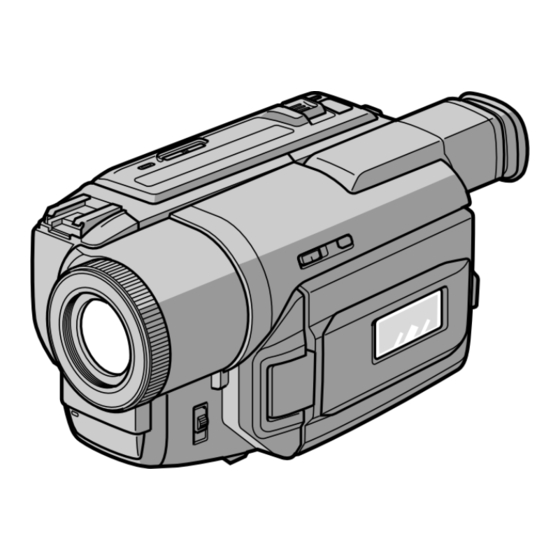
Identifying the Parts and Controls
Diagrams and labels identifying all parts and controls on the camcorder and remote.
Quick Function Guide
A quick reference to functions for exposure, image impact, natural appearance, and editing.
Need help?
Do you have a question about the Digital 8 DCR-TRV520E and is the answer not in the manual?
Questions and answers