Table of Contents
Advertisement
Quick Links
LCD Television Users Guide
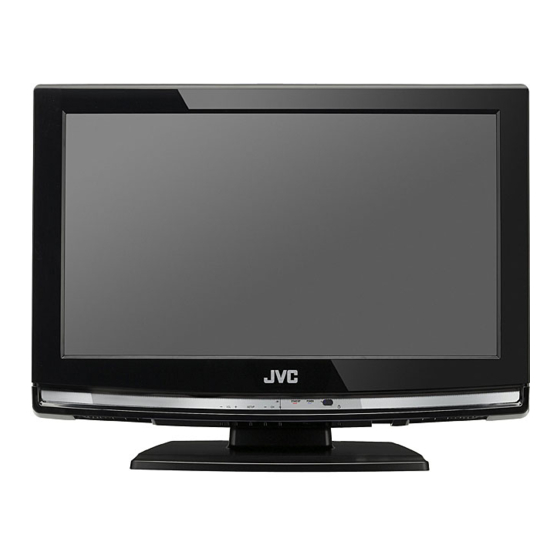
LT-19A200
Important Note:
In the spaces below, enter the model and serial number of your television (located at the rear of the television cabinet). Staple your
sales receipt or invoice to the inside cover of this guide. Keep this user's guide in a convenient place for future reference. Keep the
carton and original packaging for future use.
Model No:
Serial Number:
19" class (18.5" Diagonal)
Español
Français
English
HIGH DEFINITION TELEVISION
0209TKH-FU-FU
Advertisement
Table of Contents
Troubleshooting

Related Manuals for JVC LT-19A200 - 19" LCD TV


Summary of Contents for JVC LT-19A200 - 19" LCD TV
- Page 1 Español Français English LCD Television Users Guide LT-19A200 19" class (18.5" Diagonal) HIGH DEFINITION TELEVISION Important Note: In the spaces below, enter the model and serial number of your television (located at the rear of the television cabinet). Staple your sales receipt or invoice to the inside cover of this guide.
-
Page 2: Precautions
Precautions WARNING: TO REDUCE THE RISK OF FIRE OR ELECTRIC SHOCK, DO NOT EXPOSE THIS APPARATUS TO RAIN OR MOISTURE. APPARATUS SHALL NOT BE EXPOSED TO DRIPPING OR SPLASHING AND NO OBJECTS FILLED WITH LIQUIDS, SUCH AS VASES, SHALL BE PLACED ON THE APPARATUS. The lightning flash with arrowhead symbol, within an CAUTION equilateral triangle, is intended to alert the user to the... -
Page 3: Trademark Information
English This apparatus should not be placed in a built-in installation such as a bookcase or rack unless proper ventilation is provided. Make sure to leave a space of 2.8 inches (7cm) or more around this apparatus. Disconnect the mains plug to shut off when find trouble or not in use. The mains plug shall remain readily operable. CAUTION: Danger of explosion if battery is incorrectly replaced. -
Page 4: Introduction
NTRODUCTION Supplied Accessories remote control batteries (AA x 2) Screw for attaching the (RM-C-2150) stand x 3 (FPH34120) • If you need to replace these accessories, please refer to the part No. with the illustrations and call our toll free customer support line found on the cover of this manual. -
Page 5: Table Of Contents
English Features Contents Precautions ..........2 •... -
Page 6: Control Panel
NTRODUCTION Control Panel 1. y (power) (p. 15) Press to turn the unit on and off. 2. CH - / + (p. 16 / p. 17) Press to select channels or move up ( + ) / down ( - ) through the main menu items. -
Page 7: Remote Control Function
English Remote Control Function MUTE (p. 14) POWER (p. 13) Press to turn the sound on and Press to turn the unit on and off. off. 10. AUDIO (p. 15) Number buttons (p. 14) Digital mode (DTV) • Press to select channels. •... -
Page 8: Preparation
REPARATION No supplied cables are used in this connection: Please purchase the necessary cables at your local store. High Speed HDMI cable (also known as HDMI category 2 cable) is recommended for the better compatibility. Before you connect... Be sure your antenna or other device is connected properly before plugging in the AC power cord. Antenna Connection Connect the RF coaxial cable on your home outlet to the antenna input jack of this unit. -
Page 9: External Device Connection
English No supplied cables are used in this connection: Please purchase the necessary cables at your local store. High Speed HDMI cable (also known as HDMI category 2 cable) is recommended for the better compatibility. External Device Connection [HDMI Connection] HDMI connection offers the highest picture quality. - Page 10 REPARATION No supplied cables are used in this connection: Please purchase the necessary cables at your local store. [Component Video Connection] RCA component video connection offers better picture quality for video devices connected to the unit. If you connect to the unit’s component Video Input jack, connect RCA audio cables to the Audio L/R jacks below the Component Video Connector.
- Page 11 English No supplied cables are used in this connection: Please purchase the necessary cables at your local store. [Video Connection] RCA video connection offers standard picture quality for video devices connected to the unit. If you connect to the unit’s Video Input jack, connect RCA audio cables to the Audio L/R jacks below the Video connector.
-
Page 12: Plug In The Ac Power Cord
REPARATION No supplied cables are used in this connection: Please purchase the necessary cables at your local store. [PC Connection] This unit is equipped with a PC input jack. If you connect this unit to your PC, you can use this unit as a PC monitor. Use an VGA cable for this connection and it requires stereo mini plug audio cable as well. -
Page 13: Initial Setup
English These operations are accessible by remote control. Some may also be accessible by controls on the main unit. Initial Setup This section will guide you through the unit’s initial setting which includes Use [Cursor s / B] to select the desired location setting, selecting a language for your on-screen menu and autoscan, which then press [ENTER]. -
Page 14: Watching Tv
ATCHING TV Channel Selection Volume Adjustment Select channels by using [CHANNEL ] or [the Number buttons]. This section describes how to adjust the volume. The mute function, which turns the sound off and on, is also described. • To select the memorized channels, use - / + [CHANNEL ] or [the Number buttons]. -
Page 15: Still Mode
English Still Mode Switching Audio Mode You can pause the image shown on the TV screen. This section describes how to switch the audio in the analog mode and how to switch the audio language in the digital mode. Press [STILL] to pause the image shown on the TV Press [AUDIO] to display the currently selected screen. -
Page 16: Tv Screen Information
ATCHING TV TV Screen Information You can display the currently selected channel or other information such as the audio mode on the TV screen. In the digital mode, the detailed broadcasting information for the current In the analog mode, the current channel number and the audio mode are channel such as program title, program guides are displayed. -
Page 17: Tv Screen Display Mode
English TV Screen Display Mode 4 types of display modes can be selected when the broadcasting station is sending 4:3 or 16:9 video signal. And 3 types of display modes can be selected for PC input signal. Press [SCREEN MODE] repeatedly to switch the TV aspect ratio. -
Page 18: Optional Setting
PTIONAL SETTING Main Menu Autoscan This section describes the overview of the main menu displayed when you If you switch wires (e.g., between antenna and CATV) or if you move the press [SETUP]. For more details, see the reference page for each item. unit to a different area after the initial setting, or if you restore the DTV The main menu consists of the function setting items below. -
Page 19: Channel List
English Channel List Manual Register The channels selected here can be skipped when selecting the channels This function lets you add the channels that were not added by / + ]. using [CHANNEL the autoscan due to the receptible condition at the initial setting. Those channels can still be selected with [the Number buttons]. -
Page 20: Antenna Confirmation
PTIONAL SETTING Antenna Confirmation Language Selection You can choose English, Spanish, or French as your on-screen language. This function lets you check the digital signal strength of each channel. Press [SETUP] to display the main menu. Press [SETUP] to display the main menu. Use [Cursor K / L] to select “CHANNEL”, then press Use [Cursor K / L] to select “LANGUAGE”, then press [ENTER]. -
Page 21: Picture Adjustment
English Picture Adjustment You can adjust brightness, contrast, color, tint, sharpness and color temperature. Before you begin: You must set ”Home” in ”Location” (Refer to page 31). Otherwise, the settings you adjusted will not be memorized after you turn off the unit. Brightness, Contrast, Color, Tint, Sharpness, Press [SETUP] to display the main menu. -
Page 22: Sound Adjustment
PTIONAL SETTING Sound Adjustment You can adjust the sound mode, equalizer and some other sound functions. TV Speakers Select the audio output from the unit’s speakers, or not. Before you begin: You must set ”Home” in ”Location” (Refer to page 31). If your amplifier compatible with the CEC function is Otherwise, the settings you adjusted will not be connected to this unit using an HDMI cable, some part... -
Page 23: Closed Caption
English Closed Caption A. Caption Service You can view closed captioning (CC) for TV programs, movies and news. Closed caption refers to text of dialogue or descriptions displayed on- Use [Cursor K / L] to select “Caption Service”, then screen. press [ENTER]. - Page 24 PTIONAL SETTING B. Digital Caption Service C. Caption Style In addition to the basic closed caption described on page 23, DTV has its You can change the caption style such as font, color or size, etc. own closed caption called digital caption service. Use this menu to change the settings for digital caption service.
-
Page 25: Font Style
English Font Style Edge Color Closed Captioning font style can be changed as below. Edge color of the displayed caption can be switched as below. Caption Style Closed Caption PICTURE User Setting Caption Style Closed Caption Font Style S OUND Font Size PICTURE User Setting... -
Page 26: Child Lock
PTIONAL SETTING Child Lock Child lock reads the ratings for programs, then denies access to the programs which exceed the rating level you set. With this function, you can block certain programs inappropriate for children and any channels or external input modes can be invisible. See the following description for setting each item. - Page 27 English A. Channel Lock B. MPAA Rating Particular channels or external input modes can be invisible in this MPAA Rating is the rating system created by MPAA (Motion Picture function. Association of America). Use [Cursor K / L] to select “Channel Lock”, then press Use [Cursor K / L] to select “MPAA Rating”, then press [ENTER].
- Page 28 PTIONAL SETTING C. TV Rating Rating Category Use [Cursor K / L] to select “TV Rating”, then press [ENTER]. TV-MA Mature audience only higher TV-14 Unsuitable for children under 14 Child Lock TV-PG Parental guidance suggested PICTURE Cannel Lock MPAA Rat ng S OUND TV-G General audience...
- Page 29 English D. New Password Although the default code “0000” is supplied with the unit, you can set your own PIN Code. Use [Cursor K / L] to select “New Password”, then press [ENTER]. Child Lock PICTURE Channel Lock MPAA Rat ng S OUND TV Rating Canadian English Rat ng...
-
Page 30: Pc Settings
PTIONAL SETTING PC Settings This function lets you adjust the PC screen position, clock and phase during PC input. Press [SETUP] to display the main menu. Adjust the setting. Auto Adjustment Use [Cursor K / L] to select “Adjust”, then press [ENTER]. -
Page 31: Energy Saving Mode
English Energy Saving Mode Location You can set whether the power consumption is saved or not. When you select ”Retail”, the power consumption may possibly exceed the limited requirement of the ENERGY STAR® qualification. Press [SETUP] to display the main menu. Press [SETUP] to display the main menu. -
Page 32: Current Software Info
PTIONAL SETTING Current Software Info This function shows what version of the software currently used. Press [SETUP] to display the main menu. Use [Cursor K / L] to select “DETAIL”, then press [ENTER]. PICTURE S OUND CHANNEL DETAIL LANGUAGE Use [Cursor K / L] to select “Current Software Info”, then press [ENTER]. -
Page 33: Troubleshooting
English ROUBLESHOOTING Question Answer • Check the antenna or cable connection to the main unit. • Check the batteries of the remote control. • Check if there is an obstacle between the infrared sensor window and the remote control. • Test the signal output. If OK, then possible infrared sensor trouble. (Refer to “IR Signal Check”... -
Page 34: Troubleshooting Guide
ROUBLESHOOTING Troubleshooting Guide If the unit does not perform properly when operated as instructed in this manual, check the following chart and all connections once before calling for service. Symptom Remedy • Make sure the AC power cord is plugged in. •... - Page 35 English Symptom Remedy • This unit will memorize the volume level from the last time you adjusted it. You switch to a different input • If the volume of the sound from another device is higher or lower, then the loudness and the volume.
-
Page 36: Glossary
NFORMATION Glossary ATSC Component Video NTSC Acronym that stands for Advanced This is a video signal format that conveys Acronym that stands for National Television Television Systems Committee and the each of 3 principal colors of light (red, Systems Committee and the name of the name of the digital broadcasting standards. -
Page 37: Cable Channel Designations
Español Français English Cable Channel Designations If you subscribe to cable TV, the channels are displayed as 1-135. Cable companies often designate channels with letters or letter-number combinations. Please check with your local cable company. The following is a chart of common cable channel designations. CATV channel TV Display W+2 W+3... - Page 38 Do not attempt to service the product yourself...
- Page 40 JVC Loves the Earth JVC COMPANY OF AMERICA Division of JVC Americas Corp. 1700 Valley Road Wayne, New Jersey, 07470 A91N7UH Printed in China 1EMN24940 ★★★★★...
Need help?
Do you have a question about the LT-19A200 - 19" LCD TV and is the answer not in the manual?
Questions and answers