Table of Contents
Advertisement
Aurora Electric Fire
Installation and
Operation Instructions
CS 3SFPT 750 - Aurora 750 Electric Fire
CS 3SFPT 1100 - Aurora 1100 Electric Fire
CS 3SFPT 1300 - Aurora 1300 Electric Fire
CS 3SFPT 1400 - Aurora 1400 Electric Fire
CS 3SFPT 1500 - Aurora 1500 Electric Fire
CS 3SFPT 1800 - Aurora 1800 Electric Fire
Advertisement
Table of Contents

Related Manuals for Henley Stoves Aurora 1500


Summary of Contents for Henley Stoves Aurora 1500
- Page 1 Aurora Electric Fire Installation and Operation Instructions CS 3SFPT 750 - Aurora 750 Electric Fire CS 3SFPT 1100 - Aurora 1100 Electric Fire CS 3SFPT 1300 - Aurora 1300 Electric Fire CS 3SFPT 1400 - Aurora 1400 Electric Fire CS 3SFPT 1500 - Aurora 1500 Electric Fire...
-
Page 2: Table Of Contents
TABLE OF CONTENTS IMPORTANT INFORMATION ..........2 UNPACKING ................ 3 ............# OPTIONAL SIDE PANELS ..........# INSTALLATION AND LOCATION ........... # PLACING THE LOGS AND EMBERS PRODUCT INFORMATION ..........# ........# PRODUCT TECHNICAL INFORMATION ............# PRODUCT DIMENSIONS .......... -
Page 3: Important Information
Important information: Please read the instructions carefully BEFORE installation. Keep the front of the fire at least 3 FEET AWAY from combustible materials. These include but are not limited to: articles of clothing, curtains, cushions, furniture, other soft furnishings and papers. ... -
Page 4: Unpacking
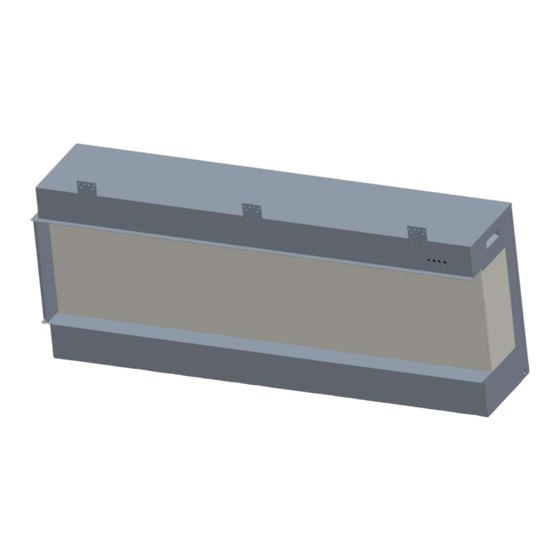
Aurora Range Unpacking: Congratulations on your new electric fire. In order to unpack your product without causing any damage to yourself of the product, please take care and follow the instructions. 1. Place the box on a flat surface. Make sure you have enough space. -
Page 5: Optional Side Panels
Optional Side Panels When unpacked the fire has only one pane of glass visible at the front. The two side sections are covered by blanking plates. If the fire is to be installed as a two or three sided appliance these plates need to be removed. -
Page 6: Installation And Location
Aurora Range Please read the instructions carefully BEFORE installation. The installation MUST be carried out by a qualified person. Installation and location Connect the appliance to a single-phase AC supply of the voltage specified on the ratings plate. In the instance that the fire is connected directly to the mains electricity supply, a fused switched spur with a 13 amp fuse must be fitted. - Page 7 This product should be fitted to one of the following options: 1. Wall Mounted – Using the H bracket which is located on the back of the appliance. It is important to use fixtures that are appropriate for the type of wall. The wall must be of sound construction and able to hold the weight of the appliance.
-
Page 8: Placing The Logs And Embers
Aurora Range Make sure that the cable is not run across the heater and can be plugged into the mains socket without the use of an extension cable. Please make sure that the plug socket outlet is in a location that is easily accessible. -
Page 9: Product Information
Product information: Product technical information Henley Stoves Supplier name Model number CS 3SFPT 750 CS 3SFPT 1100 CS 3SFPT 1300 CS 3SFPT 1400 CS 3SFPT 1500 CS 3SFPT 1800 Voltage 220V – 240V AC50HZ Fuse 13Amp Nominal heat output 2.0KW Minimum heat output 1.0KW... -
Page 10: Operating The Fire
Aurora Range Operating the fire: Manual control: MODE HEATER FLAME STANDBY POWER SWITCH This appliance can be operated manually using the controls situated on the top right hand side of the fire screen. ON/OFF POWER SWITCH- This switch is used to turn the mains supply to the appliance on or off. -
Page 11: Remote Control
heater switches off the fan will continue to run to cool the appliance. MODE- Shuffle through a selection of pre-programmed effects. Remote control: Remove the battery / control panel cover by sliding completely down and insert 2 x AAA batteries ensuring the batteries are fitted correctly. - Page 12 Aurora Range SENDING ADAPTIVE FLAME BATTERY HEATING ROOM ADAPTIVE TEMPERATURE TEMPERATURE STANDBY CLOCK ON/OFF BRIGHTNESS SETTING HEAT HEAT FLAME ADAPTIVE MODE MODE ADAP FLAME COLOUR TEMPERATURE SCALE ASH BED COLOUR TEMPERATURE UP EMBER COLOUR TEMPERATURE DOWN CLOCK UP CLOCK SETTING CLOCK DOWN Setting the Time Press the clock setting...
- Page 13 using The minute setting will now be blinking, adjust using clock up and buttons to the desired minutes and confirm using the clock setting button. Adjusting the desired temperature Whilst the fire is switched on, use temperature and down to set the desired room temperature.
-
Page 14: Wi-Fi / Smart Control
Aurora Range Wi-Fi / Smart control: Preparation In order to prepare please check that your mobile phone is connected to your Wi-Fi router. Plug your fire in to the wall. Switch the fire on at the wall socket. DO NOT use the STANDBY button to turn on, use the power switch. - Page 15 3. Add your device Please touch the ‘Add device’ button or the ‘Add’ symbol to add your device. 4. Scan the QR code Touch the ‘SCAN’ symbol. Scan the below QR code.
- Page 16 Aurora Range 5. Connecting to your Wi-Fi Select your Wi-Fi network and input the password of your Wi-Fi network. 6. Establishing a connection Give a long press to the standby button for around 3 seconds. You should see a red light next to the orange dot in the middle of the fire screen.
- Page 17 7. Adding your device Wait whilst the app adds the device. Please keep the phone close to the device whilst the device is syncing. If it fails to sync Repeat steps 4,5 and 6 8. Your device has been added successfully. ...
- Page 18 Aurora Range Using the App 1. To turn the fire on press the standby button at the bottom of the screen 2. To set timers press the clock button at the bottom left of the screen. Along the top of the screen there are 5 tabs ‘Heat, Flame, Ember, Logs and Mode’...
-
Page 19: Cleaning
Maintenance: You MUST remove the plug from the socket outlet and allow the heater to cool completely before cleaning or maintenance. Maintenance should only be carried out by a qualified person. Cleaning: A soft dry cloth, such as microfiber cloths, can be used to remove dust and for general day to day care. -
Page 20: Environment
Aurora Range obstructed. If your fire is connected to a chimney, the chimney must be blocked off as the drafts can affect the appliance. If the problem continues, keep the product unplugged from the power socket and contact your supplier. WARNING! ... -
Page 21: Warranty
Warranty: In the unlikely event that the appliance should prove to be defective due to faulty design, materials or workmanship within 24 months of purchase, the product will be repaired free of charge, In accordance with the following conditions: It is the consumers’ responsibility to prove that the unit is under warranty, e.g.
Need help?
Do you have a question about the Aurora 1500 and is the answer not in the manual?
Questions and answers