Table of Contents
Advertisement
Quick Links
Advertisement
Table of Contents

Related Manuals for Ratio SmartSolar


Summary of Contents for Ratio SmartSolar
- Page 1 Ratio Smart/Solar Charger MANUAL...
- Page 2 Thank you for choosing Ratio Smart/Solar Charger Manufacturer Ratio Electric B.V. Ambachtsstraat 12 NL – 3861 RH Nijkerk The Netherlands Tel. +31-33-2452360 info@ratio.nl UK English - Original www.ratio.nl EV082 - V01 - 11/2022...
- Page 3 Disclaimer of liability Ratio Electric B.V. cannot be held responsible for personal injury, damage to the product or property damage caused by incorrect use, foreseeable misuse or failure to follow the instructions in this manual. This also applies to unauthorized modifications of the product and the use of non-approved spare parts, tools or accessories.
-
Page 4: Table Of Contents
1.4. Qualification of personnel Charging App 1.5. Personal protective equipment 6.3. Initial configuration of the charger 33 1.6. Safety precautions 6.4. Overview of the Ratio EV Charging App Description of the product 6.5. Connect the charger to the 2.1. Charger components Ratio EV Charging App 2.2. -
Page 5: Safety
Messages that are not hazard-related are indicated with the signal word NOTICE. These messages do not have a safety alert symbol. Signal word Meaning NOTICE Could result in damage to the product when instruction is ignored or not followed correctly Note Additional information or emphasis on an instruction www.ratio-electric.com... -
Page 6: Intended Use
1.2. Intended use The Ratio Smart/Solar Charger is both a non-restricted and restricted charger intended to charge electrical vehicles using power from solar panels and household power grid. The product can be operated indoors and outdoors. The product must only be operated within its performance limits and under the permitted ambient conditions, as stated in the technical specifications in chapter 3. -
Page 7: Personal Protective Equipment
• Do not use this product if it does not function according to the instructions in this manual. Seek advice from Ratio, your vendor, or a qualified electrician or serviceman. • Do not remove the charging plug while a charging session is active. - Page 8 Do not store the product in an environment that exceeds the ambient conditions as stated in this manual. • Do not expose the internal components product to moisture. • Do not immerse the product in water or any other liquid. Ratio Smart/Solar Charger Manual...
-
Page 9: Description Of The Product
A maximum of five users or cars can be created. Ratio EV Charging App The charger can be controlled with the Ratio EV Charging App. The App is available in the Google Play Store and Apple store, or check our website. -
Page 10: Charger Components
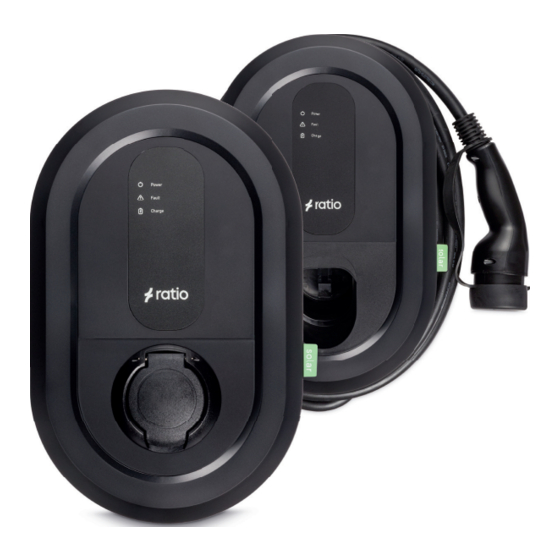
Note: PureSolar mode is not compatible with Power Sharing . If you set the charge mode to PureSolar, Power Sharing will be disabled. 2 . 1 . Charger components Power Fault Ready/Charge Front cover ring Power LED Charge socket Fault LED Ready/Charge LED Ratio Smart/Solar Charger Manual... -
Page 11: Sensorbox Components (Optional For Smart Charger)
Dynamic Load Balancing and PV charging. To upgrade your Ratio Smart charger to support Dynamic Load Balancing, purchase Ratio Sense. This package contains a Ratio Sensorbox and CT clamps. Follow the instructions in chapter 5 . 3 . of this manual to install Ratio Sense in your Ratio Smart charger. -
Page 12: Technical Data
Sinusoidal wave distortion Not exceeding 5% Relative humidity (maximum value at 40 °C) Markings Ventilation Not supported Required protection device type Type A Required protection device rating 30 mA Supported connectivity protocols Bluetooth® wireless technology Wi-Fi Ethernet Ratio Smart/Solar Charger Manual... -
Page 13: Nameplate/Marking
3.1. Nameplate/Marking The product is marked in accordance with the applicable legislation requirements. The nameplate/marking is located on the bottom of the housing, above the cable inlets. Ratio Electric BV Ambachtsstraat 12, 3861 RH Nijkerk NL Prod- SNr : XXXXXXX PNr: 388xx Solar 11-22kW 5m IP54 -25ºC .. -
Page 14: Installation
Dynamic Load Balancing and PV charging. To upgrade your Ratio Smart charger to support Dynamic Load Balancing, purchase Ratio Sense. This package contains a Ratio Sensorbox and CT clamps. Follow the instructions in chapter 5 . 3 . of this manual to install Ratio Sense in your Ratio Smart charger. - Page 15 5 × 6,00 mm , solid wire* Mains Circuit Breaker (MCB) 20 A, B/C-characteristic 40 A, B/C-characteristic Residual Current Device (RCD) 30 mA, Type A Data cable Shielded UTP cable or 4×0,25 mm cable * max 25 m cable length www.ratio-electric.com...
-
Page 16: Install The Power Cable In The Consumer Unit
Note: The mains input is orientation sensitive. If the mains plug is inserted upside down, the measurements of the Sensorbox will be inaccurate. Check the markings on the Sensorbox for the correct orientation, check the correct position of L and N. Ratio Smart/Solar Charger Manual... - Page 17 Note: Make sure the arrow on the current transformer points towards the entry point of the main power grid. See the image below for more information on the correct mounting location of the CT clamps. Main Distribution Fuse Clamp User User User User Sensor L1 L2 L3 Solar Panels Data to Charging Station www.ratio-electric.com...
- Page 18 10 . Insert four wires of the data cable into the RJ10 connector. 11 . Secure the wires to the RJ10 connector. Use a RJ10 crimping tool. 12 . Write down the colours and order of the inserted wires of the data cable. Ratio Smart/Solar Charger Manual...
- Page 19 2 . Ensure the template is level. Use a spirit level. Alternatively 1 . Hold the charger against the wall at the installation location, with the bottom of the charger about 80-100 cm above the ground. 2 . Ensure the charger is level. Use a spirit level. www.ratio-electric.com...
-
Page 20: Connect The Power Cable To The Charger
Connect the power cable to the charger TX10 1 . Remove the five Torx screws from the housing lid. Use a size TX10 screwdriver. 2 . Move the housing lid to the side to access the inner circuitry of the product. Ratio Smart/Solar Charger Manual... - Page 21 3 . Carefully remove the left cable inlet cover. Use a flathead screwdriver and hammer. 4 . Remove the sealing nut from the cable gland. 5 . Insert the cable gland through the left cable inlet. 6 . Secure the cable gland with the locknut. www.ratio-electric.com...
- Page 22 7 . Guide the power cable through the sealing nut. 8 . Guide the power cable through the cable gland. 7 mm 80 mm 9 . Strip the wires of the power cable. Ratio Smart/Solar Charger Manual...
- Page 23 11 . Secure the wires to the terminals using a voltage tester screwdriver. 12 . Gently pull the excess power cable out of the charger. 13 . Secure the power cable in place by tightening the sealing nut onto the cable gland. www.ratio-electric.com...
-
Page 24: Install The Data Cable In The Charger
2 . Place the foam insert into the cable gland or punch a hole in the centre of the rubber cable grommet using a screwdriver. 3 . Insert the cable gland with foam insert or rubber cable grommet into the centre cable inlet. Ratio Smart/Solar Charger Manual... - Page 25 8 . Insert the wires into the RJ10 connector in the exact same order as in the Sensorbox. 9 . Secure the wires to the RJ10 connector. Use a RJ10 crimping tool. 10 . Insert the RJ10 connector into the left RJ10 port of the charger. www.ratio-electric.com...
-
Page 26: Install A Data Cable Between Two Chargers For Power Sharing
2 . Remove the terminal connector of the existing data cable from the charger. 3 . Guide the second data cable alongside the existing data cable through the cable gland with foam insert or rubber grommet. Ratio Smart/Solar Charger Manual... - Page 27 8 . Secure the wires to the terminals using a RJ10 crimping tool. 9 . Insert the RJ10 connector into the right RJ10 connector of the charger. 10 . Gently pull the excess data cable out of the charger. www.ratio-electric.com...
- Page 28 2 . Punch a hole in the centre of the rubber cable grommet using a screwdriver. 3 . Insert the cable gland with foam insert or rubber cable grommet into the centre cable inlet. 4 . Guide the data cable through the cable gland with foam insert or rubber grommet. Ratio Smart/Solar Charger Manual...
- Page 29 8 . Insert the wires into the RJ10 connector in the exact same order as in the main controller charger. 9 . Secure the wires to the RJ10 connector. Use a RJ10 crimping tool. 10 . Insert the RJ10 connector into the left RJ10 port of the charger. www.ratio-electric.com...
-
Page 30: Checks Before Finishing The Installation
Check if the current transformers are properly installed around the phase wires of the main power grid. • Check if the current transformers are plugged into the correct phase inputs of the Sensorbox. • Check if the housing is correctly closed and no loose wires are visible or exposed. Ratio Smart/Solar Charger Manual... -
Page 31: Finish The Installation
3 . Place the four screw caps to cover the mounting screws. 4 . Apply the Fuel Identifier sticker on the housing, next to the outlet or plug holder. Congratulations, you have finished installing the charger. Before the charger is ready for use, you must first commission the charger. www.ratio-electric.com... -
Page 32: Commissioning
6 . 2 . Download the Ratio EV Charging App Install the Ratio EV Charging App and create an account before use. 1 . Scan the QR code. Alternatively, go to the Google Play store or App Store on your device and search for "Ratio". -
Page 33: Initial Configuration Of The Charger
Note: This value must be lower than the rating of the used MCB. Number of solar Select the amount of phases on which the solar panel installation power phases is installed. Note: This value is only used when the charge mode is set to PureSolar or SmartSolar. www.ratio-electric.com... -
Page 34: Overview Of The Ratio Ev Charging App
Manage connected vehicles or add a new vehicle. Overview of recent charging sessions. Shows the current version of the Ratio EV Charging App Note: Adding vehicle information is recommended for a detailed overview of your charging activity. -
Page 35: Testing Solar Charging Functionality
Updates are performed sequentially. This allows the system to offer multiple updates in succession. Always install all updates to ensure you are using the latest version. Read the release notes on the Ratio website or in the AppStores to learn about new features and improvements to the system. -
Page 36: Use
Ratio EV Charging App and update it if available. Regularly check for available updates in the My Chargers screen of the Ratio EV Charging App. Note: Using an old version of the Ratio EV Charging app may lead to compatibility issues and is not recommended. 7.1. -
Page 37: Stop Charging
For fixed cable version: Wrap the fixed cable around the charger and insert the connector into the plug holder in the front of the charger. The Ratio EV Charging App no longer shows current directions and power usage values. Settings To edit your settings, do the following: 1. -
Page 38: Maintenance
Maintenance Ratio chargers are practically maintenance-free, aside from periodic cleaning of the housing. 1. Switch off the charger before cleaning the housing. 2. Clean the Smart/Solar Charger using a soft cloth lightly moistened with mild detergent solution. -
Page 39: Troubleshooting
Switch off the power to the main grid. Possible causes: Switch the power to the main grid back on. Damaged charging cable If the error persists, Please contact Ratio or a qualified electrician to have the charger Damaged charger inspected. -
Page 40: Service
11. Service To avoid risk of electric shock, only qualified electricians should perform service or maintenance on the charger. If your charger is in need of servicing, please contact Ratio, your local vendor or a qualified electrician. Ratio Smart/Solar Charger... -
Page 41: Data Protection
We refer you to our privacy statement on our website. 13. Warranty Ratio Electric B.V. warrants this product to be free from defects in material, manufacture and design for a period of 3 years after the date of purchase. If this product is defective in materials, manufacture or design during this warranty period, Ratio Electric B.V. -
Page 42: Ec Declaration Of Conformity
EC Declaration of Conformity EU Declara�on of Conformity This Declaration of Conformity is issued under the sole responsibility of the manufacturer Manufacturer Company name: Ratio Electric BV Full address: Ambachtsstraat 12 Postal code: 3861 RH Place: Nijkerk Country: The Netherlands... - Page 43 Notes...
- Page 44 Ratio Electric B.V. For more information, check our website. Ambachtsstraat 12 NL – 3861 RH Nijkerk The Netherlands Tel. +31-33-2452360 info@ratio.nl www.ratio-electric.com...
Need help?
Do you have a question about the SmartSolar and is the answer not in the manual?
Questions and answers