
Related Manuals for Major Science UVCI-1100


Summarization of Contents
Product Contents
Standard Package Items
Lists all components included in the standard SmartView Pro 1100 Imager System package.
Optional Package Items
Details optional modules and accessories available for purchase.
Safety and Compliance Information
FCC Regulatory Compliance
Explains FCC Part 15 compliance and interference mitigation procedures.
Warning on Equipment Modification
Advises users against unauthorized modifications that could void operating authority.
General Safety Guidelines
Operating Safety and Compliance
Covers CE/RoHS compliance and essential safety rules for operating the equipment.
System Safety and Environmental Requirements
Electrical Safety and Environmental Conditions
Details precautions against electrical shock and specifies operating environment requirements.
Introduction to the Imager System
System Overview and Features
Provides a general introduction to the SmartView Pro Imager System, including its key features.
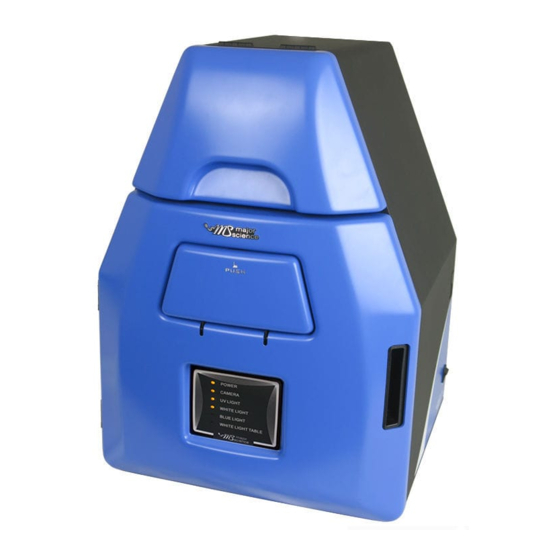
System Component Identification
Guide to System Components
Illustrates and labels the various physical components of the imager system.
Technical Specifications
Model, General, and Darkroom Specs
Details specifications for model, general hardware, and darkroom features like UV transilluminator.
Camera and Lens Specifications
Lists technical details for the CMOS camera and lens, including sensor and resolution.
Technical Specifications
Viewing Window and PC Requirements
Specifies viewing window details and minimum PC hardware requirements for the software.
Installation Instructions
Installing the Optional Blue Light Module
Step-by-step guide for installing the optional blue light module.
Installation Instructions
Installing the Optional White Light Table
Step-by-step guide for installing the optional white light table module.
Software Installation Guide
Installing the SmartView Pro 1100 Software
Details the process for installing the main software for the imager system.
Operation Instructions: Interface Overview
Capture and Analysis Control Interface
Introduces the main software interface used for capturing and analyzing images.
Operation Instructions: Image Controls
Light Source and Exposure Controls
Covers controlling light sources (UV, blue, white) and adjusting exposure time.
Operation Instructions: Capture Interface
Capture Screen Interface Details
Provides a detailed breakdown of the elements within the capture screen interface.
Operation Instructions: Gel Analysis
Image Analysis Interface Overview
Introduces the interface for performing gel analysis, including peak finding and base lining.
Starting the Imaging Process
Stain Selection and Gel Preparation
Provides guidance on selecting stains and preparing the gel for imaging.
Operation Procedures: Gel Placement and Filters
Gel Placement and Filter Selection
Details how to place the gel and select the appropriate filter based on light source.
Operation Procedures: System Setup
System Power-Up and Image Optimization
Covers powering up the system, connecting to PC, and optimizing image settings.
Operation Procedures: Light and Lens Controls
Light Source Selection and Lens Adjustment
Guides on choosing light sources and manually adjusting the lens iris.
Operation Procedures: System Settings
Configuring Default Settings
Explains how to customize and save default system parameters for startup and advanced features.
Operation Procedures: Image Capture
Freezing and Saving Images
Describes the freeze image function and how to acquire and save images.
Operation Procedures: Image Capture and Saving
Acquiring and Saving Image Data
Details the process for capturing images using the capture button and saving them.
Gel Analysis: Loading and Processing
Loading Gel Images for Analysis
Steps to load an image file from storage into the analysis software.
Gel Analysis: Image Editing Tools
Cropping and Rotating Gel Images
Details how to crop and rotate images to define the specific area for analysis.
Gel Analysis: Image Editing Tools
Rotating and Flipping Images
Covers rotating and flipping images for optimal presentation.
Gel Analysis: Image Editing Tools
Adjusting Image Brightness
Guides on using the brightness adjustment tool to modify image contrast.
Gel Analysis: Image Editing Tools
Image Contrast and Negative Effects
Explains how to adjust image contrast and apply negative effects.
Gel Analysis: Image Editing Tools
Image Zoom Functionality
Describes how to zoom in and out of the image.
Gel Analysis: Image Editing Tools
Adding Text Annotations to Images
Explains how to add text annotations to images and customize font properties.
Gel Analysis: Workflow and Analysis Selection
Selecting Analysis Method
Guides on choosing between Gel Positive/Negative analysis methods.
Gel Analysis: Lane Selection
Adding and Deleting Gel Lanes
Steps for adding and deleting lanes to define regions for gel band analysis.
Gel Analysis: Peak Detection
Automatic Peak Finding
Describes using the Auto Find feature to automatically detect peaks in gel lanes.
Gel Analysis: Peak Management
Setting Peak Baselines
Explains how to set a baseline for peaks to include or exclude them from quantification.
Gel Analysis: Data Summarization
Baseline Feature and Data Summarization
Details the baseline feature and proceeding to summarize analysis data.
Gel Analysis: Density Calculation
Calculating Band Density
Steps for calculating sample density by inputting known concentrations of marker bands.
Gel Analysis: Molecular Weight Calculation
Calculating Molecular Weight
Introduces the process of calculating molecular weights using marker information.
Dot Blot Analysis: Loading Images
Loading Images for Dot Blot Analysis
Steps to load an image file for dot blot analysis.
Dot Blot Analysis: Image Processing
Image Loading and Cropping for Dot Blot
Covers loading images and initial cropping for dot blot analysis.
Dot Blot Analysis: Image Editing
Cropping Dot Blot Images
Details how to crop an image to isolate the dot blot area.
Dot Blot Analysis: Image Editing
Rotating Dot Blot Images
Covers rotating the dot blot image for optimal presentation.
Dot Blot Analysis: Image Editing
Adjusting Dot Blot Image Brightness
Guides on adjusting the brightness of the dot blot image.
Dot Blot Analysis: Image Editing
Adjusting Dot Blot Image Contrast
Details how to adjust the contrast of the dot blot image.
Dot Blot Analysis: Image Editing
Zooming Dot Blot Images
Describes how to zoom in and out of the dot blot image.
Dot Blot Analysis: Workflow and Selection
Selecting Analysis Method
Guides on choosing between Gel Positive/Negative analysis methods.
Dot Blot Analysis: Dot Selection
Selecting Dots for Analysis
Steps to automatically detect and select dots within the dot blot image.
Dot Blot Analysis: Density Calculation
Inputting Dot Densities for Calculation
Details the process of inputting dot densities for calculation.
Troubleshooting Guide
Screen, Camera, and Light Issues
Solutions for common problems with the screen, camera signal, and light sources.
Troubleshooting Guide
Printing and Operational Issues
Addresses problems with printing on 64-bit systems and operating the device or capturing images.
Troubleshooting Guide
Connection Errors and Bluetooth Interference
Solutions for connection errors, com port issues, and potential Bluetooth conflicts.
Cleaning and Maintenance
Replacing the System Fuse
Provides a step-by-step guide for safely replacing the fuse.
Cleaning and Maintenance
Adjusting Camera Focus for Clarity
Details how to adjust the camera focus for improved image clarity.
Cleaning and Maintenance
Replacing Viewing Window Filter
Instructions for replacing the amber filter on the viewing window.
Cleaning and Maintenance
Adjusting Scientific Camera Focus
Steps to adjust the scientific camera focus using the UV table and ruler.
Ordering Information
Models, Applications, and Accessories
Lists available imager system models, their applications, and related accessories and filters.
Warranty and Support
Manufacturer Warranty Terms and Contact
Outlines warranty terms, exclusions, and provides manufacturer contact details.
Appendix: Software Installation
Camera Software Installation Prerequisites
General prerequisites and steps for installing the camera software on a computer.
Appendix: Software Installation
Camera Software Installation Steps
Details the process of installing camera setup software, including system type selection.
Appendix: Software Installation
Software Installation Wizard Steps
Covers selecting language, starting the program, and accepting the license agreement.
Appendix: Software Installation
Setup Type and Destination Folder Selection
Guides on choosing the setup type and specifying the installation destination folder.
Appendix: Software Installation
Completing the Software Installation
Final steps to begin and complete the software installation process.
Appendix: Software Installation
Windows XP USB Port Configuration
Specific instructions for configuring USB ports on Windows XP systems during hardware setup.
Appendix: Software Installation
Installing Light Signal Software
Steps for installing the PL2303 USB-to-Serial driver software.
Need help?
Do you have a question about the UVCI-1100 and is the answer not in the manual?
Questions and answers