
Related Manuals for Ella's Bubbles Elite


Summary of Contents for Ella's Bubbles Elite
- Page 1 ELLA ACRYLIC ELITE WALK-IN TUB OWNERS MANUAL Customer Support #: 800 480 6850 Email: info@ellasbubbles.com...
- Page 2 Table of Contents IMPORTANT Warranty Activation Form MUST be completed for both the Owner and Installer to validate the warranty. Failure to complete both pages (p.18 and p.19) will void the warranty on this bathtub. Completed Ella Warranty Activation Forms can be emailed to warranty@ellasbubbles.com, faxed to 312.666.3551, OR mailed to 2101 S.
-
Page 3: Unpacking And Inspecting
Unp a c k ing a nd Insp e c t ing Inspect the carton for damage: Take a picture if possible. CAREFULLY RECORD ALL PERCEIVED DAMAGE DO NOT LIFT THE TUB BY THE PLUMBING. Doing so can result in leaks, for which the installer is responsible. -
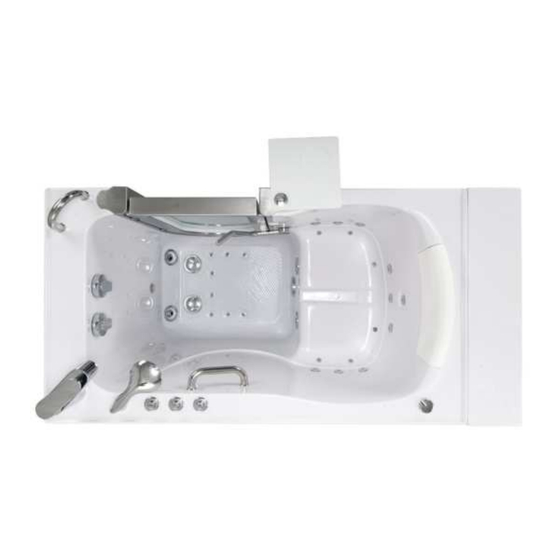
Page 4: Warnings And Labels
Warnings and Labels Your Ella's bathtub comes with several warning label stickers throughout and are as follows: Details on Page 12 Push Control Acrylic Shell Back nut Air hose Details on Page 3 0 3 / 1 8 2 of 22 w w w.e lla sb ub b le s.c o m... - Page 5 Warnings and Labels continued Backnut MUST be securely tightened. Failure to do so will cause loosening over time resulting in it coming apart and falling down the drain. Drain closed Drain open completely all the way Drain must open completely to drain properly and close completely to avoid unnecessary drainage.
- Page 6 W A RNING ! PLEA SE REA D BEFO RE BEG INNING INSTA LLA TIO N Do no t a tta c h the ha nd he ld sho we r to the wa ll unle ss yo u ha ve a n e xte nsio n W A RNING : ho se with a b a rre l p ro te c tio n.
- Page 7 Mo v ing yo ur Ella Wa lk in Ba th •Re mo ve a ll fo ur (4) a c c e ss p a ne ls b e fo re mo ving the tub •T a ke o ff the sc re w c a p s •Unsc re w the sc re ws with a Philip s he a d sc re wd rive r La rg e Ac c e ss Pa ne l (1)
-
Page 8: Important Safety Instructions
Imp o rta nt Sa fe ty Instruc tio ns WARNING : ***Re a d thro ug h the e ntire m a nua l c o m p le te ly b e fo re b e g inning insta lla tio n.*** C o ntra c t a lic e nse d p lum b e r a nd e le c tric ia n fo r insta lla tio n. - Page 9 Imp o rta nt Sa fe ty Instruc tio ns WARNING: USE TUB ONLY AS INTENDED! FAILURE TO DO SO CAN LEAD TO INJURY OR DEATH WARNING CORRECT BATHER SHOULD ONLY SIT AS SHOWN IN FIGURE TO THE LEFT. SIT FULLY IN SEAT WITH BACK ON THE BACKREST.
- Page 10 Required Steps Prior to Installation Pro te c ting the Ba th Cover and protect the bath shell and fixtures from scratches or other damages during the insta lla tio n a nd te sts. Re mo ve the a c c e ss p a ne ls whe n mo ving the Wa lk in Ba th a nd a lwa ys lift the b a thtub fro m the fra me .
- Page 11 2" T Type Dual Port Dual Drain 0 3 / 1 8 9 of 22 w w w.e lla sb ub b le s.c o m...
- Page 12 Dra in a nd Plum b ing Positioning Options for 2" T Type Dual Port Drain Systems 10 of 22 w w w.e lla sb ub b le s.c o m...
- Page 13 Dra in a nd Plum b ing Positioning Options for 2" T Type Dual Port Drain Systems 11 of 22 w w w.e lla sb ub b le s.c o m...
- Page 14 Door and Frame Adjustments Prepare the sub-floor for the drain and ensure that the area is level. The supporting sub-floor must b e a b le to sup p o rt the to ta l we ig ht o f the b a thtub , b a the r a nd wa te r and must meet local construction code requirements.
- Page 15 Door and Frame Adjustments Your walk in bathtub has been tested and leveled properly before leaving our facility. Our walk in bathtubs have been set on a perfectly level surface to ensure no leaks and proper door closing. It is up to your installer to test and make any adjustments necessary to ensure that all leveling legs support the tub frame and that the door is aligned correctly to prevent any leaks.
- Page 16 Door and Frame Adjustments WARNING: Failure to level the tub correctly WILL RESULT IN MISALIGNMENT! The drawings below illustrate some examples of what types of frame warping will occur if the legs are not level with the floor. 14 of 22 w w w.e lla sb ub b le s.c o m...
- Page 17 Se rvic e Ac c e ss a nd Ve ntila tio n It is the re sp o nsib ility o f the insta lle r o r o w ne r to p ro vid e a c c e ss fo r se rvic e re q uire d , p e r c o d e .
- Page 18 Insta lla tio n o f De c k Mo unt G ra b Ba r Pa rts List: C hro me g ra b b a r x (1) Esc utc he o n x (2) Rub b e r wa she rs x (4) Me ta l wa she rs x (2) Bo lts x (2) WARNING...
- Page 19 Insta lling Exte nsio n Kits De luxe Dim e nsio ns: 5"W x 29 1/ 2"L x 37"H L " Sta inle ss Ste e l Bra c ke ts ......Q ty (3) Elite Dim e nsio ns: 7"W x 29 3/ 4"L x 37 3/ 4"H L "...
- Page 20 Finishing Insta lla tio n After all of the water and electrical testing is completed and all fixtures are checked, the tub c a n b e insta lle d to the surro und ing wa ll o r wa lls. Ella Wa lk in Ba ths c o me w ith lo w rise tile flange which allows for two or one wall installations.
- Page 21 LED Chromatherapy Light LED Chromatherapy Light Press the button once for a continuous stream of changing lights. To maintain a solid color (8 colors to choose from), continue to press the button until your desired light shines. To turn off, press and hold the button.
- Page 22 Ella's Bubbles offers cleaning service for the cartridges for a nominal fee: labor + shipping. The cartridge cleaning is done at Ella's Bubbles facility, or it can be done by the contractor hired by customer. The removal and cleaning of TCV should...
- Page 23 Wa rra nty Ac tiva tio n Fo rm 1 o f 2 INSTALLER'S INFORMATION _______________________________________________________________________________________ Pa g e 1 Na me _______________________________________________________________________________________ Ad d re ss C ity Sta te _________________________________ _________________________________________________ T e le p ho ne Ema il _________________________________ _________________________________________________ Da te...
-
Page 24: Owner's Information
Wa rra nty Ac tiva tio n Fo rm 2 o f 2 OWNER'S INFORMATION _______________________________________________________________________________________ Na me _______________________________________________________________________________________ Ad d re ss C ity Sta te _________________________________ _________________________________________________ T e le p ho ne Ema il _________________________________ _________________________________________________ Da te Sig na ture Mo d e l: ___________________________________ Se ria l Num b e r: ______________________________ Purc ha se Da te : ___________________________ Purc ha se Pric e : _____________________________...
Need help?
Do you have a question about the Elite and is the answer not in the manual?
Questions and answers