
Related Manuals for Kverneland TIGER 800


Summary of Contents for Kverneland TIGER 800
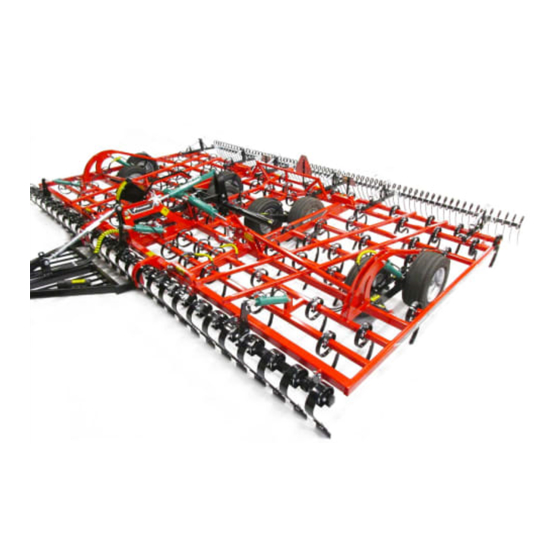
- Page 1 OPERATING INSTRUCTIONS TIGER SEEDBED CULTIVATORS READ THIS MANUAL CAREFULLY BEFORE OPERATING THE SEEDBED CULTIVATOR From serial number 12 1233 onwards 11/2019...
-
Page 2: Table Of Contents
Contents 1. INTRODUCTION ....................... 4 2. SAFETY GUIDELINES ..................... 8 3. SETTING-UP ........................12 4. HARROWING ........................24 5. MAINTENANCE .................. 26 6. WARRANTY ........................36 EC DECLARATION OF CONFORMITY ....Virhe. Kirjanmerkkiä ei ole määritetty. - Page 3 1. INTRODUCTION Intended use Technical specifications Type plate...
-
Page 4: Introduction
KVERNELAND TIGER seedbed cultivators are available with a wide range of optional equipment to ensure optimal granular structure and level soil surface. - Page 5 Technical specifications Type TIGER Number of sections Working width, m Number of tines Number of tine axles Draught requirement, kW Number of required hydraulic outlets single-/double-acting Transport width, m Working depth control M = mech. H = hydr. Number of wheels Wheel size Weight, incl.
- Page 6 Type plate Each machine is equipped with a type plate shown in the figure. Mark the machine data to the type plate. Model Serial Nr Year Made in Finland by Potila Tuotanto Oy...
- Page 7 2. SAFETY GUIDELINES Warnings Transport on roads...
-
Page 8: Safety Guidelines
2. SAFETY GUIDELINES Warnings Pay special attention to all instructions and diagrams marked with this symbol. Read the manual carefully and make sure that you understand everything. All safety guidelines must be read carefully before hitching the seedbed cultivator to the tractor. Learn how to operate the cultivator carefully and in a correct manner. - Page 9 Wear safety goggles when performing maintenance. Wear hearing protectors when driving. Instructions for the operator - Never stay near the wing sections when they are in the raised position. - Do not allow anyone to stay on the seedbed cultivator when it is being used or transported.
- Page 10 Transport on roads • Slowly raise the wing sections fully into the transport position. They are controlled with the same hydraulic valve as the frontboard during harrowing. • Ensure that the automatic locking bars lock into their holes and do not drive off before both wings are locked.
- Page 11 3. SETTING-UP Raising/lowering the draw bar Hitching and hydraulics Adjusting the seedbed cultivator • Horizontal adjustment • Middle section and wing section adjustment • Depth adjustment • Working depth indicator • Use of the frontboard • Use of the rear equipment Troubleshooting/FAQ...
-
Page 12: Setting-Up
3. SETTING-UP Always observe the tractor's safety guidelines when hitching or unhitching the seedbed cultivator. Crushing and cutting hazard when hitching or unhitching the seedbed cultivator. Never disconnect or connect hoses that are under pressure. Raising/lowering the draw bar The draw bar of the seedbed cultivator can be raised to reduce the space needed for storage (for example, in winter storage). - Page 13 Hitching and hydraulics Always observe the tractor's safety guidelines when hitching or unhitching the seedbed cultivator. Crushing and cutting hazard when hitching or unhitching the seedbed cultivator. Never disconnect or connect hoses that are under pressure. • Hitch the cultivator to the tractor tow hook only. •...
- Page 14 • Open transport valve. (The figure shows the valve in a closed position.) • Lift the cultivator on its wheels. • Drive the tractor with the hitched cultivator onto a firm, level surface. • Lower the wing sections. Ensure that the wing section extension areas are clear! For this procedure, the cultivator must be in the transport position.
- Page 15 Adjusting the seedbed cultivator NOTE! Ensure that the wing section extension areas are clear. Remember the minimum safe distances! Lower the wing sections as follows: • If the cultivator is not in the transport position, lift the cultivator all the way up on its wheels. (The change valve will then direct the pressure to the wing section lift cylinders.) •...
- Page 16 Because the adjustment of this position depends on the height of the tractor tow hook, it must always be readjusted when hitching the cultivator to a different tractor. MIDDLE SECTION AND WING SECTION ADJUSTMENT: • The height of the middle section is aligned with the height of the wing sections by turning the piston rod of the middle cylinder (B).
- Page 17 may be exposed. Also check this setting in the field. Lower the cultivator on its tines so that the mounting bolts of the cylinders have some play. Shut down the tractor! Pay special attention when you move between the frame of the cultivator to access the end piece to be adjusted. Never walk or stand on the frame! WHEEL HYDRAULICS AND DEPTH CONTROL...
- Page 18 Valve A-A The hoses for the wheel hydraulics control circuit are marked with red. Valve B-B The hoses for the depth control circuit are marked with blue.
- Page 19 The working depth is controlled hydraulically: • Check that the hoses are properly connected (+/–). Connect the hoses marked with the same colour to the same tractor valve. • Fully retract the cylinder piston rods of the wheel hydraulics with the wheel circuit valve A–.
- Page 20 Working depth indicator TIGER seedbed cultivators are equipped with a working depth indicator which indicates the depth in centimetres. Adjust the indicator as described below. The indicator is set to 0 at the factory, indicating the position in which the tines and wheels are at the same level.
- Page 21 Use of the rear equipment The tractor must be shut down and the parking brake must be applied when adjusting the rear equipment. The position of the following harrow can be adjusted at points E and F. On clay soil, the following harrow most effectively turns fine soil to the right sowing depth if the tines are nearly perpendicular to the ground and...
- Page 22 Troubleshooting/FAQ Hydraulic control is not working: • Check that there is no pressure in the hoses before connecting them to the tractor. • Check that the hoses are connected to the tractor. • Check that the hoses are connected to the correct connectors in pairs.
- Page 23 4. HARROWING a. General b. Driving lines...
-
Page 24: Harrowing
4. HARROWING General The S-tine cultivators are intended for producing a level seedbed. Normal working depth for cereals is 0–6 cm. Because the seedbed cultivator is adjusted at the factory on a level surface, more accurate adjustments must be made on the field (the soil type, sinking of the tractor wheels and other factors have an influence on the settings). - Page 25 5. MAINTENANCE • Key values • Instructions • Lubrication points • Tine • Bogie beam • Wheel hub • Hydraulics...
-
Page 26: Maintenance
5. MAINTENANCE Observe the safety guidelines specified in Section 2 when performing maintenance. - Shut down the tractor before performing any maintenance procedures. - Support the cultivator with jack stands when performing maintenance. - Do not stay on the cultivator. Key values Tyre pressures: 200/60-14.5... - Page 27 Winter storage: • If the cultivator is to be stored for a longer period of time, clean and lubricate it thoroughly. If a high-pressure washer is used for cleaning, do not aim the water jet directly to the cylinders, bearings and stickers. •...
- Page 28 Lubrication points...
- Page 29 Tine Replacing a tine A tine must be replaced if it is broken. Open the tine mounting bolt and remove the old tine. Leave the bolt in the tine clamp and insert the new tine into the clamp. Pull the tine backwards so that the bolt contacts the tine axle. Tighten the nut to 110 Nm.
- Page 30 Bogie beam Checking the bogie beam bearing • Check the clearance of the bogie beam bearing before lubrication. • Extend the cultivator on a level surface. • Lower the cultivator on its tines so that the wheels lift off the ground. Push the rear wheel so that the front wheel is off the ground.
- Page 31 Wheel hub • Check the bearing clearance before lubricating the hubs. • Extend the cultivator. • Lower the cultivator on its tines so that the wheels lift off the ground. • Hold the wheel firmly and feel for play: the wheel must rotate easily without perceptible play in the bearing.
- Page 32 Hydraulics The working depth of TIGER seedbed cultivators is controlled hydraulically. The cylinders for frontboard hydraulics and wheel transport hydraulics are connected in series, ensuring that all functions controlled by these cylinders take place accurately...
- Page 33 at the same rate. Change valve The change valve assemblies control the hydraulics for the frontboard and wing sections. Their purpose is to distribute the pressure of the same hydraulic outlet to the frontboard cylinders or wing section lift cylinders depending on the position of the cultivator (work or transport position).
- Page 34 Disassembling the valve Open the bolts of the lever assembly and remove the levers. • Open the body bolts. • When disassembling the valve, pay attention to the markings • in the valve stem! Mark the oil channel directions on the valve stem to the valve •...
- Page 35 6. WARRANTY...
-
Page 36: Warranty
6. WARRANTY We offer a one operating season warranty for Kverneland Tiger seedbed cultivators. Terms of warranty: 1. The manufacturer shall, free of charge, replace any parts that fail due to manufacturing defects or substandard materials during the warranty period. - Page 37 7. EC Declaration of Conformity...
-
Page 38: Ec Declaration Of Conformity
FI-38360 KIIKOINEN FINLAND We thus assure that the following machines: Kverneland Tiger 500, 600 700 and 800 harrows starting from serial number 000 04 03 07 K 2 02 1849 meet the machine structure requirements provided in machine directive 2006/42/EY.
Need help?
Do you have a question about the TIGER 800 and is the answer not in the manual?
Questions and answers