Table of Contents
Advertisement
Advertisement
Table of Contents

Related Manuals for THOR TRG3001


Summary of Contents for THOR TRG3001
- Page 1 COOK LIKE...
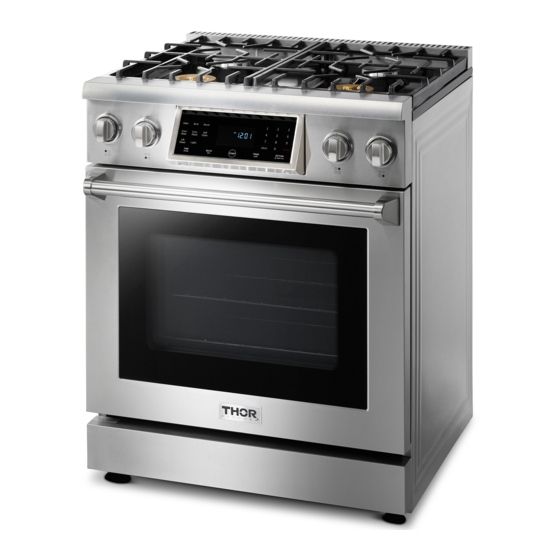
- Page 2 USE AND CARE MANUAL PROFESSIONA L GAS RA NGETOPS TRG MODELS TRG3001 TRG3601...
-
Page 3: Table Of Contents
TABLE OF CONTENTS Warnings ..............................2 Welcome ............................... 2 Before you start ............................2 Safety and Warnings ............................ 3 Safety Symbols ............................. 3 Electrical Shock Hazard ..........................3 Tipping Hazard .............................. 3 Explosion Hazard ............................3 Fire Hazard ..............................4 Poisoning Hazard ............................ - Page 4 Replacing the oven light ..........................25 Replacing the burner parts ........................25 Warranty ..............................25 Warranties and Duration ..........................25 Thor Group will pay for ..........................25 Thor Group will not pay for ........................25 Warranty and Product Registration ......................26...
-
Page 5: Warnings
WARNINGS These are the most critical warnings summarized below WARNING If the information in these instructions is not followed exactly, a fire or explosion may result causing property damage, personal injury or death. - Do not store or use gasoline or other flammable vapors and liquids in the vicinity of this or any other appliance. -
Page 6: Welcome
WELCOME Thank you for purchasing your indoor range. We appreciate your business and we recommend that you read this entire User’s Manual before operating your new appliance for the first time. This manual contains instructions on how to properly install and set up your new range, as well as insights into the unique features that our product offers. -
Page 7: Safety And Warnings
SAFETY AND WARNINGS SAFETY SYMBOLS SYMBOL DEFINITION WARNING CAUTION CAUTION IMPORTANT ELECTRICAL SHOCK HAZARD Before removing a faulty oven light bulb, make sure you turn OFF the power to the range at the main fuse or circuit breaker panel. If you don’t know how to do this, contact an electrician. -
Page 8: Tipping Hazard
SAFETY AND WARNINGS TIPPING HAZARD All ranges can tip and cause injuries to adults and children. To prevent tipping, install the anti-tip device supplied with your range. Follow all installation instructions. Even after the safety device is installed, do not step, lean or sit on the oven door or place any heavy objects on it. -
Page 9: Fire Hazard
SAFETY AND WARNINGS FIRE HAZARD Never use your appliance as a space heater. Persons could be injured or a fire could start. Keep the area around the appliance free from combustible materials (e.g. wall coverings, curtains, drapes), gasoline and other flammable vapors and liquids. Clean the stove and burners regularly. -
Page 10: Hot Surface Hazard
SAFETY AND WARNINGS HOT SURFACE HAZARD Accessible parts may become hot during use. Do not touch burners, areas near burners, the grill, griddle, grease drip- pans, heating elements or interior surfaces of oven. These may be hot enough to cause burns even though they are dark in color. - Page 11 SAFETY AND WARNINGS Don’t wear lose clothing that could catch fire Loose-fitting or hanging garments should never be worn while using the appliance. Do not repair or replace parts yourself (unless recommended) Do not repair or replace any part of the appliance unless specifically recommended in the manual. All other servicing should be referred to a qualified technician.
-
Page 12: Self-Cleaning Oven Safety Instructions
SAFETY AND WARNINGS Always disconnect power to appliance before any type of servicing. Do not use abrasive or caustic cleaners or detergents on this appliance. They may cause permanent damage to the surface. When cooking, set the burner controls so that the flame heats only the bottom of the utensil and does not overlap at the sides of the utensil. -
Page 13: Gas Supply Requirements
GAS SUPPLY REQUIREMENTS Installation of this range must conform with local codes, or in the absence of local codes, with national Fuel Gas Code ANSIZ223.1 / NFPA 54. In Canada, installation must conform to the current natural Gas Installation /code, CAN 1-1.1-M81 and with local codes where applicable. -
Page 14: Dimensions And Clearances
DIMENSIONS AND CLEARANCE The range may be installed flush to the rear wall. You may install a non-combustible material, such as tile, on the rear wall above the range and up the vent hood. It is not necessary to install non-combustible materials behind the range below the counter top height. -
Page 15: Top Hood And Cabinet Specifications
DIMENSIONS AND CLEARANCE Top hood and cabinet specifications... -
Page 16: Anti-Tip Device Installation
ANTI-TIP DEVICE INSTALLATION Anti-tip device installation - wall mount... -
Page 17: Electric Power Supply Requirements
ELECTRIC POWER SUPPLY REQUIREMENTS Your range must be electrically grounded in accordance with local codes or, in the absence of local codes, in accordance with the National Electrical Code (ANSI/NFPA 70, latest edition). In Canada, electrical grounding must be in accordance with the current CSA C22.1 Canadian Electrical Code Part 1 and/or local codes. - Page 18 ELECTRIC POWER SUPPLY REQUIREMENTS...
-
Page 19: Install Oven Knobs
ELECTRIC POWER SUPPLY REQUIREMENTS WARNING This indoor gas cooking appliance is equipped with a three-prong (grounding) plug for your protection against shock hazard and should be plugged directly into a properly grounded threepronged receptacle. Where a standard two-prong wall receptacle is encountered, it is the responsibility and obligationof the customer to have it replaced with a properly grounded three-prong wall receptacle. -
Page 20: Install Oven Handle
ELECTRIC POWER SUPPLY REQUIREMENTS INSTALL OVEN HANDLE 1. Your Thor range might have a KD handle that needs to be installed. Please Follow up the following procedures for the oven door handle installation 2. Check if the oven door handle is level and stable. -
Page 21: Install Rubber Pad On Back Panel
ELECTRIC POWER SUPPLY REQUIREMENTS INSTALL RUBBER PAD ON BACK PANEL To Prevent the range too close to the wall, there are 2 plastic pads offered with the user's manual, please find the accessories and follow the below steps: 1. check the installation kit packed with manual. 2. -
Page 22: Connect Range To Gas Supply
CONNECT RANGE TO GAS SUPPLY CONNECT RANGE TO GAS SUPPLY Most localities will require that the stove shutoff valve and gas connections be installed by a certified technician or plumber. These instructions are for a professional. Gas installation specifications and reg- ulations may vary so please consult your local codes before proceeding. -
Page 23: First Use
FIRST USE CONDITIONING THE OVEN Conditioning will burn off any manufacturing residues and ensure that you get the best results right from the start. Follow these steps to condition your new stove’s oven: 1. Insert all the shelves. See ‘Positioning the shelves’ for instructions. 2. -
Page 24: Cook Top Safety Guideline
COOKTOP SAFETY GUIDELINES There are dual burners have the same low turn-down setting (SIM) for gentle simmering (620 BTU/hr.). Use the SIM setting for melting chocolate and butter, cooking rice and delicate sauces, simmering soups and stews, and keeping cooked food hot. Never leave the cooktop unattended when in use. -
Page 25: Flame Size
COOKTOP SAFETY GUIDELINES FLAME SIZE Warning: Top burner flame size should be adjusted so it does not extend beyond the edge of the cooking utensil. This instruction is based on safety considerations. When you select the flame size, watch the flame when you turn the knob. Any flame larger than the bottom of the cookware is wasted.The flame should be steady and blue in color. - Page 26 COOKTOP SAFETY GUIDELINES THE OVEN CONTROL PANEL...
-
Page 27: Oven Cooking Guidelines
OVEN COOKING GUIDELINES SETTING THE CLOCK The Clock must be set to the correct time of day for the automatic oven timing functions to work properly. · The time of day cannot be changed during timed cooking,delay-timed cooking, or a self-cleaning cycle. -
Page 28: Time Cooking
OVEN COOKING GUIDELINES TIME COOKING In Timed Cooking mode, the oven turns on immediately and COOKS for the length of time you select. At the end of the cooking time, the oven turns off automatically. √ You can use the Timed Cooking only with another cooking operation (Convection Bake, Convection Roast, Bake). -
Page 29: Turning The Light On And Off
OVEN COOKING GUIDELINES TURNING THE LIGHT ON AND OFF · The oven light turns on and door light turns off automatically when the door is opened. · The oven light turns off automatically when the door is closed. You can turn the oven and door light on and off manually by touching the Light. - Page 30 OVEN COOKING GUIDELINES Rack and Pan placement Centering baking pans in the oven as much as possible will produce better results. If baking with more than one pan, place the pans so each has at least 1 to 1 ½ of air space around It.
-
Page 31: Baking
OVEN COOKING GUIDELINES BAKING The oven can be programmed to bake at any temperature from 150 °F to 550°F.Baking temperature and time will vary depending on the ingredients and the size and shape or the baking pan used. Dark or nonstick coatings may cook faster with more browning. How to set the oven for baking a. -
Page 32: Convection Roasting
OVEN COOKING GUIDELINES Tips for convection baking The amount of time you save will vary depending on the amount and type of food you are cooking. When baking cookies or biscuit, you should use pans with no sides or very lows sides to allow the heated air to circulate around the food. -
Page 33: Broiling
OVEN COOKING GUIDELINES BROILING Broiling is a method of cooking tender cuts of meat by direct heat under the broil element of the oven. The high heat cooks quickly and gives a rich, brown outer appearance. Broil mode is best for meats, fish, and poultry up to 1"... -
Page 34: Using Keep Warm
OVEN COOKING GUIDELINES USING KEEP WARM Keep Warm will keep cooked food warm for serving up to 3 hours after cooking has finished. After 3 hours, the feature will shut off automatically. You can use the Keep Warm feature without any other cooking operations or you can set it to activate after a timed or delay timed cooking operation. -
Page 35: Temp Adjust
OVEN COOKING GUIDELINES · Do not to attempt to activate any other program feature except BAKE while the Sabbath feature is active. ONLY the following key pads will function correctly with the Sabbath feature on: NUMBER, BAKE, START and Cancel. All other keypads should not be used once the Sabbath feature is activated. ·... -
Page 36: Time Of Day (12Hr/24Hr)
OVEN COOKING GUIDELINES TIME OF DAY (12HR/24HR) The oven control can be programmed to display time of day in the 12 hour or 24 hour mode. The oven has been preset at the factory to display in the 12 hour mode. How to change between the 12 and 24 hour time of day display ·... -
Page 37: Self-Cleaning
OVEN COOKING GUIDELINES How to unlock the controls a. Press SETTING/LOC(Hold 3 sec) for 3 seconds. Loc and the lock icon will disappear from the display. SELF-CLEANING This self-cleaning oven uses high temperatures (well above cooking temperatures) to burn off leftover grease and residue completely or reduce them to a finely powdered ash that you can wipe away with a damp cloth. - Page 38 OVEN COOKING GUIDELINES How to unlock the controls a. Press SETTING/LOC(Hold 3 sec) for 3 seconds. Loc and the lock icon will disappear from the display. SELF-CLEANING This self-cleaning oven uses high temperatures (well above cooking temperatures) to burn off leftover grease and residue completely or reduce them to a finely powdered ash that you can wipe away with a damp cloth.
- Page 39 OVEN COOKING GUIDELINES How to run a self-cleaning cycle a. Select the length of time for the self-cleaning operation, eg. 3 hours. Touch Self Clean 2/3/5h once for a 3 hour clean time, twice for a 5 hour clean time, or 3 times for a 2 hour clean time.The default setting is 3 hours.
-
Page 40: Care And Cleaning Of The Oven
OVEN COOKING GUIDELINES CARE AND CLEANING OF THE OVEN WARNING Be sure all controls are 0FF and all surfaces are COOL before cleaning any part of the range. If your range is moved for cleaning, servicing, or any reason, be sure the Anti-Tip device is re-engaged properly when the range is replaced. - Page 41 OVEN COOKING GUIDELINES Cleaning painted parts and decorative trim · For general cleaning, use a cloth with hot, soapy water. · For more difficult residue and built-up grease, apply a liquid detergent directly onto the area and leave for 30 to 60 minutes. Wipe with a damp cloth and dry.Do not use abrasive cleaners on any oven surface. They can be scratched.
-
Page 42: Cleaning Burner Caps And Brass Flame Spreaders
OVEN COOKING GUIDELINES Cleaning burner caps and flame spreaders a. Check that the burner is turned OFF and allow it to cool. Lift off the burner cap and brass flame spreader. Wash them in hot soapy water, rinse, and dry. b. -
Page 43: Cleaning Porcelain Surfaces
OVEN COOKING GUIDELINES Cleaning porcelain surfaces Clean oven interior and inner door liners with a solution of mild detergents and hot water. Rinse and dry with a soft, lint-free cloth. Do not use abrasives or commercial oven cleaners. Cleaning the oven glass window Clean all glass surfaces with a solution of mild detergent and hot water. -
Page 44: Troubleshooting Guide
TROUBLESHOOTING GUIDE If you can’t find an answer to your problem in the chart below, or if the problem cannot be fixed, you will need technical help. Contact your Authorized Service Center or Customer Care. COOK TOP... -
Page 45: Oven
TROUBLESHOOTING GUIDE OVEN... - Page 46 TROUBLESHOOTING GUIDE...
- Page 47 TROUBLESHOOTING GUIDE...
-
Page 48: Information Code
TROUBLESHOOTING GUIDE INFORMATION CODE... -
Page 49: Removing The Oven Door
TROUBLESHOOTING GUIDE REMOVING THE OVEN DOOR CAUTION Remark: a. When E5, E6, E7 appears, you can press Cancel to cancel. b. E9 is the power supply frequency monitoring: the power supply frequency range is between (38Hz~75Hz), each monitoring time is 5 minutes, if the frequency continuously exceeds the range within 5 minutes, it is a fault;... -
Page 50: Replacing The Oven Door
TROUBLESHOOTING GUIDE · Locate the oven door hinge locks in both corners of the oven door, and then rotate the hinge locks toward the oven door to the unlocked position. If the door hinge lock is not rotated fully (see illustration B on the left for an example of full rotation), you will not be able to remove the door properly. -
Page 51: Removing And Replacing The Storage Drawer
TROUBLESHOOTING GUIDE REMOVING AND REPLACING THE STORAGE DRAWER The storage drawer is a good place to store cookware and bakeware. Do not store plastics or flammable material in the drawer. Clean the storage drawer with a damp cloth or sponge. Never use harsh abrasives or scouring pads. How to remove the storage drawer a. -
Page 52: Replacing The Oven Light
TROUBLESHOOTING GUIDE Replacing the oven light a. Make sure the oven and the bulb are cool. b. Unplug the range or disconnect the power. c. Turn the glass bulb cover in the back of the oven counterclockwise to remove. d. Turn the bulb counterclockwise to remove it from its socket. e. -
Page 53: Warranty
WARRANTY This product has been manufactured by Thor Group, 4651 E Airport Drive, Ontario, CA 91761. Thor Group disclaims all express warranties except for the following: This warranty applies to products purchased and located in the United States. Products purchased or located outside this area are excluded. - Page 54 · Damages caused by: services performed by unauthorized service companies; use of parts other than genuine Thor parts or parts obtained from persons other than authorized service companies; or external causes such as abuse, misuse, inadequate power supply, accidents, fires, or acts of God;...
-
Page 55: Warranty And Product Registration
Thor Kitchen sell your name or any of the information your provide to us. We are very grateful that you have chosen THOR Kitchen products for your home. Warranty and product registration 26... - Page 56 WELCOME TO THE CLUB You chose THOR Kitchen to enhance your culinary journey and we’re stoked to have you in the club. Think of it as a secret society of really savvy people, such as yourself, choosing professional power and performance at an affordable price.
Need help?
Do you have a question about the TRG3001 and is the answer not in the manual?
Questions and answers