Table of Contents
Advertisement
Advertisement
Table of Contents

Related Manuals for Westinghouse WVG615SC


Summary of Contents for Westinghouse WVG615SC
- Page 1 USER MANUAL GAS BUILT-IN OVENS WVG613SC/WC, WVG615SC WVG655SC, WVG665SC/WC...
-
Page 2: Table Of Contents
Products must be used, installed and operated in accordance with this manual. You may not be able to claim on the Westinghouse manufacturer’s warranty in the event that your product fault is due to failure to adhere this manual. -
Page 3: Important Safety Instructions
IMPORTANT SAFETY INSTRUCTIONS • Always keep the appliance clean. Ensure fats and oils Please read the user manual carefully and store in a handy do not accumulate around elements, burners or fans. place for later reference. • Care must be taken when wiping exposed stainless steel edges.…they can be sharp! TIPS &... - Page 4 IMPORTANT SAFETY INSTRUCTIONS WARNING CAUTION Read the following carefully to avoid damage to the appliance. • The grill door must be left fully open whilst grilling in a separate grill wall oven and a separate grill underbench oven. • The grill tray must be fully inserted whilst grilling. •...
-
Page 5: Installing Your Appliance
INSTALLING YOUR APPLIANCE • This appliance must be mounted on a flat surface for the full width and depth of the product. WARNING WARNING To avoid any potential hazard, you must follow our • To avoid overheating, the appliance must not instructions when you install your appliance. - Page 6 INSTALLING YOUR APPLIANCE (CONTINUED) Levelling oven Place a level in the oven as below making sure the level sits on the front and rear forms. ✓ Underbench ovens Your underbench oven looks best when the control panel is directly under the benchtop. An upper infill panel may have to be added if the cooktop placed above the benchtop is too deep.
- Page 7 Separate grill underbench ovens NOTE TO INSTALLER: For separate grill underbench installations where a cooktop is installed directly above the appliance, a minimum clearance distance of 10mm must be allowed for between the bottom of the cooktop and the top of the separate grill underbench oven. 1.7m flexible gas hose (supplied unfitted) 1.5m electrical...
- Page 8 INSTALLING YOUR APPLIANCE (CONTINUED) Separate grill wall oven use black installation screws supplied mounting holes use black installation screws with plastic spacers provided Recommended 650mm min. carry handle 8 min. clearance 1.7m flexible gas hose (supplied unfitted) 1.5m electrical service cord D Gas connection - 150mm from right hand side GAS TYPE...
- Page 9 Recommended cabinet design NOTE: Powerpoint connection must be accessible with the appliance installed. Front View Area for mounting of powerpoint. Supporting shelf 8mm below door line to give perfect alignment of cooker & cupboard (kick panel notched to suit). 720mm Module(s) Bench Top Cleat (2) Infill Panel (2)
-
Page 10: Gas Installation Information
GAS INSTALLATION INFORMATION Gas Connection Connecting flexible hose Before commencing installation, check to ensure the type • Place a spanner on the flats provided on the gas inlet of gas to which the appliance is intended to be connected to brace the inlet against the action of wrenching matches the gas type given on the appliance data plate. - Page 11 Operating Pressures Check the manometer zero point is correct. Connect the manometer to the cooker pressure Supply and operating pressures for various gases and test point. This is located on the regulator or LPG corresponding injector sizes for each burner. inlet fitting.
-
Page 12: Product Description
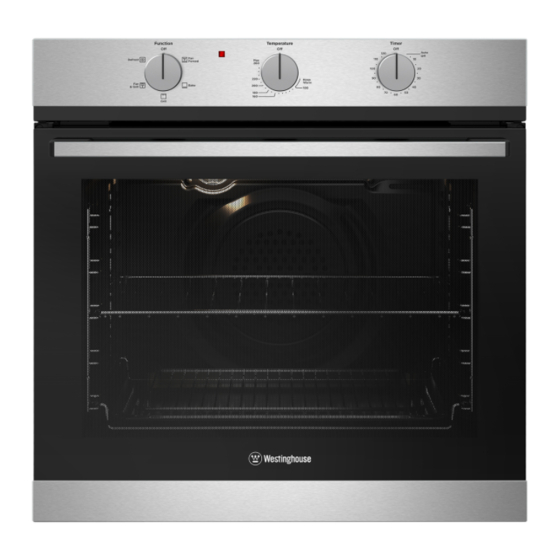
PRODUCT DESCRIPTION WVG613 WVG615 WVG655 & WVG665 Oven indicator light Function selector Oven/grill temperature selector ‘Auto-off’ timer Function indicator light Electronic Clock Oven temperature selector Grill indicator light Grill temperature selector PRODUCT DESCRIPTION... -
Page 13: Before Using Your Appliance For The First Time
BEFORE FIRST USE Setting the time WARNING CAUTION If you have purchased a model fitted with an electronic • Do not line the oven with foil as it will damage clock, you must set the time of day before you can the enamel. -
Page 14: Installing Oven Accessories
INSTALLING YOUR OVEN ACCESSORIES Installing your oven accessories Shelves Side racks The shelves are designed so that they have maximum extension but cannot be accidentally pulled right out. The side racks attached to each side of your oven. To fit a shelf to side racks: There is a left hand and right hand version (see image below for details). - Page 15 Shelves and trays (WVG655 only) To insert the grill tray in a separate drill underbench product, open the grill door and fully extend the grill drawer. Postion the grill tray so that the slots on the outer edges fit over the tabs on the slides. WVG655...
-
Page 16: Using Your Oven
USING YOUR OVEN Grill Understanding your oven functions Refer to grilling guide for more information. Your oven will have a selection of the following functions. Refer to “Description of your appliance” to confirm what functions are available to you. Grill (grill in oven models only) Oven Refer to cooking guide for more information. - Page 17 Operating your oven temperature selector TIPS & INFORMATION IMPORTANT A thermostat controls the temperature in your appliance. The temperature can be selected within the specified Cooling/Venting fan range. To set the temperature, turn the temperature selector in a clockwise direction to the desired setting. Your built-in appliance is fitted with a cooling fan.
- Page 18 USING YOUR OVEN (CONTINUED) Cooking with your timer Setting the time of day (after electrical connection) After the appliance has been electrically connected, “12.00” will be displayed and the indicator WARNING CAUTION symbol will flash. Set the timer clockwise. Do not force anticlockwise or To set the time of day, press the symbols damage to the timer will result.
- Page 19 Setting the cooking end time Select the desired oven Press until the indicator symbol begins flashing. Enter the time of day to finish cooking by pressing symbols while the indicator symbol is flashing. After 5 seconds from the last change, the indicator symbol will stop flashing and the current time of day will be displayed.
- Page 20 USING YOUR OVEN (CONTINUED) Electronic burner control Recognising a safety shut-down condition Your gas oven is fitted with an electronic controller which During normal cooking the thermostat indicator light manages the operation of the burner and monitors the is on when the burner flame is igniting or on, and the flame.
- Page 21 Oven shelves Roasting meat • Place the meat in the oven and set the temperature between 180°C and 200°C. (It is recommended to TIPS & INFORMATION IMPORTANT wrap your meats in an oven roasting bag or foil to • Select the correct shelf location for food being cooked. prevent fats and oils from splattering, making it easier to clean your oven.) •...
-
Page 22: Cooking Guide
COOKING GUIDE Choosing the best oven settings The following table is intended as a guide and experience may show some variation in cooking times necessary to meet individual requirements. It may be necessary to change some cooking times and temperatures from your previous oven. -
Page 23: Grilling Guide
GRILLING GUIDE Grilling hints Do not place aluminium foil under the food as this prevents fats and oils from draining away, which could result in a fire. WARNING WARNING Baste the food during cooking with butter, olive oil Always clean the grill/oven dish after every use. Excessive or marinade. -
Page 24: Dealing With Cooking Problems
DEALING WITH COOKING PROBLEMS PROBLEM CAUSES REMEDY Uneven cooking Incorrect shelf position Select shelf that places food in the centre of the oven Baked products too brown on top Experiment with other trays or dishes Trays not centralised Centre trays Air flow in oven uneven Rotate food during cooking Grill dish affecting thermostat... -
Page 25: Getting To Know Your Oven
GETTING TO KNOW THE OVEN Get to know the oven with this ‘Simple Test Cake’ Although we strive for a perfect performing oven, it’s possible that there will be some variation in colour when baking. Therefore, we suggest this simple, easy and delicious to make Simple Test Cake, it can help you understand your new oven. -
Page 26: Cleaning Your Appliance
CLEANING YOUR APPLIANCE WARNING WARNING WARNING WARNING • Ensure the oven is electrically isolated before • The door glass on this appliance is made from a cleaning. This can be done by switching off tough, durable material that withstands heating and the appliance via the powerpoint or isolating switch cooling without breaking. - Page 27 Cleaning your oven accessories Removing the side racks Grasp the middle wire at the front. Removing the trays and shelves from your appliance Pull firmly inwards while pushing back. • Slide the dish and shelves towards you until they reach the front stop. •...
-
Page 28: Cleaning The Oven Door
CLEANING YOUR APPLIANCE (CONTINUED) Removing and replacing the oven light Removing the oven door WARNING WARNING TIPS & INFORMATION IMPORTANT Make sure the appliance is turned off before you remove Your oven is equipped with a door that can be or replace parts, to avoid the possibility of electric shock. - Page 29 Removing oven door top trim Cleaning the door glass panels • Take hold of the grid embossed sections of the door WARNING trim at each end and press inwards to release the CAUTION clips. Remove the door trim by pulling it towards you. Do not to use harsh abrasives on the glass panes as the reflective surface plays a role in the function of the oven.
- Page 30 CLEANING YOUR APPLIANCE (CONTINUED) Re-assembling the door glass panels Re-assembling the top door trim Insert the smaller clear glass panel (when fitted) first Take hold of the top door trim at each side and from above and at an angle to the profile of the door. position it to the inside edge of the glass.
- Page 31 Fitting the oven door Take hold of the oven door with a hand on each side and with the door at an angle of 45º, position the recesses at the bottom of the door onto the hinge arms of the oven. Let the door slide down the hinge arms as far as it will go.
-
Page 32: Troubleshooting
TROUBLESHOOTING Faults PROBLEM POSSIBLE CAUSE If there is a problem with the oven and/or Oven or grill • Time of day not set. grill, please: not working • Power not turned on. • Check the points listed below before calling •... - Page 33 NOTES NOTES...
- Page 34 NOTES NOTES...
-
Page 35: Warranty
(c) ‘ASC’ means Electrolux’s authorised serviced centres; the Appliance; (d) ‘Westinghouse’ is the brand controlled by Electrolux Home Products In addition, Electrolux is not liable under this warranty if: Pty Ltd of 163 O’Riordan Street, Mascot NSW 2020, ABN 51 004... - Page 36 NEW ZEALAND phone: 0800 10 66 10 email: customercare@electrolux.co.nz web: westinghouse.co.nz and WESTINGHOUSE are trademarks of Westinghouse Electric Corporation. Used under license. All Rights Reserved. P/NO: A18930701 Rev A © 2020 Electrolux Home Products Pty Ltd. ABN 51 004 762 341...
Need help?
Do you have a question about the WVG615SC and is the answer not in the manual?
Questions and answers