Troy-Bilt Bronco 634F Operator's Manual
Rear-tine tiller
Hide thumbs
Also See for Bronco 634F:
- Operator's manual (33 pages) ,
- Operator's manual (33 pages) ,
- Operator's manual (32 pages)
Advertisement
Quick Links
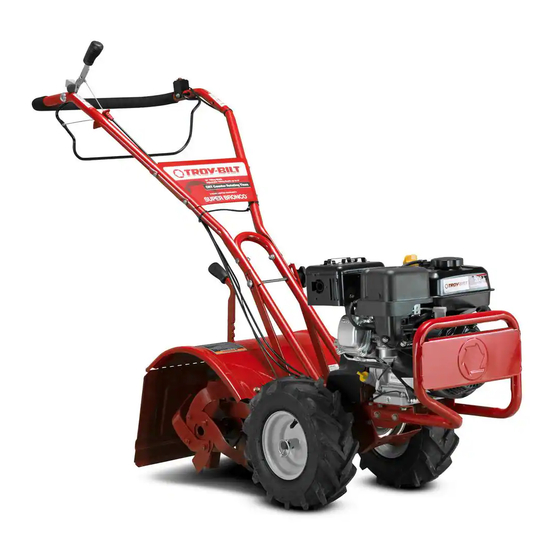
Model 634B Shown
IMPORTANT: READ SAFETY RULES AND INSTRUCTIONS CAREFULLY
WARNING:
This unit is equipped with an internal combustion engine and should not be used on or near any unimproved forest-
covered, brush-covered or grass-covered land unless the engine's exhaust system is equipped with a spark arrester meeting applicable
local or state laws (if any). If a spark arrester is used, it should be maintained in effective working order by the operator. In the State of
California the above is required by law (Section 4442 of the California Public Resources Code). Other states may have similar laws.
Federal laws apply on federal lands. A spark arrester for the muffler is available through your nearest engine authorized service dealer or
contact the service department, P.O. Box 361131 Cleveland, Ohio 44136-0019.
TROY-BILT LLC, P.O. BOX 361131 CLEVELAND, OHIO 44136-0019
PRINTED IN U.S.A.
Operator's Manual
Rear-tine Tiller Models
630C — Tuffy
634F — Bronco
634B — Super Bronco
®
TM
770-10594C.fm
FORM NO.
11/25/02
TM
Advertisement

Related Manuals for Troy-Bilt Bronco 634F


Summary of Contents for Troy-Bilt Bronco 634F
- Page 1 Federal laws apply on federal lands. A spark arrester for the muffler is available through your nearest engine authorized service dealer or contact the service department, P.O. Box 361131 Cleveland, Ohio 44136-0019. TROY-BILT LLC, P.O. BOX 361131 CLEVELAND, OHIO 44136-0019 770-10594C.fm FORM NO.
-
Page 2: Table Of Contents
Copy the model number here: Copy the serial number here: TROY-BILT LLC P. O. BOX 3 6 1 1 3 1 www.troybilt.com... -
Page 3: Safety
SECTION 1: SAFETY This machine meets voluntary safety stan- dard B71.8 – 1996, which is sponsored by the Outdoor Power Equipment Institute, Inc., and is published by the American National Standards Institute. Forward Clutch Bail Reverse Clutch Control (Models 634F⁄634B) WARNING Depth Regulator The engine exhaust from this product contains... - Page 4 4. Exercise caution to avoid slipping or fall- If in doubt about the tilling conditions, al- 24. Do not touch engine parts which may ing. ways use the following operating precau- be hot from operation. Let parts cool down tions to assist you in maintaining control sufficiently.
- Page 5 Decals Reverse Clutch Control For your safety and the safety of others, vari- Forward Clutch Bail Operating Instruction ous safety and operational decals are located (Models 634F/634B) on your unit (see Figure 1-2). Keep the decals clean and legible at all times. Starting Stabilization Contact your local service dealer or the factory Message (on engine)
-
Page 6: Assembly
15 days after the unit has been Hex hd. screw, 1/4-20 x 1-1/4" sition the handlebars at approximately delivered. Contact Troy-Bilt LLC if you Hex hd. screw, 5/16-18 x 1-1/2" waist level when the tines are 3"-4" into the need assistance in this matter. - Page 7 Fig. 2-3: Wheel in FREEWHEEL position STEP 4: INSTALL FORWARD CLUTCH CABLE 1. Attach the forward clutch cable bracket (P, Fig. 2-4) to the handlebar support (A) with a 1⁄4"-20 x 1-1⁄4" hex hd. screw (R) and 1⁄4"-20 hex locknut (S). Tighten se- curely.
- Page 8 5. Test the function of the reverse clutch by pulling out and releasing the cable knob. The knob should return to its neutral posi- tion (resting against bracket). If it doesn’t, contact your local dealer or Troy-Bilt LLC for technical assistance. Fig. 2-5: Cable Fig. 2-6: Attach forward...
-
Page 9: Freatures And Controls
STEP 6: CHECK LEVEL OF STEP 7: ADD MOTOR OIL The transmission was filled with gear oil at The tiller is shipped without oil in the en- the factory. However, you should check the gine. gear oil level at this time to make certain it IMPORTANT: Do not start the engine with- is correct. - Page 10 SECTION 3: FEATURES AND CONTROLS WARNING: Before operating your machine, carefully read and understand all safety, controls and operating instructions in this Manual, the separate Engine Forward Clutch Bail Reverse Clutch Control Owner’s Manual, and on the (Models 634F/634B) decals on the machine. Failure to follow these instructions can result in Depth Regulator...
- Page 11 begin tilling at a very shallow depth setting WARNING: Use extreme and gradually increase the tilling depth. caution when reversing or pulling the machine towards WARNING: Do not attempt you. Look behind to avoid to till too deeply too quickly. obstacles.
-
Page 12: Operation
SECTION 4: OPERATION WARNING: 1. Complete the Pre-Start Checklist on Before Reverse Clutch Control this page. operating your machine, (Models 634F/634B) carefully read and understand 2. Put the wheels in the WHEEL DRIVE po- all safety (Section 1), controls sition (see Wheel Drive Pins in Section 3 of (Section 3) and operating this manual). - Page 13 4. For forward motion of the wheels and (b) Swing the handlebar to the left so the tines: right wheel takes a “step” backward. Next (a) Pull Forward Clutch Bail (Fig. 4-1) up swing the handlebar to the right so the left against handlebar.
- Page 14 TILLING TIPS & TECHNIQUES Tilling Depths • Avoid pushing down on the handlebars in an attempt to force the tiller to dig deeper. Doing so takes the weight off the powered wheels, causing them to lose traction. Without the wheels helping to hold the tiller back, the tines will attempt to propel the tiller –...
- Page 15 TILLING TIPS & TECHNIQUES (CON’T) Power Composting WARNING: Power composting simply means tilling under and burying in the soil all manner of organic When power matter such as crop residues, leaves, grass clippings and cover crops. This material will de- composting, do not keep the compose during the non-growing season and add important natural nutrients to the soil.
- Page 16 TILLING TIPS & TECHNIQUES (CON’T) Terrace Gardening (continued) • To create a terrace, start at the top of the slope and work down. Go back and forth across the first row as shown in Fig. 4-10. • Each succeeding lower terrace is started by walking below the terrace you’re pre- paring.
-
Page 17: Maintenance
SECTION 5: MAINTENANCE WARNING: TILLER LUBRICATION If a cover is leaking, check for loose Before screws. If the screws are tight, a new inspecting, cleaning or servicing After every 10 operating hours, oil or gasket or oil seal may be required. the machine, shut off engine, grease the lubrication points shown in wait for all moving parts to come... - Page 18 WARNING: Before inspecting, cleaning or servicing the machine, shut off engine, wait for all moving parts to come to a complete stop, disconnect spark plug wire and move wire away from spark plug. Failure to follow these instructions can result in serious personal injury or property damage.
- Page 19 WARNING: Before inspecting, cleaning or servicing the machine, shut off engine, wait for all moving parts to come to a complete stop, disconnect spark plug wire and move wire away from spark plug. Failure to follow these instructions can result in serious personal injury or property damage.
- Page 20 The procedure requires average sion). If this fails to correct the problem, ing and tighten the outer jam nut (D) mechanical ability and commonly available contact Troy-Bilt LLC or your authorized against the bracket. Prevent the outer jam tools. dealer for service advice.
-
Page 21: Off-Season Storage
WARNING: Before inspecting, cleaning or servicing the machine, shut off engine, wait for all moving parts to come to a complete stop, disconnect spark plug wire and move wire away from spark plug. Failure to follow these instructions can result in serious personal injury or property damage. -
Page 22: Troubleshooting
WARNING: Before inspecting, cleaning or servicing the machine, shut off engine, wait for all moving parts to come to a complete stop, disconnect spark plug wire and move wire away from spark plug. Failure to follow these instructions can result in serious personal injury or property damage. -
Page 23: Parts List
SECTION 6: MODELS 630C, 634F & 634B PARTS LIST (A) For Model 630C (B) For Model 634F (C) For Model 634B PART NO. DESCRIPTION PART NO. DESCRIPTION 1185469 Spirol Pin GW-55015 Drag Bar 710-0597 Hex Hd. Screw, 1/4-20 x 1 GW-55018 Depth Regulator Lever 710-0599... - Page 24 MODELS 630C, 634F & 634B...
- Page 25 MODELS 630C, 634F & 634B PART NO. DESCRIPTION 1916719 Cable Assembly, Reverse Clutch(B) (C) 1916755 Upper Handlebar 1917479 Bail, Forward Clutch 1918745 Cable Assembly, Forward Clutch 710-0599 Screw, Self-Tapping,1/4-20 x 1/2 710-3008 Screw, Hex, 5/16-18 x 3/4 712-3009 Hex Lock Nut, 5/16-18 GW-55042 Handlebar Support GW-55043...
- Page 26 MODELS 630C, 634F & 634B PART NO. DESCRIPTION GW-9517 Snap Ring GW-1714 Bearing, Tapered Roller (with race) GW-50043 Support Washer, Rear 711-04109 Drive Shaft (A) (B) (C) GW-1224-1* Shim, Rear Bearing Cap, .010" thick GW-1224-2* Shim, same as above, except .030" thick GW-1224-3* Shim, same as above, except .005"...
- Page 27 MODELS 630C, 634F & 634B FRONT PART NO. DESCRIPTION GW-9512 Retainer, Snap Ring, “E” Type 1909950 Retainer, Snap Ring GW-1166-1* Shim, 0.062" thick GW-1166-2* Shim, 0.030" thick GW-1166-3* Shim, 0.015" thick GW-1166-4* Shim, 0.010" thick GW-1166-5* Shim, 0.005" thick GW-1086 Bronze Bushing 711-04092 Wheel Shaft (B) (C)
- Page 28 MODELS 630C, 634F & 634B * Included with transmission when purchased as an assembly only. Remove and discard when installing the transmission on tiller. PART NO. DESCRIPTION PART NO. DESCRIPTION GW-9727 Plug, Transmission Oil Fill 721-04031 Oil Seal, Wheel Shaft 710-04049 Hex Hd.
- Page 29 MODELS 630C, 634F & 634B Hold Tines With Blunt End Toward You FRONT LEFT-HAND TINE RIGHT-HAND TINE NOTE: Identify Left and Right sides of tiller by standing in operator position and facing direction of forward travel. WHEEL SHAFT 7, 8 TINE SHAFT (A) For Model 630C †...
- Page 30 MODELS 630C, 634F & 634B REVERSE CLUTCH CABLE 2 (B, C) 37 (A) FORWARD CLUTCH CABLE...
- Page 31 MODELS 630C, 634F & 634B PART NO. DESCRIPTION 1107382 Flat Washer, 5/16 1108841 Key, 3/16" x 1-1/2" (B 1916531 Pulley, Engine Drive (B) (C) GW-55035 Pulley, Engine Drive (A) 1916532 Transmission Pulley (B) (C) GW-55031 Transmission Pulley 1916535 Pulley, Reverse Idler (B) (C) 1916652 Guard, Belts/Pulleys 1916657...
- Page 32 The provisions set forth in this warranty provide the sole and exclusive remedy arising from the sale. Troy-Bilt LLC shall not be liable for any incidental or consequential damage or expense of any kind, including but not limited to cost of equipment rental, loss of profits, or costs of hiring services to perform tasks normally performed by the equipment.
Need help?
Do you have a question about the Bronco 634F and is the answer not in the manual?
Questions and answers