Table of Contents
Advertisement
Advertisement
Chapters
Table of Contents

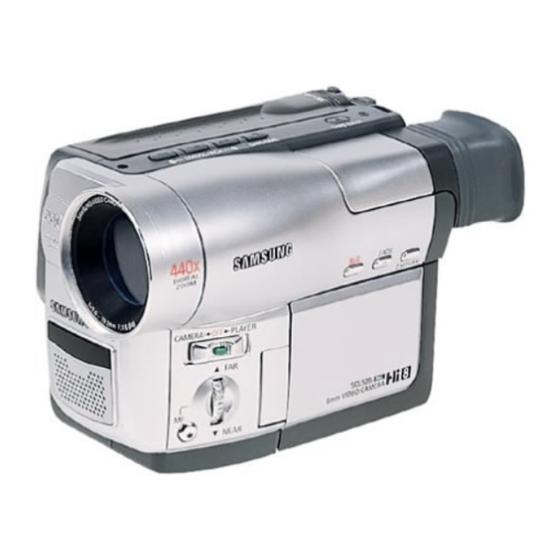
Related Manuals for Samsung SCL520


Summarization of Contents
Precautions
Leakage Current Hot Check
Warning: Perform leakage current hot check using specified tester and system. Do not use isolation transformer.
X-ray Limits
Ensure continued X-ray protection by replacing the picture tube with the same type as the original.
Antenna Cold Check
Perform antenna cold check by connecting a jumper across AC prongs and measuring resistance.
High Voltage Limit
Measure high voltage limits for B+, horizontal deflection, and high voltage circuits.
More Precautions
Design Alteration Warning
Never alter the unit's design; such changes may create hazards or void warranty.
Hot Chassis Warning
Warning for hot chassis units; ensure correct AC plug insertion for safety or use isolation transformer.
Hot Chassis Servicing with Isolation Transformer
Service hot chassis units with isolation transformer if AC voltage between chassis and ground is > 1.0V.
B+ Voltage Interlocks and Heat Sink Installation
Do not defeat B+ interlocks; ensure heat sinks are installed before applying power.
Test Instrument Grounding Procedure
Always connect ground lead first and remove it last when using test instruments.
Lead Dress and Wiring Inspection
Observe lead dress, inspect wiring, check cord for damage, and ensure no hot parts touch leads.
Picture Tube Implosion Warning
Ensure replacement picture tube is identical to the original for implosion protection.
Picture Tube Handling Precautions
Handle picture tubes with goggles; never by the neck. Do not remove attached yokes.
Product Safety Notice for Replacement Parts
Use identical replacement parts for safety; non-conforming parts may cause hazards.
Product Specifications and Comparison Chart
NTSC Model Specifications
Specifications for NTSC models: SCL500, SCL520, SCL530, and SCL550.
PAL Model Specifications
Specifications for PAL models: VP-L500, L520, L530, L530B, and L550.
Model Comparison Chart
Comparison chart for NTSC and PAL models, detailing features and specifications.
Disassembly and Reassembly
Cabinet and PCB Disassembly
Procedure for removing the cabinet and PCB components for disassembly.
Ass'y Cover Housing Removal
Steps to remove the assembly cover housing, including screw removal.
Ass'y Case Top Removal
Procedure for removing the assembly case top, including releasing locking tabs.
Ass'y Front Removal
Steps to remove the front assembly, including screws and connector disconnection.
Ass'y Case Left Removal
Procedure for removing the left case assembly, including screws and knob adjustment.
Ass'y Case Right Removal
Steps to remove the right case assembly, including pulling out the left assembly.
Ass'y LCD Removal
Procedure for removing the LCD assembly, including cover bottom removal.
Ass'y EVF Removal
Steps to remove the EVF assembly, including cover left top removal.
Ass'y Rear Board Removal
Procedure for removing the rear board assembly, including screw removal.
Ass'y Deck and Main PCB Removal
Steps to remove the deck assembly and main PCB, including connector disconnection.
Ass'y Camera Removal
Procedure for removing the camera assembly, including screws and desoldering.
Circuit Boards Location
Diagram showing the location of the main, front, function, and rear circuit boards.
Connector Diagram
Diagram illustrating the connections between various components and PCBs.
Alignment and Adjustment
Mechanism Alignment
Procedure for mechanism alignment, referencing mechanical manual and test points.
Camera Section Adjustment
Procedures for camera section adjustment, including equipment and preparations.
Camera Adjustment Preparations
Lists required equipment and PCB composition for camera adjustment.
Function Keys Usage for Camera Adjustment
Explains the function of each button used as a camera adjustment tool.
Entering Service ADJUST Mode
Steps to enter the service ADJUST mode using specific button combinations.
Focus to Zoom Tracking Adjustment
Procedure for adjusting focus and zoom lens position to maintain focus throughout zoom range.
P. CLK Adjustment
Adjust P.CLK frequency using a frequency counter and specific buttons.
Zoom VR Center Adjustment
Find and store the Zoom VR Center position using camera and specific buttons.
Auto Hall Adjustment
Adjust auto hall settings for iris open/closed states by pressing specific buttons.
Auto IRIS Adjustment
Adjust auto iris control minimum and maximum values using camera and vectorscope.
Auto White Balance Adjustment
Adjust auto white balance for indoor and outdoor conditions using camera and vectorscope.
Pre White Balance (I) Adjustment
Adjust pre white balance to move the white vector to the B-Y axial using camera.
Pre White Balance (II) Adjustment
Adjust pre white balance to move the white vector to the R-Y axial using camera.
R-Y Positive Gain Adjustment
Adjust the red level to a specific IRE value for R-Y positive gain.
R-Y Negative Gain Adjustment
Adjust the cyan level to a specific IRE value for R-Y negative gain.
B-Y Positive Gain Adjustment
Adjust the blue level to a specific IRE value for B-Y positive gain.
B-Y Negative Gain Adjustment
Adjust the yellow level to a specific IRE value for B-Y negative gain.
R-Y Positive Hue Adjustment
Adjust the yellow vector to a specific degree for R-Y positive hue.
R-Y Negative Hue Adjustment
Adjust the blue vector to a specific degree for R-Y negative hue.
B-Y Positive Hue Adjustment
Adjust the cyan vector to a specific degree for B-Y positive hue.
B-Y Negative Hue Adjustment
Adjust the red vector to a specific degree for B-Y negative hue.
CVF Adjustment
Procedures for CVF adjustment, including preparation and mode entry.
CVF Adjustment Preparation
Steps for preparing CVF adjustment, including connecting power and entering service mode.
Remote Control Button Functions for Adjustment
Explains button functions used in service adjustment mode, noting differences from normal control.
CVF Adjustment Mode Table
Table detailing adjustment addresses, modes, and values for NTSC and PAL.
CVF Adjustment Procedures
Detailed steps for adjusting PLL, Brightness, R-Sub Brightness, B-Sub Brightness, and Color.
PLL Adjustment
Procedure for adjusting PLL using a multimeter and EVR.
Brightness Adjustment
Procedure for adjusting brightness level using an oscilloscope and EVR.
R-Sub Brightness Adjustment
Adjust R-OUT level so that pedestal level equals TP-G level for R-Sub brightness.
B-Sub Brightness Adjustment
Adjust pedestal level to be equal to TP-G level for B-Sub brightness.
Color Adjustment
Adjust yellow level to match pedestal line for color adjustment.
Tint Adjustment
Adjust EVR for superimposed dual waveforms (PAL) or equal green/red levels (NTSC).
EVF Adjustment
Procedures for EVF adjustment, including mode entry and button functions.
EVF Adjustment Preparation
Steps to enter EVF adjustment mode by connecting power and pressing buttons.
EVF Adjustment Button Functions
Explains button functions used in EVF adjustment mode, noting differences from normal control.
EVF Adjustment Mode Table
Table detailing adjustment addresses, modes, and values for NTSC and PAL.
EVF Adjustment Procedures
Detailed steps for adjusting PLL, VCOM, Brightness, R-Sub Brightness, B-Sub Brightness, and Color.
PLL Adjustment (EVF)
Procedure for adjusting PLL DC voltage using a voltmeter.
VCOM Adjustment
Procedure for adjusting VCOM DC voltage using a voltmeter.
Brightness Adjustment (EVF)
Adjust brightness level using an oscilloscope and EVR.
LCD Adjustment
Procedures for LCD adjustment, including mode entry and button functions.
LCD Adjustment Preparation
Steps to enter LCD adjustment mode by connecting power and pressing buttons.
LCD Adjustment Remote Button Functions
Explains remote control button functions used in LCD adjustment mode.
LCD Adjustment Mode Table
Table detailing adjustment addresses, modes, and values for NTSC and PAL.
Adjustment Test Point Locations
Diagram showing test points (TP) for VCO, VCOM, and other adjustments.
R-Sub Brightness Adjustment (EVF)
Adjust pedestal level to be equal to TP-G level for R-Sub brightness.
B-Sub Brightness Adjustment (EVF)
Adjust pedestal level to be equal to TP-G level for B-Sub brightness.
Color Adjustment (EVF)
Adjust EVR so yellow level equals pedestal level.
Tint Adjustment (NTSC Only)
Adjust EVR so green level equals red level for NTSC tint.
C-COM Adjustment (PAL Only)
Adjust EVR to minimize red carrier level for PAL C-COM.
VCR Section Adjustment
Details on VCR section adjustments, including video signal connection and recording.
VCR Section Adjustment Equipment
Lists necessary equipment for VCR section adjustment, including monitor TV and oscilloscope.
VCR Section PCB Composition
Identifies the main PCBs involved in VCR section adjustment.
Entering VCR Service ADJUST Mode
Steps to enter VCR adjustment mode using buttons and inserting tape.
Function Button Locations for VCR Adjustment
Diagram showing the location of buttons used for VCR adjustment.
Finishing VCR Adjustment Mode (Battery Reset)
Procedure to finish adjustment mode by performing a battery reset.
VCR Section Adjustments
Details on VCR section adjustments, including video signal connection and recording.
Connecting Video Out Signal
Instructions on connecting the video cable to the A/V Jack.
VCR Recording for Adjustment
Steps to insert a recordable tape and press the START/STOP button for VCR adjustment.
VCR Adjustment Details
Lists various VCR adjustments, including Model Code 0 preparation.
Model Code 0 Adjustments
Preparation and adjustment steps for Model Code 0, covering various parameters.
Model Code 1 Adjustments
Preparation and adjustment steps for Model Code 1, covering specific parameters.
Head Switching Point Adjustment
Performs head switching point adjustment after deck replacement to prevent playback noise.
Y-Emphasis Input Adjustment (Normal)
Sets Y level recorded on tape; maladjustment affects playback picture.
PB OUT Level Adjustment (Normal/Hi8)
Sets A/D input level for normal and Hi8 playback.
Y-Emphasis Input Adjustment (Hi8)
Adjusts Y level for Hi8 playback, ensuring correct signal.
PB Output Level Adjustment (Hi8)
Sets Hi8 playback A/D input level to regulated level using oscilloscope.
VIDEO Out Level Adjustment
Sets video out level to regulated level using oscilloscope.
Y-FM Carrier Adjustment (Normal)
Sets sync tip level of composite video signal to prevent noise.
Y-FM Deviation Adjustment (Normal)
Sets Y-FM modulation level for recording; check waveform in playback.
Y-FM Carrier Adjustment (Hi8)
Sets sync tip level of composite video signal for Hi8.
Y-FM Deviation Adjustment (Hi8)
Sets Y-FM modulation level for Hi8 recording; check waveform in playback.
Band Pass Filter Adjustment
Adjusts band width of 1.5MHz BPF for distortion-free audio playback.
Exploded View and Parts List
Cabinet Assembly (1) - Exploded View
Exploded view of cabinet assembly part 1, showing numbered components.
Cabinet Assembly (2) - Exploded View
Exploded view of cabinet assembly part 2, showing numbered components.
Cabinet Assembly (3) - Exploded View
Exploded view of cabinet assembly part 3, showing numbered components.
Cabinet Assembly (4) - Exploded View
Exploded view of cabinet assembly part 4, showing numbered components.
EVF Exploded View
Exploded view of the EVF assembly, showing numbered components.
Mechanical Parts (1) - Exploded View
Exploded view of mechanical parts (1), showing numbered components.
Mechanical Parts (2) - Exploded View
Exploded view of mechanical parts (2), showing numbered components.
Mechanical Parts (3) - Exploded View
Exploded view of mechanical parts (3), showing numbered components.
Cabinet Assembly (1) - Parts List
Exploded view diagram for Cabinet Assembly (1) with numbered parts.
Cabinet Assembly (2) - Exploded View
Exploded view diagram for Cabinet Assembly (2) with numbered parts.
Cabinet Assembly (3) - Exploded View
Exploded view diagram for Cabinet Assembly (3) with numbered parts.
Cabinet Assembly (4) - Exploded View
Exploded view diagram for Cabinet Assembly (4) with numbered parts.
EVF - Exploded View
Exploded view diagram of the EVF assembly with numbered parts.
Mechanical Parts (1) - Exploded View
Exploded view diagram of mechanical parts (1) with numbered components.
Mechanical Parts (2) - Exploded View
Exploded view diagram of mechanical parts (2) with numbered components.
Mechanical Parts (3) - Exploded View
Exploded view diagram of mechanical parts (3) with numbered components.
Schematic Diagrams
Option List
List of optional features and their availability across different models.
DC/DC Converter (Main) Schematic
Schematic diagram for the DC/DC converter on the main PCB.
System Control/Servo (Main) Schematic
Schematic of system control and servo circuits on the main PCB.
Video (Normal) (Main) Schematic
Schematic of normal video circuits on the main PCB.
Video (Hi8) (Main) Schematic
Schematic of Hi8 video circuits on the main PCB.
Audio (Main) Schematic
Schematic of audio circuits on the main PCB.
Camera (Main) Schematic
Schematic of camera circuits on the main PCB.
Rear PCB Schematic
Schematic diagram of the rear PCB.
CCD PCB Schematic
Schematic diagram of the CCD PCB.
CVF PCB Schematic
Schematic diagram of the CVF PCB.
Front PCB Schematic
Schematic diagram of the front PCB.
Function PCB Schematic
Schematic diagram of the function PCB.
EVF PCB Schematic
Schematic diagram of the EVF PCB.
LCD PCB Schematic
Schematic diagram of the LCD PCB.
Need help?
Do you have a question about the SCL520 and is the answer not in the manual?
Questions and answers