
Related Manuals for ROLY RL-6000U


Summary of Contents for ROLY RL-6000U
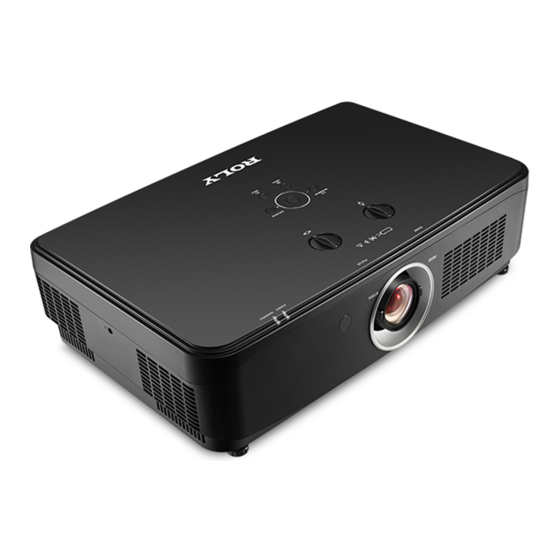
- Page 1 User's Manual Laser Projector RL-600X RL-6500X RL-600W RL-6200W RL-600U RL-6000U Thank you for purchasing this product. Before operating this product, please read this manual carefully and keep it properly for future reference .
-
Page 2: Table Of Contents
Important safety tips TIMER button Precautions for use Part names and functions ASPECT button Terminal panel Top control panel Menu operation Indicators Remote control Auto adjustment Operating range of remote control Placing the projector Adjustable Vertical position feet Phase adjustment Connecting to your computer Image display mode Connecting to an audio device... -
Page 3: Important Safety Tips
Important Safety Tips Important Safety Tips ! WARNING : This device must be grounded. WARNING : To prevent damages that may cause fire or electric shock, do not expose this appliance to rain or moisture. This device cannot be used in the direct vision area of visual display workplace. To avoid interfering reflection in visual display workplaces, it is strictly forbidden to place this device in direct vision area. - Page 4 Important Safety Tips : Do not look directly at the light emitted from the lens while using the projector. Mark on the projector Laser Declaration : This projector complies with the first class of laser products of IEC/EN 60825-1:2014 . Class 1 laser product Precaution :...
- Page 5 Important Safety Tips WARNING : POWER The wall outlet or circuit breakers shall be installed near the device to ensure easy insertion and removal when problems occur. If the following problems occur, cut off the power supply immediately. In these conditions, continued use of the projector will result in fire or electric shock, or will cause visual impairment.
- Page 6 Important Safety Tips Use/Installation Do not place the projector on soft materials such as carpets or sponge mats. Otherwise, it will cause the projector body to overheat, which can cause burns, fire or damage the projector. Do not install the projector in a place that is damp or dusty, or where the projector may be exposed to oil-smoke or steam.
- Page 7 Important Safety Tips Installation work should only be carried out by qualified technicians, such as mounting the projector on the ceiling. If the installation is not properly fixed, it may cause personal injury or electric shock. ACCESSORIES Please use or discard the battery properly and refer to the following instructions. Otherwise, it may cause burns, battery leakage, overheating, explosion or fire.
- Page 8 Important Safety Tips Before replacing the projection lens, be sure to turn off the power and pull the power plug from the wall socket. ● Unexpected projection may cause injury to eyes. ● Replacing the projection lens without pulling the power cord may cause electric shock. Pull the power plug from the wall outlet before cleaning or replacing any components, otherwise it may lead to electric shock.
- Page 9 Important Safety Tips Accessories When not using the projector for a long time, remove the batteries from the remote control. Failure to do so may cause the batteries to leak, overheat, catch fire or explode, which may lead to fire or contamination of the surrounding area.
-
Page 10: Precautions For Use
Precautions for use Lens Protection Material To protect the projection lens from vibration during transportation, the lens protection material has been attached to the product at the time of purchase. Remove the lens protection material before use and store it for future use. Move the lens to its original position and the attach lens protection material when transporting. - Page 11 Precautions for use Focus Adjustment When turning on the projector, the high-transparency projection lens is easily affected by the illumination of the light source, resulting in unstable focus. It is recommended to adjust the lens focus after continuously projecting the image for at least 30 minutes.
- Page 12 Precautions for use Do not stack multiple projectors up and down. Do not use the projector supporting it by the top. Do not block the vents (intake and exhaust) of the projector. Avoid cool and hot air from air conditioning system blowing directly to the vents (intake and exhaust) of the projector.
- Page 13 Precautions for use Please note that these phenomena are not malfunctions. Also, when a still image is projected for a long time, the residual image may remain on the image of the LCD panel, in which case the whole white image will appear for an hour or more.
-
Page 14: Part Names And Functions
Part names and functions Control Panel Lens Shift Dial Intake Vent+Speaker Zoom Ring Focus Ring Front Remote Sensor Status Indicators Exhaust Vent Adjustab le Foot Exhaust Vent Security Bar Intake Vent Security Lock Terminal Panel Power Socket Rear Remote Sensor CAUTION Do not place anything around the vents, as it may cause internal heat... -
Page 15: Terminal Panel
Part names and functions Terminal Panel AUDIO IN Connect the computer audio signal Connect the DVI digital output to this terminal. signal to this terminal. AUDIO OUT RGB OUT Connect an external audio device Connect an external display device. to this terminal. VIDEO IN Connect the video output signal to Connect the network cable. -
Page 16: Top Control Panel
② ① ③ ⑥ ④ ⑤ POWER ① ② ▲▼ AUTO SETUP ③ MENU ④ ⑤ OK ⑥ INPUT... -
Page 17: Indicators
Part names and functions Indicators WARNING indicator POWER indicator Standby The projector is connected to the power supply and in standby mode. (Off )(Red light on ) Power on mode The projector is ready for projection. (Off) (Green light on) Get into Sleep mode after no signal input for Sleep mode a period of time. -
Page 18: Remote Control
Remote Control ⑨ EXIT Button ① ② ③ Return to the upper menu. ECO Button ⑩ Go into ECO mode. ④ ⑤ KEYSTONE Button ⑦ ⑥ Perform keystone correction. ⑧ ⑨ DEFAULT Button ⑩ Go into default mode. DISPLAY Button Display source information. -
Page 19: Operating Range Of Remote Control
Remote Control Operation To ensure safe operation, please observe the following items: Use 2 AAA alkaline batteries. ● Replace both batteries at the same time. ● Do not use a new battery and an old battery at the same time. ●... -
Page 20: Placing The Projector Adjustable
● The approximate values shown in the figure below may differ from the actual sizes. Projection Distance Tables RL-600X (4:3 aspect ratio) RL-6500X Screen size min. -
Page 21: Connecting To Your Computer
Connecting to Your Computer Cables for connection ● DVI-D cable * ● RS232 serial cable * ● HDM I cable* ● USB memory device* (*:This projector is not equipped with this cable. ) RS232 RGB IN HDMI DVI-D serial cable U memory input RJ45 cable When connecting the cable, unplug the power cord of the projector and... -
Page 22: Connecting To An Audio Device
Connecting to an Audio Device Cable for connection ● Audio cable * (*:This projector is not equipped with this cable. ) External audio devices Audio input Video output Audio output Audio output Video input Audio input When connecting the cable, unplug the power cord of the projector and external devices from the power outlet. - Page 23 Video Decoder Support List O refer to support X refer to NOT support File Container Video Decoder Resolution Frame/Sec Extension DivX Divx 3.11 1920x1080 DivX Divx 4.x 1920x1080 DivX Divx 5.1 1920x1080 MPEG 1/2/4 XviD 1920x1080 MPEG 1/2/4 MPEG1 768x576 MPEG 1/2/4 MPEG2 MP@HL 1920x1080...
- Page 24 Audio Decoder Support List O refer to support X refer to NOT support P refer to planning (under development) File Container Audio Decoder (For MM Video) Extension Generic(MTK) wav: PCM / ADPCM / A-law PCM / u-law PCM O(**5) Generic(MTK) MPEG1 Layer1/2 Generic(MTK) MP3 (MPEG1 Layer3)
- Page 25 Image Decoder Support List O refer to support X refer to NOT support SW refer to software decoder P refer to planning (under development) File Audio Decoder Container Extension (For MM Video) baseline O (H/W) *.jpg JPEG progressive O (H/W) *.bmp (Note 1**) O (S/W)
-
Page 26: Connecting The Ac Power Cord
Connecting the AC Power Cord The projector uses an AC power supply with standard voltage of 100-240V, which can automatically adapt to different input voltages. This unit uses single-phase power system with neutral grounding conductor. To avoid the risk of electric shock, do not use any other type of power system. -
Page 27: Turning On The Projector
Turning On the Projector Video device Power outlet Computer Complete the connection of external devices first before turning on the projector. Connect the AC power cord to the AC outlet. The power indicator lights up in red. Press button to turn on the projector. Turn on the connected devices. - Page 28 When projecting a computer image, switch the computer output to external display. Output switching method varies according to computer types. (example) Adjust the focus, size and position of the projected image. Adjust the focus, size and position of the projected image. Focus Size (Zoom) Position (Lens shift)
-
Page 29: Adjusting The Projector Tilt By Shifting
Adjusting the Projector Tilt by Shifting The position of projection image can be adjusted by turning the lens shift dials (horizontal lens shift dial, vertical lens shift dial). Turn the horizontal lens shift dial (for left and right adjustment), vertical lens shift (for up and down adjustment) to adjust the lens shift. Horizontal lens shift dial Vertical lens shift dial When turning the lens shift dials repeatedly, the lens can be shifted back to its original... -
Page 30: How To Operate On-Screen Menu
How to Operate On-screen Menu Remote control You can adjust or set the projector through the on-screen menu. The menu has a multi-player structure, and each main menu is divided into several sub-menus, which are divided into several sub-menus. For the steps of each adjustment and MENU setting, refer to the corresponding section of this manual. -
Page 31: Menu Bar
Menu Bar ① ① SIGNAL menu In VGA signal input, automatic adjustment, image display adjustment, horizontal position, vertical position, phase adjustment and clock rate adjustment are available. ② IMAGE menu Image mode can be selected as standard, cinema, dynamic, DICOM, color matching- red, color matching-green, color matching-yellow, user. -
Page 32: Auto Setup Function
AUTO SETUP Function This function can automatically execute the settings of [AUTO SETUP] in SETUP menu Remote control (including [SOURCE SEARCH], [AUTO PC ADJUST] and [AUTO KEYSTONE]) by pressing the AUTO SETUP button on the remote control or [AUTO SETUP] button on top control panel. -
Page 33: Keystone
Keystone If keystone distortion occurs in projected image, the image can be manually corrected by following steps. Press the KEYSTONE button of the remote control and the “KEYSTONE” box (including: KEYSTONE UP AND DOWN, KEYSTONE LEFT AND RIGHT, CORNERSTONE, RETURN TO DEFAULT SETTINGS) displays. -
Page 34: Volume Adjustment
Volume Adjustment Top control panel Direct operation, it is recommended to use the remote control. Press the SOUND MODE button to +/- point button switch between standard, speech, user, music, etc. Volume Press the +/- button on the top control panel or VOL +/VOL- button on the remote control to adjust the volume. -
Page 35: Remote Control Operation
Remote Control Operation For some common operations, it is Remote control recommended to use the remote control. It can be operated by pressing SOURCE a button without calling out the on- FREEZE BLACK SCREEN screen menu. FREEZE Button Press the FREEZE button on the remote control to freeze the screen image. -
Page 36: Black Screen Button
BLACK SCREEB Button Remote control Press the black screen button on the remote control, the image disappears TIMER and a black screen appears. Press the black button again and the image will return to normal. Each time you press the black screen button, the screen changes BLACK SCREEN as follows:... -
Page 37: Menu Operation
Menu Operation Press the SOURCE button on the remote control to display the SOURCE menu. Press ▲▼ button to select the source icon, then press ► point button or OK button to select VGA source. Remote control SOURCE Direct Operation Press the INPUT button on the top control panel or the SOURCE button on the remote control to select VGA. -
Page 38: Auto Adjustment
Auto Adjustment The [AUTO SETUP] function can automatically adjust the horizontal position, vertical position, phase and clock to match the computer. AUTO PC ADJUST menu Menu Operation Press the SOURCE button on the remote control and press ▲▼ button to select VGA source icon, then press ►... -
Page 39: Phase Adjustment
Phase Adjustment When there is a flickering image or smeared outlines, you can adjust the image to achieve an optimal image. 1) Press button to select [PHASE]. 2) Press <OK> button. 3) Press button to adjust the level. The adjustment range is 0-31. -
Page 40: Image Display Mode
Screen Size Adjustment This projector has an image screen size IMAGE DISPLAY MODE reset function that allows the user to display the desired image size. Press the ASPECT button on the remote control to display the IMAGE DISPLAY MODE menu. Then press ►... -
Page 41: Selecting Video System
Selecting Video System Press the SOURCE button on the remote control to display the SOURCE menu. Press ▲▼ point button to select the source icon, then press ► point button or OK button to select AV input. The projector can automatically detect the input video system and adjust itself to the optimal state. -
Page 42: Setup
Setup The projector has a [SESTUP] menu, and you can set other functions as described below. Press the MENU button on the remote control to display the menu. Press ► button to select select the setting, then press ▼ point button or OK button to enter the sub-menu. - Page 43 HIGH ALTITUDE The projector provides fan control function in [SETUP] menu. Select the running speed of the cooling fan according to the altitude of the projector below. HIGH ALTITUDE 1 ..Faster than [OFF] mode. When using the projector at high altitudes, the fan cooling effect is weakened, please choose this mode.
- Page 44 KEYSTONE KEYSTONE LEFT/RIGHT ..Corrects vertical direction. KEYSTONE UP/DOWN ..Corrects horizontal direction. CORNERSTONE ..Corrects four corners. RESTORE DEFAULT SETTINGS ..Cancel the set values of horizontal, vertical and cornerstone and restore to the initial state. PROJECTION MODE FRONT ..Project to the front projection screen. REAR ..
- Page 45 STARTUP SCREEN The startup screen uses the default as the startup screen. NONE ..No startup screen. DEFAULT ..Display the background color of the screen. SLEEP MODE OFF ..Sleep mode is off. 5 minutes ..When no signal is input, the projector goes into sleep mode in 5 minutes. 10 minutes ..
- Page 46 REMOTE CONTROL LOCK OFF ..The remote control is not locked. ON ..The remote control is locked. AC DIRECT POWER ON ON ..Power on directly when plugged in OFF ..The function that power on directly when plugged in is off. STANDBY MODE This function is available when the projector is operated by the network in standby mode.
- Page 47 AUTO SETUP SOURCE SEARCH, AUTO KEYSTONE, and AUTO PC ADJUST can be performed by pressing the AUTO SETUP button on the top control panel or AUTO SETUP button on the remote control. These functional settings can be converted as follows: SOURCE SEARCH This feature automatically detects the input signal.
-
Page 48: Using Network Control
Using NETWORK CONTROL Function:This function is suitable for remote control of the projector by computer in LAN. Preparations 1 Required equipment: projector, computer, LAN cable; 2 Connection process: Connect the projector to a router or switch in the LAN with a direct or crossover cable. -
Page 49: Security Password
SECURITY PASSWORD Enter the password to go into security password settings. STARTUP PASSWORD LOCK ..Not to lock. ON ..Every time you turn on the projector, you need to enter a password. CHANGE YOUR PASSWORD You can change the password to the four numbers you want. Press OK button, select PASSWORD, and password change dialog box appears. -
Page 50: Lens Shift Adjustment Range
Through the manual lens shift function, the projection lens can be moved up and down, left and right. This function allows the user to easily adjust the position of the projected image. The projection position The projection position can be moved up at can be moved down at most to a distance equal most to a distance equal... -
Page 51: Specification
Specifications RL-600X RL-600W RL-600U Model Display Technology Liquid Crystal Display LCD panel 3x0.64”(16:10) 3x0.64”(16:10) 3x0.63”(4:3) Brightness 6000 lm WXGA (1280x800) XGA (1024x768) WUXGA (1920x1200) Resolution Supports highest to WUXGA Supports highest to WUXGA 2,304,000 (1920 x 1200) x3, 1,024,000 (1208 x 800) x3,... - Page 52 Specifications RL-6500X RL-6200W RL-6000U Model Display Technology Liquid Crystal Display LCD Panel 3x0.63 ” 3x0.64” 6500lm luminance 6200lm 6000lm Resolution XGA (1024x768) WXGA (1280x800) WUXGA (1920x1200) Contrast 3500000:1 Image Uniformity ≥ Lens F1.6~1.9,f=15.31~24.64mm,1.6 Zoom Ratio Throw Ratio 1.15-1.84 1.05-1.68 1.05-1.68 Aspect Ratio 16:10 (compatible with 4:3) 4:3(compatible with16:9)
-
Page 53: Ceiling Mounting Holes
Dimensions Unit:mm Ceiling mounting holes Use screws with a length of 8mm (minimum) to 10mm (maximum) for ceiling mounting. Screw locking torque:( M6)4±0.5 N.m Minimum length of the screw Insert the nut (M6) Maximum length of the screw Screw holes Projector Unit:mm... -
Page 54: Compatible Input Signal
Compatible Input Signal *1 Video Signal HDMI and DVI... -
Page 55: Compatible Input Signal
Compatible Input Signal CAUTION • The image may not be displayed VGA Signal correctly when inputting a signal other than those in the table. • When the screen resolution of the input signal is different from that of the panel, the signal will not be displayed at its initial resolution. - Page 56 Appendix Indicators and Projector Status Check the indicators for the status of the projector. Indicators Projector status POWER WARNING Green / Red Yellow The projector is off (AC power cord is not plugged in) . The projector is in standby mode, press the standby button to turn on the projector.
- Page 57 Appendix Troubleshooting Before requesting help from your dealer or service center, please check the following items again: Problems Solutions Unable to turn on – Insert the projector's power plug into an AC outlet. – Confirm that if the power indicator is lighting in red. –...
- Page 58 Appendix – Check the input signal, color system, video system or Color is abnormal computer system mode. – Make sure the value of SATURATION under [IMAGE MODE] is appropriate. AUTO PC ADJUST – Check the input source signal. The AUTO PC ADJUST function is invalid when 480p, 576p, 720p, 480i, 576i function is invalid or 1080i is selected.
Need help?
Do you have a question about the RL-6000U and is the answer not in the manual?
Questions and answers