Table of Contents
Advertisement
Quick Links
Advertisement
Table of Contents
Troubleshooting

Related Manuals for Magni RTH 6.25


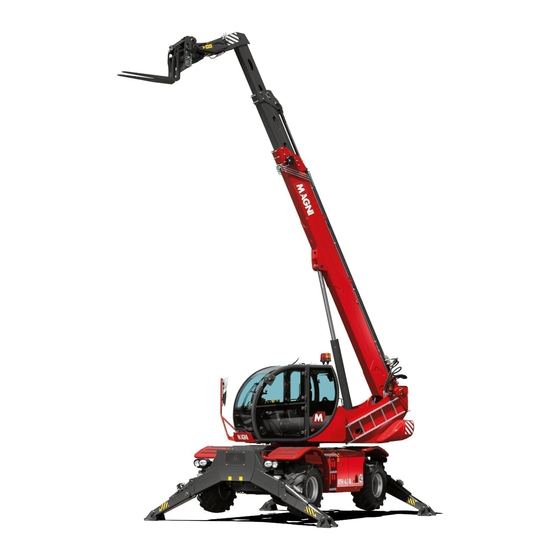
Summary of Contents for Magni RTH 6.25
- Page 1 P.N.54615.D_EN 11/2020 Use and Maintenance Manual Rotary telescopic elevators [Deutz] -- TRANSLATION OF THE ORIGINAL INSTRUCTIONS -- Prepared in compliance with the essential requirement for the protection of health and safety 1.7.4 of annex I of directive 2006/42/EC...
- Page 2 Revision no. Date Notes 04/2019 First release 07/2019 Range of models updated 12/2019 Range of models updated 02/2020 Added specific Stage V 100kW drive unit 11/2020 Added technical specifications: automatic parking brake.
-
Page 3: Table Of Contents
Safety devices present ..........20 Index Residual risks ............20 Hot fluid jets ..............20 Hot fluids and surfaces ..........20 PREFACE ..............7 Generic faults ...............21 Important information regarding safety ......7 Braking system accumulators ........21 Information regarding this Manual ........ 7 Reasonably foreseeable misuse ...... - Page 4 Pedals ................50 Leaving the vehicle ............74 Transmission selector ..........50 INFORMATION REGARDING TRANSPORT ....75 Lights/windscreen wiper selector for RTH 4.18 models Shipping the vehicle ............ 75 ..................51 Travelling by road with the vehicle ......75 Horn ................51 Lifting and anchoring the vehicle ........
- Page 5 Two or three-speed reduction gear oil ...... 102 Wheel reduction gears oil .......... 102 Steering elements ............103 Engine air filter ............103 Cab air filter ..............104 Telescopic boom sliding blocks ........104 Telescopic boom pins ..........105 Emergency hydraulic pump........106 Engine radiator ............
-
Page 7: Preface
The safety precautions and warnings are highlighted in latest and complete information before starting any this Manual and on the vehicle by means of operation on the vehicle. Please contact your Magni informative stickers. Ignoring these warnings can Dealer for the latest copy of this Manual. -
Page 8: Symbols Used
The symbols used in this Manual comply with standard Symbols used UNI EN ISO 7010:2012. To make it easy for the user, a Parts of the text that are considerably important or summary of the symbols used is given below with their specific operating procedures have been highlighted brief description: with the use of the following symbols:... -
Page 9: Safety And Warnings Section
Do not touch SAFETY AND WARNINGS SECTION Symbols and safety labels Several specific safety symbols are present on this This safety symbol is present on the outside of the vehicle. This section shows the exact position of the engine compartment. warning plates on the vehicle and the entity of the hazard. -
Page 10: Radiator
Radiator fan There are several sources of risk inside the engine compartment which can cause serious injury or even death. Do not approach or touch any part inside the engine compartment without protective equipment and adequate technical training. The engine has tubing under high pressure. Liquid This safety symbol is present on the radiator surface leakage can penetrate the tissues causing even near the cooling fan. -
Page 11: Do Not Enter The Operating Area Of The Vehicle
Do not enter the operating area of the Do not approach the accessory vehicle This safety symbol is applied at the top of the This safety symbol is present on both sides of the telescopic boom, on the left side, near the quick-fit counterweight of the telescopic boom, at the back of coupling for the accessories. -
Page 12: General Danger Information
Make sure all the guards and covers are fitted GENERAL DANGER correctly on the vehicle. INFORMATION Keep the vehicle in perfect working condition by carrying out the scheduled maintenance punctually and scrupulously. Unless otherwise specified, carry out the maintenance operations with the vehicle in the maintenance position. -
Page 13: Penetration Of Fluids
If it is necessary to remove the safety devices fitted on the vehicle to carry out maintenance or repairs, always Magni T.H. products and spare parts are asbestos-free. refit these at the end of operations. Using non genuine spare parts can lead to risk of handling products containing asbestos. -
Page 14: Preventing Burns
batteries or electric connectors. Use of protective Preventing burns gloves is recommended. Prevention of fires and explosions Do not touch the engine or any components directly connected to it during operation. Allow the engine to cool down before carrying out any maintenance. Before disconnecting any component of the hydraulic or pneumatic circuits, make sure all the residual All fuels, most lubricants and certain coolant mixtures... -
Page 15: Extinguisher
Connecting the poles in short circuit can cause the Information regarding AdBlue battery to explode. Do not place metallic objects on (DEF) the surface of the batteries. Do not connect the batteries differently from the method described in this Manual. AdBlue is a water-soluble non flammable, non toxic, colourless, odourless liquid. -
Page 16: Adblue And High Temperatures
AdBlue and high temperatures Regeneration The chemical composition of AdBlue can change if After a predefined period of use or use which affects exposed to temperatures exceeding 50 °C, releasing the working, the filters for scrubbing fine dust emissions ammonia vapours. require regeneration. -
Page 17: Accident Prevention In Case Of Thunderstorms With Lightning
Accident prevention in case of Proceed as follows to run manual regeneration. thunderstorms with lightning Never try to climb on or get down from the vehicle if lighting strikes in the vicinity. The operator in the cab must stay inside until the thunderstorm and lightning is over. -
Page 18: Before Using The Vehicle
Replace the entire safety belt after 3 years irrespective Before using the vehicle of wear. Do not use extensions. Make sure the lighting on board is adequate for the Operators using the vehicle must be trained and must working conditions, and that all the lights are working be familiar with all its working aspects. -
Page 19: Protection For The Operator
Therefore, it is advisable to follow stop working until the fault has been repaired the operating procedures described in the following (Contact your dealer or Magni Telescopic Handlers sections of this Manual. After-Sales Service). Roll-Over Protective Structure (ROPS),... -
Page 20: Safety Devices Present
Safety devices present Residual risks Below is a list of the main safety devices on the vehicle: • ROPS-FOPS certified cab DANGER OF CRUSHING • Emergency light Always stay at a safe distance from moving parts. (red beacon on top of the cab) •... -
Page 21: Generic Faults
Troubleshooting Manual. surgically removed within a few hours to avoid infection. Alternatively you can contact your local dealer or Magni Telescopic Handlers After-Sales Service. ELECTROCUTION Braking system accumulators All maintenance work and/or adjustments to be To know the procedures to be followed to discharge... -
Page 22: Reasonably Foreseeable Misuse
Reasonably foreseeable misuse During daily work, it can happen that the vehicle may be used incorrectly or the instructions in this manual may not be followed. Experience has taught us that there may be some indications of reasonably foreseeable misuse of the forklift truck. -
Page 23: Section On Product Information
SECTION ON PRODUCT INFORMATION Forklift truck with pivoting stabilisers RTH 4.18 RTH 5.18 RTH 5.21 RTH 5.23 RTH 5.25 Forklift truck with scissor stabilisers RTH 6.21 RTH 6.23 RTH 6.25 SECTION ON PRODUCT INFORMATION... -
Page 24: Technical Specifications
TECHNICAL SPECIFICATIONS ENGINE: DEUTZ (STAGE 3A / STAGE IV / STAGE V) 5.18 / 5.21 / 5.23 / 5.25 / RTH Model 4.18 6.21 / 6.23 / 6.25 TCD 3.6 L4 TCD 3.6 L4 ENGINE SERIES (Stage 3A / Stage IV (Stage 3A / Stage IV / Stage V) Stage V) THERMODYNAMIC CYCLE... - Page 25 AXLES 5.21 / 5.23 / 5.25 / RTH Model 4.18 5.18 6.21 / 6.23/ 6.25 FRONT AXLE Steering Steering and levelling REAR AXLE Steering and tilting WHEEL HUB REDUCERS Epicyclic TYRES 18 R 19.5 18 R x22.5 BRAKES RTH Model TYPE Multiple disc in oil bath SERVICE BRAKE...
- Page 26 MASSES RTH Model MASS IN RUNNING 14,400 15,300 16,150 16,500 16,900 17,500 17,850 17,980 ORDER (kg) WEIGHT DISTRIBUTION 6,280 6,800 7,250 7,500 9,400 8,000 7,600 8,050 ON FRONT AXLE (kg) WEIGHT DISTRIBUTION 8,120 8,500 8,900 9,000 9,500 9,500 10,250 9,930 ON REAR AXLE (kg) PERFORMANCES RTH Model...
-
Page 27: Dimensions
DIMENSIONS RTH 4.18 RTH 5.18 SECTION ON PRODUCT INFORMATION... - Page 28 RTH 5.21 RTH 5.23 SECTION ON PRODUCT INFORMATION...
- Page 29 RTH 5.25 RTH 6.21 SECTION ON PRODUCT INFORMATION...
- Page 30 RTH 6.23 RTH 6.25 SECTION ON PRODUCT INFORMATION...
-
Page 31: Information On Identification
INFORMATION ON IDENTIFICATION Acoustic power emitted plate Vehicle’s identification plate The plate indicating the acoustic power level emitted The vehicle’s identification plate is fixed in the cab to (guaranteed), according to the Noise Directive the right of the steering column, and shows the 2000/14/EC, is affixed inside the cab at bottom right, vehicle's mechanical data. -
Page 32: Serial No. Stamped On Chassis
Serial no. stamped on chassis Service pump identification plate The vehicle registration number is shown on the front of the chassis at the top right. Engine identification plate The service pump identification plate is affixed to the pump inside the engine compartment, as shown above. -
Page 33: Transmission Motor Identification Plate
Transmission motor identification plate The transmission motor plate is affixed to the motor on the bottom right hand side of the vehicle. To access it, lie down under the vehicle between the two axles near the right front wheel. Axles identification plate The axles (front and rear) identification plate is affixed on the top of the differential. -
Page 34: Features Of The Vehicle
- Low beams/high beams 2: low beams always On when the I.C. engine is started up for RTH 4.18 models, which can be activated via the lights switch under the steering wheel for the other models in the range;... -
Page 35: Quick-Fit Coupling For The Equipment
The shear pin must also be present on the vehicle so The type “I”, coupling, with Magni Telescopic Handlers as to be available when required. patent, is designed to be more rigid, more compact, Always fit the shear pin in its housing when not in use. -
Page 36: Tow Hook
Tow hook Toolbox (Optional) The vehicle may be provided with a toolbox for routine If not used correctly, the tow hook can cause maintenance or for various kinds of working tools. accidents or material damage. The toolbox is firmly fixed to the front part of the The towing operations must always be carried out by vehicle and is provided with a lock. -
Page 37: Operation
The description of each page is provided in the OPERATION following sections. Multi-function display Browsing through the pages Using the multi-function display while driving the vehicle can cause serious accidents. It is advisable to limit the use of the display while driving to the minimum possible extent to allow prompt identification and avoid obstacles along the Each page is divided into a number of sections. -
Page 38: Adjusting The Control Panel Intensity
It is possible to browse through the pages of the Rotate the joystick clockwise or anti-clockwise to select display manually. To do so, use the four arrows the buttons in the current section of the page. present at the corners of the screen: Press the joystick down to press the button selected on the display. -
Page 39: Accessory Confirmation Page
This page cannot be selected manually. It contains numeric and graphic digital indicators, pushbuttons and control and alarm indicator lights. Below the Magni, logo, the name of the equipment identified by the control system is shown in the centre Indicators of the screen. - Page 40 Indicator lights Telescopic boom orientation Fuel tank in reserve Diesel engine oil pressure alarm Diesel engine temperature alarm Hydraulic motor oil filter clogging alarm Water/fuel separator filter clogging alarm The accessory fitted at the top of the boom is shown SCR Alarm in the centre of the page.
-
Page 41: Stabilisers Page
An icon next to the stabiliser indicates its status. Stabilisers page The icon may have three configurations: Stabiliser completely retracted and raised. Stabiliser partly extended and/or lowered but not in contact with the ground. Stabiliser in contact with the ground. Checking the stabilisers movement The stabilisers page contains information regarding the configuration of the stabilisers, and certain... -
Page 42: Controls Page
Configuration of boom Load percentage On the right hand side of the page a graduated indicator displays the ratio, expressed in percentage, of the load acting on the equipment and the maximum permitted load. The load percentage indicator is present in all the control and command pages. -
Page 43: Work Lights
To adjust the temperature of the air coming out of the off in the main page of the display to confirm the air vents use the buttons under the air required selection. temperature indicator 3. To adjust the air flow from the vents use the buttons under the air flow rate indicator 4. -
Page 44: Socket (Optional)
24V socket (optional) Hydraulic blocking of turret rotation (optional) Press this button to activate the power socket (optional) present at the top of the boom for supplying current to the accessories that may be fitted. The buttons shown above are present if said optional device is present on the forklift truck being used. -
Page 45: Features Of The Cab
FEATURES OF THE CAB Cab door To shut the window, turn lever 5 anti-clockwise to release the limit stop block. Hold the window by means of handle 2 till it is completely closed. Turn lever 1 clockwise and make sure the window is locked in the closed position. -
Page 46: Ceiling Lights
Ceiling lights Always adjust the seat to suit your physical structure There are two ceiling lights on the cab roof on either for maximum comfort. side of the driver’s seat, which can be individually Use the seat adjustment controls in the order in which operated with the switch at the front of each one. -
Page 47: Seat Belts
The adjustment is correct when the operator’s back Unfasten the seat belt forms a 95° ±5° angle with the legs when seated Push the red button 3 on the buckle. properly. Hold the tab with one hand while the seat belt is Lumbar support rewound automatically. -
Page 48: Steering Column
On the right hand side, under the lever for adjustment Steering column of the depth of the steering column depth 2, there are The steering column provides numerous possibilities for 2 CAN type connectors for control of the diagnostics of adjustment. -
Page 49: Electric Cigarette Lighter / Dual Usb Socket
The vehicle radio is present on the rear covering of the the male cigarette lighter socket supplied with the cab behind the operator’s head. The speakers are device to be powered. present between the driver’s seat and the rear USB socket window. -
Page 50: Controls
Pedals CONTROLS Ignition switch The accelerator pedal 1 is present on the cab floor. Press the accelerator pedal to increase the I.C. engine speed. The ignition switch is situated on the steering column, to the right. The switch has three active positions: Release the accelerator pedal to decrease the I.C. -
Page 51: Lights/Windscreen Wiper Selector For Rth 4.18 Models
: activates continuous movement of the front and Lights/windscreen wiper selector for upper windscreen wipers; RTH 4.18 models Ј : activates the rear windscreen wiper. To active dispensing of the window washer liquid press the crown at the tip of the lever. -
Page 52: Emergency Lights
- apply slight traction towards the steering wheel to Emergency lights activate the high beam headlights. The lever will return immediately to the neutral position when released. Horn To use the warning buzzer press the button in the centre at the tip of the lever. The switch for activation of the emergency lights is under the right steering wheel. -
Page 53: Parking Brake
Parking brake Work lights The switch for engaging/disengaging the parking brake The button for activation/deactivation of the work is under the steering wheel in the centre of the lights is in the centre of the controls page. steering column. When the command is activated, the button turns blue Press the upper part of the switch to put the parking and the beacon starts working;... -
Page 54: Steering Modes
You can switch between the two modes only under the Joystick following conditions: The vehicle is equipped with two joysticks near the - vehicle stopped; driver’s seat arm rests. The joysticks control the main - brake pedal pressed; hydraulic movements of the vehicle. - gear selector in NEUTRAL position. -
Page 55: Levelling On Wheels
Right joystick Consult the Manual relative to the equipment fitted on the forklift truck for the correct operating procedures. If the roller present on the joystick is activated without the help of the enable button and with the engine switched on, pressure in the hydraulic circuit sent to the accessory is discharged. -
Page 56: Control Of The Stabilisers
Control of the stabilisers Control by means of the multi-function display The stabilisers can be controlled in two ways: - by means of switches; - by means of multi-function display. The switches for control of the stabilisers are present in the dashboard to the right of the driver’s seat. The switches are used to control the movements of the four stabilisers simultaneously. -
Page 57: Activation Of The Emergency Hydraulic Circuit
- Y1: move the joystick forward to lower the Exclusion of the safety systems stabilisers; - Y2: move the joystick backward to raise the stabilisers. After stabilising the vehicle, always check the levelling by means of electronic level 4. The indicator must be in the centre of the measuring range. -
Page 58: Boom Movements Limits
Boom movements limits Hydraulic movements speed The telescopic boom movement can be limited to avoid collisions with elements inside the work area The controls for hydraulic movements speeds which cannot be removed, like the walls of buildings, adjustment are present in the limits page. columns or hanging beams. -
Page 59: Radio Controls (Optional)
General information The vehicles can be equipped with radio control for controlling remotely: depending on the final user’s requirements, Magni Telescopic Handlers provides selection between two types of commands to be sent via radio to the forklift truck: - standard radio control:... -
Page 60: Before Starting The Engine
Do not climb on or down from the vehicle with your BEFORE STARTING THE ENGINE back to it. Always use three gripping points when climbing up or Visual inspection down: two hands gripping the handles and one foot on To ensure the maximum useful operating life of the a step, or two feet on the steps and one hand gripping vehicle, proceed with a thorough visual inspection the handle. -
Page 61: Starting The Engine
Start-up using jumper cables STARTING THE ENGINE BATTERIES RISK OF INTOXICATION The batteries generate flammable gases which can The exhaust from the I.C. engine always contains explode causing injuries to persons. chemical elements that may be asphyxiating or toxic. Avoid sparks near the batteries. Make sure the Start the engine in open, well ventilated areas. -
Page 62: After Start Up
- Connect the other end of the positive jumper cable - with the engine running, check to make sure the gear to the positive terminal of the battery of the power lever is in the NEUTRAL position, source; - press button (P) positioned on the steering column - The negative terminals of the jumper cable are under the handwheel for 3 seconds and check to... - Page 63 On the LEVEL 1B password page of the multi-function The change of mode between the automatic and display, there is a button that allows the operator to manual parking brake can only occur if the following switch from the AUTOMATIC to MANUAL parking conditions are met: brake.
- Page 64 If the forward speed is faster than 5 km/h, the neutral gear is inserted (situation controlled by the transmission by applying the maximum possible hydraulic braking), and then, under this threshold, SEAT SWITCH the parking brake is automatically engaged, which can be removed, once the operator is again detected in the driving position, only by moving the button first to “vehicle braked”...
-
Page 65: Driving The Vehicle
Driving the vehicle Move the vehicle with the accessory in transport position, i.e. with the boom completely retracted and the load approx. 300 mm above the ground. The speed of the forklift truck with load must never exceed 10 km/h. Drive carefully, adjusting the speed according to the stability of the vehicle and the ground conditions. -
Page 66: Operating Techniques
Installing the accessory OPERATING TECHNIQUES Telescopic boom extension If fitted incorrectly, a piece of equipment can synchronisation suddenly detach from the vehicle during operation. This can cause injury or even death. Do not operate the vehicle without the shear pin At every daily start up, carry out synchronisation of the fitted in the quick-fit coupling. -
Page 67: Dismantling The Accessory
The multi-function display shows the name of the equipment identified by the automatic identification system. Two buttons are displayed under the name: Attachment confirmation No attachment confirmation Press the confirmation button if the equipment identified corresponds to that actually fitted on the Rotate the quick-fit until it is aligned perfectly with the vehicle. -
Page 68: List Of Compatible Accessories
Contact your Magni dealer for more information on approved accessories. For loads with mobile centre of gravity, such as tanks containing liquids, it is necessary to take into account... - Page 69 Incline the quick-fit coupling so that the forks are not in the horizontal position. Approach the load slowly with the boom lowered and insert the forks under it. If possible, lower the load without shifting the vehicle: lift the boom to move the load away [3], retract the telescopic boom [4] and lower it to bring the load to Apply the parking brake and set the reverse gear lever the transport position [5].
-
Page 70: Picking Up And Placing A Suspended Load
After picking up the load, lift [1] and extend [2] the Take care to lift the load vertically on its axis, never telescopic boom to position the load above the area in sideways or longitudinally. which it is to be deposited. Move the forklift truck near Handling the load with the forklift stationary to where it is to be deposited [3]. -
Page 71: Visibility
Use and Maintenance Manuals of the individual that this manoeuvre is exceptional and can only be accessories. carried out over short distances. ˗ The forklift truck’s signalling systems and lights During operation, the forklift truck is subjected to a must be suitable for its conditions of use. The number of stresses that can affect its stability and vehicle’s standard lighting might not be enough for therefore its safety. -
Page 72: Climatic Conditions Of Use
(optional)” sections in this manual. Near gale Magni telescopic handlers can be used up to a wind Adverse climatic conditions speed of 36 km/h equal to 10 m/s (5 on the Beaufort Always take into account the climatic and atmospheric scale) measured on the ground. -
Page 73: Mechanical Blocking Of The Turret
Periodically check the correct sliding of the pin in its Mechanical blocking of the turret seat: if necessary, grease it to avoid seizing due to rust The mechanical turret block is located on the turret to and corrosion of the materials. the right of the telescopic boom. -
Page 74: Parking The Vehicle
Leaving the vehicle PARKING THE VEHICLE Remove the ignition key. Parking position Before leaving the cab, shut all windows and make sure they are locked properly. The parking position is a vehicle configuration suitable for parking and carrying out routine maintenance. Get down from the vehicle and lock the cab door shut. -
Page 75: Information Regarding Transport
Lifting and anchoring the vehicle INFORMATION REGARDING TRANSPORT If the vehicle slips during transport, it can cause injury Shipping the vehicle or even death. Make sure the total weight of the vehicle and The vehicle may slip if inadequate procedures or transport vehicle comply with the standards and equipment are used for transport. -
Page 76: Towing The Vehicle
Lower the stabilisers until the lower surface of each Towing the vehicle arm is horizontal. Check using a spirit level. Wind the lifting belts in positions 1 and 2 as shown above. Towing the vehicle using an incorrect procedure can cause serious accidents. - Page 77 Disengage the parking brake and remove the wedges. Tighten the tow cable slowly. Avoid sudden movements to avoid overload on the cable. Keep the angle between the vehicle and the towing cable minimum; it must not exceed 30° in any case whatsoever.
-
Page 79: Maintenance
Nuts and bolts in inches Diameter Tightening torque MAINTENANCE 12 ± 3 Nm General information 5/16 25 ± 6 Nm 47 ± 9 Nm Tightening torques 7/16 70 ± 15 Nm 105 ± 20 Nm Unsuitable bolts or those of incorrect size can cause damage, faults and injuries. -
Page 80: Tyres
Only use tyres approved by Magni Telescopic the sticker applied near each wheel under the Handlers. mudguard or, if it is missing, contact Magni TH Support Service. Inflation with air Adjust the tyre inflation apparatus regulator to not more than 0.5 bar more than the inflation pressure. - Page 81 Standard tyre characteristics for RTH 4.18 models Measurement characteristics Make Inflation pressure Rim size 18 R 19,5 MPT-03 TL 156D Mitas 4.5 bar (0.45 Mpa) (65 psi) 14.00 x 19.5 (445/65 R 19,5) Standard tyre characteristics for RTH 5.18 – RTH 5.21 RTH 5.23 – RTH 5.25– RTH 6.21 – RTH 6.23 –...
-
Page 82: Washing
Washing While cleaning the vehicles, avoid using high pressure water jets on visible and invisible While cleaning the vehicle, avoid aiming high connectors: under the cab, at the head of the pressure water jets directly at the hydraulic hoses telescopic boom, inside the rear cab compartment, inside the turret. -
Page 83: Fuseboxes
Fuseboxes Turret compartment fuseboxes [p.n.37178] Reference Colour Description Amperes 3B6 electronic level gauge, 3B6 boom strain gauge, Nut brown rotation manifold encoder Nut brown Midac Plus 3B6 electronic control unit Nut brown Touch-screen panel timer Nut brown Vehicle radio Nut brown GPS setup Nut brown Setup... - Page 84 Reference Colour Description Amperes Brown Optional Cabletronic control unit for steering 7.5 A Brown Windscreen wipers intermittence 7.5 A Brown Compensation and lift sensors 7.5 A Brown Vehicle radio 7.5 A Brown Danfoss directional control valve 7.5 A Brown Pneumatic cab seat 7.5 A Brown Lights stalk switch, gears stalk switch...
- Page 85 Reference Colour Description Amperes Front cab work lights 10 A Rear cab work lights 10 A Hot water tap valve opening 10 A Hot water tap valve closing 10 A Air conditioning tap opening 10 A Air conditioning tap closing 10 A Front windscreen wiper intermittence 10 A...
- Page 86 Fuseboxes [p.n.23546] in the chassis compartment for models with continuous rotation Reference Colour Description Amperes Nut brown Optional positive “15”. 30 A Diagnostics positive “30”. 10 A Nut brown Hydromotor positive “15”. Nut brown Positive “15” stabilisers proximity switches. Brown Positive “15”...
- Page 87 Reference Colour Description Amperes Brown Positive “15” right side low beams. 7.5 A Brown Positive “15” reversing lights and buzzer. 7.5 A Brown Positive “15” parking brake control system. Brown Positive “15” slow/fast speed change. 7.5 A Brown Positive “15” available in motor plant line. 7.5 A Brown Positive “15”...
- Page 88 Reference Colour Description Amperes Pink Positive “15” right front stabilisers proximity switch Pink Positive “15” left front stabilisers proximity switch Pink Positive “15” right front stabilisers proximity switch Nut brown Positive “15” retarder control NOT CONNECTED Main power supply relay selected by mushroom-shaped 80 A emergency button Main power supply relay selected by ignition key...
- Page 89 Fuseboxes [p.n.36533] in the chassis compartment for models with limited rotation Reference Colour Description Amperes Green Positive “30” DEUTZ engine control unit EDC17 CV54 30 A Nut brown Positive “30” available in motor plant line. Positive “15” Deutz diagnostics; Bosch Rexroth diagnostics and Nut brown consent relay Neutral position at EDC17 CV54 Nut brown Positive “15”...
- Page 90 Reference Colour Description Amperes Brown Positive “15” parking brake control system. 7.5 A Brown Positive “15” slow/fast speed change. 7.5 A Brown Positive “15” available in motor plant line. 7.5 A Brown Positive “15” stabilisers strain gauges. 7.5 A Brown Positive “15”...
- Page 91 Reference Colour Description Amperes Radiator electric fan relay oil-2. 20 A Air compressor electric fan relay. 20 A Stabilisers descent function negative cut-off relay. 20 A Stop lights relay. 10 A Relay- Feedback for parking brake bistable. 10 A Slow/fast speed change relay. 10 A DEUTZ engine control unit Neutral position relay EDC17 CV54 10 A...
-
Page 92: Liquids And Lubricants
* The percentages correspond, in the order, to the composition of the antifreeze+distilled water mixture: - 50%/50% means a mixture in equal parts; - 35%/65% corresponds to a mixture of 35% anti-freeze and 65% distilled water. Not present in models: RTH 4.18 / RTH 4.18 Smart. MAINTENANCE... -
Page 93: Spares For Routine Maintenance
Spares for routine maintenance Position Description Quantity Code Alternator transmission belt Belt 34631 Compressor transmission belt Belt 24230 Cab air filter Filter cartridge 09371 Engine air filter Primary air filter cartridge 24069 Engine air filter Safety filter cartridge 12684 Fuel filter Filter cartridge 24309 Fuel pre-filter... -
Page 94: Maintenance Schedule
Every 250 hours of operation or every 3 months MAINTENANCE SCHEDULE Telescopic boom chains – checking and lubrication Read and understand all the warnings and instructions before starting any maintenance operation. Transmission belt - check Before carrying out any maintenance operation, make Differentials oil - check sure all the scheduled actions have been carried out as Two-speed reduction gear oil –... -
Page 95: Maintenance Operations
Lubrication of levelling cylinders pins MAINTENANCE OPERATIONS Transmission shaft Lubrication of universal joints Set the vehicle in the parking position. Make sure no one approaches the work area. Access the levelling cylinders present behind the wheels of the vehicle. Lubricate pins 2 and 3 by injecting grease in the grease nipples provided for Set the vehicle in the parking position. - Page 96 Adjustment Checking for wear The services of an operator and an inspector are To check the chains for wear, the main structural required to check the chains to see if they require dimensions of the chains of each extension must be adjustment.
-
Page 97: Transmission Belt
Replacement Phase displacement of the boom B↔A Before operating, check the phase displacement of the telescopic boom extensions: if a certain phase displacement is ascertained, solve the problem by acting immediately on the extensions closure command until the boom is retracted completely. A misalignment greater than 50 mm involves risk of breakage of the hydraulic pipes inside the boom. -
Page 98: Checking The Engine Oil Level
Dispose of the leaked lubricant oil and the filter Replacing the lubrication oil cartridge elements. Do not let the used lubricant oil spread in the ground. Run a test cycle after every intervention. At the same time, ensure sealing and pressure of the lubricant oil and then check its level. -
Page 99: Fuel Filter
Drain the liquid until the pure diesel fuel starts flowing Bleed the fuel supply system out. The fuel supply system is bled by means of the fuel Fit the drainage cap by applying a tightening torque delivery electric pump. of 1.6±0.3 Nm. To make sure fault messages are not generated, Connect the cables. -
Page 100: Coolant
Checking Replacement 1 cover - 2 compensator - filter cartridge. Set the vehicle in the parking position. Proceed with replacement of the filter cartridge of the Check the level in the expansion tank placed above the radiator. The level is correct when it is half-way on the AdBlue supply pump by following the indications inspection window. -
Page 101: Differentials Oil
Differentials oil Hydraulic fluid Checking Checking Set the vehicle in the parking position. Make sure no The hydraulic fluid tank is on the left side of the one approaches the work area. vehicle. Check the hydraulic fluid level through the inspection window present on the tank. -
Page 102: Hydraulic Fluid Filter
Start the engine. Check to make sure there is space to Two or three-speed reduction gear oil extend the telescopic boom completely. Raise and lower the boom a number of times. Extend and retract the boom a number of times. With the boom in the transport position, drive the vehicle carefully forwards. -
Page 103: Steering Elements
Replacement Replacing the primary cartridge Place a suitably sized container under the reduction Set the vehicle in the parking position. Rotate the gear. Turn the reduction gear cap in position 1. turret to the left through 45° to allow easier access to the filter housing. -
Page 104: Cab Air Filter
Check for the presence of a sufficient layer of grease Replacing the safety cartridge on the sliding surfaces and on the sliding blocks. Carry out the primary filter removal procedure described earlier. Lubrication Grip the filter element by means of handle 3 and pull to separate it from its seat. -
Page 105: Telescopic Boom Pins
Tighten each lock nut holding the relative screw firm. Telescopic boom pins Also tighten the fixing screws 4. Tightening torque: Lubricate the pins of the movable parts of the 100 Nm. telescopic boom at regular intervals. Lack of Repeat the adjustment operations for the lateral lubrication can cause seizure of the pins in their seats. -
Page 106: Emergency Hydraulic Pump
Lubrication of compensation cylinder pins Emergency hydraulic pump Operating test Set the vehicle in the parking position. Extend and lift the telescopic boom. Switch off the engine and turn the ignition key to position I. Lubricate pins 5 and 6 of the compensation cylinder. To make access to the grease nipples easier, lift the telescopic boom completely. -
Page 107: Turret Rotation Slewing Ring Gear
Turret rotation slewing ring gear Lubrication To check the fixing screws of the slewing ring gear on the chassis, align hole 5 with the screw underneath by rotating the turret. Tighten the screws by applying a 570 Nm torque. Lubricate both the turret axial bearing tracks by means Repeat the operation for each screw, rotating the of the two grease nipples 1. -
Page 108: Check The Slewing Ring Gear Bearings For Wear
Lubricate areas 1 in contact with the sliding blocks of Check the slewing ring gear bearings for wear the scissor type stabilisers. Apply the lubricant using The factory setting of the play of the bearings is a brush. between 0.05 and 0.25 mm. Repeat the operation for all four stabilisers. -
Page 109: Fuel Tank
Fuel tank Window washing liquid tank Refuelling Filling Set the vehicle in the parking position. Switch the Open the compartment in the rear part of the cab to engine off. access the window washing liquid tank housing. Unlock the tank cap using wrench 1. Unscrew the tank Unscrew the cap by turning it anti-clockwise. -
Page 110: Troubleshooting
TROUBLESHOOTING Error and display messages Message Causes Solutions Movement on wheels was attempted Lower the telescopic boom or activate Boom height with “hare” mode activated and boom the “tortoise” mode height greater than 3 m Movement on wheels was attempted Lower the telescopic boom or activate Boom angle with “hare”... - Page 111 Message Causes Solutions Actuation of stabilisers with excessive boom extension Retract the telescopic boom until the Boom length error message disappears Lift platform movement on wheels with excessive boom extension Do not load platform beyond the Platform microswitch Lift platform overload permitted capacity Movement on wheels or a hydraulic Sit properly in the driver’s seat...
-
Page 112: Engine Troubleshooting
Engine Troubleshooting Engine – does not switch on or switching on is difficult (no fumes at exhaust) Cause Solution No fuel in tank Refuel. Ignition switch defective Check the opening and closing of the electric connection. Fuel filter clogged Bleed the water separator or replace the filter. Check to make sure the pump provides the flow rate suitable Fuel priming pump defective for the high pressure pump. - Page 113 Engine – Starts up but switches off immediately Cause Solution No fuel in tank Refuel. Starter motor charged Check the presence of external loads due to faulty auxiliaries. Visually inspect the suction and discharge, and remove any Suction or discharge system obstructed obstructions present.
- Page 114 Cause Solution Incorrect adjustment of valve play Correct the adjustment Compression not good in one or more cylinders Check the compression ratio ECU or sensors fault Check the electrical connections. Engine – excessive noise Cause Solution Slipping of transmission belt, tension insufficient Check the belt tensioner and inspect the belt.
- Page 115 Cause Solution Check to make sure the pump provides the flow rate suitable Fuel priming pump defective for the high pressure pump. Check the electrical connections. Visually inspect the suction and discharge, and remove any Suction or discharge system obstructed obstructions present.
- Page 116 Engine – Excessive vibrations Cause Solution Oil level excessive Check the level Fan damaged or auxiliaries fault Replace the defective components Fan hub damaged Check and replace the hub Tighten the loose supports and replace those that are Engine supports loose or damaged damaged Incorrect adjustment of valve play Correct the adjustment...
- Page 117 Engine - white fumes at the exhaust Cause Solution SWITCH THE ENGINE OFF. Replace the fuel filters. Fuel dirty or non conforming Run the engine with correct fuel. Oil level not correct Check the level If the oil is contaminated, check the gaskets at the power Diesel and hydraulic oil in engine casing take-offs.
- Page 118 AdBlue® filling level Beginning of warning signals starting from AdBlue filling level less than 15 %. ® Power reduction SCR indicator light Engine indicator light AdBlue® filling level <15% Permanent light None None Flashing <10% None None (0.5 Hz) Flashing Acoustic signal <5% None...
- Page 119 Manipulation If the system detects the presence of a component that has been manipulated or if an unsuitable reduction agent has been used, the power is reduced. The power reduction takes place gradually and depends on the engine power. Power reduction SCR indicator light Engine indicator light Manipulation Level 1...
- Page 120 Fuel – excessive consumption Cause Solution Additional loads on the engine Check/repair the auxiliaries and equipment of the forklift truck Check for leaks near the tank, Fuel leaks fuel line, filters and priming pump. DO NOT try to repair the defective piping Control unit defective Contact your dealer Fault in one or more injectors...
- Page 121 Lubricant - pressure excessively low Cause Solution Oil level not correct Check the level Make sure a suitable lubricant is used. Lubricant specifications unsuitable Check contamination by fuel Pressure gauge fault Check the correct working Change the oil and filters. If operating in particularly heavy Oil filter clogged duty conditions, increase the maintenance frequency.
- Page 122 Coolant - overheating Cause Solution Coolant level not correct (low) Check the level Radiator grille obstructed Clean the radiator grille Air flow to radiator insufficient or obstructed Check/repair the fan Belt tension insufficient Check the tension Radiator tube crushed, obstructed or cracked Check/replace the defective tube Oil level not correct (high) Check the level...
-
Page 123: Reference Information
Reusing the vehicle REFERENCE Clean the fuel tank. Refuel. INFORMATION Replace the fuel prefilter and filter. Check the coolant level. If topping up is necessary, Leaving the vehicle unused for take a sample of the liquid and check the composition. long periods Add distilled water or pure liquid to adjust the composition. -
Page 124: Approved Equipment
Using equipment that is not approved for use on the vehicle can cause accidents or even death. Before installing equipment on the vehicle, make sure it has been approved by Magni Telescopic Handlers s.r.l., and that the corresponding load charts are present in the vehicle management software. -
Page 125: Delivering The Forklift Truck To The Customer
DELIVERING THE FORKLIFT TRUCK TO THE CUSTOMER Vehicle model Serial No. Year of manufacture for which this Inspection Register is being handed over by Magni Telescopic Handlers S.r.l. Via Magellano, 22 41013 - Castelfranco Emilia (MO) - Italy Tel +39-059-8031000 by Mr.____________________________________________________________________________... - Page 126 Register of change of ownership on ____________________ The ownership of the vehicle identified in this Register was transferred to: Company ______________________________________ represented by Mr. _________________________ Street/No. __________________________________________ Post code/City/Town __________________________________ Province _______________________ It is hereby declared that, at the time of preparation of this document, the technical, dimensional and functional features of the vehicle described in this Register conform to those indicated at the beginning by the Manufacturer and that changes, if any, have been recorded.
- Page 127 Register of change of ownership on ____________________ The ownership of the vehicle identified in this Register was transferred to: Company ______________________________________ represented by Mr. _________________________ Street/No. __________________________________________ Post code/City/Town __________________________________ Province _______________________ It is hereby declared that, at the time of preparation of this document, the technical, dimensional and functional features of the vehicle described in this Register conform to those indicated at the beginning by the Manufacturer and that changes, if any, have been recorded.
Need help?
Do you have a question about the RTH 6.25 and is the answer not in the manual?
Questions and answers