Table of Contents
Advertisement
Quick Links
For product information,
Owner's Manual translations,
and more, visit
www.MillerWelds.com
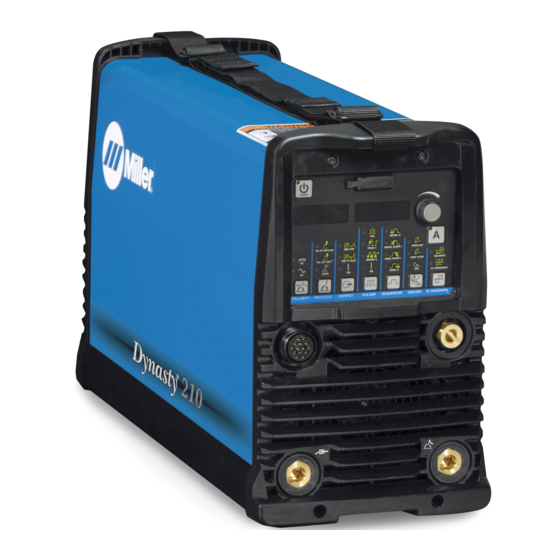
Dynasty 210
Maxstar 210
CE And Non-CE Models
OM-270536P
Processes
Processes
TIG (GTAW) Welding
Stick (SMAW) Welding
Description
120−480 Volt Models W/Autoline
Arc Welding Power Source
)
)
File: TIG (GTAW)
2020-10
R
Advertisement
Table of Contents
Troubleshooting

Related Manuals for Miller Maxstar 210 DX


Summarization of Contents
Processes
TIG (GTAW) Welding
Specifies TIG welding as a supported process.
Stick (SMAW) Welding
Specifies Stick welding as a supported process.
Description
120-480 Volt Models W/Autoline® Arc Welding Power Source
Identifies the unit as a 120-480V welding power source with Autoline.
DECLARATION OF CONFORMITY
Product/Apparatus Identification
Lists specific product models and their identification details.
Council Directives and Commission Regulations
Lists relevant EU directives and commission regulations.
Standards
Lists applicable industry standards for compliance.
EMF DATA SHEET FOR ARC WELDING POWER SOURCE
Product/Apparatus Identification
Identifies the product and stock number for EMF assessment.
Compliance Information Summary
Summarizes regulatory compliance and assessment for EMF effects.
EMF Data for Non-thermal Effects
Provides exposure indices and distances for non-thermal EMF effects.
SECTION 1 - SAFETY PRECAUTIONS - READ BEFORE USING
1-1. Symbol Usage
Explains hazard symbols and their meanings.
1-2. Arc Welding Hazards
Discusses general arc welding hazards like electric shock, fumes, rays, fire.
SECTION 1 - SAFETY PRECAUTIONS - READ BEFORE USING
Fumes and Gases Hazards
Details risks associated with breathing welding fumes and gases.
Arc Rays Hazards
Covers risks of intense rays from welding process burning eyes and skin.
Welding Fire and Explosion Hazards
Explains dangers of welding causing fire or explosion.
SECTION 1 - SAFETY PRECAUTIONS - READ BEFORE USING
Additional Hazards For Installation, Operation, And Maintenance
Covers further hazards during installation, operation, and maintenance.
Falling Equipment Hazards
Warns about injury risks from falling equipment.
Overheating Hazards
Explains risks associated with equipment overheating.
Flying Sparks Hazards
Covers risks from flying sparks causing injury or fire.
SECTION 1 - SAFETY PRECAUTIONS - READ BEFORE USING
Interference and Regulatory Warnings
Addresses HF/EMF interference, California Prop 65, and safety standards.
SECTION 3 – DEFINITIONS
3-1. Additional Safety Symbols And Definitions
Lists and explains additional safety symbols, some specific to CE products.
SECTION 3 – DEFINITIONS
3-2. Miscellaneous Symbols And Definitions
Defines miscellaneous symbols used in the manual for processes and functions.
SECTION 4 – SPECIFICATIONS
Serial Number And Rating Label Location
Guides on locating serial and rating information on the machine.
Software Licensing Agreement
Provides a link to the end-user license agreement for software.
Information About Default Weld Parameters And Settings
Explains that default settings are reference and user is responsible for validation.
Dynasty Output Ratings
Details electrical and output specifications for Dynasty models.
SECTION 5 – INSTALLATION
Selecting a Location
Provides guidelines for choosing a safe and suitable installation location.
SECTION 5 – INSTALLATION
Dimensions, Weights, And Mounting Options
Details physical dimensions, weights, and mounting methods for the unit.
SECTION 5 – INSTALLATION
Selecting Cable Sizes
Guides on choosing appropriate weld cable sizes based on ampere and duty cycle.
SECTION 5 – INSTALLATION
Connections
Explains how to connect power sources, work leads, and gas.
SECTION 5 – INSTALLATION
Cooler Connections
Details how to connect optional coolant systems to the welding equipment.
SECTION 5 – INSTALLATION
Electrical Service Guide (Dynasty)
Provides electrical service requirements for Dynasty models.
SECTION 5 – INSTALLATION
Electrical Service Guide (Maxstar)
Provides electrical service requirements for Maxstar models.
SECTION 5 – INSTALLATION
Connecting Three-Phase Input Power
Step-by-step instructions for connecting three-phase input power.
SECTION 5 – INSTALLATION
Connecting Single-Phase Input Power
Step-by-step instructions for connecting single-phase input power.
SECTION 5 – INSTALLATION
Remote 14 Receptacle Information
Details the function and pin assignments of the remote receptacle.
Simple Automation Application
Illustrates a basic automation application circuit.
SECTION 5 – INSTALLATION
Software Updates
Explains how to download and install software updates.
SECTION 6 – DYNASTY 210 OPERATION
6-1. Dynasty 210 Controls
Overview of the control panel layout and functions for Dynasty 210.
SECTION 6 – DYNASTY 210 OPERATION
6-2. Accessing Control Panel Menu: AC TIG
Guide to accessing and using AC TIG control panel menus and settings.
SECTION 6 – DYNASTY 210 OPERATION
6-3. Accessing Control Panel Menu: DC TIG
Guide to accessing and using DC TIG control panel menus and settings.
SECTION 6 – DYNASTY 210 OPERATION
6-4. Accessing Control Panel Menu: AC And DC Stick
Guide to accessing AC/DC Stick control panel menus and settings.
SECTION 6 – DYNASTY 210 OPERATION
6-5. Accessing User Setup Menu: AC And DC TIG
Guide to accessing AC/DC TIG user setup menus and parameters.
SECTION 6 – DYNASTY 210 OPERATION
6-6. Accessing User Setup Menu: AC And DC Stick
Guide to accessing AC/DC Stick user setup menus and parameters.
SECTION 7 – DYNASTY 210 DX OPERATION
7-1. Dynasty 210 DX Controls
Overview of the control panel layout and functions for Dynasty 210 DX.
SECTION 7 – DYNASTY 210 DX OPERATION
7-2. Accessing Control Panel Menu
Guide to accessing and using the control panel menus for Dynasty 210 DX.
SECTION 7 – DYNASTY 210 DX OPERATION
7-3. Accessing User Setup Menu
Guide to accessing and configuring user setup menus and parameters.
SECTION 7 – DYNASTY 210 DX OPERATION
7-4. AC Independent Expansion
Details AC independent amperage and waveshape control features.
SECTION 8 – MAXSTAR 210 OPERATION
8-1. Maxstar 210 Controls
Overview of the control panel layout and functions for Maxstar 210.
SECTION 8 – MAXSTAR 210 OPERATION
8-2. Accessing Control Panel Menu: DC TIG HF And Lift Arc
Guide to DC TIG HF/Lift Arc control panel menus and settings.
SECTION 8 – MAXSTAR 210 OPERATION
8-3. Accessing Control Panel Menu: DC Stick
Guide to accessing DC Stick control panel menus and settings.
SECTION 8 – MAXSTAR 210 OPERATION
8-4. Accessing User Setup Menu: DC TIG Lift-Arc And DC Stick
Guide to DC TIG/DC Stick user setup menus and parameters.
SECTION 8 – MAXSTAR 210 OPERATION
8-5. Accessing User Setup Menu: DC Stick
Guide to accessing DC Stick user setup menus and parameters.
SECTION 9 – MAXSTAR 210 STR OPERATION
9-1. Maxstar 210 STR Controls
Overview of the control panel layout and functions for Maxstar 210 STR.
SECTION 9 – MAXSTAR 210 STR OPERATION
9-2. Accessing Control Panel Menu: DC TIG Lift Arc
Guide to DC TIG Lift Arc control panel menus and settings.
SECTION 9 – MAXSTAR 210 STR OPERATION
9-3. Accessing Control Panel Menu: DC Stick
Guide to accessing DC Stick control panel menus and settings.
SECTION 9 – MAXSTAR 210 STR OPERATION
9-4. Accessing User Setup Menu: DC TIG Lift-Arc And DC Stick
Guide to DC TIG/DC Stick user setup menus and parameters.
SECTION 10 – MAXSTAR 210 DX OPERATION
10-1. Maxstar 210 DX Controls
Overview of the control panel layout and functions for Maxstar 210 DX.
SECTION 10 – MAXSTAR 210 DX OPERATION
10-2. Accessing Control Panel Menu
Guide to accessing and using the control panel menus for Maxstar 210 DX.
SECTION 10 – MAXSTAR 210 DX OPERATION
10-3. Accessing User Setup Menu
Guide to accessing and configuring user setup menus and parameters.
SECTION 11 – ADVANCED MENU FUNCTIONS
11-1. Accessing Tech Menu For Dynasty/Maxstar 210 Models
Guide to accessing and using the Tech Menu for Dynasty/Maxstar 210.
SECTION 11 – ADVANCED MENU FUNCTIONS
11-2. Accessing Tech Menu For Dynasty/Maxstar 210DX Models
Guide to accessing and using the Tech Menu for Dynasty/Maxstar 210DX.
SECTION 11 – ADVANCED MENU FUNCTIONS
11-3. Sequencer And Weld Timer For DX Model
Details the sequencer and weld timer functions for DX models.
SECTION 11 – ADVANCED MENU FUNCTIONS
11-4. Output Control And Trigger Functions For DX Models
Explains output control and trigger functions for DX models.
SECTION 11 – ADVANCED MENU FUNCTIONS
11-5. Lockout Functions
Describes the lockout functions and their levels of adjustability.
SECTION 12 – MAINTENANCE AND TROUBLESHOOTING
12-1. Routine Maintenance
Outlines the schedule for routine maintenance tasks for the welding unit.
SECTION 12 – MAINTENANCE AND TROUBLESHOOTING
12-2. Voltmeter/Ammeter Display Messages
Explains the meanings of voltmeter/ammeter display messages and errors.
SECTION 12 – MAINTENANCE AND TROUBLESHOOTING
12-3. Troubleshooting Table
Provides solutions for common operational issues and error messages.
SECTION 12 – MAINTENANCE AND TROUBLESHOOTING
12-4. Blowing Out Inside of Unit
Instructions for safely cleaning the inside of the unit.
12-5. Coolant Maintenance
Details procedures for maintaining the coolant system.
SECTION 13 – PARTS LIST
13-1. Recommended Spare Parts
Lists recommended spare parts for the equipment.
SECTION 14 – ELECTRICAL DIAGRAMS
Figure 14-1. Circuit Diagram For Dynasty 210
Provides the circuit diagram for the Dynasty 210 model.
SECTION 14 – ELECTRICAL DIAGRAMS
Figure 14-2. Circuit Diagram For Maxstar 210
Provides the circuit diagram for the Maxstar 210 model.
SECTION 15 – HIGH FREQUENCY
15-1. Welding Processes Requiring High Frequency
Identifies welding processes that require high frequency.
15-2. Installation Showing Possible Sources Of HF Interference
Illustrates potential sources of HF interference in installations.
SECTION 15 – HIGH FREQUENCY
15-3. Recommended Installation To Reduce HF Interference
Provides recommendations for installation to minimize HF interference.
SECTION 16 – SELECTING AND PREPARING A TUNGSTEN FOR DC OR AC WELDING WITH INVERTER MACHINES
16-1. Selecting Tungsten Electrode (Wear Clean Gloves To Prevent Contamination Of Tungsten)
Guides on selecting the appropriate tungsten electrode based on diameter and type.
SECTION 16 – SELECTING AND PREPARING A TUNGSTEN FOR DC OR AC WELDING WITH INVERTER MACHINES
16-2. Preparing Tungsten Electrode For DC Electrode Negative (DCEN) Welding Or AC Welding With Inverter Machines
Provides instructions for preparing tungsten electrodes for DCEN and AC welding.
SECTION 17 – TIG PROCEDURES
17-1. Lift-Arc And HF TIG Start Procedures
Explains the procedures for starting TIG arcs using Lift-Arc and HF methods.
SECTION 17 – TIG PROCEDURES
17-2. Pulser Control
Details the function and adjustment of the pulser control.
SECTION 17 – TIG PROCEDURES
17-3. General (GEN) Tungsten Programmable TIG Starting Parameters (DX Models Only)
Provides default TIG starting parameters for DX models based on tungsten type.
SECTION 18 – STICK WELDING (SMAW) ELECTRODE AND AMPERAGE SELECTION CHART
Electrode and Amperage Selection Chart
Provides a chart for selecting stick electrodes and their corresponding amperage.
Need help?
Do you have a question about the Maxstar 210 DX and is the answer not in the manual?
Questions and answers