Advertisement
SERVICE MANUAL
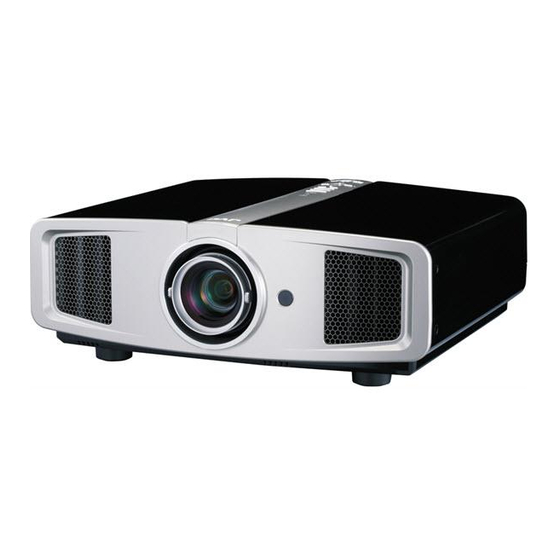
D-ILA HOME THEATER PROJECTOR
3 S ERVICE MANUAL
PA023
2007
........
........
OFF
OPERATE
ON
HDMI 1
HDMI 2
COMP.
VIDEO
S-VIDEO
ASPECT
CINEMA
NATURAL
DYNAMIC
C
N
D
USER
USER
USER
1
2
3
COLOR
SHARP
GAMMA
+
+
COLOR
SHARP
COLOR
-
-
TEMP
CONTRAST
BRIGHT
INFO
HIDE
MENU
EXIT
ENTER
TEST
LIGHT
PROJECTOR
COPYRIGHT © 2007 Victor Company of Japan, Limited
1
PRECAUTION. . . . . . . . . . . . . . . . . . . . . . . . . . . . . . . . . . . . . . . . . . . . . . . . . . . . . . . . . . . . . . . . . . . . . . . . . 1-3
2
SPECIFIC SERVICE INSTRUCTIONS . . . . . . . . . . . . . . . . . . . . . . . . . . . . . . . . . . . . . . . . . . . . . . . . . . . . . . 1-7
3
DISASSEMBLY . . . . . . . . . . . . . . . . . . . . . . . . . . . . . . . . . . . . . . . . . . . . . . . . . . . . . . . . . . . . . . . . . . . . . . 1-15
4
ADJUSTMENT . . . . . . . . . . . . . . . . . . . . . . . . . . . . . . . . . . . . . . . . . . . . . . . . . . . . . . . . . . . . . . . . . . . . . . . 1-19
5
TROUBLESHOOTING . . . . . . . . . . . . . . . . . . . . . . . . . . . . . . . . . . . . . . . . . . . . . . . . . . . . . . . . . . . . . . . . . 1-22
DLA-HD1-BC,
DLA-HD1-BE,
DLA-HD1-BU
TABLE OF CONTENTS
COPYRIGHT © 2007 Victor Company of Japan, Limited
R
No.PA023
2007/3
Advertisement

Related Manuals for JVC D-ILA DLA-HD1-BE


Summarization of Contents
SPECIFICATION
General Specifications
Details general physical and electrical characteristics of the projector.
Electrical Specifications
Outlines color system, video inputs, resolution, and fuse rating.
Optical Specifications
Covers projection system, D-ILA device, lens, screen size, and lamp unit.
Input Connectors
Lists and describes various video and control input terminals.
PRECAUTION
Safety Precautions during Servicing
Crucial safety guidelines for servicing JVC projectors, including part replacement and wiring.
Safety Checks after Servicing
Procedures for verifying safety standards after repair, including insulation and dielectric tests.
Warning and Caution Labels
Explains various warning and caution labels affixed to the product for user safety.
Additional Cautionary Items
Provides further safety advice for handling high voltage, internal parts, and work environment.
INSTALLATIONS
Installation Method
Step-by-step guide on how to properly position and set up the projector for optimal viewing.
Installation Site and Status Requirements
Specifies environmental conditions and site requirements for safe and effective projector operation.
SPECIFIC SERVICE INSTRUCTIONS
New Technology Overview
Introduces new optical engine technology and image processing circuits used in the projector.
Main Difference List
Compares key component part numbers across different projector models (BC, BE, BU).
Functions and LED Indications
Explains the meaning of LED status lights and their relation to projector functions and warnings.
Operation Button and LED Location
Identifies the location and function of the projector's top-side operation buttons and LEDs.
Input/Output Terminal Locations
Shows the rear panel layout, indicating the position of various input and output connectors.
Lamp Unit Instructions
Covers lamp life, operation when exceeding hours, handling cautions, and time reset procedures.
Projection Specifications and Notes
Provides details on projection distance, image size, and other relevant projection-related notes.
Service Policy
Outlines the general policy regarding service and part replacement for the projector.
DISASSEMBLY
Removing the Lamp Unit
Step-by-step instructions for safely removing the projector's lamp unit.
Removing the Top Cabinet
Guide on how to detach the projector's top casing for internal access.
Removing the Operation PWB and Control
Instructions for removing the operation printed wiring board and bottom control unit.
Removing the Front Panel
Details the process of removing the projector's front panel assembly.
Removing Blind Intake
Procedure for detaching the blind intake component from the projector.
Removing Temp PWB
Instructions for removing the temperature monitoring printed wiring board.
Removing Duct Ext and Optical Block
Steps for removing the top duct extension and the optical block assembly.
Removing Duct Fan and Lamp Fan
Instructions for removing the duct and lamp fans and associated brackets.
Removing Duct Intake Fan
Procedure for detaching the duct intake fan and its holder.
Removing Duct (PCS) and CVR PWB
Steps for removing the duct (PCS) and the CVR PWB.
Removing I/F PWB and Processor PWB
Instructions for removing the interface and processor printed wiring boards.
Removing Power PWB
Guide for removing the power supply printed wiring board.
Removing Fan PWB and Duct PS Fan
Steps for removing the fan PWB and the duct PS fan.
Removing Lamp Ballast Unit
Procedure for detaching the projector's lamp ballast unit.
Removing Main Chassis
Final steps for removing the main chassis assembly from the projector.
ADJUSTMENT
Preparation for Adjustment
Essential pre-adjustment steps including PC connection, warm-up, and data backup.
Required Instruments and Tools
Lists necessary instruments like oscilloscopes, light meters, and PC software for adjustment.
Component Replacement Adjustments
Details adjustments required after replacing major components like PWBs or the lamp ballast.
Adjustment Procedures
Step-by-step guides for performing lamp time backup, color temperature, pixel shift, and destination writing.
TROUBLESHOOTING
Protective Sensors and Switches
Explains the function of protective sensors and switches that prevent damage during abnormal operation.
LED Indicator Warning Indications
Lists error codes and corresponding LED flashes, indicating specific malfunctions and causes.
Abnormality Measures
Flowcharts detailing troubleshooting steps for common error codes like lamp failure or fan issues.
Error Log and Self-Diagnosis
Instructions on how to load and interpret the projector's error log data for diagnosis.
Need help?
Do you have a question about the D-ILA DLA-HD1-BE and is the answer not in the manual?
Questions and answers