Table of Contents
Advertisement
OWNER'S MANUAL
AIR
CONDITIONER
Read this owner's manual thoroughly before operating the appliance and keep it
handy for reference at all times.
TYPE: WALL MOUNTED
EN
English
NO
Norsk
FI
Suomi
DA
Dansk
SV
Svenska
www.lg.com
MFL70270103
Rev.02_030520
Copyright © 2018 - 2020 LG Electronics Inc. All Rights Reserved
Advertisement
Table of Contents

Related Manuals for LG F12KM


Summary of Contents for LG F12KM
- Page 1 Read this owner's manual thoroughly before operating the appliance and keep it handy for reference at all times. TYPE: WALL MOUNTED English Norsk Suomi Dansk Svenska www.lg.com MFL70270103 Rev.02_030520 Copyright © 2018 - 2020 LG Electronics Inc. All Rights Reserved...
-
Page 2: Table Of Contents
Using the Comfort Air Function ...............19 Using the Energy Control Function ............20 Using Special Functions .................21 SMART FUNCTIONS ............23 Using LG ThinQ Application ..............23 MAINTENANCE .............26 Clean the Air Filter ..................27 Clean the 3M Filter .................27 Clean the Ionizer ..................28... -
Page 3: Safety Instructions
SAFETY INSTRUCTIONS The following safety guidelines are intended to prevent unforeseen risks or damage from unsafe or incorrect operation of the appliance. The guidelines are separated into ‘WARNING’ and ‘CAUTION’ as described below. This symbol is displayed to indicate matters and operations that can cause risk. - Page 4 For use in Europe: This appliance can be used by children aged from 8 years and above and persons with reduced physical, sensory or mental capabilities or lack of experience and knowledge if they have been given supervision or instruction concerning use of the appliance in a safe way and understand the hazards involved.
- Page 5 •Dispose of the batteries in a place where there is no danger of fire. •Use only the refrigerant specified on the air conditioner label. •Cut off the power supply if there is any noise, smell, or smoke coming from the air conditioner.
- Page 6 Technical Safety •Installation or repairs made by unauthorized persons can pose hazards to you and others. •Any person who is involved with working on or breaking into a refrigerant circuit should hold a current valid certificate from an industry-accredited assessment authority, which authorizes their competence to handle refrigerants safely in accordance with an industry recognized assessment specification.
- Page 7 CAUTION To reduce the risk of minor injury to persons, malfunction, or damage to the product or property when using this product, follow basic precautions, including the following: Installation •Do not install the air conditioner in an area where it is directly exposed to sea wind (salt spray).
-
Page 8: Notes For Operation
•Stop using the remote control if there is a fluid leak in the battery. If your clothes or skin are exposed to the leaking battery fluid, wash off with clean water. •Do not expose people, animals, or plants to the cold or hot wind from the air conditioner for extended periods of time. -
Page 9: Operation
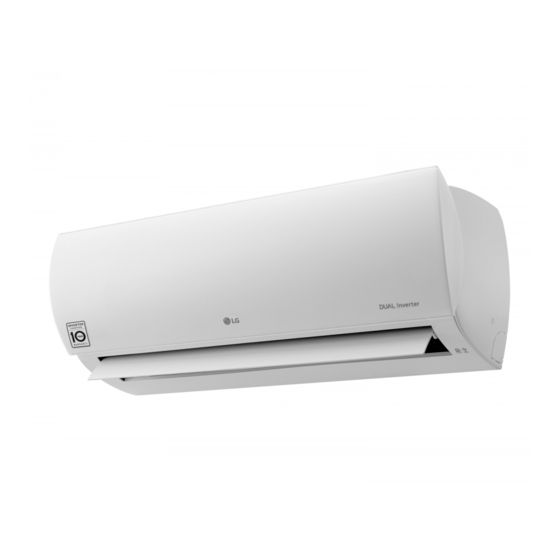
OPERATION Parts and Functions Indoor Unit Outdoor Unit On/Off Button Refrigerant Pipes Signal Receiver Drain Hose Operation Lamp Connection Wire Ionizer Mounting Feet Air Deflector (Vertical Louver) Air Outlet Vents Air Deflector (Horizontal Vane) Air Intake Vents Air Outlet 3M Filter Air Filter Front Panel Indoor Unit Display... -
Page 10: Wireless Remote Control
Wireless Remote Control Operating Method Point the remote control towards the signal receiver Inserting Batteries at the right side of the air conditioner to operate it. If the display screen of the remote control begins to fade, replace the batteries. Insert AAA (1.5 V) batteries before using the remote control. - Page 11 Setting the Current Time Press the ON/OFF button. Insert batteries. • The icon below blinks at the bottom of the display screen. Press button to select the minutes. Press SET/CANCEL button to finish. Close the front panel as soon as you press the ON/OFF button.
- Page 12 Using Wireless Remote Control You can operate the air conditioner more conveniently with the remote control. Display Description Button Screen To turn on/off the air conditioner. To adjust the desired room temperature in cooling, heating or auto changeover mode. To select the cooling mode. (P.14) To select the heating mode.
- Page 13 Display Description Button Screen LIGHT To set the brightness of the display on the indoor unit. (P.19) ROOM To display the room temperature. TEMP °C↔°F [5 s] To change unit between °C and °F (P.11) COMFORT To adjust the air flow to deflect wind. (P.19) ENERGY To bring the effect of the power saving.
-
Page 14: Restarting The Air Conditioner Automatically
Restarting the Air Using the Mode Function Conditioner Automatically This function allows you to select the desired function. When the air conditioner is turned on again after a Cooling & Heating Model power failure, this function restores the previous settings. Cooling Mode Disabling Auto Restart Open the front panel. - Page 15 Heating Mode Dehumidification Mode This mode removes excess moisture from a highly Turn the appliance on. humid environment or during the rainy season, in order to prevent mildew from setting in. This mode Press MODE button repeatedly to select the adjusts the room temperature and the fan speed Heating Mode.
-
Page 16: Using The Jet Mode Function
Using the Jet Mode Function Auto Changeover Mode This mode changes the mode automatically to Changing Room Temperature maintain the set temperature at ±2 °C Quickly Turn the appliance on. This function allows you to cool indoor air quickly during the summer or warm it quickly during winter. Press MODE button repeatedly to select the Auto •... -
Page 17: Using The Fan Speed Function
Using the Fan Speed Using the Air Flow Direction Function Function This function adjusts the direction of the air flow Adjusting the Fan Speed vertically (horizontally). • Press FAN SPEED button repeatedly to adjust the • Press ) button repeatedly and select the SWING SWING fan speed. -
Page 18: Setting The On/Off Timer
Setting the On/Off Timer Setting the Off Timer This function sets the air conditioner to turn on/off Press button repeatedly. TIMER automatically at desired time. • The icon below blinks at the bottom of the On/Off Timer can be set together. display screen. -
Page 19: Using The Sleep Function
Using the Sleep Function Using the Light Off Function This function turns off the air conditioner Display Screen Brightness automatically when you go to sleep. You can set the brightness of the indoor unit display Turn the appliance on. screen. •... -
Page 20: Using The Energy Control Function
Using the Energy Control Function Turn the appliance on. Press ENERGY CTRL button. • Press ENERGY CTRL button repeatedly to select each step. 1 step 2 step 3 step NOTE • 1 step : The power Input is decreased by 20 % compared to rated power input. -
Page 21: Using Special Functions
Using Special Functions Canceling Special Functions Press FUNC button repeatedly to select the Turn the appliance on. desired function. Press FUNC button repeatedly to select the Press SET/CANCEL button to cancel the desired function. function. Press SET/CANCEL button to finish. Using the Air Purification Function These functions supply clean and fresh air by ion particles and the filter. - Page 22 Using the Silent Function NOTE • This function is available with Heating Mode. This function prevents potential claims by neighbors, • During LH operation, when you press buttons such reducing noise from outdoor units. , MODE, FAN SPEED, and then return is displayed on the display screen.
-
Page 23: Smart Functions
Internet service provider or refer to your Things to check before using LG wireless router manual. ThinQ • LG ThinQ is not responsible for any network connection problems or any faults, malfunctions, or • For appliances with the or ThinQ logo errors caused by network connection. - Page 24 NOTE • If you change your wireless router, Internet service provider, or password, delete the registered appliance from the LG ThinQ application and register it again. • The application is subject to change for appliance improvement purposes without notice to users.
- Page 25 Smart Diagnosis™ can not be activated unless the appliance is connected to power. If the appliance is LG Electronics will also provide open source code to unable to turn on, then troubleshooting must be you on CD-ROM for a charge covering the cost of done without using Smart Diagnosis™.
-
Page 26: Maintenance
MAINTENANCE WARNING • Before cleaning or performing maintenance, disconnect the power supply and wait until the fan stops. If the air conditioner will not be used for an extended period of time, dry the air conditioner to maintain it in best condition. -
Page 27: Clean The Air Filter
Clean the Air Filter Clean the 3M Filter Clean the air filters once every 2 weeks, or more, if Turn off the power to the unit. necessary. Turn off the power to the unit. Remove the air filters from the indoor unit. Open the front panel. -
Page 28: Clean The Ionizer
Clean the Ionizer Turn off the power to the unit. Use dry cotton bud to remove any dust. Ionizer CAUTION • Turn off the power and unplug the power cord before you perform any maintenance; otherwise it may cause electric shock. •... -
Page 29: Troubleshooting
TROUBLESHOOTING Self-diagnosis Function This product has a built-in self-diagnosis function. If an error occurs, the lamp of the indoor unit will blink in 2 second intervals. If this occurs, contact your local dealer or service center. Before Calling for Service Please check the following before you contact the service center. - Page 30 Problem Possible Causes Corrective Action • Make sure that there are no curtains, Air is not circulating properly. blinds, or pieces of furniture blocking the front of the air conditioner. • Clean the air filter once every 2 weeks. The air filter is dirty. •...
- Page 31 • Find the Wi-Fi network connected to your you are trying to connect to is smartphone and remove it, then register incorrect. your appliance on LG ThinQ. • Turn off the Mobile data of your Mobile data for your smartphone smartphone and register the appliance is turned on.
- Page 32 Memo...
Need help?
Do you have a question about the F12KM and is the answer not in the manual?
Questions and answers