Table of Contents
Advertisement
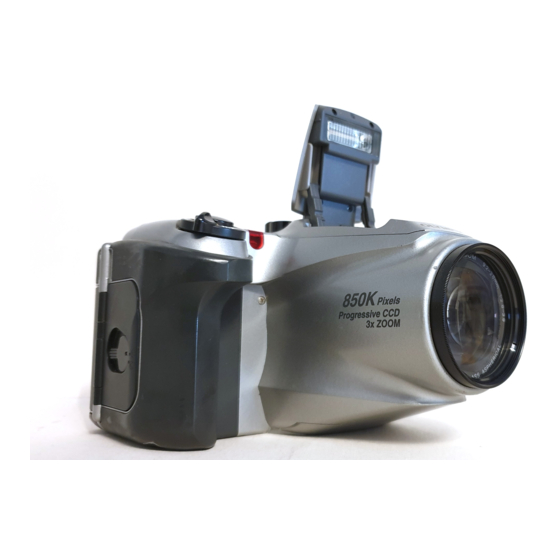
C-1400L
C-1000L
ENGLISH
Digital Camera Instructions
Before using your camera, read this manual carefully
to ensure correct use.
We recommend that you take test shots to get
accustomed to your camera before taking important
photographs.
FRANÇAIS
Mode d'emploi pour appareil photo
numérique
Avant d'utiliser votre appareil photo, nous vous prions
de lire attentivement ce mode d'emploi, de manière à
obtenir les meilleurs résultats possibles.
Avant d'effectuer des prises de vues importantes,
nous vous conseillons par ailleurs de faire quelques
essais afin de vous familiariser avec le maniement de
l'appareil photo.
DEUTSCH
Digital-Kamera Bedienungsanleitung
Bitte lesen Sie diese Bedienungsanleitung vor
Gebrauch der Kamera sorgfältig durch, um optimale
Ergebnisse zu erzielen.
Wir empfehlen, vor wichtigen Aufnahmen Probeauf-
nahmen durchzuführen, um sich mit der Bedienung
und den Funktionen der Kamera vertraut zu machen.
Advertisement
Table of Contents

Related Manuals for Olympus CAMEDIA C-1000L


Summarization of Contents
Important Notice
Disclaimer of Warranty
Olympus disclaims all warranties and liabilities for damages arising from use.
Precautions
General Precautions
Guidelines for general camera operation, problem solving, opening, and protecting the unit.
Notes and Important Checks
Make Sure
Set date before pictures, keep spare batteries handy for special occasions or cold weather.
Taking Pictures with Focus Lock
Caution
Never open card compartment, eject card, remove batteries, or disconnect AC adaptor while card access lamp blinks.
Using the Focus Lock
Make Sure
Green lamp lights when focus is locked. Ensure correct positioning for focus lock.
Autofocus Operation
Subjects with Low Contrast
Use focus lock by focusing on a subject at the same distance first, then aim at the main subject.
Subjects in Excessively Bright Light
Use focus lock by focusing on a subject at the same distance first, then aim at the main subject.
Dark Subjects
Use focus lock by focusing on a subject at the same distance first, then aim at the main subject.
Two Subjects at Different Distances
If out of focus, focus on another subject at desired distance first, then recompose.
High-speed Subjects at Close Range
Focus on another subject at desired distance first, then recompose to take the picture.
Spot Metering Mode
Make Sure
Green lamp lights when focus is locked. Ensure correct positioning for spot metering.
Selftimer Operation
Notes
Use a tripod for stability. Press Selftimer button again to cancel activation (mode not cancelled).
Using the Flash Modes
Note
Flash charges while orange lamp blinks. Wait for lamp to go off before taking pictures.
Flash Mode Selection
Auto-Flash Mode
Fires automatically in low-light and backlight conditions.
Red-Eye Reducing Flash Mode
Reduces red-eye by emitting pre-flashes before the main flash.
Fill-In Flash Mode
Fires regardless of available light; used to brighten shaded faces.
Red-Eye Reducing Flash Mode
Note
Hold camera still for pre-flashes. Red-eye reduction may be ineffective if subject is far or not watching.
Fill-In Flash Mode
Note
Use within flash working range. May not work well in excessively bright light.
Off (Flash Override) Mode
Note
Slow shutter speed in Off mode may cause blur. Use a tripod to prevent camera shake.
Menu Operations
Notes
Menu mode cancels after 15 sec inactivity. Adjustments valid until power off; may reset after battery replacement.
SHQ/HQ/SQ (Resolution)
Notes
Remaining pictures may turn to 0 depending on resolution. See page 56 for storable pictures.
Format Card
Note
Formatting erases data. Be careful not to erase important data. Use camera for best results.
Date and Time Settings
Notes
Nonexistent dates cannot be set. Date/time adjustment can be made via PC.
Connecting to the Printer
Notes
Printer buttons invalid. LCD monitor display goes off during printing. Auto-cancels print mode after 15 sec inactivity.
Print Menu Operations
Notes
Card error prevents print mode. PRINT ALL, SELECT IMAGE, SELECT PRINT require AC adaptor.
Installing Provided Software
Download Image Data
Connect camera to computer via RS-232C to download data and control camera functions.
Image Viewer
Displays images and thumbnails downloaded from the camera.
Format Exchange
Save files in various formats: JPEG, BMP, PICT, TIFF.
Basic Image Processing
Includes rotation, color change, and color adjustment.
Printing
Supports single image, thumbnail, and A4 layout printing.
Connecting to a Personal Computer
IBM PC/AT Compatible
Connect cable to D-SUB 9-Pin COM 1 or COM 2 serial port.
Apple Macintosh or Compatible
Use conversion connector for Macintosh to printer or modem serial port.
Note
Use optional AC adaptor to prevent battery consumption.
Questions and Answers
How long will the batteries last?
Battery life depends on flash use, battery type, and conditions; figures are estimates.
How can I correct the clock in the camera that will be used to record the date on the image data?
Date adjustment can be made from camera or PC; not set when shipped.
Miscellaneous Questions
Camera Storage
Protect from dust, moisture, salt. Wipe dry. Unload batteries if not using for a long period.
Red-Eye Phenomenon
Caused by flash reflection on retina. Red-Eye Reducing mode helps. Varies by individual and conditions.
Using Filters or Hoods
C-1400L needs adaptor for 55mm filter/hood. C-1000L takes 43mm filter/hood directly.
Troubleshooting: Operating Problems
Camera Does Not Work
Check power, battery installation/charge, card compartment cover, and battery condition.
No Picture When Shutter Pressed
Check SmartMedia status (writing, full, battery). Ensure camera is on and in Play mode.
Troubleshooting: Image Focus and Flash Issues
Picture Out of Focus
Check camera movement, autofocus, lens, mode, and quick focus range.
Flash Does Not Fire
Check flash setting, charge status, subject brightness, and flash condition.
Pictures Not on LCD Monitor
Check power, mode, and SmartMedia status.
LCD Monitor Hard to Read
Adjust brightness setting and block monitor glare.
Computer Connection Error Messages
Cable Not Plugged In
Ensure cable is connected correctly. Check power and battery status.
Power is OFF
Press the power button to turn it on.
Batteries Exhausted
Replace batteries or use AC adaptor.
Serial Port Not Selected
Use OS software to check serial port selection. Turn off AppleTalk/LocalTalk on Macintosh.
No Available Serial Port
Make serial port available per PC instructions. Turn off AppleTalk/LocalTalk on Macintosh.
Image Transfer Speed Incorrect
Select the correct speed on the computer.
TWAIN/Plug-In Not Installed
Install TWAIN/Plug-In on your computer.
No Operations Possible
Press Reset button in card compartment, then Power button.
Power Supply and Operating Environment
Automatic Calendar System Power
Uses one 3V lithium battery (CR2025).
Direct Print Options
Supports single, index, random, multi, mirror, and all print types.
Operating Environment
Specifies temperature and humidity ranges for operation and storage.
Main Power Supply
Uses four AA batteries or optional AC adaptor. Avoid manganese or lithium batteries.
Need help?
Do you have a question about the CAMEDIA C-1000L and is the answer not in the manual?
Questions and answers