Olympus CAMEDIA C-100 Basic Manual
Hide thumbs
Also See for CAMEDIA C-100:
- Basic manual (152 pages) ,
- Operation manual (80 pages) ,
- Quick start manual (2 pages)
Table of Contents
Advertisement
Available languages
Available languages
DIGITAL CAMERA/APPAREIL PHOTO NUMÉRIQUE
DIGITALKAMERA/CAMERA DIGITAL/ 數碼相機
C-100/D-370
BASIC MANUAL/MANUEL DE BASE
KURZANLEITUNG/MANUAL BÁSICO/ 基本手冊
I Before using your camera, read this manual carefully to ensure correct use.
I We recommend that you take test shots to get accustomed to your camera before taking important
photographs.
I These instructions are only a basic manual. For more details on the functions described here, refer to
the software CD's reference manual on CD-ROM. The CD-ROM reference manual also includes
instructions for connecting the camera to a PC.
I Avant d'utiliser votre appareil photo, veuillez lire attentivement ce mode d'emploi, de manière à obtenir
les meilleurs résultats possibles.
I Avant d'effectuer des prises de vues importantes, nous vous conseillons par ailleurs de faire quelques
essais afin de vous familiariser avec le maniement de l'appareil photo.
I Ces instructions ne sont qu'un manuel de base. Pour plus de détails sur les fonctions décrites ici, se
référer aux manuel de référence du CD logiciel sur le CD-ROM. Le manuel de référence compris dans
le CD-ROM comprend aussi des instructions pour la connexion à un ordinateur.
I Bitte lesen Sie vor dem Gebrauch dieser Kamera sorgfältig diese Bedienungsanleitung, um optimale
Ergebnisse beim Fotografieren zu erzielen.
I Wir empfehlen, vor wichtigen Aufnahmen Probeaufnahmen durchzuführen, um sich mit der
Bedienung und den Funktionen der Kamera vertraut zu machen.
I Die vorliegende Broschüre stellt nur eine einfache Anleitung dar. Falls Sie ausführlichere Angaben zu
den hier beschriebenen Funktionen benötigen, steht Ihnen die KURZANLEITUNG auf der CD-ROM
zur Verfügung. Das CD-ROM Nachschlage-Handbuch enthält auch Anweisungen für den Anschluss
der Kamera an einen PC.
I Antes de usar su cámara lea este manual detalladamente para asegurar el uso correcto.
I Nosotros le recomendamos que tome fotografías de prueba para familiarizarse con su cámara antes
de tomar fotografías importantes.
I Estas instrucciones constituyen sólo un manual básico. Para más detalles de las funciones descritas
aquí, refiérase a las manual de consultas del software CD en el CD-ROM. En el manual de consulta
de CD-ROM también se incluyen las instrucciones para conectar la cámara a un PC.
I 在使用本相機之前,請仔細閱讀本手冊以掌握正確之用法。
I 在進行重要的拍攝之前,最好先試拍數次以熟悉本相機之性能。
I 本手冊僅為基本手冊。本手冊中所提到的功能之詳細說明,請參閱 CD-ROM 上的軟體 CD 參考手冊。CD-ROM
參考手冊中也包括相機與個人電腦連接的說明。
Downloaded From camera-usermanual.com
ENGLISH
FRANÇAIS
DEUTSCH
ESPAÑOL
中文
Advertisement
Chapters
Table of Contents

Related Manuals for Olympus CAMEDIA C-100


Summary of Contents for Olympus CAMEDIA C-100
- Page 1 DIGITAL CAMERA/APPAREIL PHOTO NUMÉRIQUE DIGITALKAMERA/CAMERA DIGITAL/ 數碼相機 C-100/D-370 ENGLISH BASIC MANUAL/MANUEL DE BASE FRANÇAIS KURZANLEITUNG/MANUAL BÁSICO/ 基本手冊 DEUTSCH ESPAÑOL 中文 I Before using your camera, read this manual carefully to ensure correct use. I We recommend that you take test shots to get accustomed to your camera before taking important photographs.
- Page 2 G Olympus will not assume any liability for damages and loss of profit due to loss of image data resulting from servicing by a third party who is not designated by Olympus or from other causes.
- Page 3 Declaration of conformity Model Number: C-100/D-370 Trade Name: OLYMPUS Responsible Party: Olympus America Inc. Address: 2 Corporate Center Drive, Melville, New York 11747-3157 USA Telephone Number: 631-844-5000 This device complies with Part 15 of the FCC rules. Operation is subject...
-
Page 4: Table Of Contents
ICONTENTS PREPARATIONS OTHER FUNCTIONS Names of parts ........ 5 Recording a moving image .... 24 Attaching the strap ......6 Playing back moving images ..24 Loading the batteries ....... 6 Rec view ........25 Using a smartmedia card (optional) ..7 Beep sound ........ -
Page 5: Preparations
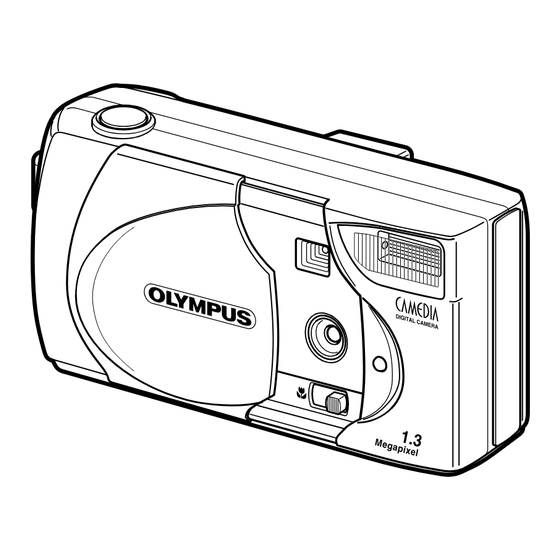
REPARATIONS NAMES OF PARTS 0 A B C 1 Shutter button 0 Monitor 2 Lens barrier A Viewfinder 3 Lens B Green lamp 4 Flash C Arrow pad 5 Macro lever D Tripod socket 6 Selftimer lamp (Monitor) button 7 DC-IN jack (OK/Menu) button 8 Connector cover G Card cover... -
Page 6: Attaching The Strap
ATTACHING THE STRAP Pass the short end of the strap through the strap eyelet. Pass the long end of the strap through the loop. Pull tight and check that the strap is securely attached. LOADING THE BATTERIES This camera uses four AA alkaline (included), NiMH, lithium or NiCD batteries, or two CR-V3 lithium battery packs. -
Page 7: Using A Smartmedia Card (Optional)
Close the card cover until it clicks. Note Non-Olympus or non-Lexar cards, or cards formatted on other equipment, such as a PC, may not be recognized by the camera. Format the card with the camera before using it. See “Card format/Memory setup” ( p.26). -
Page 8: Turning The Camera On/Off
• Some of the camera function are ignored if a write-protect seal is affixed to the SmartMedia card. When you use these functions, remove the seal from Caution the card. Write-protect seal Approx. number of recordable images Image Card memory quality capacity Internal memory... -
Page 9: Adjusting The Date And Time
WHEN PLAYING BACK PICTURES Turning the monitor on ... Press the button with the lens barrier closed. The camera will turn on in Play mode and the monitor will turn on. Turning the monitor off ... Press the button. The camera and the monitor will turn off. Camera with Monitor turns on Monitor turns off... - Page 10 Set the first item using the buttons and press the button. Move to the next item. Repeat until the date and time settings are adjusted. Press the button when the time reaches 00 seconds. Setting of the date and time is completed. Press the button again.
-
Page 11: Taking Pictures
aking pictures TAKING PICTURES TAKING PICTURES USING THE VIEWFINDER Slide the lens barrier open until it clicks. Position the subject in the viewfinder using the Target mark. To take pictures at a distance of less than 60cm (2ft.), see “Macro mode” p.13). -
Page 12: Using The Flash
• When taking pictures at close range using the flash, the appropriate brightness may not be achieved and there may be pronounced shadows as a result. Olympus recommends that you check the picture on the camera’s LCD monitor. • The flash cannot be used in Sequence mode, Panorama mode and Movie mode. -
Page 13: Macro Mode
Shutter button is released. • If you use the flash in Macro mode, the brightness may not be correct and there may be pronounced shadows as a result. Olympus recommends that you check the picture on the camera’s monitor. -
Page 14: Digital Tele Mode
DIGITAL TELE MODE This mode enables you to enlarge the image digitally to magnifications 1.6×, 2×, 3.2× and 4×. Open the lens barrier and press the button. The magnification changes in the sequence [1.6× → 2.0× → 3.2× → 4.0×] each time the button is pressed. -
Page 15: Exposure Compensation
Note • Sequence mode is canceled when the lens barrier is closed. • The flash cannot be used in this mode. • Since the shutter speed is set to the maximum 1/30 sec. to prevent hand jitter, the resulting picture may be darker than usual. •... -
Page 16: White Balance
WHITE BALANCE This camera uses automatic white balance to shoot the subject in a natural- looking tone. However, it may sometimes be difficult to get satisfactory results automatically due to lighting or weather conditions. In such cases, change the white balance settings. Press the button with the lens barrier open. -
Page 17: Image Quality
IMAGE QUALITY There are 4 kinds of image quality: SHQ, HQ, SQ1 and SQ2. Press the button with the lens barrier open. Select [PICTURE] from the Camera menu screen using the buttons and press the button. Select [ ] using the buttons and press the button. -
Page 18: Spot Metering Mode
SPOT METERING MODE If a shot is backlit, ordinary photometric settings (Digital ESP Metering) will make the subject appear too dark. To compensate for this, switch the camera to Spot Metering Mode. This feature is used to obtain the right exposure regardless of backlighting. -
Page 19: Playing Back Pictures
LAYING BACK PICTURES PLAYING BACK AN IMAGE This mode is for displaying images one at a time on the monitor. Press the button with the lens barrier closed. The camera will turn on in Play mode. The last recorded image will be displayed on the monitor. -
Page 20: Auto Playback
Press the button to display the Play menu screen. Select [PLAY] using the buttons and press the button. Select [ ] using the buttons and press the button. Select the number of images [4], [9] or [16] using the buttons and press the button. -
Page 21: Erasing An Image
Press the button after exiting scroll mode to return to the 1× single-image playback screen. Note The above operation cannot be performed while an image marked by the Moving Image ( ) symbol is displayed. Display a still picture first. ERASING AN IMAGE Press the button with the lens barrier closed. -
Page 22: Erasing All Images
• You can also move to the erase menu by keeping the button pressed for at least 1 second while the image you want to erase is displayed. Caution • If the image you want to erase is protected or a write-protect seal is affixed to the SmartMedia card, the image cannot be erased. - Page 23 Select [PLAY] using the buttons and press the button. Select [ ] using the buttons and press the button. Select [ON] using the buttons and press the button. The image will be protected. To cancel the protect setting, select [OFF]. Note •...
-
Page 24: Other Functions
THER FUNCTIONS RECORDING A MOVING IMAGE In addition to still pictures, this camera has the ability to take movie pictures. Press the button with the lens barrier open. Select [CAMERA] using the buttons and press the button. Select [DRIVE] using the buttons and press the button. -
Page 25: Rec View
REC VIEW This function enables you to check an image by displaying it immediately after it is taken. Open the lens barrier and press the button. Select [SETUP] using the buttons and press the button. Select [REC VIEW] using the buttons and press the button. -
Page 26: Card Format/Memory Setup
• When formatting a SmartMedia card, insert the card first. Caution • Before using a non-Olympus SmartMedia card or a card formatted on a PC, format the card on the camera first. Olympus CAMEDIA brand SmartMedia cards do not require formatting. -
Page 27: Memory Back-Up
• All protected images will be erased. Once formatted, the SmartMedia card or internal memory cannot be restored. Caution • Cards with a write-protect seal affixed to them cannot be formatted. Remove the seal before formatting the card. Do not re-use seals. MEMORY BACK-UP This function enables you to copy all image data recorded in the internal memory onto a SmartMedia card. - Page 28 Press the button with the lens barrier closed. Press the button. Select [PLAY] using the buttons and press the button. Select [INFO] using the buttons and press the button. Select [ON] using the buttons and press the button. The image information will be displayed on the display screen. Press the button again to exit the menu.
-
Page 29: Error Messages
RROR MESSAGES ERROR CODES Monitor display Error Remedy No card has been inserted or Insert or reinsert card. card is not detected. Failure to record, display or Failure to record, display or erase erase. Wipe the card terminal with cleaning paper and reformat. -
Page 30: Specifications
640 × 480 pixels (SQ2 mode) White balance: Full auto TTL Preset (daylight, overcast, tungsten light, fluorescent light) Lens: Olympus lens 4.5mm, F4, 5 elements, 5 groups (equivalent to 35mm lens on 35mm camera) Photometric system: Digital ESP metering system with imager, Spot Metering... - Page 31 Power supply: Four AA alkaline batteries, AA nickel metal hydride batteries or AA NiCd batteries. Or two CR-V3 lithium battery packs (LB-01 manufactured by Olympus), or optional AC adapter. AA manganese batteries cannot be used. 123(W) × 65(H) × 44.5(D) mm Dimensions: (4.8"(W) ×...
- Page 32 G Olympus décline toute responsabilité pour les pertes subies et les bénéfices manqués, de même que pour les créances de tiers en découlant, consécutifs à...
- Page 33 Numéro de modèle: C-100/D-370 Nom de marque: OLYMPUS Partie responsable: Olympus America Inc. Adresse: 2 Corporate Center Drive, Melville, New York 11747-3157 USA Numéro de téléphone: 631-844-5000 Cet appareil satisfait aux termes de la partie 15 des directives FCC. Son utilisation est soumise aux deux conditions suivantes: (1) Cet appareil ne doit pas causer de brouillage radioélectrique, et...
- Page 34 TABLE DES MATIÈRES PRÉPARATION AUTRES FONCTIONS Nomenclature ....... 5 Mode d’images animées .... 24 Fixation de la bandoulière .... 6 Affichage des images animées .. 24 Mise en place des piles ....6 Vérification immédiate ....25 Utilisation d’une carte smartmedia Bip sonore ........
-
Page 35: Préparation
RÉPARATION NOMENCLATURE 0 A B C 1 Déclencheur 0 Écran ACL 2 Capot de protection de A Viseur B Voyant vert l’objectif 3 Objectif C Touches fléchées 4 Flash D Embase filetée de trépied 5 Levier gros plan E Touche d’écran 6 Voyant du retardateur F Touche OK/Menu 7 Prise d’entrée CC (DC-IN) -
Page 36: Fixation De La Bandoulière
FIXATION DE LA BANDOULIÈRE Passez l’extrémité la plus courte de la bandoulière à travers l’œillet de bandoulière. Passez l’extrémité la plus longue de la bandoulière dans la boucle. Tirez fermement et vérifiez que la bandoulière est fixée correctement. MISE EN PLACE DES PILES Cet appareil utilise 4 piles alcalines AA (fournies), NiMH, lithium ou NiCD ou deux bloc-piles au lithium CR-V3. -
Page 37: Utilisation D'une Carte Smartmedia (Optionnelle)
Refermez le couvercle du logement de la carte jusqu’à ce que vous entendiez un clic. Remarque Les cartes non-Olympus ou non-Lexar, ou les cartes formatées sur un autre appareil, comme sur un ordinateur peuvent ne pas être reconnues. Formatez les cartes avec cet appareil avant de les utiliser. Reportez-vous à “Formatage de la carte ou de la mémoire”... -
Page 38: Mise Sous/Hors Tension De L'appareil
• La carte SmartMedia est un matériel de précision. Ne la soumettez pas à une force non raisonnable ni à des chocs. Ne touchez pas les contacts en métal Attention doré sur la carte. • Certaines des fonctions de l’appareil sont ignorées si l’autocollant de protection en Autocollant de écriture est collé... -
Page 39: Réglage De La Date Et De L'heure
LORS DE LECTURE D’IMAGES Mise en service de l’écran ACL ... Appuyez sur la touche quand le capot de protection d’objectif est fermé. L’appareil se met sous tension en mode de lecture et l’écran ACL se met en service. Mise hors service de l’écran ACL Appuyez sur la touche Le moniteur se met hors service et l’appareil se met hors tension. - Page 40 Réglez le premier nombre en utilisant les touches et appuyez sur la touche Passez au nombre suivant. Répétez la procédure ci-dessus jusqu’à ce que le réglage de la date et de l’heure soit terminé. Appuyez sur la touche quand l’heure atteint 00 seconde.
-
Page 41: Prise De Vue
RISE DE VUE PRISE DE VUE PRISE DE VUE EN UTILISANT LE VISEUR Ouvrez le capot de protection de l’objectif jusqu’à ce que vous entendiez un clic. Positionnez le sujet dans le viseur en utilisant la marque de cible. Pour prendre des photos à une distance de moins de 60cm, reportez- vous au “Mode macro”... -
Page 42: Utilisation Du Flash
Remarque • Quand une photo est prise sous une lumière importante, telle que la lumière du soleil, des lignes verticales peuvent apparaître sur l’écran ACL. Ce n’est pas un mauvais fonctionnement. • L’écran ACL sert à vérifier la composition. Vérifiez les floues, la mise au point et l’exposition plus tard en affichant l’image sur un ordinateur. -
Page 43: Mode Macro
• Lors de prises de vue en gros plan avec le flash, il peut être impossible d’obtenir la luminosité correcte et les ombres peuvent être accentuées. Olympus Attention recommande que vous vérifiiez l’image sur l’écran ACL de l’appareil. • Le flash ne peut pas être utilisé en mode de prise de vue en rafale, en mode panoramique ni en mode d’images animées. -
Page 44: Mode Téléobjectif Numérique
Remarque • Le déclencheur est annulé automatiquement une fois que la photo a été prise. • Pour annuler le retardateur après avoir appuyé sur le déclencheur, fermez le capot de protection de l’objectif. MODE TÉLÉOBJECTIF NUMÉRIQUE Ce mode vous permet d’agrandir numériquement l’image avec un rapport de 1,6×, 2×, 3,2×... -
Page 45: Compensation De L'exposition
Remarque • Le mode de prise de vue en rafale est annulé quand le capot de protection de l’objectif est fermé. • Le flash ne peut pas être utilisé dans ce mode. • Comme la vitesse d’obturation est réglée sur un maximum de 1/30 sec. pour éviter les risques de bougé, l’image obtenue peut apparaître plus sombre qu’habituellement. -
Page 46: Balance Des Blancs
BALANCE DES BLANCS Cet appareil utilise un réglage automatique de la balance des blancs pour prendre un sujet dans un ton naturel. Cependant, il peut être difficile d’obtenir automatiquement des résultats satisfaisants à cause des conditions d’éclairage ou météo. Dans ces cas, changez le réglage de la balance des blancs. Appuyez sur la touche alors que le capot de protection de l’objectif est ouvert. -
Page 47: Qualité De L'image
QUALITÉ DE L’IMAGE Il y a 4 qualités d’image différentes: SHQ, HQ, SQ1 et SQ2. Appuyez sur la touche alors que le capot de protection de l’objectif est ouvert. Choisissez [PICTURE] à partir de l’écran de menu de l’appareil en utilisant les touches et appuyez sur la touche Choisissez [... -
Page 48: Mode De Mesure Spot
MODE DE MESURE SPOT Si une vue est en contre-jour, le réglage photométrique ordinaire (mesure numérique ESP) fera apparaître le sujet trop sombre. Pour compenser ce problème, réglez l’appareil en mode de mesure Spot. Cela vous permettra d’obtenir une exposition correcte même en cas de contre-jour. Ouvrez le capot de protection de l’objectif et appuyez sur la touche Choisissez [CAMERA] à... -
Page 49: Lecture Des Images
ECTURE DES IMAGES LECTURE D’UNE IMAGE Ce mode permet d’afficher une image à la fois sur l’écran ACL. Appuyez sur la touche alors que le capot de protection de l’objectif est fermé. L’appareil se met sous tension en mode de lecture. La dernière image enregistrée est affichée sur l’écran ACL. -
Page 50: Lecture Automatique
Modification du nombre d’images de l’affichage d’index Choisissez le nombre d’images de l’index parmi 4, 9 ou 16. Appuyez sur la touche alors que le capot de protection de l’objectif est fermé. Appuyez sur la touche pour afficher l’écran du menu de lecture. Choisissez [PLAY] en utilisant les touches et appuyez sur la touche... -
Page 51: Effacement D'une Image
Appuyez sur la touche Le mode de défilement est en service. Faites défiler la zone agrandie vers le haut ou le bas, vers la gauche ou la droite, en utilisant les touches pour afficher la zone que vous souhaitez voir. Appuyez de nouveau sur la touche pour sortir du mode de défilement. -
Page 52: Effacement De Toutes Les Images
• Vous pouvez passer au menu d’effacement en maintenant pressée la touche pendant au moins une seconde quand l’image que vous souhaitez effacée Attention est affichée. • Si l’image que vous souhaitez effacer est protégée ou si un autocollant de protection en écriture est collé... -
Page 53: Protection Des Images Importantes
PROTECTION DES IMAGES IMPORTANTES Appuyez sur la touche alors que le capot de protection de l’objectif est fermé. Affichez l’image que vous souhaitez protéger. Appuyez sur la touche pour afficher l’écran du menu de lecture. Choisissez [PLAY] en utilisant les touches et appuyez sur la touche... -
Page 54: Autres Fonctions
UTRES FONCTIONS MODE D’IMAGES ANIMÉES En plus des images fixes, cet appareil peut prendre des images animées. Appuyez sur la touche alors que le capot de protection de l’objectif est ouvert. Choisissez [CAMERA] en utilisant les touches et appuyez sur la touche Choisissez [DRIVE] en utilisant les touches et appuyez sur la touche... -
Page 55: Vérification Immédiate
Choisissez [START] en utilisant les touches et appuyez sur la touche Les images animées sont affichées. VÉRIFICATION IMMÉDIATE Cette fonction vous permet de vérifier une image en l’affichant immédiatement après qu’elle a été prise. Ouvrez le capot de protection de l’objectif et appuyez sur la touche Choisissez [SETUP] en utilisant les touches et appuyez sur la touche Choisissez [REC VIEW] en utilisant les touches... -
Page 56: Formatage De La Carte Ou De La Mémoire
• Lors du formatage d’une carte SmartMedia, insérez la carte d’abord. Attention • Avant d’utiliser une carte SmartMedia non Olympus ou une carte formatée sur un ordinateur, formatez d’abord la carte sur l’appareil. Cartes SmartMedia de marque Olympus CAMEDIA n’ont pas besoin d’être formatées. -
Page 57: Sauvegarde De La Mémoire
Remarque Vous pouvez aussi formater une carte ou la mémoire interne à partir du menu de l’appareil. • Toutes les images protégées sont effacées. Une fois formatée, la carte SmartMedia ou la mémoire interne ne peut plus être récupérée. Attention •... - Page 58 Affichage des informations des Affichage des informations des images en service (ON) images hors service (OFF) Appuyez sur la touche alors que le capot de protection de l’objectif est fermé. Appuyez sur la touche Choisissez [PLAY] en utilisant les touches et appuyez sur la touche Choisissez [INFO] en utilisant les touches...
-
Page 59: Messages D'erreur
ESSAGES D’ERREUR CODES D’ERREUR Affichage de l’écran ACL Erreur Remède Aucune carte n’est insérée Insérez ou réinsérez la carte. ou la carte n’est pas détectée. Échec de l’enregistrement, Essuyez les contacts de la carte d e l ’ a f f i c h a g e o u d e avec un papier de nettoyage et l’effacement. - Page 60 Balance des blancs: TTL complètement automatique Préréglage (lumière du jour, nuageux, éclairage tungstène, éclairage fluorescent) Objectif: Objectif Olympus 4,5mm, F4, 5 éléments, 5 groupes (équivalent à un objectif 35mm sur un appareil 35mm) Système photométrique: Système de mesure numérique ESP avec imageur/mesure spot Système de commande de l’exposition: Exposition automatique programmée...
- Page 61 Quatre piles alcalines AA, piles à l’hydrure métallique de nickel AA ou piles NiCd AA. Ou deux bloc-piles au lithium CR-V3 (LB-01 fabriqué par Olympus), adaptateur secteur optionnel. Les piles manganèses AA ne peuvent pas être utilisées. 123(L) × 65(H) × 44,5(P) mm...
- Page 62 G Olympus haftet nicht für Schäden, Gewinnausfall oder Forderungen Dritter, die aus dem unsachgemäßen Gebrauch dieses Produktes herrühren. G Olympus haftet nicht für Schäden oder Gewinnausfall infolge des Verlustes von Bilddaten, der aus der Dienstleistung von nicht durch Olympus autorisierten Dritten oder aus anderen Ursachen herrührt.
- Page 63 Zum Anschluss der Kamera an einen Personal Computer (PC) ausschließlich das USB-Kabel verwenden. Betriebserlaubnis Modellnummer: C-100/D-370 Markenname: OLYMPUS Haftende juristische Person: Olympus America Inc. Anschrift: 2 Corporate Center Drive, Melville, New York 11747-3157 USA Telefon: 631-844-5000 Dieses Gerät erfüllt die Auflagen unter Abschnitt 15 der FCC- Bestimmungen.
- Page 64 INHALT VORBEREITUNGEN SONSTIGE FUNKTIONEN 24 Bezeichnung der Teile ...... 5 Laufbildaufnahmemodus ....24 Anbringen der Handschlaufe ... 6 Laufbildwiedergabe ......24 Einlegen der Batterien ..... 6 Aufnahmekontrolle ......25 Verwendung von SmartMedia-Karten Signalton ........25 (sonderzubhör) ......7 Helligkeits-Einstellung des LCD- Ein-/Ausschalten der Kamera ..
-
Page 65: Vorbereitungen
ORBEREITUNGEN BEZEICHNUNG DER TEILE 0 A B C 1 Auslöser A Sucher 2 Objektivschutzschieber B Grüne LED 3 Objektiv C Pfeiltaste 4 Blitz D Stativgewinde 5 Makrohebel E LCD-Monitor-Taste 6 Selbstauslöser-LED F OK/Menü-Taste 7 Gleichspannungseingang G Kartenfachabdeckung 8 Anschlussbuchsenabdeckung H Schlaufenöse 9 USB-Buchse I Batteriefachdeckel 0 LCD-Monitor... -
Page 66: Anbringen Der Handschlaufe
ANBRINGEN DER HANDSCHLAUFE Führen Sie das kurze Ende der Handschlaufe durch die Schlaufenöse. Führen Sie das lange Ende der Handschlaufe durch die Schleife . Ziehen Sie die Handschlaufe straff, um sicherzugehen, dass sie einwandfrei angebracht ist. EINLEGEN DER BATTERIEN Diese Kamera kann mit jeweils vier AA-Alkalibatterien (mitgeliefert), NiMH- Akkus, Lithium- oder NiCD-Akkus oder mit zwei Lithiumbatterien CR-V3 betrieben werden. -
Page 67: Verwendung Von Smartmedia-Karten (Sonderzubhör)
Kamera akzeptiert. Formatieren Sie die Karte vor Gebrauch mit der Kamera. Siehe [Kartenformatierung/Speichereinrichtung] ( S. 26). • Karten anderer Marken als Olympus, oder Karten, die mit anderen Geräten, wie z.B. einem PC, formatiert wurden, werden eventuell nicht von der Kamera akzeptiert. Vorsicht Die auf der Karte gespeicherten Daten können sonst unwiederbringlich verloren... -
Page 68: Ein-/Ausschalten Der Kamera
• Die SmartMedia-Karte ist ein Präzisionsteil. Setzen Sie die Karte keinem übermäßigen Druck oder Stoßeinwirkung aus. Vermeiden Sie eine Berührung Vorsicht des goldfarbenen Metallteils der Karte. • Bestimmte Kamerafunktionen werden ignoriert, wenn ein Schreibschutzaufkleber an der SmartMedia-Karte angebracht ist. Um diese Funktionen zu benutzen, muss der Aufkleber von der Karte entfernt werden. -
Page 69: Einstellen Von Datum Und Uhrzeit
ZUR WIEDERGABE VON BILDERN Einschalten des LCD-Monitors ... Drücken Sie die Taste geschlossenem Objektivschutzschieber. Kamera und LCD-Monitor werden im Wiedergabemodus eingeschaltet. Ausschalten des LCD-Monitors .. Drücken Sie die Taste K a m e ra u n d L C D - M o n i t o r w e r d e n ausgeschaltet. - Page 70 Stellen Sie den ersten Posten mit den Tasten ein, und drücken Sie die Taste Gehen Sie zum nächsten Posten weiter. Wiederholen Sie den Vorgang, bis alle Datums- und Uhrzeiteinstellungen komplett sind. Drücken Sie die Taste , wenn die Uhr 00 Sekunden erreicht.
-
Page 71: Fotografieren
OTOGRAFIEREN BILDAUFNAHME FOTOGRAFIEREN MIT DEM SUCHER Öffnen Sie den Objektivschutzschieber bis zum Klicken. Richten Sie die AF-Markierung im Sucher auf das Motiv. Um Bilder aus einem Abstand von weniger als 60 cm aufzunehmen, siehe [Makro-Modus] ( S. 13). Drücken Sie den Auslöser halb nieder. Die grüne LED neben dem Sucher leuchtet auf. -
Page 72: Blitzbenutzung
• Der LCD-Monitor dient lediglich zur Überprüfung der Bildkomposition. Überprüfen Sie Verwacklung, Schärfe und Belichtungsgenauigkeit später durch Wiedergabe des Bildes auf einem PC. • Bei eingeschaltetem LCD-Monitor dauert die Aufzeichnung eines Bildes länger. • Drücken Sie sachte auf den Auslöser. Ruckartiges Drücken des Auslösers führt zu Verwackeln der Kamera, was ein unscharfes Bild zur Folge hat. -
Page 73: Makro-Modus
Vorsicht • Wenn Sie Nahaufnahmen mit Blitz machen, besteht die Gefahr, dass keine korrekte Belichtung erzielt wird und starke Schatten erzeugt werden. Olympus empfiehlt die Überprüfung des Bildes auf dem LCD-Monitor der Kamera. • Der Blitz kann im Serienaufnahmemodus, Panoramamodus und Laufbildaufnahmemodus nicht benutzt werden. -
Page 74: Digital-Tele-Modus
Bestimmen Sie den Bildausschnitt auf dem LCD-Monitor oder im Sucher, und drücken Sie den Auslöser. Die Selbstauslöser-LED an der Vorderseite der Kamera leuchtet erst 10 Sekunden lang und blinkt dann 2 Sekunden lang, bevor der Verschluss ausgelöst wird. Der Selbstauslöser wird nach der Aufnahme automatisch deaktiviert. •... -
Page 75: Serienaufnahmemodus
Halten Sie den Auslöser gedrückt. Die Aufnahme wird fortgesetzt, solange der Auslöser gedrückt gehalten wird, und stoppt, sobald der Auslöser losgelassen wird. Durch Schließen und erneutes Öffnen des Objektivschutzschiebers können Sie auf den normalen Aufnahmemodus zurückschalten. • Durch Schließen des Objektivschutzschiebers wird der Serienaufnahmemodus aufgehoben. -
Page 76: Weissabgleich
• Bei Blitzbenutzung wird die gewünschte Helligkeit (Belichtungskorrektur) eventuell nicht erzielt. Vorsicht • Die Belichtungskorrekturwerte sind eventuell unzulänglich, wenn sich das Motiv in einer sehr hellen oder dunklen Umgebung befindet. WEISSABGLEICH Diese Kamera verwendet einen automatischen Weißabgleich, um Aufnahmen mit natürlich wirkenden Farbtönen zu erzielen. -
Page 77: Bildqualität
BILDQUALITÄT Die Kamera verfügt über 4 verschiedene Bildqualitätsmodi: SHQ, HQ, SQ1 und SQ2. Drücken Sie die Taste bei offenem Objektivschutzschieber. Wählen Sie [PICTURE] auf dem Kameramenü-Bildschirm mit den Tasten , und drücken Sie die Taste Wählen Sie [ ] mit den Tasten , und drücken Sie die Taste Wählen Sie die Bildqualität mit den Tasten... -
Page 78: Spotmessmodus
SPOTMESSMODUS Bei Gegenlichtaufnahmen lassen gewöhnliche Lichtmessungs-Einstellungen (digitale ESP-Messung) das Motiv zu dunkel erscheinen. Um diesen Mangel auszugleichen, schalten Sie die Kamera auf den Spotmessmodus um. Diese Funktion wird verwendet, um eine korrekte Belichtung bei Gegenlicht zu erzielen. Öffnen Sie den Objektivschutzschieber, und drücken Sie die Taste Wählen Sie [CAMERA] im Aufnahmemenü... -
Page 79: Bildwiedergabe
ILDWIEDERGABE WIEDERGABE VON BILDERN Mit dieser Funktion können Sie jeweils ein Bild auf dem LCD-Monitor anzeigen. Drücken Sie die Taste bei geschlossenem Objektivschutzschieber. Die Kamera wird im Wiedergabemodus eingeschaltet. Das zuletzt aufgenommene Bild wird auf dem LCD-Monitor angezeigt. Drücken Sie die Tasten Drücken Sie die Tasten , um jeweils das vorherige bzw. -
Page 80: Automatische Bildvorführung
Ändern der Bilderzahl für die Indexanzeige Die Anzahl der Bilder für die Indexanzeige kann unter 4, 9 und 16 ausgewählt werden. Drücken Sie die Taste bei geschlossenem Objektivschutzschieber. Drücken Sie die Taste , um den Wiedergabemenü-Bildschirm aufzurufen. Wählen Sie [PLAY] mit den Tasten , und drücken Sie die Taste Wählen Sie [... -
Page 81: Löschen Einzelner Bilder
Drücken Sie die Taste Mit jedem Drücken der Taste wird das Bild in der Reihenfolge [1.5×] → [2.0×] → [2.5×] → [3.0×] vergrößert. Drücken Sie die Taste Der Scrollmodus wird aktiviert. Mit Hilfe der Tasten können Sie das Bild nach oben, unten, links oder rechts verschieben, um den gewünschten Ausschnitt anzuzeigen. -
Page 82: Löschen Aller Bilder
• Sie können das Löschmenü auch aufrufen, indem Sie die Taste mindestens 1 Sekunde lang gedrückt halten, während das zu löschende Bild Vorsicht angezeigt wird. • Falls das zu löschende Bild geschützt ist, oder ein Schreibschutzaufkleber an der SmartMedia-Karte angebracht ist, kann das Bild nicht gelöscht werden. Heben Sie die Schutzeinstellung auf, oder entfer nen Sie den Schreibschutzaufkleber von der SmartMedia-Karte, bevor Sie versuchen, das Bild zu löschen. -
Page 83: Schützen Wichtiger Bilder
SCHÜTZEN WICHTIGER BILDER Drücken Sie die Taste bei geschlossenem Objektivschutzschieber. Zeigen Sie das zu schützende Bild. Drücken Sie die Taste , um den Wiedergabemenü-Bildschirm aufzurufen. Wählen Sie [PLAY] mit den Tasten , und drücken Sie die Taste Wählen Sie [ ] mit den Tasten , und drücken Sie die Taste Wählen Sie [ON] mit den Tasten... -
Page 84: Sonstige Funktionen
ONSTIGE FUNKTIONEN LAUFBILDAUFNAHMEMODUS Mit dieser Kamera können Sie nicht nur Standbilder, sondern auch Laufbilder aufnehmen. Drücken Sie die Taste bei offenem Objektivschutzschieber. Wählen Sie [CAMERA] mit den Tasten , und drücken Sie die Taste Wählen Sie [DRIVE] mit den Tasten , und drücken Sie die Taste Wählen Sie [... -
Page 85: Aufnahmekontrolle
AUFNAHMEKONTROLLE Diese Funktion ermöglicht das Überprüfen eines Bildes durch Anzeigen unmittelbar nach der Aufnahme. Öffnen Sie den Objektivschutzschieber, und drücken Sie die Taste Wählen Sie [SETUP] mit den Tasten , und drücken Sie die Taste Wählen Sie [REC VIEW] mit den Tasten , und drücken Sie die Taste Wählen Sie [ON] mit den Tasten... -
Page 86: Kartenformatierung/Speichereinrichtung
• Um eine SmartMedia-Karte zu formatieren, setzen Sie zuerst die Karte ein. • Bevor Sie eine markenfremde oder in einem PC formatierte SmartMedia-Karte benutzen, müssen Sie die Karte in der Kamera formatieren. Getrennt erhältliche SmartMedia-Kar ten der Marke Olympus CAMEDIA bedürfen keiner Formatierung. Drücken Sie die Taste bei geschlossenem Objektivschutzschieber. -
Page 87: Speichersicherung
• Alle geschützten Bilder werden gelöscht. Die Formatierung einer SmartMedia- Karte oder des internen Speichers kann nicht wieder rückgängig gemacht Vorsicht werden. • Mit einem Schreibschutzaufkleber versehene Karten können nicht formatiert werden. Entfernen Sie den Aufkleber vor dem Formatieren der Karte. Schreibschutzaufkleber sollten nicht wiederverwendet werden. - Page 88 Drücken Sie die Taste bei geschlossenem Objektivschutzschieber. Drücken Sie die Taste Wählen Sie [PLAY] mit den Tasten , und drücken Sie die Taste Wählen Sie [INFO] mit den Tasten , und drücken Sie die Taste Wählen Sie [ON] mit den Tasten , und drücken Sie die Taste Die Bilddaten werden auf dem Wiedergabe-Bildschirm angezeigt.
-
Page 89: Fehlermeldungen
EHLERMELDUNGEN FEHLERCODES Monitoranzeige Fehler Abhilfemaßnahme Es ist keine Karte eingesetzt, Schieben Sie eine Karte korrekt oder die Karte wird nicht ein. erkannt. Aufnahme, Wiedergabe oder Wischen Sie die Kartenkontakte mit Löschung nicht möglich. Reinigungspapier sauber und nehmen Sie eine erneute Formatierung vor. Falls sich die Karte nicht formatieren lässt, verwenden Sie eine andere Karte. - Page 90 1024 × 768 Pixel (Modus SQ1) 640 × 480 Pixel (Modus SQ2) Weißabgleich: Vollautomatische TTL-Messung Vorgabe (Tageslicht, Bewölkung, Leuchtstofflampenlicht, Glühlampenlicht) Objektiv: Olympus-Objektiv 4,5 mm, F4, 5 Elemente in 5 Gruppen (entspricht 35-mm-Objektiv von Kleinbildkamera) Belichtungsmessung: Digitale ESP-Messung mit Bildelement, Spotmessung...
- Page 91 30 ~ 90 % (Betrieb) 10 ~ 90 % (Lagerung) Stromversorgung: Vier AA-Alkalibatterien, AA-Nickel-Hydrid- Akkus oder AA-NiCd-Batterien. Oder zwei Lithiumbatterien CR-V3 (LB-01 von Olympus), oder ein gesonderten Netzgerät. AA-Manganbatterien können nicht verwendet werden. 123(B) × 65(H) × 44,5(T) mm Abmessungen: (ohne Vorsprünge)
- Page 92 G Olympus no asume responsabilidad alguna por los daños o pérdidas de ganancias debido a pérdida de datos de imagen resultante del servicio realizado por terceras partes no designadas por Olympus o de otras causas.
- Page 93 Declaración de conformidad Número de modelo: C-100/D-370 Nombre comercial: OLYMPUS Parte responsable: Olympus America Inc. Dirección: 2 Corporate Center Drive, Melville, Nueva York 11747-3157 EE.UU. Número de teléfono: 631-844-5000 Este equipo cumple con la Parte 15 de las reglas de la FCC. La operación se encuentra sujeta a las dos condiciones siguientes: (1) Este dispositivo no producirá...
- Page 94 CONTENIDO PREPARATIVOS OTRAS FUNCIONES Nomenclatura ........5 Modo vídeo ........24 Fijación de la correa ......6 Reproducción de imágenes en Colocación de las pilas ....6 movimiento ........ 24 Utilización de una tarjeta SmartMedia Rec View ........25 (opcional) ........7 Tono de pitido .........
-
Page 95: Preparativos
REPARATIVOS NOMENCLATURA 1 Botón disparador 0 Monitor 2 Cubreobjetivo A Visor 3 Objetivo B Lámpara verde 4 Flash C Pad selector 5 Palanca Macro D Rosca para el trípode 6 Luz del autodisparador E Botón del monitor 7 Jack DC-IN F Botón OK/Menú... -
Page 96: Fijación De La Correa
FIJACIÓN DE LA CORREA Haga pasar el extremo corto de la correa a través del enganche para correa. Haga pasar el extremo largo de la correa a través del lazo. Tire de la correa con fuerza y compruebe que haya quedado firmemente colocada. COLOCACIÓN DE LAS PILAS Esta cámara utiliza cuatro pilas alcalinas AA (suministradas), de NiMH, de litio, o de NiCd. -
Page 97: Utilización De Una Tarjeta Smartmedia (Opcional)
Cierre la tapa de la tarjeta hasta que encaje con un chasquido. Nota Es posible que la cámara no pueda reconocer tarjetas que no sean de Olympus ni de Lexar, o tarjetas formateadas con otros equipos, como un PC. Formatee la tarjeta con la cámara antes de utilizarla. Véase [Formateo de la tarjeta/Configuración de la memoria] (... -
Page 98: Encendido/Apagado De La Cámara
• Si la tarjeta SmartMedia lleva el sello de protección contra escritura, alguna de las funciones de la cámara Precaución serán ignoradas. Cuando utilice estas funciones, retire el sello de Sello de protección la tarjeta. contra escritura Número aprox. de imágenes que se pueden grabar Calidad de Capacidad de la imagen... -
Page 99: Ajuste De Fecha Y Hora
PARA REPRODUCIR LAS IMÁGENES Encender el monitor .. Presione el botón con el cubreobjetivo cerrado. La cámara se encenderá en el modo de reproducción y el monitor se enciende. Apagar el monitor ..Presione el botón La cámara y el monitor se apagan. Cámara con el El monitor se enciende El monitor se apaga... - Page 100 Ajuste el primer ítem utilizando los botones , y presione el botón Avance al ítem siguiente. Repita el proceso hasta que la fecha y la hora queden ajustadas. Presione el botón cuando el reloj marque 00 segundo. El ajuste de fecha y hora ha finalizado. Presione de nuevo el botón Con esto finalizará...
-
Page 101: Funciones De Grabación
UNCIONES DE GRABACIÓN TOMA DE FOTOGRAFÍAS TOMA DE FOTOGRAFÍAS UTILIZANDO EL VISOR Abra el cubreobjetivo deslizándolo hasta que encaje con un chasquido. Posicione el motivo utilizando la marca de referencia del visor. Para tomar fotografías a una distancia de menos de 60cm, consulte [Modo macro] ( pág.13). -
Page 102: Uso Del Flash
• Cuando realice tomas a corta distancia utilizando el flash, puede suceder que no se obtenga el brillo apropiado y que aparezcan sombras oscuras. Olympus recomienda verificar la imagen en el monitor LCD. • El flash no se puede utilizar en el modo secuencial, en el modo panorama, ni en el modo de vídeo. -
Page 103: Modo Macro
• Si utiliza el flash en el modo macro, el brillo podría no ser correcto o podrían aparecer sombras oscuras. Olympus recomienda verificar la imagen en el monitor de la cámara. -
Page 104: Modo Tele Digital
MODO TELE DIGITAL Este modo le permite ampliar digitalmente las imágenes con aumentos de 1,6×, 2×, 3,2× y 4×. Abra el cubreobjetivo y presione el botón Cada vez que presiona el botón , el ajuste cambiará en la secuencia de [1.6× → 2.0× → 3.2× → 4.0×]. Cada vez que presiona el botón , el aumento cambiará... -
Page 105: Compensación De La Exposición
• El modo secuencial se cancela al cerrar el cubreobjetivo. Nota • No se podrá usar el flash en este modo. • Debido a que la velocidad del obturador se ajusta al máximo de 1/30 seg. para evitar la vibración de la mano, la imagen resultante puede ser más oscura que lo normal. -
Page 106: Balance De Blancos
BALANCE DE BLANCOS Esta cámara utiliza el balance de blancos automático para fotografiar un motivo en un tono natural. No obstante, según las condiciones del tiempo o de iluminación, algunas veces podría experimentar dificultades en obtener automáticamente resultados satisfactorios. En tal caso, cambie los ajustes del balance de blancos. -
Page 107: Calidad De Imagen
CALIDAD DE IMAGEN Se disponen de 4 tipos de calidades de imagen: SHQ, HQ, SQ1 y SQ2. Presione el botón con el cubreobjetivo abierto. Utilizando los botones , seleccione [PICTURE] en el menú [Camera] y presione el botón Utilizando los botones , seleccione [ ] y presione el botón... -
Page 108: Modo De Medición Puntual
MODO DE MEDICIÓN PUNTUAL Si fotografía a contraluz, los ajustes fotométricos normales (Medición ESP Digital) harán que el motivo aparezca demasiado oscuro. En este caso, ajuste la cámara al modo de medición puntual. Esta función le permitirá obtener una exposición correcta aunque fotografíe a contraluz. Abra el cubreobjetivo y presione el botón Utilizando los botones , seleccione [CAMERA] en el menú... -
Page 109: Reproducción De Imágenes
EPRODUCCIÓN DE IMÁGENES REPRODUCCIÓN DE UNA IMAGEN Este modo se utiliza para visualizar imágenes en el monitor, una tras otra. Presione el botón con el cubreobjetivo cerrado. La cámara se enciende en el modo de reproducción. La imagen grabada en último término será... -
Page 110: Reproducción Automática
Presione el botón para visualizar el menú de la pantalla de reproducción. Seleccione [PLAY] utilizando los botones y presione el botón Seleccione [ ] utilizando los botones y presione el botón Seleccione el número de imágenes [4], [9] o [16] utilizando los botones , y presione el botón El ajuste del número de imágenes en la reproducción de índice finaliza. -
Page 111: Borrado De Una Imagen
Para volver a la pantalla de reproducción de una sola imagen 1× presione el botón después de salir del modo de desplazamiento. Nota La operación de arriba no se podrá realizar mientras se está visualizando una imagen marcada mediante el símbolo de imagen en movimiento ( ). -
Page 112: Borrado De Todas Las Imágenes
BORRADO DE TODAS LAS IMÁGENES Usted podrá borrar todas las imágenes de la memoria interna o de la tarjeta SmartMedia. • Para borrar imágenes de la memoria interna, no inserte una tarjeta SmartMedia. Precaución • Para borrar imágenes de una tarjeta SmartMedia, inserte primero la tarjeta. Presione el botón con el cubreobjetivo cerrado. - Page 113 Seleccione [PLAY] utilizando los botones y presione el botón Seleccione [ ] utilizando los botones y presione el botón Seleccione [ON] utilizando los botones y presione el botón La imagen será protegida. Para cancelar el ajuste de protección, seleccione [OFF]. •...
-
Page 114: Otras Funciones
TRAS FUNCIONES MODO VÍDEO Además de imágenes fijas, esta cámara puede capturar imágenes de vídeo. Presione el botón con el cubreobjetivo abierto. Seleccione [CAMERA] utilizando los botones y presione el botón Seleccione [DRIVE] utilizando los botones y presione el botón Seleccione [ MOVIE] utilizando los botones y presione... -
Page 115: Rec View
REC VIEW Esta función le permite verificar una imagen mostrándola inmediatamente después de ser capturada. Abra el cubreobjetivo y presione el botón Seleccione [SETUP] utilizando los botones y presione el botón Seleccione [REC VIEW] utilizando los botones presione el botón Seleccione [ON] utilizando los botones y presione el botón ON: La última imagen será... -
Page 116: Formateo De La Tarjeta/Configuración De La Memoria
Precaución • Para formatear una tarjeta SmartMedia, inserte primero la tarjeta. • Antes de usar una tarjeta SmartMedia que no sea Olympus o una tarjeta formateada en un PC, primero deberá formatear la tarjeta en la cámara. Tarjetas SmartMedia marca Olympus CAMEDIA opcionales no necesitan ser formateadas. -
Page 117: Respaldo De La Memoria
• Todas las imágenes protegidas serán borradas. Una vez inicializada, no se podrán restablecer ni la tarjeta SmartMedia ni la memoria interna. Precaución • No se podrán formatear tarjetas que lleven el sello de protección contra escritura. Antes de formatear la tarjeta, retire el sello. No reutilice sellos despegados. - Page 118 Presione el botón con el cubreobjetivo cerrado. Presione el botón Seleccione [PLAY] utilizando los botones y presione el botón Seleccione [INFO] utilizando los botones y presione el botón Seleccione [ON] utilizando los botones y presione el botón La información sobre la imagen será visualizada en la pantalla de reproducción.
-
Page 119: Códigos De Error
ÓDIGOS DE ERROR CÓDIGOS DE ERROR Visualización en el monitor Error Solución NO se ha insertado la tarjeta Inserte o reinserte la tarjeta. o no ha sido detectada. No se puede grabar, visualizar Limpie el terminal de la tarjeta con o borrar. - Page 120 TTL totalmente automático Preajustado (luz diurna, nublado, luz de tungsteno, luz fluorescente) Objetivo: Objetivo Olympus 4,5mm, F4, 5 elementos en 5 grupos (equivalente a un objetivo de 35 de una cámara de 35 mm) Sistema fotométrico: Sistema de medición ESP digital con Imager/ Medición puntual...
- Page 121 Cuatro pilas alcalinas AA, pilas de hidruro de níquel-metal AA, o pilas NiCd AA. O dos paquetes de pilas de litio CR-V3 (LB-01 fabricado por Olympus), o un adaptador de CA opcional. No utilice pilas de manganeso AA. Dimensiones: 123 (An) x 65 (Al) x 44,5 (Pr) mm...
- Page 122 發現錯誤或不完全的資訊,請與當地的 Olympus 辦事處聯絡。 G 除個人使用以外,版權法禁止複製本手冊中的部分或全部資訊。未經版權所 有者的許可禁止複製。 G 由於使用本產品不當而引起損壞、利益損失或受第三者的索賠,Olympus 概 不負責。 G 由於經非 Olympus 指定的第三者維修或其他原因丟失影像數據而引起損壞 和利益損失,Olympus 概不負責。 G 用本產品拍攝的影像質量與用普通膠片相機拍攝的影像質量不同。 © 版權所有 2001 OLYMPUS OPTICAL CO., LTD。 收音機和電視機干擾 進行任何未經廠家特別許可的改變或改造可能會使用戶失去使用本裝置的權 力。本裝置已根據 FCC 規則的第 15 部分經過測試並被認定符合 B 級數字裝 置的限制條件。這些限制條件是為在住宅區安裝時提供合理保護以防止有害干 擾而設定的。本裝置產生、使用並可能釋放射頻能量,如果未按說明書進行安 裝和使用,可能會對無線電通訊帶來有害的干擾。 但是,不能保證某種特定的安裝不會引起干擾。如果本裝置對收音機或電視機的接收產生有 害的干擾(這可以通過接通或關閉本裝置的電源來確定),建議用戶試試以下一種或多種措 施以減小干擾︰...
- Page 123 Declaration of conformity Model Number: D-370L/C-100 Trade Name: OLYMPUS Responsible Party: Olympus America Inc. Address: 2 Corporate Center Drive, Melville, New York 11747-3157 USA Telephone Number: 631-844-5000 This device complies with Part 15 of the FCC rules. Operation is subject...
- Page 124 目錄 使用準備 其他功能 部件名稱 ....... 5 拍攝動畫 ...... 24 安裝肩帶 ....... 6 播放動畫 ...... 24 安裝電池 ....... 6 影像回顧 ...... 25 使用 SmartMedia 卡 .... 7 嗶聲 ......25 打開和關閉相機 ....8 調整顯示器亮度 ....25 調整日期和時間 ....9 插卡格式化 記憶體設定 ..26 記憶體備份...
-
Page 125: 使用準備
使用準備 部件名稱 0 A B C 1 快門鍵 0 顯示器 2 鏡頭蓋 A 取景器 3 鏡頭 B 綠色指示燈 4 閃光燈 C 箭頭鍵 5 近攝鈕 D 三腳架孔 6 自拍指示燈 鍵(顯示器) 7 DC-IN 插孔 鍵(OK 選單) 8 接口蓋 G 插卡蓋 9 USB 接口 H 肩帶安裝孔... -
Page 126: 安裝肩帶
安裝肩帶 將肩帶短的一端穿過肩帶安裝孔。 將肩帶長的一端穿過環孔。 拉緊並檢查是否安裝牢靠。 安裝電池 本相機使用 4 節 AA 鹼性電池(附帶) 、鎳氫電池、鋰或鎳鎘電池,或 2 節 CR- V3 鋰電池組。 請確認鏡頭蓋關閉,而且顯示器和綠色指示燈均熄滅。 按箭頭方向 A 推電池室蓋並按箭頭方 向 B 拉上。 如圖所示按正確的極性方向安裝電池。 按箭頭方向 C 拉下電池室蓋並按箭頭 方向 D 用力推 標誌關緊。 Downloaded From camera-usermanual.com... -
Page 127: 使用 Smartmedia 卡
的表。)本相機僅接受 SmartMedia 抽取式記憶體。如果插入 SmartMedia 卡, 影像將記錄在插卡上,您可以用插卡播放影像。如果從相機中取出 SmartMedia 卡,影像將記錄在內部記憶體上,您可以用內部記憶體播放影像。 ➜ ➜ ➜ 卡插入方向標誌 確認相機電源已關閉。 關上鏡頭蓋並確認顯示器和綠色指示燈均已熄滅。 打開插卡蓋。 如圖所示正確插入 SmartMedia 卡。 在插卡蓋的內側有表示卡插入方向的標誌。 要取出卡時,用指尖拿住卡朝所示的方向拔出。 關上插卡蓋直至發出喀嗒聲。 本相機可能無法偵測非 Olympus 或非 Lexar 插卡或經電腦等其他裝置格式化的 插卡,因此請在使用之前先在相機上進行格式化。請參見“插卡格式化 記憶體 設定”( 第 26 頁)。 • 在相機電源打開時切勿打開插卡蓋或取出插卡或電池,否則可能會破壞插卡上 的數據,而且數據無法恢複。 • 插卡是精密儀器。請勿對其施加過大的力或衝擊。請勿直接用手觸摸插卡的金 色金屬部位。 Downloaded From camera-usermanual.com... -
Page 128: 打開和關閉相機
• 如果 SmartMedia 上貼有寫保護封條,則相機的某些功能不起作用。當您使用 這些功能時,請從插卡上揭下封條。 寫保護封條 可拍攝的影像數 影像質量 插卡的 記憶容量 內部記憶體 約 1 枚 4 MB 8 MB 16 MB 32 MB 64 MB 128 MB 打開和關閉相機 攝影時 打開電源… 打開鏡頭蓋。 相機於攝影模式打開電源。 關閉電源… 關上鏡頭蓋。 電源切斷。 打開電源 關閉電源 • 打開鏡頭蓋時如果未插入卡,顯示器上會出現“NO CARD”。這並非是故障。 請使用相機的內部記憶體拍照。 •... -
Page 129: 調整日期和時間
放影時 打開顯示器… 在鏡頭蓋關上時按 鍵。 相機於放影模式打開電源。 顯示器點亮。 關閉顯示器… 按 鍵。 電源切斷,顯示器熄滅。 打開顯示器 關閉顯示器 鏡頭蓋關上時 點亮 熄滅 如果 3 分鐘內不進行任何操作,相機模式改變為節電模式。要拍照時,請打開電 源。 調整日期和時間 按 鍵。 顯示器打開。 按 鍵。 顯示選單。 用 鍵選擇 [SETUP] 並按 鍵。 用 鍵選擇 [ ] 並按 鍵。 用 鍵選擇日期格式 [Y-M-D(年-月- 日)... - Page 130 用 鍵調整第一個項目並按 鍵。 移到下一個項目。 重複上述操作直至調整好日期和時間設定。 當時鐘顯示 00 秒時按 鍵。 日期和時間被設定。 再按一下 鍵。 日期和時間設定選單結束。 按 鍵關閉顯示器。 如果相機在取出電池或電池耗盡時擱置,日期和時間設定會被刪除或變成不正 確。在拍攝重要影像之前,請確認日期和時間設定正確。 在攝影模式和放影模式均可以相同的步驟設定。 Downloaded From camera-usermanual.com...
- Page 131 拍照 拍照 使用取景器拍照 拉開鏡頭蓋直至發出喀嗒聲。 用取景器中的定位標誌對準被攝對象。 要在 65 cm 以下的距離拍照時,請參見“近攝模式”( 第13頁)。 半按下快門鍵。 取景器旁邊的綠色指示燈點亮。 半按下快門鍵時曝光被鎖定。 完全按下快門鍵。 拍攝影像。 使用顯示器拍照 打開鏡頭蓋。 按 鍵 顯示器點亮。 再按一下 鍵關閉顯示器。 看著顯示器中的被攝對象構圖。 與使用取景器時相同的方法拍照。 • 半按下快門鍵時如果綠色指示燈閃爍,則閃光燈未完全充電。攝影後綠色指示 燈閃爍時,影像正在保存。請等待約 2 至 40 秒閃爍結束。 • 記憶體標誌存滿時無法再攝影。請等待數秒鐘使記憶體標誌熄滅後再拍攝。 • 在晴天等明亮的光線下拍照時,顯示器上可能會出現豎條,這並非是故障。 • 顯示器上的影像僅用於確認構圖。攝影後請在電腦上顯示影像檢查手是否抖 動、聚焦和曝光是否正確。 • 使用顯示器拍照時影像保存所化的時間較長。 Downloaded From camera-usermanual.com...
-
Page 132: 使用閃光燈
紅眼( ) ︰減輕被攝人物的眼睛在相片中呈紅色的現象 閃光燈打開( ) ︰不論光線條件如何都閃光 閃光燈關閉( ) ︰即使在光線暗的條件下也不閃光 夜景( ) ︰用於拍攝夜景相片 夜景 紅眼( ) ︰用於拍攝夜景中的人物 • 在打開鏡頭蓋時按 鍵可以確認當前的閃光模式。再按一下 鍵時改變 閃光模式。 • 閃光燈的光可以照射到的範圍為 2.5m。 • 關閉鏡頭蓋時,除紅眼( )以外的所有閃光模式恢復到自動模式(預先設 定)。 • 綠色閃光燈閃爍時,閃光燈正在充電,快門鍵無法按下。請等待綠色指示燈熄 滅。 • 在近距離用閃光燈拍照時,可能無法獲得適當的亮度,並出現明顯的陰影。 Olympus 建議您在相機的顯示器上檢查影像。 • 閃光燈無法在連拍、全景和動畫模式中使用。 Downloaded From camera-usermanual.com... -
Page 133: 近攝模式
使用此模式在 25 至 60 cm 的距離拍攝特寫相片。 打開鏡頭蓋並滑動近攝鈕。 顯示器將自動開啟並顯示 (近攝)標誌。 要取消近攝模式時,將近攝鈕移回到其原來位置。 拍照。 相機電源關閉時近攝模式自動取消。 關上鏡頭蓋時近攝模式取消。 • 請將近攝鈕推到底。 • 近攝時請保持 25cm 以上的距離。 • 試圖在小於 25cm 的距離拍攝時,即使能按下快門鍵,自動聚焦功能也會異 常。 • 如果在近攝模式中使用閃光燈,亮度可能不正確並出現明顯的陰影。Olympus 建議您在相機的顯示器上檢查影像。 自拍 打開鏡頭蓋並按 鍵。 用 鍵從攝影選單畫面中選擇 [CAMERA] 並按 鍵。 用 鍵選擇 [DRIVE] 並按 鍵。 用... -
Page 134: 數碼遠攝模式
數碼遠攝模式 此模式供您以數碼形式按四種放大倍率放大影像︰1.6 倍,2 倍,3.2 倍和 4 倍。 打開鏡頭蓋並按 或 鍵。 每按一下 鍵設定以 [1.6× → 2.0× → 3.2× → 4.0] 的順序改變。 每按一下 鍵設定以 [3.2× → 2.0× → 1.6× →[無顯示(1.0)] 的順序 改變。 拍照。 • 按 鍵關閉顯示器並取消數碼遠攝模式。 • 當放大倍率設定為 3.2 倍或 4 倍時,將影像質量設定為 SQ2。 •... -
Page 135: 曝光補正
• 關上鏡頭蓋將取消連拍模式。 • 在此模式中閃光燈無法使用。 • 為防止手的抖動,快門速度最大設定為 1/30 秒。因此影像可能會比通常暗。 • 在此模式記錄影像所化的時間略長。 • 可拍攝影像數根據影像質量模式和是否使用插卡而異。要拍攝大量影像時,最 好使用插卡。 曝光補正 此模式供您改變影像的亮度。 在打開鏡頭蓋時按 鍵。 用 鍵從攝影選單畫面中選擇 [CAMERA] 並按 鍵。 用 鍵選擇 [ ] 並按 鍵。 按 鍵調整曝光補正設定以使影像較暗,按 鍵使影像較亮,並按 鍵。 曝光補正現在被設定。再按一下 鍵退出選單。 拍照。 可以用所選的曝光補正設定連續拍照。關上鏡頭蓋將取消爆光補正設定。 • 關上鏡頭蓋曝光補正恢復至 ±0.0(預先設定)。 • 調整曝光補正時,顯示器上所顯示的影像之亮度也改變。在被攝對象較暗難以 看出變化時,請在顯示器上顯示所拍攝的影像來查看亮度。... -
Page 136: 白平衡
白平衡 本相機採用自動白平衡以自然的色調拍攝被攝對象。但是,有時因照明或拍攝 條件難以自動獲得滿意的結果。這時,請改變白平衡設定。 在鏡頭蓋打開時按 鍵。 用 鍵從攝影選單畫面中選擇 [PICTURE] 並按 鍵。 用 鍵選擇 [ ] 並按 鍵。 選擇白平衡設定並按 鍵。 白平衡現在被設定。再按一下 鍵退出選單。 拍照。 可以用所選的白平衡設定連續拍攝相片。 關上鏡頭蓋將取消白平衡設定。 白平衡設定 自動(無圖標) :自動調整白平衡以確保自然的色彩(預先設定)。 日光( ) :確保在晴天白天時的自然色彩。 多雲( ) :確保在多雲天氣白天時的自然色彩。 鎢燈( ) :確保在鎢燈照明下的自然色彩。 熒光燈( ) :確保在熒光燈照明下的自然色彩。 • 關上鏡頭蓋白平衡恢復為 [AUTO](預先設定)。 •... -
Page 137: 影像質量
影像質量 有 4 種類型的影像質量︰SHQ、HQ、SQ1 和 SQ2。 在鏡頭蓋打開時按 鍵。 用 鍵從攝影選單畫面中選擇 [PICTURE] 並按 鍵。 用 鍵選擇 [ ] 並按 鍵。 用 鍵選擇影像質量並按 鍵。 影像質量現在被設定。再按一下 鍵退出選單。 拍照。 可以用所選的影像質量模式連續拍照。 影像質量模式 1280 × 960 像素(用於列印清晰的影像) 1280 × 960 像素(用於在電腦上觀看影像) 1024 × 768 像素(用作電子郵件的附帶檔案) 640 × 480 像素(用於拍攝大量影像) 關上鏡頭蓋時影像質量設定仍然保留。... -
Page 138: 點測光
點測光 如果拍攝逆光對象,普通測光設定(數碼 ESP 測光)會使被攝對象太暗。為 補償此現象,將相機切換到點測光模式。此功能用於獲得正確的爆光而不受逆 光的影響。 打開鏡頭蓋並按 鍵。 用 鍵從攝影選單中畫面選擇 [CAMERA] 並按 鍵。 用 鍵選擇 [ ] 並按 鍵。 用 鍵選擇 [ SPOT] 並按 鍵。 測光設定結束。再按一下 鍵退出選單。 按快門鍵。 可以用所選的測光模式連續拍照。 關上鏡頭蓋後重新打開時,測光模式恢復到 ESP 模式。 關上鏡頭蓋後測光模式恢復到 ESP 模式(預先設定)。 Downloaded From camera-usermanual.com... -
Page 139: 播放影像
播放影像 播放影像 此模式用於在顯示器上一次顯示一幅影像。 在鏡頭蓋關上時按 鍵。 相機於放影模式打開電源。最後拍攝的 影像顯示在顯示器上。 按 鍵。 按 鍵顯示上一幅影像,按 鍵顯示 下一幅影像。 按 鍵。 顯示器熄滅,相機關閉。 • 也可以在攝影模式按兩次(雙擊) 鍵進入放影模式。 • 打開相機後,顯示器可能點亮片刻,稍後才顯示影像。這並非是故障。 索引放影 此模式用於從單影像放影模式以索引模式顯示影像。 在鏡頭蓋關上時按 鍵。 在放影模式中按 鍵。 按 鍵將綠色邊框移到下一幅影像上,按 鍵將邊框移到上一幅影像 上。 按 鍵。 綠色邊框中的影像顯示。 改變索引放影的影像數 從 4、9 或 16 選擇索引放影中的影像數。 在鏡頭蓋打開時按... -
Page 140: 自動放影
按 鍵顯示放影選單畫面。 用 鍵選擇 [PLAY] 並按 鍵。 用 鍵選擇 [ ] 並按 鍵。 用 鍵選擇影像數 [4]、[9] 或 [16] 並按 鍵。 索引放影中的影像數設定結束。 再按一次 鍵退出選單。 自動放影 在此模式中所有影像自動依次播放。 在鏡頭蓋關上時按 鍵。 按 鍵顯示放影選單畫面。 用 鍵選擇 [PLAY] 並按 鍵。 用 鍵選擇 [ ] 並按 鍵。 用... -
Page 141: 刪除一幅影像
按 鍵。 滾動模式啟動。用 鍵向上或向下、向左或向右滾動 以顯示所要觀看的區域。 再按一下 鍵退出滾動模式。 退出滾動模式後按 鍵返回 1 倍單影像播放畫面。 在顯示帶動畫( )標誌的影像過程中無法進行上述操作。請先顯示靜像。 刪除一幅影像 在鏡頭蓋關上時按 鍵。 顯示您要刪除的影像並按 鍵。 用 鍵選擇 [PLAY] 鍵並按 鍵。 用 鍵選擇 [ ] 鍵並按 鍵。 用 鍵選擇 [ ] 並按 鍵。 影像被刪除。 Downloaded From camera-usermanual.com... -
Page 142: 刪除所有影像
• 若在顯示所要刪除的影像時按住 鍵 1 秒鐘以上,可以移到刪除選單。 • 要刪除的影像受保護或插卡上貼有寫保護封條時無法刪除。請先進行解除保護 或揭掉寫保護封條等操作後再刪除。 • 刪除的影像無法恢復。在刪除影像之前,請務必確認不要刪除重要數據。 刪除所有影像 可以刪除內部記憶體或 SmartMedia 卡上的所有影像。 • 要刪除內部記憶體上的影像時,請勿插入插卡。 • 要刪除插卡上的影像時,請先插入卡。 在鏡頭蓋關上時按 鍵。 按 鍵顯示放影選單畫面。 用 鍵選擇 [SETUP] 並按 鍵。 用 鍵選擇 [ ] 或 [ ] 並按 鍵。 用 鍵選擇 [ ALL ERASE] 鍵並按 鍵。... - Page 143 用 鍵選擇 [PLAY] 並按 鍵。 用 鍵選擇 [ ] 並按 鍵。 用 鍵選擇 [ON] 並按 鍵。 影像受保護。 要取消保護設定時,選擇 [OFF]。 • 若在顯示所要保護的影像時按 鍵 1 秒鐘以下,也可以設定影像保護。 • 受保護的影像上顯示 標誌。 • 即使關閉相機,保護設定仍然保存。 • 受保護的影像無法通過刪除一幅影像或刪除所有影像刪除,但進行格式化將刪 除所有影像。 • 貼有寫保護封條的插卡無法進行影像保護操作。 Downloaded From camera-usermanual.com...
-
Page 144: 其他功能
sonotakino 其他功能 拍攝動畫 除靜像以外,本相機還具有拍攝動畫的能力。 在鏡頭蓋打開時按 鍵。 用 鍵選擇 [CAMERA] 並按 鍵。 用 鍵選擇 [DRIVE] 並按 鍵。 用 鍵選擇 [ MOVIE] 並按 鍵。 動畫模式現在被設定,顯示器將自動點亮。再按一下 鍵退出選單。 攝影。 按下快門鍵開始拍攝動畫。再按一下快門鍵攝影停止。 • 按 鍵時顯示器熄滅,動畫模式被解除。 • 閃光燈無法用於動畫模式。 • 拍攝動畫後影像的保存需要一定的時間。 • 可拍攝時間根據是否使用插卡而異。 • 聲音無法記錄。 播放動畫 在鏡頭蓋關上時按 鍵顯示帶 標誌的所需影像。... -
Page 145: 影像回顧
影像回顧 此功能供您在拍攝影像後立即顯示以查看影像。 打開鏡頭蓋並按 鍵。 用 鍵選擇 [SETUP] 並按 鍵。 用 鍵選擇 [REC VIEW] 並按 鍵。 用 鍵選擇 [ON] 並按 鍵。 ON︰ 拍攝結束後播放最後拍攝的影像。 OFF︰ 拍攝結束後立即播放拍攝下一幅影像的畫面。 影像回顧的設定結束。 再按一次 鍵退出選單。 即使關上鏡頭蓋,影像回顧設定仍然保留。 嗶聲 此功能供您關閉警告嗶聲。 打開鏡頭蓋並按 鍵。 用 鍵選擇 [SETUP] 並按 鍵。 用 鍵選擇 [ ] 並按... -
Page 146: 插卡格式化 記憶體設定
顯示屏亮度的設定現在結束。 再按一下 鍵退出選單。 • 即使關上鏡頭蓋,顯示器的亮度仍然設定保持。 • 也可以從放影選單進行設定。 插卡格式化 記憶體設定 此功能供您對 SmartMedia 卡或內部記憶體格式化。對插卡或記憶體格式化 時,插卡或內部記憶體中的影像將被刪除。 • 對內部記憶體格式化時,請勿插入插卡。 • 對插卡格式化時,請先插入卡。 • 在使用非 Olympus 插卡或經過個人電腦格式化的插卡之前,務必先在本相機 上格式化。Olympus CAMEDIA 牌 SmartMedia 卡不需要格式化。 在鏡頭蓋關上時按 鍵。 按 鍵。 用 鍵選擇 [SETUP] 並按 鍵。 如果對卡格式化,用 鍵選擇 [ ] 並按... -
Page 147: 記憶體備份
• 所有受保護的影像也被刪除。一旦經格式化,插卡或內部記憶體無法復原。 • 貼有寫保護封條的插卡無法格式化。請揭下封條後再進行格式化。請勿再次使 用揭下來的封條。 記憶體備份 此功能供您將記錄在內部記憶體中的影像數據複製到 SmartMedia 卡。請在進 行下列步驟之前先插入卡。 插入 SmartMedia 卡。 在關上鏡頭蓋時按 鍵。 按 鍵。 用 鍵選擇 [SETUP] 並按 鍵。 用 鍵選擇 [ ] 並按 鍵 用 鍵選擇 [[ BACKUP] 並按 鍵。 內部記憶體中的所有影像被複製到插卡上。 顯示影像數據 此功能供您設定在播放影像時是否在顯示器上顯示影像資訊。如果開啟此功 能,這些資訊顯示 5 秒鐘。 影像數據顯示... - Page 148 在鏡頭蓋關上時按 鍵。 按 鍵。 用 鍵選擇 [PLAY] 並按 鍵。 用 鍵選擇 [INFO] 並按 鍵。 用 鍵選擇 [ON] 並按 鍵。 在放影畫面上顯示影像數據。 關閉相機時影像數據設定恢復到 OFF(預先設定)。 Downloaded From camera-usermanual.com...
-
Page 149: 錯誤資訊
錯誤資訊 錯誤資訊 顯示器顯示 錯誤 解決方法 未插入卡或卡無法檢 插入或重新插入卡。 測。 無法記錄、顯示或刪 用乾淨的紙擦拭卡的端子並 除。 重新格式化。如果無法格式 化,請使用其他卡。 卡為寫保護。 要記錄時,請解除保護封 條。有關詳細說明,請閱讀 SmartMedia 卡的使用說明 書。 SmartMedia 卡存滿了, 插入其他卡或刪除不要的影 無法再記錄影像。 像。 內部記憶體存滿了,無 使用 SmartMedia 卡或刪除 法再記錄影像。 不要的影像。 無法顯示影像。 插卡上無影像。請攝影後再 播放。 無法顯示影像。 內部記憶體中無影像。請攝 影後再播放。 卡上用其他廠家的相機記錄 所選的影像無法顯示。 的影像或從個人電腦上傳送 來的影像無法顯示。 Downloaded From camera-usermanual.com... - Page 150 1280 × 960 像素(SHQ 和 HQ 模式) 記錄像素數︰ 1024 × 768 像素(SQ1 模式) 640 × 480 像素(SQ2 模式) 白平衡︰ 全自動 TTL 預設(日光、多雲、鎢燈、熒光燈) 鏡頭︰ Olympus 鏡頭 4.5 mm,F4,5 組 5 塊 (相當於 35 mm 相機上的 35 mm 鏡頭) 測光模式︰ 成像元件的數碼 ESP 測光模式、點測光 曝光控制模式︰ 程式自動曝光 光圈︰ f4、f8 快門*︰...
- Page 151 0 ∼ 40°C(動作時) –20 ∼ 60°C(保存時) 濕度︰ 30 ∼ 90%(動作時) 10 ∼ 90%(保存時) 電源︰ 4 節 AA 號鹼性電池、氫化鎳電池或鎳鎘充電池, 或 2 節 CR-V3(Olympus 跟 LB-01)鋰電池組或另 售的交流電源轉接器。 無法使用 AA 號錳電池。 尺寸︰ 123 (寬)× 65 (高)× 44.5 (深) mm (不包括突出部分) 重量︰ 190 克(不包括電池 插卡)...
- Page 152 Our Phone customer support is available from 8 am to 10 pm (Monday to Friday) ET E-Mail: distec@olympus.com Olympus software updates can be obtained at: http://olympus.com/digital/ OLYMPUS OPTICAL CO. (EUROPA) GMBH. Premises/Goods delivery: Wendenstraße 14-18, 20097 Hamburg, Germany Tel. 040-237730...
Need help?
Do you have a question about the CAMEDIA C-100 and is the answer not in the manual?
Questions and answers