Table of Contents
Advertisement
Available languages
Available languages
Quick Links
See also:
Manual
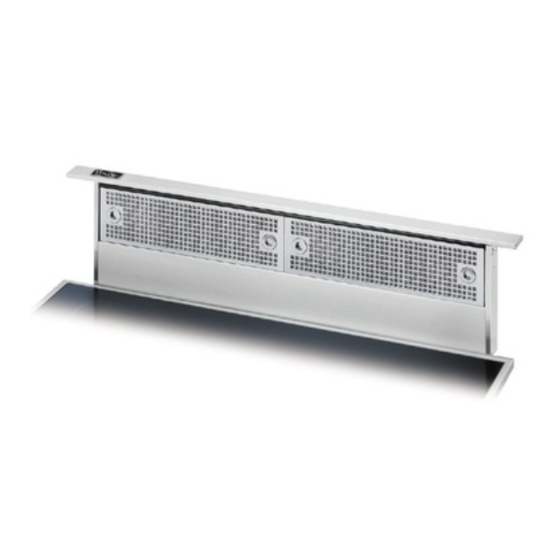
viking range corporation
MoDeL
rDipr101r
rDipr161r
rDipr151r
Warning - To reduce the risk of burns or ignition of clothing by reaching across burners, the downdraft remote control MUSt
be mounted in the countertop - at least 4" from the burners. See "INSTALL COOKTOP" section on page 8.
reaD anD Save tHeSe inStrUctionS
!
intenDeD For DoMeStic cooking onLY
Warning
to reDUce tHe riSk oF Fire, eLectric SHock, or in-
JUrY to perSonS, oBServe tHe FoLLoWing:
1. Use this unit only in the manner intended by the manufacturer.
If you have questions, contact the manufacturer at the address
or telephone number in the warranty.
2. Before servicing or cleaning unit, switch power off at service
panel and lock the service disconnecting means to prevent
power from being switched on accidentally. When the service
disconnecting means cannot be locked, securely fasten a
prominent warning device, such as a tag, to the service panel.
3. Installation work and electrical wiring must be done by a
qualified person(s) in accordance with all applicable codes
and standards, including fire-rated construction codes and
standards.
4. Sufficient air is needed for proper combustion and exhausting
of gases through the flue (chimney) of fuel burning equip-
ment to prevent backdrafting. Follow the heating equipment
manufacturer's guideline and safety standards such as those
published by the National Fire Protection Association (NFPA),
and the American Society for Heating, Refrigeration and Air
Conditioning Engineers (ASHRAE), and the local code authori-
ties.
5. When cutting or drilling into wall or ceiling, do not damage
electrical wiring and other hidden utilities.
6. Ducted fans must always be vented to the outdoors.
7. To reduce the risk of fire, use only metal ductwork.
8. Do not install this product with the activating switch directly
behind a burner or element. Minimum distance between the
switch and the edge of the cook top or range top should be 4
inches.
9. Loose-fitting or hanging clothing should never be worn when
operating this appliance. They may be ignited by burners/
elements on cooktop.
10. Children should not be left alone or unattended in the area
where this appliance is in use.
11. This unit must be grounded.
to reDUce tHe riSk oF a range top greaSe Fire:
a) Never leave surface units unattended at high settings.
Boilovers cause smoking and greasy spillovers that may
ignite. Heat oils slowly on low or medium settings.
b) Always turn hood ON when cooking at high heat or when
cooking flaming foods.
c) Clean ventilating fans frequently. Grease should not be
allowed to accumulate on fan or filter.
d) Use proper pan size. Always use cookware appropriate
for the size of the surface element.
WiDtH
30" w/ remote control
36" w/ remote control
45" w/ remote control
BLoWer
(purchase separately)
VIDV500 Interior or VEDV900 Exterior
VIDV500 Interior or VEDV900 Exterior
VIDV500 Interior, VEDV900 Exterior, or VEDV1200 Exterior
Warning
to reDUce tHe riSk oF inJUrY to perSonS in tHe
event oF a range top greaSe Fire, oBServe tHe
a
FoLLoWing
:
1. SMOTHER FLAMES with a close-fitting lid, cookie sheet,
or metal tray, then turn off the burner. BE CAREFUL TO
PREVENT BURNS. If the flames do not go out immediately,
EVACUATE AND CALL THE FIRE DEPARTMENT.
2. NEVER PICK UP A FLAMING PAN - You may be
burned.
3. DO NOT USE WATER, including wet dishcloths or towels
- a violent steam explosion will result.
4. Use an extinguisher ONLY if:
A. You know you have a Class ABC extinguisher, and you
already know how to operate it.
B. The fire is small and contained in the area where it
started.
C. The fire department is being called.
D. You can fight the fire with your back to an exit.
a
Based on "Kitchen Firesafety Tips" published by NFPA.
caUtion
1. For general ventilating use only. Do not use to exhaust hazard-
ous or explosive materials and vapors.
2. To avoid motor bearing damage and noisy and/or unbalanced
impellers, keep drywall spray, construction dust, etc. off power
unit.
3. Clean filters and grease-laden surfaces frequently.
4. Do not repair or replace any part of this appliance unless
specifically recommended in this manual. All other servicing
should be done by a qualified technician.
5. Please read specification label on product for further informa-
tion and requirements.
Save this manual for electrical
inspector and Homeowner to use.
Use and care information on page 11.
1
D3 Downdraft Ventilators
!
inStaLLer:
HoMeoWner:
!
Advertisement
Table of Contents

Related Manuals for Viking RDIPR101RSS


Summary of Contents for Viking RDIPR101RSS
- Page 1 D3 Downdraft Ventilators MoDeL WiDtH BLoWer (purchase separately) rDipr101r 30" w/ remote control VIDV500 Interior or VEDV900 Exterior rDipr161r 36" w/ remote control VIDV500 Interior or VEDV900 Exterior rDipr151r 45" w/ remote control VIDV500 Interior, VEDV900 Exterior, or VEDV1200 Exterior Warning - To reduce the risk of burns or ignition of clothing by reaching across burners, the downdraft remote control MUSt be mounted in the countertop - at least 4"...
-
Page 2: Take Measurements
1. Refer to the cooktop installation instructions for dimensions of cooktop, countertop cut-out, and cabinet requirements. The Model RDIPR101RSS will fit in most 30" wide cabinets, the Model RDIPR161RSS will fit in most 36" wide cabinets, and the Model RDIPR151RSS will fit most 45" wide cabinets. -
Page 3: Plan The Ductwork
D3 Downdraft Ventilators take MeaSUreMentS (continUeD) Interior Blower Installation Exterior Blower Installation SiDe vieW SiDe vieW oF DoWnDraFt oF DoWnDraFt WitH WitH viDv500 10" roUnD eLBoW interior (for connection BLoWer to veDv900 or veDv1200 (DIPR150RSS only) VIDV500... - Page 4 D3 Downdraft Ventilators pLan tHe caBinet cUtoUtS Interior Blower Installation Exterior Blower Installation LeFt SiDe LeFt SiDe DiScHarge DiScHarge 1 9 ¾ " " CENTER LINE CENTER CENTER LINE CENTER LINES OF COUNTER OF COUNTER LINES OF...
- Page 5 - Location oF eLectricaL oUtLet: iMportant - Location oF eLectricaL oUtLet: If Model RDIPR101RSS is being installed in a 30" wide If Model RDIPR101RSS is being installed in a 30" wide cabinet...
- Page 6 D3 Downdraft Ventilators prepare tHe DoWnDraFt 10" ROUND Exterior Blower Installation MOTOR DISCHARGE PLUG PLATE NUTS The downdraft is shipped without a blower. Purchase a Model VEDV900 Exterior Blower and mount the 10" discharge plate to the downdraft as follows: CLAMP 1.
-
Page 7: Mount The Unit
D3 Downdraft Ventilators MoUnt tHe Unit MOUNTING SCREWS All Units LEVELING BRACKET - FLANGE FACING OUT 1. Set downdraft into opening. Extend leveling brackets to floor of cabinet so downdraft sits straight. (Note: Leveling brackets can be removed and re-attached in other positions. Bottom flange may have to face inward in tight cabinet installations.) - Page 8 D3 Downdraft Ventilators inStaLL eLectricaL Wiring Interior Blower Installation Exterior Blower Installation caUtion: all electrical wiring should be done caUtion: all electrical wiring should be done by a qualified person(s) in accordance with all by a qualified person(s) in accordance with all applicable codes and standards.
- Page 9 D3 Downdraft Ventilators inStaLLation oF reMote controL SWitcH Warning: to reduce the risk of burns or ignition 3. Remove the control from the plastic bag. Remove the paper of clothing by reaching across burners, the remote from the adhesive back of the control, line the control up with control must be mounted at least 4"...
- Page 10 D3 Downdraft Ventilators This page has been left blank intentionally. BACKSIDE OF REMOTE SWITCH TEMPLATE...
-
Page 11: Operation
D3 Downdraft Ventilators operation All Units Up / DoWn-----Raises and lowers vent. Turns blower ON when vent is UP and OFF when vent is DOWN. DeLaY -----------Allows blower to run for 10 min. after button is pressed. Delay is activated by holding... - Page 12 Viking used in conjunction with Viking downdrafts or ventilator kits. This includes, but is not limited to, such devices as booster fans or in-line blowers. Any malfunction caused to Viking ventilation products as a direct result of the use of such equipment is not covered under the Viking warranty.
- Page 13 D3 Downdraft Ventilators D3 Ventilateurs encastrées MoDÈLe LargeUr ventiLateUr (vendu séparément) rDipr101r 76,2 cm (30 po) télécommande VIDV500 intérieur ou VEDV900 extérieur rDipr161r 91,4 cm (36 po) télécommande VIDV500 intérieur ou VEDV900 extérieur rDipr151r 114,3 cm (45 po) télécommande VIDV500 intérieur, VEDV900 extérieur, ou VEDV1200 extérieur avertiSSeMent –...
-
Page 14: Tous Les Appareils
à effectuer dans le comptoir et les exigences pour l’armoire. Le modèle RDIPR101RSS s’insèrent dans la plupart des armoires de 44,5 mm (1¾ po) 76,2 cm (30 po) de largeur, le modèle RDIPR161RSS dans... -
Page 15: Préparation Des Conduits
D3 Downdraft Ventilators D3 Ventilateurs encastrées priSe DeS MeSUreS (SUite) Installation du ventilateur extérieur Installation du ventilateur intérieur 5 cm (2 po) 5 cm (2 po) 2" 2" " " 7 mm 0,95 cm 7 mm 1"... - Page 16 D3 Downdraft Ventilators D3 Ventilateurs encastrées préparation DU DécoUpage De L’arMoire Installation du ventilateur intérieur Installation du ventilateur extérieur Sortie À Sortie À gaUcHe gaUcHe 6 1 , 2 5 0 , 2 ( 1 9 1 9 ¾...
-
Page 17: Préparation Du Câblage
– poSition De La priSe éLectriQUe : iMportant – poSition De La priSe éLectriQUe : Si le modèle RDIPR101RSS est installé dans une armoire Si le modèle RDIPR101RSS est installé dans une armoire de 76,2 cm (30 po) de largeur... -
Page 18: Tous Les Modèles
D3 Downdraft Ventilators D3 Ventilateurs encastrées préparation De La Hotte PLAQUE D’ÉVACUA- Installation du ventilateur extérieur COUVERCLE TION RONDE DE DU MOTEUR 25,4 cm (10 po) ÉCROUS La hotte est livrée sans ventilateur. Procurez-vous le ventilateur extérieur modèle VEDV900 et installez la plaque d’évacuation de 25,4 cm (10 po) dans la hotte comme suit : 1. -
Page 19: Installation De L'unité
D3 Downdraft Ventilators D3 Ventilateurs encastrées inStaLLation De L’Unité VIS DE MONTAGE Tous les modèles BRIDE DE NIVELLEMENT – REBORD À L’EXTÉRIEUR 1. Placez la hotte dans l’ouverture. Allongez les brides de nivellement jusqu’au plancher de l’armoire afin que la hotte s’appuie bien droite. -
Page 20: Câblage Électrique
D3 Downdraft Ventilators D3 Ventilateurs encastrées cÂBLage éLectriQUe Installation du ventilateur intérieur Installation du ventilateur extérieur attention : Le câblage doit être effectué par un attention : Le câblage doit être effectué par un électricien qualifié conformément aux codes et aux électricien qualifié... -
Page 21: Installation De La Télécommande
D3 Downdraft Ventilators D3 Ventilateurs encastrées inStaLLation De La téLécoMManDe avertiSSeMent : pour réduire les risques de 4. Sortez les deux écrous en nylon du sachet de plastique et brûlure ou que des vêtements s’enflamment en installez-les sur les goujons de la télécommande en dessous traversant les brûleurs, la télécommande doit être... - Page 22 D3 Downdraft Ventilators D3 Ventilateurs encastrées Cette page a été laissée en blanc volontairement. ARRIÈRE DU GABARIT DE LA TÉLÉCOMMANDE...
-
Page 23: Utilisation Et Entretien
D3 Downdraft Ventilators D3 Ventilateurs encastrées FonctionneMent HaUt/BaS — --Relève ou abaisse le Tous les modèles conduit d’aération. Met le ventila- teur en MARCHE lorsque le conduit est RELEVÉ et ARRÊTE le ventilateur lorsque le conduit est ABAISSÉ. - Page 24 Viking Range Corporation ou Viking Range Corporation. Précisez le modèle et le numéro de série du produit ainsi que la date originale de votre achat.