
Related Manuals for Saris MAG


Summarization of Contents
Safety Precautions
General Exercise Safety Guidelines
Consult your physician before exercising, and stop if you experience pain or discomfort.
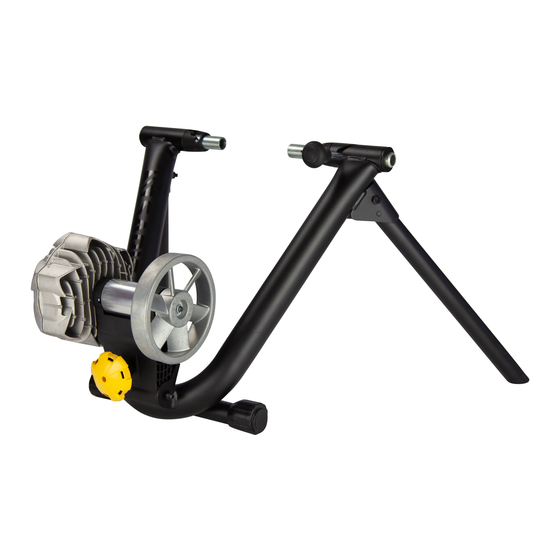
Trainer Setup
Extend Trainer Legs
Extend trainer legs and place on a flat surface, adjusting foot pads for stability.
Install Bolt Action Tube
Insert the bolt action tube and secure it with the lollipop lever.
Install L-Bolt
Insert the L-bolt into the trainer frame as illustrated.
Attach Resistance Unit
Secure the resistance unit to the trainer frame using the carriage bolt.
Engage Resistance Unit Bolt
Turn the resistance unit knob clockwise to engage the L-bolt.
Secure Resistance Unit
Place the nut onto the bolt and tighten securely using a 1/2” wrench.
Attaching Your Bike to the Trainer
Inflate Bicycle Tire
Fill the bicycle tire to the pressure recommended by the manufacturer.
Install Bike Skewer
Use the provided skewer and ensure the quick release handle is positioned correctly.
Position Bike on Trainer
Lift the bike and position the left side of the skewer into the trainer's left side.
Secure Bike to Trainer
Pull down the quick release handle to secure the skewer, ensuring it's fully locked.
Adjust Trainer Alignment
Adjust the non-drive side by pulling and rotating the shaft, then re-secure the handle.
Adjusting Roller Tension
Set Roller to Tire Contact
Turn the resistance knob until it touches the tire, then add 2.5 rotations for pressure.
MAG+ Remote Shifter Installation
Identify Shifter Components
Identification of components for the MAG+ Remote Shifter installation.
Adjust Semi-Circular Adjuster
Dial the manual resistance knob clockwise to position the semi-circular adjuster.
Position Barrel Adjuster and Lever
Tighten the barrel adjuster and push the shifting lever to the down position.
Route Shifting Cable
Route the shift cable around the adjuster and secure the end into the resistance unit casing.
Route Cable to Handlebar
Route the remote shifter cable around the bike to the handlebar, avoiding moving parts.
Secure Shifter to Handlebar
Adjust the nylon strap and flip the cam lock to secure the shifter to the handlebar.
Operate Remote Shifter
Use the remote shifter lever to increase or decrease resistance.
Adjust Cable Tension
Adjust cable tension by threading the barrel adjuster in or out.
Need help?
Do you have a question about the MAG and is the answer not in the manual?
Questions and answers