Table of Contents
Advertisement
Advertisement
Table of Contents

Related Manuals for Arcam SOLO MINI


Summary of Contents for Arcam SOLO MINI
- Page 1 Handbook Manuel Handbuch Handleiding...
-
Page 2: Important Safety Instructions
C. the equipment has been exposed to rain, or household waste throughout the EU. equipment. unit. Solo Mini must be installed in a manner that makes D. the equipment does not appear to operate disconnection possible. normally or exhibits a marked change in To prevent possible harm to the 4. -
Page 3: Table Of Contents
During that time we have amassed a wealth of knowledge on both rear panel............E-6 the design and construction of audio components in order to give the best sound performance for the price. The design of Solo Mini is a distillation of this positioning .............E-7 Positioning the unit ............E-7 knowledge into a compact and easy-to-use package that is intended to give you Power ..................E-7... -
Page 4: Overview
Music from iPod ® can be seamlessly integrated using music. Arcam’s rDock or rLead. Solo Mini takes over the control and amplification with iPod text appearing on the front Using the most advanced digital processing chipset panel display of the unit. -
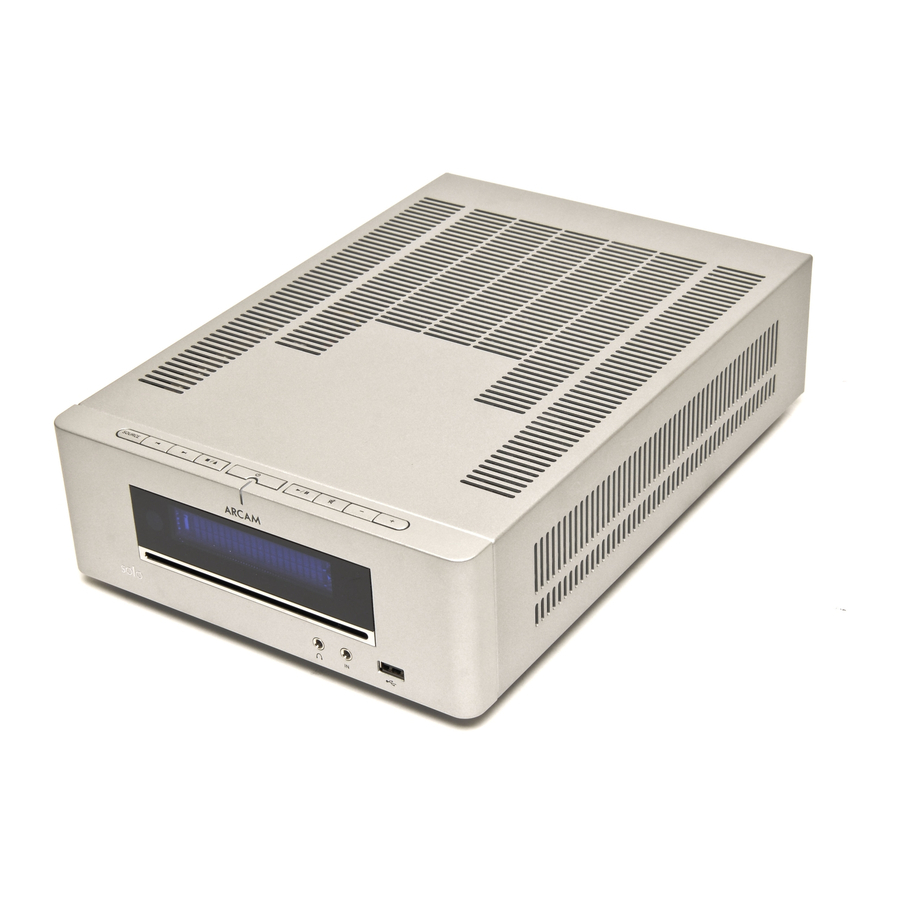
Page 5: Top Panel/ Front Panel
Power (Stop/Eject) < Note that the primary power-switch for Solo Mini is on the rear of the unit. If the power < Press the button once to stop a disc top panel/ light is not illuminated at all, check that the unit is receiving mains power and the rear playing. -
Page 6: Rear Panel
To connect a device to an input on the rear RS232 CONTROL mains power input of Solo Mini, use a stereo phono cable of a RIGHT LEFT suitable length. We advise you to use high- 100V, 115V or 230V AC,... -
Page 7: Positioning
You can restart Solo Mini after it has cooled as a bookcase or closed cabinet unless there is on the back of Solo Mini, making sure that it is pushed for 15 minutes without power. good provision for ventilation. Solo Mini is designed in firmly. -
Page 8: Speakers
0 c m Connecting speakers Speaker cables The speakers should be Solo Mini is designed to drive a pair of full-bandwidth connected to the amplifier speakers, rated between 4 and 8 ohms. Arcam muso using good-quality, high-purity, speakers ideally complement the performance and design copper cables. -
Page 9: Other Inputs
USB connection MP3 and WMA files may be played from a flash memory Solo Mini supplies a nominal 5V at 500mA, but not all USB device or an MP3 player connected to this front USB devices can be guaranteed to work with the unit ��������������... -
Page 10: Radio
Which radio aerial? Radio interference Your Solo Mini is capable of superb radio reception, but Solo Mini is an audio device containing only if it is receiving a good quality transmission signal. microprocessors and other digital electronics. Solo Mini is fitted with an AM/FM receiver module and... - Page 11 ‘noise’. Rotate the aerial to discover which position gives the best reception. in weak signal areas, or when Solo Mini is in use inside a steel-framed building (such as an apartment building), a wire between 3 and 5 metres long can be used to strengthen reception.
-
Page 12: Playing Sounds
Setting station presets Skipping tracks Solo Mini provides for 30 FM station presets, 30 AM station presets and 10 DAB station presets. To skip a track forwards or back, press To store a preset, first tune to the radio station you wish When skipping back, the first button press takes you to to store. -
Page 13: Dab
Plug the USB memory device holding the audio tracks button. Navigate through the menu options (see page into the USB socket on the front panel. Solo Mini can 16) until ‘DAB Setup’ is displayed. There are two options In the example above, ‘Repeat all’ play mode is shown. -
Page 14: Remote Control
Press once to mute the speaker and given inside the compartment itself. pre-amp outputs of Solo Mini. Press for Push the battery cover back into position. a second time (or adjust the volume) to unmute the unit. - Page 15 CD commands (source is CD) Radio commands (source is FM, DAB or iPod commands (source is iPod) USB device commands (source is USB) (Play) Start the playback of a CD. Select ‘iPod’ as source, confirm with Select ‘USB Device’ as source. taPE FROnt 1–9, 0...
-
Page 16: System Menu
Configuring the listening settings Solo Mini allows you to adjust listening settings to suit ‘Power on’ mode your taste, and to customise various system features. Use the adjacent diagram to navigate through the items system available. menu With the unit switched on (blue light showing), press MENU on the remote control. -
Page 17: Clock/Alarm
8. Press to move to Set? and confirm with If Solo Mini is turned off at the mains supply, clock settings are retained for approximately four days. In Press the (power) button to save and exit the menu. -
Page 18: Setting Alarms
Setting alarms Stopping or pausing an alarm Solo Mini allows up to four different alarms to be set. Alarm timing In this way, different users of Solo Mini can have their To enter ‘snooze’ mode, press the power button on the... -
Page 19: Technical Specification
Pre-amplifier AM receiver inputs RF tuning range 522–1710kHz, in steps of 9kHz (UK) 530–1710kHz, in steps of 10kHz (USA) Maximum input level 2.5Vrms technical 531–1629kHz, in steps of 9kHz (Japan) Ω Input impedance specification Number of AM presets Signal/noise ratio 105dB Signal/noise ratio (at 200mV) 40dB... -
Page 20: Product Guarantee
Claims under guarantee This equipment should be packed in the original packing and returned to the dealer from whom it was purchased, or failing this, directly to the Arcam distributor in the country of residence. It should be sent carriage prepaid by a reputable carrier – not by post. No responsibility can be accepted for the unit whilst in transit to the dealer or distributor and customers are therefore advised to insure the unit against loss or damage whilst in transit. - Page 21 SH201 a&R Cambridge Ltd, Pembroke avenue, waterbeach, CamBRiDGE CB25 9QR, England Issue 1...
Need help?
Do you have a question about the SOLO MINI and is the answer not in the manual?
Questions and answers