Table of Contents
Troubleshooting

Related Manuals for Dynisco 4004


Summary of Contents for Dynisco 4004
- Page 1 Dynisco Polymer Test Systems LMI 4000 Series Melt Indexer Manual Version 4.1 38 Forge Parkway Franklin, MA 02038 Phone +1 508 541 9400 Fax +1 508 541 6206 Manual Part Number: M0704 www.dynisco.com Original Language Version...
-
Page 2: Forge Parkway Franklin, Ma
Specifications contained herein are subject to change by Dynisco Polymer Test Systems without prior notice. Dynisco Polymer Test Systems is not responsible for errors or omissions that may be contained herein or for incidental or consequential damages in connection with the furnishing or use of this information. -
Page 3: Table Of Contents
About DYNISCO POLYMER TEST SYSTEMS Inc..................1 How to Use this Manual..........................1 Typographic Conventions ..........................2 How to Contact Dynisco Polymer Test Systems Inc..................2 Model Descriptions ............................2 On Overview of MI ............................3 ASTM Melt Index Tests..........................3 Method A ............................ - Page 4 Series 4000: A Guided Tour Four Options from the main menu screen..................... 12 Overview............................12 Setup ............................... 12 Edit..............................12 Run..............................12 System............................. 12 Navigating the Keypad..........................13 Introduction............................. 13 The Keypad ............................. 13 Keypad Definitions ......................... 14 Configuring the Instrument Intro: The SYS (SYSTEM) Mode....................
- Page 5 Run a Program............................... 20 Method "A" Run General Description ........................21 Calculations: Method A ........................21 Power-Up ............................21 Introduction............................. 21 Programming a Method A ..........................21 Machine Setup ..........................22 Loading the Sample............................23 Loading the Barrel .......................... 23 Bubbles ............................
- Page 6 What is it? ............................39 Why do it?............................39 Flow Rate Ratio - How to Do It ...................... 39 “Intrinsic Viscosity” Runs with PET Calculating PET I.V. from the Melt Indexer ....................41 What is it? ............................41 Why do it?............................
- Page 7 Mini-Lift................................ 59 Introduction............................. 59 Activation and Operation ........................ 59 Instrument Calibration RTD Electronics ............................60 RTD Sensor ..............................60 Calibration Steps: ..........................60 SINGLE ............................60 DOUBLE ............................61 Optical Flag ..............................61 Calibration Steps: ..........................61 Digital Encoder Calibration .......................... 62 Calibration:Digital Flag Home......................
- Page 8 Setting-Up USB Communications Set-Up with Daisy Software ................ 74 Set-Up with MI Works Software..............77 Index Series 4000 Melt Indexer Operation Manual Contents...
-
Page 9: Introduction
Test Systems' mission has grown to meeting the physical testing needs of the plastics, food, and rubber industries by providing high quality equipment and services at low cost. The company was purchased in 1988 by Dynisco, and is now a wholly owned subsidiary of Dynisco Inc. Dynisco, an ISO 9002 qualified supplier, is the world’s largest manufacturer of pressure transducers and is... -
Page 10: Typographic Conventions
How to Contact Dynisco Polymer Test Inc. Before calling Dynisco Polymer Test be sure you have gone through the "Answers to common questions" section of the manual. To help us handle your questions as quickly as possible, have the following items ready before you call:... -
Page 11: On Overview Of Mi
With moisture sensitive polymers, dryness can also play a major role, and time can be a factor with thermally unstable polymers, so procedures must be identical. Dynisco Polymer Test Systems has found that charging a consistent mass of material into the barrel (0.1 grams) is the most critical factor in getting precise data. -
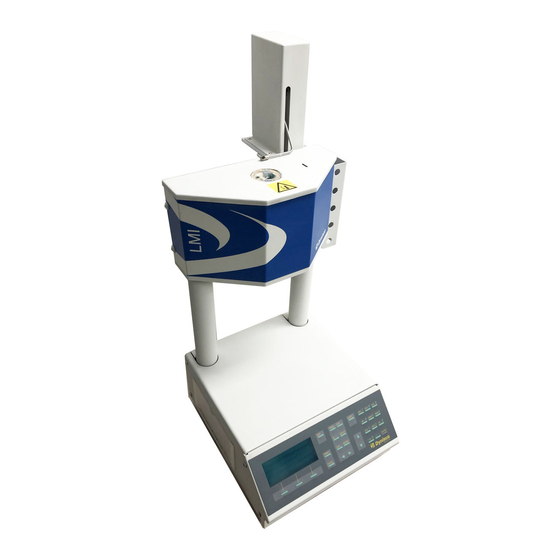
Page 12: Model 4001
Statistics on flow rate and viscosity can be averaged over replicated tests. The 4004 is the most sophisticated of the Dynisco Polymer Test's models ever available. It has all of the capabilities of the 4001, 4002 and 4003, and will... -
Page 13: Pneumatic Lift
"wet-chemistry" technique for determining the Intrinsic Viscosity of a polymer. The IV is used to determine the molecular weight of a polymer. This is described in greater detail in the Dynisco Polymer Test applications brief, "Correlating Melt Rheology of PET to Solution Intrinsic Viscosity"... -
Page 14: Getting Started
Getting Started Unpacking the Indexer The DYNISCO POLYMER TEST'S Melt Flow Indexer comes in a heavy duty, double-walled cardboard container. First, open the main box and remove the instrument. Several boxes will also arrive by UPS; check that all boxes are received. -
Page 15: Pneumatic Lift Setup
directly to their benches. Be sure to remove the level before turning on the machine. The level will be damaged if it gets hot. *** Be sure to enable the following features in the SETUP Mode *** (Please refer to drawing below) Pneumatic lift setup a.) Find the safety spike (1) taped to the guide post (2). - Page 16 Clearance may be increased a small amount by rotating the encoder housing before tightening the screws. If no clearance exists and the arm hits the pneumatic lift bucket, contact Dynisco Polymer Test before proceeding. Tighten the screws 3.
-
Page 17: Rtd Connection
NIST RTD Connection traceable temperature probes at Dynisco Polymer Test Systems. To achieve accuracy required by ASTM D1238 the RTD and electronics control should be kept together. Changing a RTD requires a complete temperature re-calibration. -
Page 18: Safety
Consider where dies may fall. If they are dropped on Nylon carpeting or similar materials they can quickly form holes. Protective mats may be needed. DYNISCO POLYMER TEST recommends keeping a hot piston rod in the chamber; this precludes someone picking it up inadvertently. Be sure to hold the piston by the top insulator. -
Page 19: Pinch Points
Broken thermometers and their spilled mercury can be sent back to the manufacturer. UPS will accept these packages provided they are labeled and the material is in a secure container. See Princo support vendor for address information. Pinch Points Do not place weights in precarious positions where they can be bumped and fall to the floor. -
Page 20: Series 4000: A Guided Tour
Series 4000: A Guided Tour Four Options from the main menu screen. The Series 4000 Melt Indexer has been designed for ease of use. The VFD display prompts the user for input necessary to program, configure and run the Overview instrument. -
Page 21: Navigating The Keypad
Navigating the Keypad The keypad provides all of the means necessary for programming the Dynisco Introduction Polymer Test Melt Indexer (Unless it is connected to a PC.) Other functions that can be performed on the keypad include calibration, instrument tests, parameter setups and pneumatic lift controls. -
Page 22: Keypad Definitions
ESC (ESCAPE) Keypad Definitions The ESC key can be used in any screen. During an EDIT function, ESC backs out one level. During a sample run, ESC aborts the test. PROG (PROGRAM) Pressing the PROG key lets the user browse through a list of preprogrammed test parameters. -
Page 23: Configuring The Instrument
Brightness can be adjusted in the SYSTEM TEST mode. SMART KEYS Dynisco Polymer Test provided three keypads below the VFD, to allow for quick navigation of the machine interface. The functions of these keys change depending on the mode of operation. Each SMART KEY is clearly and concisely labeled to assist you in programming your instrument. -
Page 24: Selecting Calib (Calibration) In The Sys Mode
Selecting CALIB (Calibration) in the SYS Mode The Digital Encoder is calibrated at Dynisco Polymer Test prior to shipment. Because the arm is locked into place, calibration is rarely required. CALIB:Digital Flag Home The instrument does allow you to reset the home position of the encoder. -
Page 25: Selecting Test In The Sys Mode
Press SELECT to view actual temperature reading accurate to 1/100 of a degree TEST:RTD Display Celsius. Dynisco Polymer Test technical support may have you do this under certain conditions. RTD Display Test may also come in handy when equilibrating RTD’s and thermometers. -
Page 26: Comm Port
[ PC, OFF, DIAG] Open up communications port for computer output, no COMM PORT output or diagnostics mode, respectively. [OFF or ON] Enable the mini lift to function during material runs when MINI LIFT installed. PNEU LIFT [OFF or ON] Enable pneumatic lift to function during material runs, when installed. -
Page 27: Method A Run Parameters
SELECT SMART Key. Accept the value with the ENTER SMART Key. The user always has the option to enter values manually via the numeric keypad. Below is a listing of the run parameters that are required for each test method. METHOD = [A, B, A/B or RATIO] SELECT and ENTER Method A. -
Page 28: Run A Program
NO FLAGS: [X] Stands for Number of Flags. Enter the number of stripes on your flag. This applies only to units with an optical eye for type B and A/B measurements. This step is different for users with a digital encoder. Please reference Digital Encoder Section. -
Page 29: Method "A" Run
Melt Indexer Serial Number XXXXXX Model Number 400X Ver 1.01 (c) DYNISCO POLYMER TEST, 1999 The instrument will beep twice after this screen. At that point, the screen will refresh and the main menu screen will be displayed. PROG #... -
Page 30: Machine Setup
1) Press the EDIT SMART Key. - The square cursor blinks in the upper left-hand corner of the screen prompting Machine Setup the user to input the number of the program that will be created or edited. 2) Enter 05 (for example) and press ENTER on the numeric keypad. The method in program 05 will now be configured for a method A experiment. -
Page 31: Loading The Sample
at this point by pressing the UP or DOWN SMART Keys. This ends the program edit mode. To SAVE the program: Press ESC twice to back out to the SAVE Program mode and select SAVE to save the program under the OLD program name. Change the program name in the EDIT mode. -
Page 32: Making The Cut
Optical Flag Post Plunger / Piston Assembly - Scribe Marks Run Area Pre-Heat Bushing 2nd Scribe 1st Scribe Run Start Zone After melt time (pre-heat) is completed, and after the piston lowers into the "run area" as denoted by the scribe marks on the piston assembly, make a cut and press RUN simultaneously. -
Page 33: Cleaning Up
deviation and coefficient of variance can be printed once, when the END key is pressed. Push down on the weight and purge any material remaining in the barrel. Remove the rod by twisting it clockwise to break the seal created by the molten Cleaning Up plastic then pull straight up. -
Page 34: Always Leave The Barrel Clean
For materials that are extremely hard to clean (Polystyrene, EVA and elastomers, etc.) solvents may be required. Never use flammable solvents on a HOT barrel. In general however, DYNISCO POLYMER TEST does not recommend using solvents for health, safety, and environmental reasons. -
Page 35: Method "A/B" Run
Method B flow rate must equal Method A. This apparent melt density definition forces the two test methods to agree. DYNISCO POLYMER TEST recommends taking an average of apparent melt densities from at least five separate A/B tests on representative samples of polymer. -
Page 36: Introduction
Programming Method A/B The instrument is powered-on and the main menu screen is seen. If you plan to Introduction use an existing method B program skip to step 4 NOTE: The unit will load the last program run into memory and attempt to equilibrate the barrel temperature to that set-temperature. -
Page 37: The Actual Run
When the instrument has latched-in, continue with sample testing: The Actual Run (Note that the standard Dynisco Polymer Test In-house test procedure section in this manual is an abbreviated version of what follows) How to do it: Step by Step Press EDIT and verify all entered program data values are correct. -
Page 38: Inserting The Timing Flag
be driven through the fill funnel. If bridging (or clogging)of the material occurs in the fill funnel, slide the fill funnel off to one side (without lifting). Pack the material in the barrel directly with the packing rod. Move the fill funnel back into place. -
Page 39: Making The Cut
Increase the test temperature (e.g. 190 to 230 C) Change to a non-standard die (typically larger diameter) Since Dynisco Polymer Test flags start at the same position as the first scribe mark, the amount of sample charge works for both Method A and Method B testing. -
Page 40: Method "B" Run
The LED senses an opaque flag on a transparent tape hung off the top of the piston rod. With all Dynisco Polymer Test Systems flags, Method A and B start in the same place. Flags may be 1/8, 1/4, 1/2, or 1". -
Page 41: Programming Method B
Temperature (C) LDPE HDPE Polybutene-1 polypropylene 0.797 0.806 0.880 0.791 0.800 0.872 0.785 0.794 0.864 0.780 0.780 0.787 0.852 0.777 0.777 0.780 0.840 0.770 0.770 0.774 0.819 0.765 0.765 0.767 0.758 0.760 0.760 0.760 0.754 0.755 0.755 0.754 0.750 0.748 0.748 0.746 0.746... -
Page 42: Choosing A Timing Flag
Press SELECT/ENTER to accept the and move to the DENSITY DENSITY = Enter the predetermined Melt Density of your material. Press ENTER. MELT TIME = The user may enter a melt time from the numeric keypad and press enter or use the Enter, Select and Scroll SMART Key keys to choose a typical value Press SELECT/ENTER to accept the and move to the NO OF FLAGS # OF FLAGS =... -
Page 43: The Actual Run
Dynisco Polymer Test provides 1/8" and 1/2" Non-ASTM flags in addition to the standard 1/4" and 1" flags to provide more flexibility in the time needed to traverse the flag (B time). -
Page 44: Timing Flag And Starting The Run
the packing tool using approximately 20 pounds of force. The packing tool can be driven through the fill funnel. If bridging (clogging) of the material occurs in the fill funnel, slide the fill funnel off to one side (without lifting) and use the fill tool to pack the material in the barrel directly. -
Page 45: Cleaning Up
Increase the test temperature (e.g. 190 to 230 C) Change to a non-standard die (typically larger diameter) Since Dynisco Polymer Test flags start at the same position as the first scribe mark the amount of sample charge for Method A can also be used here for Method B testing. - Page 46 section. Standard dies have a flat entrance and exit. When the die is out of the barrel it cools down quickly. The longer it is out the longer the wait for the temperature to stabilize. Minimizing the time the die stays out of the machine will increase the number of tests you can run.
-
Page 47: Flow Ratio" Runs
It is strongly suggested that this test be conducted if you have purchased the Pneumatic lift option from DYNISCO POLYMER TEST, Inc. The weights involved are quite heavy and dangerous for an operator to be routinely lifting. - Page 48 3.) After the LOAD HI prompt, AUTO LOWER appears. If set to YES, the lift system will lower the weight onto the piston after the melt time expires. If set to NO, the lift must be manually told to lower the weight via the keypad. 4.) After the AUTO LOWER prompt, AUTO RAISE appears.
-
Page 49: Intrinsic Viscosity" Runs With Pet
Melt Index values. This is described in greater detail in the applications brief, "Correlating Melt Rheology of PET to Solution Intrinsic Viscosity" by J. Reilly and P. Limbach, available from DYNISCO POLYMER TEST on request. Melt Flow Rate vs. -
Page 50: Why Do It
I.V. has been used to determine molecular weight relying on the key assumptions of isolated flexible linear chains. You can eliminate the hindrances Why do it? of the expertise, laboratory and solvents required for solution measurements. Improvements in process control are achievable using capillary rheometry methods over solution measurements due to their simplicity and quick turnaround. - Page 51 5.) Loads 6 grams of sample and perform run. Perform the test 3 times to obtain a repeatable MFI and record the value. 6.) Perform a run using parameters in step 3. 7.) After the run, an Intrinsic Viscosity will be displayed and printed. After each run: Clean Barrel Clean Die (remove first)
-
Page 52: Charge Weight
Charge Weight The Amount of Sample ASTM gives a recommendation of how much material to put in the barrel to perform a test. However, by determining the proper charge and controlling it from run to run. Testing can be made easier and more reproducible. - Page 53 Barrel Charge Size in grams Melt Density-> 0.75 g/cc 1.0 g/cc 1.2 g/cc MFR g/10 min. Plug Plug Plug 10.3 Plug Plug 10.9 Plug Plug 11.5 Plug Plug Plug Series 4000 Melt Indexer Operation Manual Charge Weight...
-
Page 54: A-Standard Operating Procedure
A-Standard Operating Procedure Indexer Testing of GRAY polypropylene Control Resin This the procedure Dynisco Polymer Test uses to run a control material to check Introduction: if the machine is operating properly. It is also used to qualify operators once trained. It can be used as a starting point for a SOP (standard operating procedure) to use within your company if one does not already exists. -
Page 55: Conducting The Test
At least one purge of gray material performed. (To purge: About 5 grams, wait 2 minutes hand purge) Clean MI barrel after purge (2 patches, double pass, two times). Reinstall plunger and let machine re-lock the temperature. Weigh out 4.6 grams 0.1 gram of Gray, Polypropylene, Lot # 13891 material. Conducting the Test DO THESE AS QUICKLY AS POSSIBLE Pour 2/3 material through funnel into barrel, pack until little... -
Page 56: Out Of Control Action List
Out of Control Action List Was the instrument clean? Check density value Actions Check tip diameter (> 0.3727) Check Die (clean, diameter length OK?) Check Machine is Level Check Temp Check weights used +/- 0.5% Check balance used to weigh extrudate Piston Rod Bent? Check insulator can hitting bottom of barrel? Prior to loading Sample... -
Page 57: Model 4004 And Computer Control
Point & click interface for program setup and data analysis Comprehensive data base type features Graphical display of program Talk to your Dynisco sales person for more information. USA 508-541-9400 Series 4000 Melt Indexer Operation Manual Model 4004 and Computer Control... -
Page 58: The Digital Encoder: Use And Calibration
You can perform experiments using from one Method B Encoder Option digital flag up to fifteen digital flags. The Dynisco Polymer Test Encoder for Method B tests employs a 1016 count optical encoder coupled to high accuracy gears to measure the piston travel. -
Page 59: Why Use It
No manual cuts Why use it? Check how homogeneous a sample is within a charge. Get better precision (averages are less variable than a single observations) See if barrel pressure drop is significant Gain ability to reject data point if bubble or air pocket existed The following parts should be in the encoder upgrade kit or included with the Digital Encoder Installation encoder based melt indexer: (if ordered) -
Page 60: Programming For Use With The Digital Encoder
Clearance may be increased a small amount by rotating the encoder housing before tightening the screws. If no clearance exists and the arm hits the pneumatic lift bucket, contact Dynisco Polymer Test Systems before proceeding. -
Page 61: Flag Calculation Manual Or Auto
Encoder Homing and Maintenance Digital Flag Home Calibration: Digital Flag Home The Digital Encoder is calibrated at Dynisco Polymer Test prior to shipment. Because the arm is locked into place, calibration is rarely required. The instrument does allow you to reset the home position of the encoder. -
Page 62: Complete Digital Encoder Calibration
Galaxy Series melt indexer. Complete Digital Encoder Calibration The Digital Encoder is calibrated at Dynisco prior to shipment. Because the arm is locked into place, calibration is rarely required. If calibration needs to be checked due to suspected encoder damage, then the following steps should be followed if an Encoder Calibrator is available. - Page 63 on the calibrator counterclockwise until the MI displays a negative value (example -1.0mm). Slowly turn the micrometer head in the opposite direction while watching the front display. Stop turning the micrometer head when the MI display reads <+0.00>. Record the value of the micrometer head position to the nearest 0.0000".
- Page 64 then the adjustment screw must be turned -87.6 degrees (negative = ccw rotation as viewed from the rear of the instrument) or about ccw 1/4 of a full turn to bring it back into calibration per ASTM requirements. Use a 1/8" Allen Wrench to turn the adjustment screw.
- Page 65 TABLE 1 Number of Degrees Micrometer of Rotation Required Reading When MI To Bring Arm Into Displays 25.4mm Calibration dial degrees_turn 25.25 25.26 25.27 25.28 25.29 25.3: 25.3 ASTM & 25.31 DIN Min 25.32 Positive turn = cw 25.33 screw rotation (push arm out to make 25.34 longer)
- Page 66 Figure 3 Series 4000 Melt Indexer Operation Manual The Digital Encoder: Use and Calibration...
-
Page 67: Pneumatic Lift Options
Pneumatic Lift Options Pneumatic Lift The pneumatic lift accessory is a key piece of hardware to invest in if the flow ratio test needs to be conducted. Also, if your material has a low flow rate and a Introduction heavy weight is used, the pneumatic lift system lowers and raises the weight for you. -
Page 68: Instrument Calibration
If the temperature deviates from the expected value an offset is computed. Accepting the offset applies it to all future temperature conversions The RTD electronics are calibrated at Dynisco Polymer Test prior to shipment and really should not be changed. RTD Sensor Calibration of the RTD Sensors requires one or two thermometers or equivalent. -
Page 69: Double
Sensitivity directly affects the measured length of the tape flag. The Optical sensor is calibrated at Dynisco Polymer Test prior to shipment. There should be no need to re calibrate the RTD sensor. For this procedure you must have the Flag Calibration Unit. -
Page 70: Digital Encoder Calibration
5. Press SAVE to permanently save the new value to memory. Digital Encoder Calibration The Digital Encoder is calibrated at Dynisco Polymer Test prior to shipment. Because the arm is locked into place, calibration is rarely required. The instrument does allow you to reset the home position of the encoder. -
Page 71: Instrument Maintenance And Troubleshooting
Instrument Maintenance and Troubleshooting Maintenance Remove the orifice and clean thoroughly with brush and drill bit. Clean your indexer barrel with cotton patch when hot. Piston should spin easily when Daily placed into a clean barrel. Give good cleaning with brass brush. Use oven cleaner to clean the piston rod assembly and orifice. -
Page 72: Barrel Diameter
The support vendor list shows the address for a bore gage manufacturer. Once the barrel is extremely clean, all dimensional measurements are to be made at Barrel Diameter room temperature it can be checked using a bore gage. Be sure to get or make a long enough extension so the entire barrel can be checked. -
Page 73: Conversion Factors
Mercon Products: distributed by Fisher Scientific Unit 8, 7551 Vantage Way Delta, B.C. Canada V4G 1C9 Tech Assistance (800)926-8999 (604) 940-0975 or call Fisher Scientific PRINCO Instruments Inc. (Accepts Standards Hg for Recycle) 1020 Industrial Highway Southampton, PA 18966 (215) 355-1500 Temperature Conversion Factors To Convert... -
Page 74: Temperature Is Unstable
The precision and accuracy of the test and instrument has been standardized by ASTM D1238. Dynisco Polymer Test has found that the contributing factors to the accuracy of the test includes sample weights (the amount of material tested), timing (how long the material is in the heated barrel), packing technique, dryness (has the material been properly dried), cleaning and cutting technique. -
Page 75: Pneumatic Lift Troubleshooting
+4 to +5 volts (UP) to less than +1 volt (DOWN) on the other connector. If these conditions are not met, call Dynisco Polymer Test Systems tech support. If voltages are OK, proceed. b.) Reassemble the solenoid and reenter the solenoid cycle. While the lift is FIGURE B cycling, listen for the manifold to open and close;... - Page 76 GUIDE ROD FIGURE C Series 4000 Melt Indexer Operation Manual Instrument Maintenance and Troubleshooting...
-
Page 77: Questions And Answers
PROBLEM: Temperature is stable but not reaching set point. SOLUTION: Heat the instrument with the die and piston rod assembly in the sample chamber. If you have any difficulty, please call Dynisco Polymer Test Technical Support. PROBLEM: The keyboard works but the instruments display does not work. -
Page 78: Typical Questions
PROBLEM: How long should my cut time be for a Method A run? SOLUTION: Dynisco Polymer Test suggests that you collect about 1 gram of sample extrudate, or more, before making your 2nd cut. PROBLEM: My printer does not work! What gives? SOLUTION: Enable the printer in the SETUP mode. - Page 79 ANSWER: A Certificate of Conformity is based on only one test, usually. As a polymer may vary throughout the process, you cannot be sure that the polymer is the same throughout your delivery. It has been known for processors to have problems during production and for them to think that they are machine problems, when in fact it is their material that is out of specification.
- Page 80 ANSWER: Yes, in fact many of our instruments have been on for several years. Some customers use a timer to turn their instrument on before they arrive for work, and off after they have left. Sometimes lightning storms can damage the instrument. As with all accessories that are plugged into wall outlets, a surge protector is a great idea.
-
Page 81: Glossary Of Terms
Glossary of Terms A device used to measure piston travel Digital Flag, Digital Encoder Software embedded into the instrument's hardware. Sometimes you may receive Firmware firmware upgrades A measure of polymer's mass flow rate (grams extruded in 10 minutes) using a Flow rate particular orifice under specified conditions of temperature and load A test used to obtain two different flow rates at two different shear stresses. - Page 82 USB Setup PC and Daisy Instructions LMI’s with USB ports will need the COM Port that is automatically assigned by a PC, when an USB device is plugged in to it, set to match a COM Port in the Daisy configuration file.
- Page 83 5) Scroll down to line, “RS232=’X’, 19200,N,8,1” and if necessary, change parameter ‘X’ to match the USB port assignment noted from Device Manager in step 3. 6) Save Device1.CFG if COM Port was changed. To Verify Communications: 7) Start LMI software by opening “Daisy for Melt Indexer” from desktop or through C:\Program Files\ Username: alpha Password: alpha...
- Page 84 8) Either of the two windows below may open. If this first window does not open, go to “Daisy 8.50 Eclipse” window (the second below) and press upper, left button. If the first window fails to open, check communications to instrument.
- Page 85 PC and MI Works Instructions LMI’s with USB ports will need the COM Port that is automatically assigned by a PC, when an USB device is plugged in to it, set to match a COM Port choice within MI Works. This can be done through the PC as follows: Verify USB port assigned to LMI 1) Power-up LMI and PC with USB connected from LMI to PC...
- Page 86 5) Right click on “ATEN USB to Serial Bridge” and select Properties. 6) Select “Port Settings” Series 4000 Melt Indexer Operation Manual USB Setup...
- Page 87 7) Select “Advanced”. In “Advanced Settings”, select “COM2” (or COM1), then “OK” to “Advanced Settings, then “OK” to “Communications Port Properties”. Then, close Device Manager. 8) Start MI Works and the following window should appear: Series 4000 Melt Indexer Operation Manual USB Setup...
- Page 88 9) Select “Communications” and the following window should appear. Select the COM port that was assigned the USB port in step 7 in the “Select PC Port” section of the window. MI Works should now function with the LMI. Series 4000 Melt Indexer Operation Manual USB Setup...
- Page 89 I.V. 41 Index Level the Melt Indexer 6 Loading the Barrel 23, 29, 36 LOCKOUT 18 MACHINE ID 18 Maintenance 63 Making the Cut 24, 31 melt density 32 Mercury 10 mercury thermometers 10 Method B Encoder Option 4, 50 Method B Flags Setup 33 action list 48 Model Descriptions 2...
- Page 90 Series 4000 Melt Indexer Operation Manual Page...
Need help?
Do you have a question about the 4004 and is the answer not in the manual?
Questions and answers