
Related Manuals for Yamaha YSP-2200


Summary of Contents for Yamaha YSP-2200
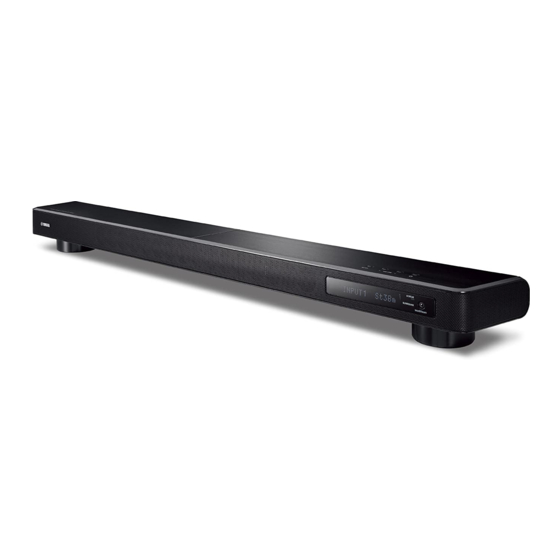
- Page 1 (YSP-CU2200 + NS-SWP600) (YSP-CU2200 + NS-SWP600) Digital Sound Projector™ OWNER’S MANUAL English...
- Page 2 Yamaha will not be held responsible for any damage resulting from use of this unit with a voltage other than specified.
- Page 3 ■ For U.K. customers ■ Notes on remote controls and batteries If the socket outlets in the home are not suitable for the plug supplied • Do not spill water or other liquids on the remote control. with this appliance, it should be cut off and an appropriate 3 pin plug •...
- Page 4 What you can do with this unit To enjoy Blu-ray To enjoy games movies To enjoy TV Checking supplied accessories (p. 4) Installation (p. 9) Preparing the remote control (p. 13) Connecting your TV and Blu-ray disc player (p. 14) When enjoying STB program Connecting a game such as on satellite/CATV tuner...
-
Page 5: Table Of Contents
Using the supplied demonstration DVD.....54 Settings for each input source (Option menu)....32 Index ..............55 Playing back iPod/iPhone ........... 33 When using Yamaha Universal Dock for iPod (optional YDS-12, etc.)..............34 When using Wireless System for iPod (optional YID-W10) ................... 34 About this manual •... -
Page 6: Preparation
PREPARATION Getting started Supplied accessories Before connecting, make sure you have received all of the following items. Units Center unit (YSP-CU2200) Subwoofer (NS-SWP600) Accessories Remote control Battery (× 2) Optical cable Digital audio pin cable Video pin cable (AA, R6, UM-3) (1.5 m (4.9 ft)) (1.5 m (4.9 ft)) (for displaying menu... -
Page 7: Front Panel
Controls and functions Controls and functions Front panel 4 5 6 Front panel display INTELLIBEAM jack Shows information about the operational status of this unit. Connect the supplied IntelliBeam microphone for AUTO SETUP (☞p. 7) (☞p. 17). SURROUND indicator Remote control sensor Lights up according to the input signal. -
Page 8: Rear Panel
For connecting HDMI compatible TV and external components. VIDEO OUT jack (☞p. 14) For connecting video input jack of TV to display the YSP-2200’s HDMI IN jack setup menus on your TV or to play back video in iPod/iPhone. For connecting HDMI compatible Blu-ray disc player, tuner and (☞p. -
Page 9: Front Panel Display
Controls and functions Front panel display HDMI indicator VOL indicator Lights up when HDMI signal is input. Indicates the current volume level. (☞p. 26) SLEEP indicator Multi information display Lights up when the sleep timer is set. (☞p. 32) Displays information in alpha-numeric values. Displays playback components and current sound output when CINEMA DSP indicator power is on. -
Page 10: Remote Control
Controls and functions Remote control CINEMA DSP program keys Infrared signal transmitter When playback is in surround sound, select the CINEMA DSP programs (☞p. 28). SURROUND key Switches to surround playback. (☞p. 28) STEREO key Switches to stereo playback. (☞p. 27) Input selector keys Select playback component. -
Page 11: Connection/Initial Settings
CONNECTION/INITIAL SETTINGS Installation and Connection To achieve desired surround sound effects, install this unit where there are no objects such as furniture obstructing the path of sound beams (☞p. 11). Depending on your installation environment, connections with external components (☞p. 14) should be done before installation. - Page 12 Installation and Connection ■ Adjust the height of center unit ■ When the center unit hides the remote control sensor of your TV In case that the center unit straddles the stands of your TV, turning the stands to left makes the unit higher. Confirm the The unit receives the signal from the remote control of your TV graduation of each stand to make each stand the same height.
-
Page 13: Installing This Unit
Installation and Connection Installing this unit This unit outputs sound beam as shown in the illustrations below. Install this unit where there are no obstacles such as furniture obstructing the path of sound beams. Otherwise, the desired surround sound effects may not be achieved. You may install this unit in parallel with the wall or in the corner. - Page 14 Installation and Connection Installing in a non-square room Install this unit so that the sound beams can be reflected off the walls. Example for installing the unit in living room • As surround beams normally pass through tables, tables are not obstacles.
-
Page 15: Remote Control Preparation
Installation and Connection Remote control preparation Before installing batteries or using the remote control, make sure that you read precautions on the remote control and batteries in “CAUTION: READ THIS BEFORE OPERATING YOUR UNIT.” Installing the batteries Operation range Battery × 2 (AA, R6, UM-3) Press Within 6 m (20 ft) -
Page 16: Connections
Connections • Do not connect the power cable until all connections are completed. • Do not use excessive force when inserting the cable plug. Doing so may damage the cable plug and/or terminal. TV and Blu-ray disc player connection For the cable connection, follow the orders below. HDMI cable HDMI cable Optical cable... -
Page 17: Game Console Or Tuner Connection
Connections Game console or tuner connection Additional external device (example) Connecting cable HDMI supported game console HDMI cable (optional) Satellite/cable TV (HDMI supported) HDMI cable (optional) Satellite/cable TV (HDMI not supported) Digital audio pin cable (supplied) HDMI not supported game console Analog audio stereo pin cable (optional) Video signals Audio signals... -
Page 18: Initial Settings
Initial settings Selecting language for menu display Turn the unit and your TV on. Switch TV’s input to “VIDEO INPUT 1 (example)”. YSP- 2200 Push [SETUP] to begin SETUP MENU. (example) Check whether the initial screen is displayed. Press and hold SETUP key until the “LANGUAGE SETUP”... -
Page 19: Installing The Intellibeam Microphone
Initial settings Make sure that there are no obstacles between the Auto setup for appropriate IntelliBeam microphone and the walls in your listening room as these objects obstruct the path of sound beams. surround effects (IntelliBeam) However, any objects that are in contact with the walls will be regarded as a protruding part of the walls. - Page 20 Initial settings Using AUTO SETUP (IntelliBeam) Notes • It is normal for loud test tones to be output during the AUTO SETUP procedure. Make sure that there are no children around in the listening room while the AUTO SETUP procedure is in progress.
- Page 21 Initial settings Press ENTER key to confirm the The screen below is displayed after connecting results. 1) 2) IntelliBeam microphone to the unit. AUTO SETUP The measurement result is saved. (PREPARATION & CHECK) AUTO SETUP COMPLETE Please connect the MIC. Please place the MIC at least 1.8m/6ft away from SoundPro- jector.
-
Page 22: Intellibeam Microphone
Initial settings ■ AUTO SETUP via setup menu Place the IntelliBeam microphone and press SETUP key. Press to select “AUTO SETUP” and then press ENTER key. Press to select one of the items below and then press ENTER key. Select Item: “BEAM+SOUND OPTIMIZE”... -
Page 23: Error Messages For Auto Setup
[ERROR E-7], [ERROR E-9]: Press key to turn this unit contact the nearest to standby mode, then run AUTO SETUP procedure again after authorized Yamaha service turning this unit on. center for assistance. Other errors: Press RETURN key to cancel the operation and then run the AUTO SETUP procedure again. -
Page 24: Saving Several Measurement Results/Settings
Initial settings Saving several measurement results (Memory setting function) You can save the current beam and sound settings in the system memory of this unit. It is handy to save certain settings according to the varying conditions of your listening environment. For example, if there are curtains in the path of sound beams, the effectiveness of the sound beams will vary depending on whether the curtains are open or closed. -
Page 25: Loading Settings
Initial settings ■ Loading settings Press SETUP key. Select “MEMORY” and press ENTER key. Press key to select “LOAD” and press ENTER key. Press key to select the memory number to be loaded and then press ENTER key. Selectable item: Memory 1, Memory 2, Memory 3 “Memory 1 Load Now ?”... -
Page 26: Operating The Unit By Tv's Remote Control
Initial settings Operating the unit by TV’s remote control What is the HDMI control function? You can use the TV remote control to operate this unit if your TV supports the HDMI control function (ex. REGZA Link) and is connected to this unit’s HDMI OUT (ARC) jack. Remote control of TV (Example) Power on/off Switches input... -
Page 27: Registering Hdmi Components To Tv
Initial settings Check if the HDMI control function works Setting the HDMI control function (turn on this unit or adjust the volume level using the remote control of the TV). Turn on all components connected to this unit with HDMI. If the HDMI control function is not working Check all components connected with Check the following:... -
Page 28: Playback
PLAYBACK Playback features Basic operation for playback Press key to turn on this unit. Turn on components (TV, Blu-ray disc player, game console, etc.) connected to this unit. Select a component you want to listen to by pressing the input selector key ( ) corresponding to the connection of external components. -
Page 29: Enjoying Sound With Your Preference
Playback features Automatic volume level adjustment Enjoying sound with your preference (UniVolume) Switching stereo/surround sound While watching the TV, compensate the excessive volume differences to make it easier to hear during the following cases. When playback is in stereo sound. •... -
Page 30: Enjoying Realistic Surround Sound (Cinema Dsp)
• Audio signals with sampling frequency of higher than 96 kHz are CINEMA DSP being played back. This unit is equipped with a Yamaha CINEMA DSP (digital sound field • When using My Surround function (☞p. 29). processing) chip containing several sound field programs used to •... -
Page 31: Changing The Audio Output Method For Surround Playback
Playback features MUSIC OFF (DSP Off) Music Video Sur.Decorder (surround decorder) This program produces a vibrant environment and lets you This program plays back surround sound without CINEMA feel as if you are at an actual jazz or rock concert. DISP sound field effect. - Page 32 Playback features ■ Selectable item for “Sur. (surround)” Beam modes for “5.1ch” Beam modes for “7.1ch” For enjoying 5 Beam (5 Beam) 5Beam+2 (5Beam Plus2) surround sound Outputs sound beams Outputs sound beams effects on the movie, from the front right and from the front right and etc.
-
Page 33: Surround Decoder Setting
Playback features Surround decoder setting When this unit plays back 2-channel or 5.1-channel sources in surround mode, surround decoder enables them playback for 7.1- channel. You can enjoy a variety of surround sound effects by switching the decoder. Select and set “Sur.Dec.Mode” in the option menu. -
Page 34: Using Useful Features
Playback features Using useful features Sleep timer/auto power down function Use this feature to automatically set this unit to the standby mode after a specified period of time. Press SLEEP key repeatedly. Switching the time it takes to switch to standby mode. The SLEEP indicator (☞p. -
Page 35: Playing Back Ipod/Iphone
(Volume Trim) Playing back iPod/iPhone Adjust the input level for each jack to compensate for variations You can play music stored in iPod/iPhone connected to Yamaha in volume between different input devices. Universal Dock for iPod (optional YDS-12, etc.) or Wireless Adjustable range: -6.0 dB to 0.0 dB* to +6.0 dB... -
Page 36: When Using Yamaha Universal Dock For Ipod (Optional Yds-12, Etc.)
This unit charges the battery of an iPod/iPhone stationed in the Yamaha This function works with ring tone and sound of application. When the Universal Dock for iPod connected to the DOCK terminal even when iPhone is set to silent mode, this unit does not turn on with the ring tone. -
Page 37: Playing Back Bluetooth Components
If the Bluetooth component detects the Yamaha Bluetooth Bluetooth Wireless Audio Receiver (optional YBA-10). wireless audio receiver, the audio receiver name (“YBA-10 YAMAHA”, for example) appears in the device list of the Pairing Bluetooth component. Select the Bluetooth Wireless Audio About “Pairing”... -
Page 38: Settings
SETTINGS Setup menu Setting procedure Before performing following procedures, check if this unit and TV are connected with the video pin cable (supplied) and switch TV input to “VIDEO INPUT 1 (example)”. Press SETUP key to enter the setup menu. SET MENU MEMORY AUTO SETUP... -
Page 39: Setup Menu List
Setup menu Setup menu list Category Menu Sub menu Features Page MEMORY LOAD Memory 1, Memory 2, Loads the beam and sound settings saved in the ☞p. 23 Memory 3 memory. SAVE Memory 1, Memory 2, Saves the current beam and sound settings to the ☞p. -
Page 40: Manual Setup
Setup menu When this unit is installed at Manual setup the corner of the room, specify the width of length Use this menu to manually adjust the parameters related to the of the listening room. sound beam output. To fine-adjust parameters configured by AUTO SETUP, use “BEAM ADJUSTMENT”... -
Page 41: Beam Adjustment
Setup menu Configure “FOCAL LENGTH”. Beam adjustment MANUAL SETUP BEAM ADJUSTMENT Adjust the distance from the front of this unit to the focal Use to manually adjust the various sound beam settings. point of output for each channel to achieve an expansive Configure “HORIZONTAL ANGLE”. -
Page 42: Image Location
Setup menu Image location Tone control MANUAL SETUP IMAGE LOCATION Use to adjust the direction from which the front left and right Tone control channel sound is heard so that each sound can be heard closer to the center channel. SOUND SETUP TONE CONTROL Use this feature to redirect audio signals if the sound coming... -
Page 43: Dynamic Range Control
Setup menu Sub menu: HDMI1-3 Sub menu: Dolby/DTS DRC Manually adjust the audio output delay applied to signals input Select the amount of dynamic range applied when this unit is from the HDMI IN jacks. This setting is effective only when decoding Dolby Digital and DTS signals. -
Page 44: Input Assignment
Setup menu Input assignment Input assignment INPUT MENU INPUT ASSIGNMENT Use to change the key assignments of input jacks on this unit. The sound of the input select is decided according to key assign set to each jacks. Selectable item: Sub menu Default setting Audio input jack... -
Page 45: Input Rename
“HDMI CONTROL” is set to “OFF”. position to be entered. Selectable item: YSP-2200*, OTHER “YSP-2200”: Play back the input sound signal. Press key to place the _ “OTHER”: Play back the equipment connected to HDMI OUT (underscore) under the space or the (ARC) jack. -
Page 46: Display Menu
Setup menu DISPLAY MENU ■ Front panel display setup DISPLAY MENU F.DISPLAY SETUP Use to adjust the brightness and display settings of the front panel display. Sub menu: STANDARD DIMMER Use to adjust the brightness of the front panel display when you operate this unit. -
Page 47: Advanced Setup
Advanced setup Press to select the desired Press key to turn this unit to menu on the front panel display and then standby mode. press ENTER key. While holding down INPUT key on the front Change setting by pressing key. panel, press key on the remote control to turn on the power. -
Page 48: Troubleshooting
Refer to the chart below when this unit does not function properly. If the problem you are experiencing is not listed below or if the instruction below does not help, set this unit to the standby mode, disconnect the AC power supply cable, and contact the nearest authorized Yamaha dealer or service center. General... - Page 49 Troubleshooting Problem Cause Remedy page No sound from the The subwoofer is not connected properly. Check if the subwoofer is connected properly. subwoofer. The level of subwoofer is low. Increase the subwoofer level with SUBWOOFER + key. The image is not HDMI cable is not securely connected.
- Page 50 Turn off the power of this unit and reconnect communication. Yamaha Universal Dock for iPod again. Reset iPod/iPhone to a Yamaha Universal Dock for iPod. Low Battery The battery of iPod/iPhone is running low. Unknown iPod The iPod/iPhone being used is not Connect supported iPod to this unit.
- Page 51 – – Make sure that the power of the Bluetooth component is on. – Check if the distance between the Yamaha Bluetooth Wireless Audio Receiver and the Bluetooth component is in 10 meters. – The Bluetooth component and this unit have not been performed pairing.
-
Page 52: Glossary
APPENDIX Glossary Glossary Digital Sound Projector Sampling frequency Ordinarily, two front speakers, a center speaker, two surround The number of sampling (process for digitalizing analog signals) speakers, and a subwoofer are necessary for enjoying 5.1 channel per second. In principle, the higher the sampling rate, the wider surround sound. -
Page 53: Deep Color
Glossary Dolby Pro Logic IIx HDMI Dolby Pro Logic IIx is a new technology enabling discrete HDMI (High-Definition Multimedia Interface) is the first multichannel playback from 2-channel or multi-channel sources. industry supported, uncompressed, all-digital audio/video There are three modes available: “Music mode” for music interface. -
Page 54: Specifications
DTS-HD Master Audio, and the DTS logos are trademarks of DTS, Inc. Product includes software. © DTS, Inc. All Rights Reserved. The “ “ logo and “IntelliBeam” are trademarks of Yamaha iPod, iPhone Corporation. “iPod” is a trademark of Apple Inc., registered in the U.S. and other countries. -
Page 55: Available Signal Information
Specifications Available signal information HDMI signal compatibility ■ Receivable audio signals Audio signal types Audio signal formats Compatible media 2ch Linear PCM 2ch, 32-192 kHz, 16/20/24 bit CD, DVD-Video, DVD-Audio, etc. Multi-ch Linear PCM 8ch, 32-192 kHz, 16/20/24 bit DVD-Audio, Blu-ray disc, HD DVD, etc. Bitstream (SD Audio) Dolby Digital, Dolby Digital EX, DTS, DTS- DVD-Video, etc. -
Page 56: Using The Supplied Demonstration Dvd
Using the supplied demonstration DVD By playing back the supplied demonstration DVD, you can check the digital signals being input properly from the Blu-ray disc player through the digital connection (HDMI, optical, or coaxial) and experience this unit’s multi-channel surround sound. Playing back the demonstration DVD If “Dolby D”... -
Page 57: Index
Index Dolby Digital Plus............Numerics Dolby Pro Logic IIx ............. Dolby TrueHD ............2ch................. DTS ............... 2-channel............... DTS-HD High Resolution Audio......... 3 Beam (3 Beam) ............DTS-HD Master Audio ......... 5 Beam (5 Beam) ............Dynamic range control..........5.1ch............... 5Beam+2 (5Beam Plus2) ..........7.1ch.............. - Page 58 Index Sweet spot ..............System indicator ............. MEMORY ..............Movie................MP3 ................Music ................Test tones ..............My Sur................Tone control..............TV ................. Optical cable............Option menu ..............UNIT SETUP..............OSD SETUP..............UniVolume ..............Pairing ................Video pin cable ............. Parallel to wall..............
- Page 59 YD002A0/OMEN...
Need help?
Do you have a question about the YSP-2200 and is the answer not in the manual?
Questions and answers