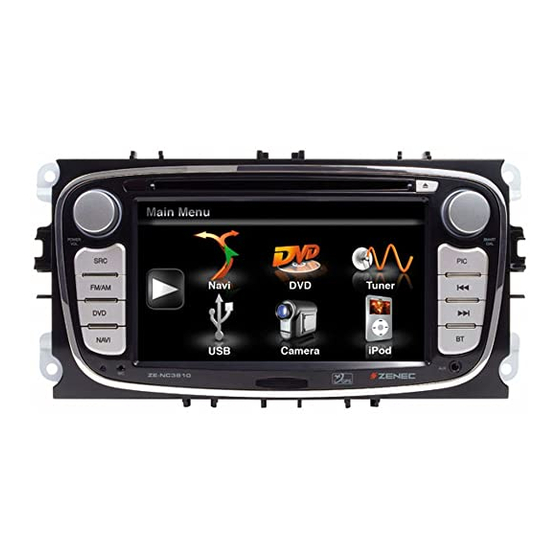
ZENEC ZE-NC3810 Instruction Manual
Hide thumbs
Also See for ZE-NC3810:
- Brochure & specs (4 pages) ,
- Instructions manual (6 pages) ,
- Operating instructions (3 pages)

Related Manuals for ZENEC ZE-NC3810


Summary of Contents for ZENEC ZE-NC3810
- Page 1 MODEL NO: MOdEL N0: ZE-DVBT1 0 1 CH DVB-T TUNER CAR SPECIFIC NAVICEIVER FOR FORd CARS INSTRUCTION MANUAL...
-
Page 2: Table Of Contents
ÜbER dIESES HANdbUCH Diese Bedienungsanleitung enthält wichtige Informationen und Warnungen zum Umgang mit diesem Gerät. Bitte fügen Sie diese Bedienungsanleitung Ihrem Bordbuch hinzu, um jederzeit darauf Zugriff zu haben. HINWEIS: ■ Texte mit diesem Symbol weisen Sie auf besondere Informationen hin, die für eine ordnungs-gemäße Bedienung äußerst wichtig sind. -
Page 3: Sicherheitshinweise
Spannungsversorgung verursacht wurde, müssen Sie die defekte Sicherung gegen ein neues Exemplar mit identischen Werten austauschen. Sollte der Kurzschluss immer noch vorhanden sein, wenden Sie sich bitte an einen autorisierten ZENEC-Fachhändler. 7. Achten Sie darauf, dass bei ausgeschaltetem Motor die Batterie des Fahrzeuges nicht entladen wird. -
Page 4: Tasten Des Bedienteils
TASTEN dES bEdIENTEILS GRUNDGERÄT bt br br bq AV-1... - Page 5 DEUTSCH 1. PWR/VOL 10. BT Drücken Sie den PWR/VOL-Drehregler, Drücken Sie die BT-Taste, um in den ■ ■ um das Gerät einzuschalten. Bluetooth-Modus zu gelangen. Drücken und halten Sie den PWR/ Drücken Sie die BT-Taste im Bluetooth- ■ ■ VOL-Drehregler, um das Gerät auszu- Modus, um zwischen Bluetooth und schalten.
-
Page 6: Tasten Der Fernbedienungen
TASTEN dES FERNbEdIENUNGEN FERNBEDIENUNG FÜR DEN VORDEREN WIEDERGABEBEREICH... - Page 7 DEUTSCH 1. POWER 17. RICHTUNGSTASTEN ■ Drücken Sie die POWER-Taste, um das Drücken Sie die Richtungstasten, um ■ Gerät ein- oder auszuschalten. in den Menüs zu navigieren oder Ein- 2. EJECT stellungen zu ändern. ■ Drücken Sie die EJECT-Taste, um eine 18.
- Page 8 FERNBEDIENUNG FÜR DEN HINTEREN WIEDERGABEBEREICH (M-ZONE) TV/RADIO...
- Page 9 DEUTSCH 1. R-SRC 14. FAST REVERSE ■ Nachdem die M-Zone im Hauptmenü ■ Erhöht den Vorlauf durch mehrmaliges aktiviert wurde, drücken Sie die R-SRC- Drücken in folgenden Schritten: Taste, um den Wiedergabemodus für den "2X", "4X", "8X", "16X". hinteren Wiedergabebereich zu wählen. 15.
-
Page 10: Grundlegende Bedienung
GRUNdLEGENdE bEdIENUNG GERÄT EIN- UND AUSSCHALTEN ■ Drücken Sie den PWR/VOL-Drehregler an der Gerätefront, um das Gerät manuell einzuschalten. Halten Sie den Drehregler gedrückt, um das Gerät auszuschalten. ■ Das Gerät kann auch mit der Zündung ein- und ausgeschaltet werden, wobei diese Funktion von dem Status abhängig ist, in welchem sich das Gerät vor dem Ausschalten befand. - Page 11 DEUTSCH STUMMSCHALTUNG ■ Manuell: Drücken Sie die PWR/VOL-Taste an der Gerätefront, um den Ton zu unterbrechen. Drücken Sie die Taste erneut, um zur zuvor eingestellten Lautstärke zurückzukehren. ■ Automatisch: Das Gerät wird stumm geschaltet, wenn ein Telefongespräch geführt wird. AUDIO CONTROL MENÜ ■...
-
Page 12: Hauptmenü Und Einstellungen
HAUPTMENÜ UNd EINSTELLUNGEN HAUPTMENÜ ■ Berühren Sie das [ ]-Icon im Hauptmenü, um in das Setup-Menü zu gelangen. ■ Berühren Sie den gewünschten Menüpunkt direkt am Display, um das Untermenü zu öffnen und den eingestellten Wert zu verändern. ■ Die Icons [ ] und [ ] zeigen an, das Optionen auf einer weiteren Seite verfügbar sind. - Page 13 DEUTSCH GENERELL Einstellung Option Funktion Zeit (HH:MM) Stellen Sie hier die Uhrzeit ein. Stellt die Uhrzeit auf AM oder PM ein. (Nur im AM/PM 12h Modus) 12Hr Anzeige im 12h Modus mit AM und PM. Uhrzeit Modus 24Hr Anzeige im 24h Modus. Beep Aktiviert/deaktiviert die Tastentöne.
- Page 14 VIDEO Einstellung Option Funktion Cinema Bildformat Anpassung des Seitenverhältnisses. Normal Schaltet automatisch zwischen PAL und NTSC Auto Aux IN Die Wiedergabe erfolgt im PAL Format. NTSC Die Wiedergabe erfolgt im NTSC Format. Helligkeit -10 bis +10 Einstellen der Helligkeit des Bildschirms. Monitor Aus Ausschalten des Bildschirms.
- Page 15 DEUTSCH Einstellung Option Funktion Down Mix 2-Kanal Stereo Audiowiedergabe. Down Mix Full 6 CH 6-Kanal Audiowiedergabe (5.1). Groß Empfohlen für LS ab 13 cm. Front Lautsprecher Klein Empfohlen für LS bis 13 cm. Groß Empfohlen für LS ab 13 cm. Center Lautsprecher Klein Empfohlen für LS bis 13 cm.
- Page 16 SPRACHEN Auswahl Funktion Stellen Sie hier die gewünschte Menüsprache ein, die beim DVD Menü Start der DVD automatisch ausgewählt werden soll. Stellen Sie hier die gewünschte Sprache für den Untertitel ein, Untertitel die beim Start der DVD automatisch ausgewählt werden soll. Stellen Sie hier die gewünschte Tonspur ein, die beim Start Audio der DVD automatisch ausgewählt werden soll.
- Page 17 DEUTSCH VERSCHIEDENES Option Funktion Einstellung Berühren Sie das "Ja"-Icon, um den Touchscreen zu Nein TS Kalibrieren kalibrieren. Folgen Sie den Anweisungen auf dem Bildschirm. Geben Sie ein Passwort ein, um den Jugendschutz Passwort Gesperrt zu aktivieren. 1. Kid Safe Kid safe: Der Inhalt ist für Kinder geeignet. G: Der Inhalt ist für sämtliche Altersgruppen 2.
- Page 18 Sie ihn bei Bedarf wieder finden. Wird der Sicherheitscode dreimal falsch eingegeben, kann das Gerät nur noch mit einem Supercode freigeschaltet werden. Dazu muss es kostenpflichtig über einen ZENEC-Fach- händler eingeschickt werden. ■ Um den Sicherheitscode zu ändern oder die Eingabe des Sicherheitscodes zu deaktivieren,...
- Page 19 DEUTSCH DURCHFÜHREN EINES SOFTWARE UPDATES HINWEIS: ■ Auf www.zenec.com werden in unregelmäßigen Abständen Software Updates bereit- gestellt. Befolgen Sie bitte die Anweisungen der dem jeweiligen Update beiliegenden Installationsanleitung, um die Software zu installieren.
-
Page 20: Radio Modus
RAdIO-MOdUS 7 8 9 bl bm bn bo bp bq br bs bt... - Page 21 DEUTSCH 1. Momentan gewählter Wiedergabe- 13. Berühren Sie das gewünschte PTY modus: Radio. Berühren, um das Haupt- Icon. Das Gerät startet automatisch mit menü zu öffnen. der Suche. Mit Hilfe der PTY-Funktion kann das Gerät gezielt nach Sendern 2. Anzeige der Signalstärke des ausge- mit bestimmten Programminhalten (z.B.
- Page 22 HINWEIS: ■ Das Gerät besitzt einen RDS Tuner, ein System, das zusätzlich zu den Radiofrequenzen auch Daten der Radiosender überträgt. Die Verfügbarkeit der RDS-Daten und deren Verwendung hängt vom jeweiligen Radiosender und dessen Empfangsqualität ab. Die RDS-Funktion steht nicht im AM Frequenzband zur Verfügung. ■...
-
Page 23: Cd/Dvd Modus
DEUTSCH dVd/Cd-MOdUS Area A Area F Area B Area C Area D Area E ■ Berühren Sie den unteren Bereich des Displays, um die Liste mit den Icons anzuzeigen. 1. Berühren Sie das Icon, um den Startpunkt A festzulegen. Berühren Sie das Icon erneut, um den Endpunkt B der Schleife zu setzen. -
Page 24: Cd/Mp3/Wma-Modus
Cd/MP3/WMA-MOdUS 8 9 bl 1. Momentan gewählter Wiedergabemodus: CD. Berühren, um das Hauptmenü zu öffnen. 2. Anzeige von Titeln oder Ordnern bzw. deren Inhalte. 3. Uhrzeit. 4. Berühren Sie das REPEAT-Icon, um Titel/Ordner zu wiederholen. 5. Öffnet ein nummerisches Tastenfeld und ermöglicht eine Direktanwahl der Titel. 6. -
Page 25: Sd/Usb Modus
DEUTSCH Sd-KARTEN-MOdUS ■ Legen Sie eine SD-Karte oder SDHC-Karte (max. 8 GB) in den SD-Kartenschacht ein und wählen Sie den Wiedergabemodus SD-Karte. HINWEIS: ■ Die Menüführung ist identisch zur Menüführung des CD/MP3/WMA Modus. ■ Je nach Ordnerstruktur und Inhalt ist die Anzahl der verfügbaren Ordner begrenzt. ■... -
Page 26: Ipod Modus
17. Zufallswiedergabe, spielt die Titel im aktuellen Ordner in zufälliger Reihenfolge ab. 18. Berühren, um in der Ordnerstruktur den vorherigen Ordner auszuwählen und dessen Inhalt anzuzeigen. 19. Untermenü schließen. HINWEIS: ■ Bitte beachten Sie die aktuelle iPod-Kompatibilitätsliste und eventuelle Änderungen bezüglich der iPod Software auf www.zenec.com. -
Page 27: Bluetooth Modus
DEUTSCH bLUETOOTH-MOdUS BLUETOOTH BEDIENUNG bo 2 bn 8 1. Momentan gewählter Wiedergabemodus: Bluetooth. Drücken, um das Hauptmenü zu öffnen. 2. Bluetooth Icon. 3. Aktivieren der Wählfunktion. 4. Öffnen des Telefonbuchs. 5. Öffnen der Anruflisten. 6. Aktivieren der A2DP-Funktion. 7. Aktivierung der Kopplungsfunktion. 8. - Page 28 Sie nach dem Anfangsbuchstaben des Nachnamens suchen. Die Einträge mit dem entsprechenden Anfangsbuchstaben werden direkt angezeigt. HINWEIS: ■ Diese Funktion und die Sortierung der Einträge sind abhängig von dem verwendeten Mobiltelefon. ■ Eine Liste mit den kompatiblen Mobiltelefonen und den unterstützten Funktionen finden Sie unter www.zenec.com.
- Page 29 DEUTSCH ANRUFLISTEN ■ Anzeigemöglichkeit der gewählten, empfangenen und verpassten Anrufe. A2DP FUNKTION ■ Starten Sie die Wiedergabe am Gerät. Der Musikplayer des Mobiltelefons wird auto- matisch aktiviert und kann über das Gerät ferngesteuert werden. PAIRING ■ Sie haben zwei Möglichkeiten ein Mobiltelefon mit dem Gerät zu koppeln. Beachten Sie hier, dass der Bluetooth-Modus des Gerätes aktiviert sein muss.
- Page 30 4. Nachdem das Gerät vom Mobiltelefon gefunden und eine Bluetooth-Verbindung aufgebaut wurde, erscheint das Gerät mit der Bezeichnung ZE-NC3810 auf dem Mobiltelefon. 5. Wählen Sie nun ZE-NC3810 auf dem Mobiltelefon aus und geben Sie den alpha- numerischen Kennschlüssel ein, welcher im Auslieferungszustand 1234 lautet.
- Page 31 ■ Anzeige der aktuellen Bluetooth Software Version des Gerätes. HINWEIS: ■ Auf www.zenec.com werden in regelmässigen Abständen Software Updates für die Bluetooth Software bereitgestellt. Befolgen Sie bitte die Anweisungen der dem jeweiligen Update beiliegenden Installationsanleitungen, um es zu installieren.
- Page 32 EINGABE EINES SPRACHBEFEHLS ■ Es besteht die Möglichkeit für 200 Telefonnummern einen Sprachbefehl aufzunehmen, so das der entsprechende Eintrag per Spracheingabe angerufen werden kann. 1. Wählen Sie einen Eintrag aus dem Telefonbuch aus. 2. Starten Sie die Aufnahme eines Sprachbefehls und befolgen Sie die Anweisungen, um den Vorgang zu beenden.
- Page 33 Bitte beachten Sie bei der Auswahl des internen oder externen Mikrofons die im ■ Lieferumfang enthaltene Montageanleitung bezüglich der Verwendung der beiden Mikrofonarten. Auf www.zenec.com werden in regelmässigen Abständen Software Updates für die ■ Bluetooth Software bereitgestellt. Befolgen Sie bitte die Anweisungen der dem jeweiligen Update beiliegenden Installationsanleitung, um es zu installieren.
-
Page 34: Navigations Modus
NAVIGATIONS-MOdUS ■ Für die Bedienung der Navigation lesen Sie bitte die separate Bedienungsanleitung, welche im Lieferumfang enthalten ist. ■ Während der Navigation können Sie einen anderen Wiedergabemodus wiedergeben. In diesem Fall verringert die Navigation den Ton des aktuellen Wiedergabemodus für die Dauer der Navigationsdurchsage. -
Page 35: Externe Wiedergabequellen
2. Für die Bedienung des DVB-T Tuners lesen Sie bitte dessen Bedienungsanleitung. HINWEIS: ■ Wenn Sie einen geeigneten ZENEC DVB-T Tuner verwenden, können Sie ihn über den Touchscreen des Gerätes steuern. Nähere Informationen zu geeigneten DVB-T Tunern finden Sie unter www.zenec.com. -
Page 36: Generelle Informationen
GENERELLE INFORMATIONEN HINWEISE ZU DIVX DivX ist ein komprimiertes digitales Videoformat, das vom DivX Videocodec der DivX, Inc. erzeugt wird. Dieses Gerät kann DivX Videodateien von CD-R/RW/-ROM und DVD-R/-RW/- ROM Discs wiedergeben. Zur Vereinheitlichung derselben Terminologie wie bei DVD Video, werden einzelne DivX Videodateien “Titel“... -
Page 37: Fehlersuche
DEUTSCH FEHLERSUCHE Problem Ursache Lösung ALLGEMEIN Durch eine Sicherung gleichen Typs Radiosicherung defekt. ersetzen. Hauptsicherung im Sicherungs- Durch eine Sicherung gleichen Typs Das Gerät schaltet kasten des Radios defekt. ersetzen. nicht ein. RESET drücken und Falsche Bedienung. Bedienungsanleitung noch einmal lesen. - Page 38 TUNER Die Fahrzeugantenne ist nicht Verbinden Sie die Antenne richtig mit dem Gerät verbunden. gemäss dem Anschluss-diagramm. Die REG-Funktion ist aktiviert. Deaktivieren Sie die REG-Funktion. Schlechter Die Phantomspeisung wurde nicht Schließen Sie die Phantom- Radioempfang. oder falsch angeschlossen. speisung richtig an. Die AF-Funktion wurde nicht Aktivieren Sie die AF-Funktion.
-
Page 39: Spezifikationen
DEUTSCH SPEZIFIKATIONEN Interner Verstärker Ausgangsleistung: 20 Watt x 4 @ 4 Ohm @ < 10% THD+N Rauschabstand: 70dBA Maximale Ausgangsleistung: 50 x 4 Watt @ 4 Ohm Frequenzgang: 20Hz to 20 kHz, -3dB Referenzspannung: 14.4V DC DVD-Player Kompatible Formate: CD, CD-R/RW, MP3, WMA, DVD, DVD-R/RW, DVD+R/RW, DVD-MP3, AVI, MPEG4, DivX6, JPEG und Picture CD Rauschabstand: 85dBA Dynamikbereich: >95dB... - Page 40 AbOUT THIS INSTRUCTION MANUAL The instruction manual contains important information and warnings about the operation of this unit. Please add this instruction manual to the log book of your vehicle to have access to it any time. NOTE: ■ Text passages with this symbol indicate particular information, which are very important for correct operation.
-
Page 41: Safety Instructions
(same values). If the short-circuit is still existing, please contact an authorized ZENEC dealer. 7. Be careful not to drain the car battery while using the unit when the car engine is turned off. -
Page 42: Front Panel Buttons
FRONT PANEL bUTTONS MAIN UNIT bt br br bq AV-1... - Page 43 ENGL I SH 1. PWR/VOL 10. BT ■ Press the PWR/VOL-rotary knob to turn ■ Press the BT-button to enter the Bluetooth on the unit. mode. ■ Press and hold the PWR/VOL-rotary ■ Press the BT-button in Bluetooth mode knob to turn off the unit. to change between the Bluetooth mode ■...
-
Page 44: Remote Control Buttons
REMOTE CONTROL bUTTONS FRONT REMOTE CONTROL... - Page 45 ENGL I SH 1. POWER 16. OK ■ Press the POWER/MUTE-button to turn ■ Start or pause the playback. on the unit. ■ Confirm the selected adjustment. 2. EJECT 17. DIRECTION BUTTONS ■ Press the EJECT-button to insert or eject ■...
- Page 46 REAR REMOTE CONTROL (M-ZONE) TV/RADIO...
- Page 47 ENGL I SH 1. R-SRC 17. REPEAT ■ After you have activated M-Zone in the ■ Press the REPEAT-button to repeat the main menu, press the R-SRC-button to track/folder/chapter/disc playback. 18. AUDIO choose the playing mode for the rear zone. ■...
-
Page 48: Basic Operation
bASIC OPERATION POWER ON/OFF ■ Press the PWR/VOL rotary knob on the front panel to turn on the unit. Press and hold the rotary knob for 2 seconds to turn off the unit. ■ It's also possible to turn on and off the unit with the ignition, but this depends on the last state, before the unit was turned off. - Page 49 ENGL I SH MUTE FUNCTION ■ Manually: Press the PWR/VOL rotary knob on the front panel to mute the audio output. Press the button again to deactivate the mute function. ■ Automatically: The audio output will be muted, if you make a phone call. AUDIO CONTROL MENU ■...
-
Page 50: Main Menu And Settings
SETUP SETUP MENU ■ Touch the [ ]-Icon in the main menu to enter the setup menu. ■ Touch the desired menu item directly on the display to open the submenu and to change the selected adjustment. ■ The icons [ ] and [ ] indicate that there are more options available on the next page of the setup menu. - Page 51 ENGL I SH GENERAL Settings Options Function Adjusts the clock appearing in the top right corner Clock (HH:MM) of the TFT screen. AM/PM Choose AM or PM mode (only for 12 Hr mode). 12Hr Clock displays 12 hour time using AM and PM. Clock Mode 24Hr Clock displays 24 hour time up to 23:59.
- Page 52 VIDEO Settings Options Function cinema Widescreen picture scaling (16:9). TV Shape normal Normal picture scaling (4:3). The video output is switched automatically based on Auto the current disc. Aux IN The video output is in the standard PAL format. NTSC The video output is in the standard NTSC format.
- Page 53 ENGL I SH Settings Options Function Down Mix 2-channel stereo mode. Down Mix Full 6 CH 6-channel mode. Large Recommended for speakers > 5.25". Front Speakers Small Recommended for speakers < 5.25". Large Recommended for speakers > 5.25". Center Speakers Small Recommended for speakers <...
- Page 54 LANGUAGES Settings Function DVD Menu Select the language for the DVD menu. Subtitle Select the language for the subtitle. Audio Select the language for the soundtrack. Select the language for the OSD menu. VOLUME Settings Options Function The unit starts with the volume, which was Adjusts adjusted with the menu item"start vol adjust".
- Page 55 ENGL I SH MISC SETUP MENU Settings Options Function Touch "Yes" to enter the touch screen calibration mode. TS Calibrate Then follow instructions on the screen. Set Password Locked Enter your password to unlock the parental lock. 1. Kid Safe Kid safe: A movie rating that is appropriate for children. G: A movie rating that allows admission to persons of all 2.
- Page 56 To unlock the unit with the super code, it’s inevitable to send it back to an authorized ZENEC-dealer. This service is not free of charge. ■ If you want to change or deactivate the anti-theft code, you must enter a valid code first. ...
- Page 57 ENGL I SH INSTALLATION OF SOFTWARE UPDATES NOTE: ■ There will be new software updates appearing for download at irregular intervals on www. zenec.com. Please follow the instruction notes of the software update, to install the update properly.
-
Page 58: Radio Mode
RAdIO MOdE 7 8 9 bl bm bn bo bp bq br bs bt... - Page 59 ENGL I SH 1. Current mode of unit. Touch to open the 14. Touch to seek forward. main menu. 15. Touch to switch between the two sub- 2. Displays the signal strength. menus. 3. The TP button lights up orange when 16.
- Page 60 NOTE: ■ This product features a tuner with RDS function. RDS (Radio Data System) is a system that transmits broadcast station information together with FM programs. RDS service is not available in AM broadcasting. RDS service availability depends on the FM broadcasting provider. ■...
-
Page 61: Cd/Dvd Mode
ENGL I SH dVd MOdE Area A Area F Area B Area C Area D Area E ■ Touch the lower section of the screen to display these icons. If no operation has been entered for 10 seconds, these icons will be automatically hidden. 1. -
Page 62: Cd/Mp3/Wma Mode
Cd/MP3/WMA MOdE 8 9 bl 1. Current mode indicator. Touch to open the main menu. 2. Display of disc folders and titles. 3. Current time indicator. 4. Touch to repeat track/folder/disc. 5. Touch to display the numeric keypad on the screen. Use the numeric keypad to directly access a track. -
Page 63: Sd/Usb Mode
ENGL I SH Sd-CARd MOdE ■ Insert the SD or SDHC card (up to 8 GB) into the SD-card slot and enter the SD card mode. NOTE: ■ The interface and the operation of the SD card mode is similar to the CD/MP3/WMA mode. ■... -
Page 64: Ipod Mode
16. Elapsed playing time and total time of the track. 17. Touch to activate/deactivate the random mode. 18. Touch to navigate through the directories/folders. 19. Open/close submenu. NOTE: ■ Please visit www.zenec.com for the latest iPod software updates and compatibility lists. -
Page 65: Bluetooth Mode
ENGL I SH bLUETOOTH MOdE BLUETOOTH OPERATION bo 2 bn 8 1. Current playing source: Bluetooth. Touch to go back to the main menu. 2. Bluetooth icon. 3. Open the dialling function. 4. Open phone book. 5. Open call log. 6. - Page 66 The entries with the respective initial letter get displayed directly. NOTE: ■ The function and the sorting of the entries depend on the mobile phone. A list of the compatible mobile phones and the supported function is available at www. zenec.com.
- Page 67 ENGL I SH CALL LOG Display the dialled, received and missed calls. ■ A2DP FUNCTION Start the playback on the unit. The music player of the mobile phone will be activated ■ automatically and it's possible to operate and control the music player of your mobile phone with the unit.
- Page 68 4. After the unit is found by the mobile phone and a Bluetooth connection was established, the unit will appear with the description ZE-NC3810 on the mobile phone. 5. Choose ZE-NC3810 on the mobile phone and enter the PIN code, which is in the delivery status 1234.
- Page 69 ■ Adjustment of the microphone sensitivity. VERSION ■ Display the current Bluetooth software version of the unit. NOTE: ■ There will be new Bluetooth software updates at regular intervals available on www.zenec.com. Please follow the instruction manual of the software update to install it.
- Page 70 ENTER A VOICE TAG ■ The user can record a voice tag for 200 phone numbers, i.e. it's possible to start a phone call with a pre-recorded voice tag. 1. Choose one entry form the phone book. 2. Start to record a voice tag and follow the instructions to finish the procedure. Entries with a voice tag are indicated with a [ ]-icon.
- Page 71 ■ A list with compatible mobile phones and functions is available at www.zenec.com. ■ It's possible to pair up to 5 mobile phones with the unit.
-
Page 72: Navigation Mode
NAVIGATION MOdE ■ Please read the separate navigation software manual to learn more about the operation of the navigation system. ■ In navigation mode, it's possible to play back an audio source. In this case, the audio output of the current playing mode will be lowered during a voice response. ■... -
Page 73: External Playing Sources
2. Please read the manual of the DVB-T tuner. NOTE: ■ If you are using a compatible ZENEC DVB-T tuner, it's possible to operate it with the touch-screen of the unit. Please visit www.zenec.com to find compatible DVB-T tuner model(s). -
Page 74: General Information
GENEREL INFORMATION ABOUT DIVX ABOUT DIVX VIDEO: DivX® is a digital video format created by DivX, Inc. This is an official DivX Certified device that plays DivX video. Visit www.divx.com for more information and software tools to convert your files into DivX video. ABOUT DIVX VIDEO-ON-DEMAND: This DivX Certified®... -
Page 75: Troubleshooting
ENGL I SH TROUbLESHOOTING Problem Cause Solution GENEREL Radio fuse blown. Install new fuse with correct rating. Unit will not power Car battery fuse blown. Install new fuse with correct rating. Illegal operation. Press the RESET button. Improper audio output connection. Check wiring and correct. Volume set too low. - Page 76 TUNER Auto antenna not properly Connect the auto antenna cable connected. properly. REG function is activated. Turn REG function off. Weak station searching. The antenna power cable is not Connect the antenna power cable connected. properly. The AF function is not activated. Activate the AF function.
-
Page 77: Specifications
ENGL I SH SPECIFICATIONS Main Amplifier Power Output: 20 watts x 4 channels into 4-ohms @ < 10% THD+N Signal to Noise Ratio: 70dBA below reference. (Reference: 1 watt, 4-ohms) MAX Power: 50 X 4 watts into 4-ohms, all channels driven Frequency Response: 20Hz to 20 kHz, -3dB. -
Page 78: Garantie
WARRANTY 2 YEARS Dear customer Thank you for purchasing this ZENEC product. It is advisable to keep the original packing material for any future transporting of the product. Should your ZENEC product require warranty service, please return it to the retailer from whom it was purchased or the distributor in your country. -
Page 79: Warranty
WARRANTY ZENEC MOdEL: ZE-NC3810 Serial number: ..........................Date of purchase: .......................... Your name: ............................ Your address: ..........................City: .............................. State: ........ZIP or postal code: ................. Country: ............................Dealer’s address & stamp ■ If at any time in the future you should need to dispose this product please note that waste electrical products should not be disposed of with household waste. - Page 80 MODEL NO: ZE-DVBT1 0 1 CH DVB-T TUNER ZENEC · By ACR AG · Bohrturmweg 1 · Bad Zurzach · Switzerland...
Need help?
Do you have a question about the ZE-NC3810 and is the answer not in the manual?
Questions and answers