Sign In
Upload
Download
Table of Contents
Contents
Add to my manuals
Delete from my manuals
Share
URL of this page:
HTML Link:
Bookmark this page
Add
Manual will be automatically added to "My Manuals"
Print this page
×
Bookmark added
×
Added to my manuals
Manuals
Brands
Brother Manuals
Label Maker
PT-H105
Service manual
Brother PT-H105 Service Manual
Hide thumbs
1
2
Table Of Contents
3
4
5
6
7
8
9
10
11
12
13
14
15
16
17
18
19
20
21
22
23
24
25
26
27
28
29
30
31
32
33
34
35
36
37
38
39
40
41
42
43
44
45
46
47
48
49
50
51
52
53
54
55
56
57
58
59
60
61
62
63
64
65
66
67
68
69
70
71
72
73
74
75
76
77
78
79
80
81
page
of
81
Go
/
81
Contents
Table of Contents
Troubleshooting
Bookmarks
Table of Contents
Table of Contents
Chapter I Specifications
Mechanical Specifications
External Appearance
Keyboard
Display
Printing Mechanism
Tape Cassette
Tape Cutter
Electronics Specifications
Character Generator
Power Supply
Key Commands for Special Functions
Initializing
Inspection Mode
Chapter II Theory of Operation
Outline of Mechanisms
Print Mechanism
Roller Holder ASSY Setting & Retracting Mechanism
Cassette Sensor Mechanism
Tape & Ribbon Feed Mechanism
Tape Cutter Mechanism
Cutter Safety Lock Mechanism
Cutter Jam Prevention Mechanism
Outline of Control Electronics
Configuration
Main PCB
1 ] Block Diagram
2 ] Identification of Tape Cassette Type
Chapter III Disassembly & Reassembly
Disassembly/Reassembly
Disassembly Procedure
1 ] Removing the Cassette Cover, Tape Cassette, Dry Cells and Cassette Panel
2 ] Removing the Cutter Case ASSY and Board, and Separating the Upper Cover from the Bottom Cover
3 ] Removing the Terminal Press Cover and Battery Terminals B
4 ] Removing the Frame ASSY, Cutter Lever and Cassette Sensor PCB ASSY
5 ] Removing the Battery Spring Plus / Minus
6 ] Removing the Cutter Sensor ASSY, Main PCB ASSY and Key PCB ASSY
7 ] Removing the Upper Cover, Rubber 54 Key and LCD
Reassembly Procedure
1 ] Installing the LCD and Rubber 54 Key
2 ] Installing the Main PCB ASSY, Key PCB ASSY and Cutter Sensor ASSY
3 ] Installing the Battery Spring Plus / Minus
4 ] Installing the Cassette Sensor PCB ASSY, Frame ASSY and Cutter Lever
5 ] Installing the Battery Terminal B and Terminal Press Cover
6 ] Assembling the Frame Cover and Bottom Cover, and Installing the Board and Cutter Case ASSY
7 ] Installing the Cassette Panel
8 ] Installing the Dry Cells, Tape Cassette and Cassette Cover
Final Check and Inspection Mode
Procedure for the Factory Inspection Mode
Factory Inspection Mode
Write Setting Mode ([1] Key) : Perform at Production
Head Rank Set Mode
Country Set Mode
Check LCD Indication Mode
INFORMATION Mode ([2] Key) : Perform at Production
Country Indication
Head Rank Indication
Power-Supply Voltage Check Indication
Inspect Cassette Sensor Mode ([3] Key) : Perform at Production
Inspect Key Mode ([4] Key) : Not Perform at Production
PRINT 1 Mode ([5] Key) : Perform at Production
CUT Mode ([6] Key) : Perform at Production
MOTOR Mode ([8] Key) for DC Motor Rotation Adjustment : Perform at Production
Chapter IV Troubleshooting
Precautions
After Repairing
Error Messages
Troubleshooting Flows
1 ] Tape Feeding Failure
2 ] Printing Failure
3 ] Powering Failure (Nothing Appears on the LCD
4 ] no Key Entry Possible
5 ] Tape Cassette Type Not Identified
Appendix 1 Main PCB Circuit Diagram
Appendix 2 Key PCB Circuit Diagram
Advertisement
Quick Links
1
Keyboard
2
Key Commands for Special Functions
Download this manual
SERVICE MANUAL
MODEL: PT-H100/H105
Table of
Contents
Previous
Page
Next
Page
1
2
3
4
5
Advertisement
Table of Contents
Troubleshooting
CHAPTER IV TROUBLESHOOTING
66
Troubleshooting Flows
70
Need help?
Do you have a question about the PT-H105 and is the answer not in the manual?
Ask a question
Questions and answers
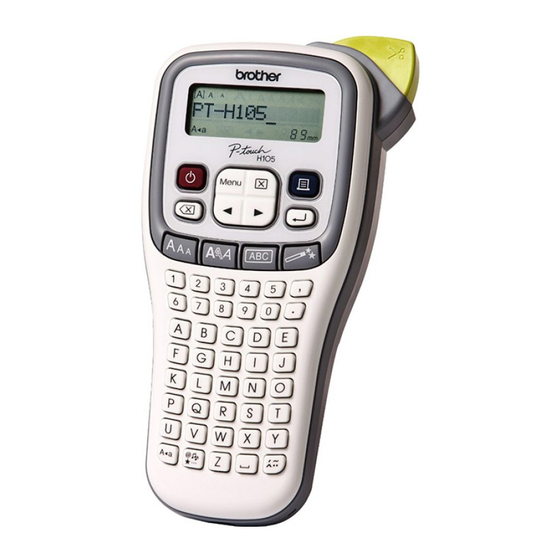
Related Manuals for Brother PT-H105
Label Maker Brother PT-H300/H300LI User Manual
Electronic labeling system (73 pages)
Label Maker Brother PT-H100 Operator's Manual
(6 pages)
Label Maker Brother PT-H100 Service Manual
(81 pages)
Label Maker Brother P-Touch PT-H100 Features
Easy handheld label maker (2 pages)
Label Maker Brother P-Touch PT-H100 User Manual
Electronic labeling system (1 page)
Label Maker Brother P-TOUCH PT-H110 User Manual
Electronic labeling system (18 pages)
Label Maker Brother P-touch PT-H110 User Manual
Electronic labeling system, tze tape (18 pages)
Label Maker Brother PT-H110 User Manual
(3 pages)
Label Maker Brother P-Touch PT-H200 User Manual
Electronic labeling system (19 pages)
Label Maker Brother P-touch PT-H107B Quick Start Manual
(2 pages)
Label Maker Brother PT-H500 User Manual
(62 pages)
Label Maker Brother P-Touch 3 User Manual
(96 pages)
Label Maker Brother P-touch Series User Manual
(9 pages)
Label Maker Brother P-touch Embellish User Manual
(18 pages)
Label Maker Brother PT-P710BT Quick Setup Manual
(17 pages)
Label Maker Brother P-touch PT-E110 User Manual
Electronic labeling system (18 pages)
Summarization of Contents
CHAPTER I SPECIFICATIONS
1.1 Mechanical Specifications
Details about the physical characteristics and components of the device, including dimensions and weight.
1.2 Electronics Specifications
Technical specifications related to the electronic components, such as character generator and power supply.
1.3 Key Commands for Special Functions
Special key combinations and their operational functions, including initialization and inspection modes.
CHAPTER II THEORY OF OPERATION
2.1 Outline of Mechanisms
Explanation of the mechanical systems within the device, covering print, feed, and cutting mechanisms.
2.2 Outline of Control Electronics
Overview of the electronic control systems and their components, including PCBs, LCD, and sensors.
CHAPTER III DISASSEMBLY & REASSEMBLY
3.1 Disassembly/Reassembly
Step-by-step instructions for taking apart and putting back together the device.
Safety Precautions
Important safety guidelines to follow before and during disassembly and reassembly processes.
Tightening Torque List
Specific torque values for tightening screws during reassembly to ensure proper assembly.
CHAPTER IV TROUBLESHOOTING
4.1 Precautions
Guidelines to prevent secondary problems and ensure effective troubleshooting.
4.2 After Repairing
Steps and checks to perform after completing a repair to ensure proper functionality.
4.3 Error Messages
A list of error messages that can appear on the LCD and their meanings.
4.4 Troubleshooting Flows
Diagnostic flowcharts for identifying and resolving common issues like tape feeding or printing failures.
Appendix 1 Main PCB Circuit Diagram
Appendix 2 Key PCB Circuit Diagram
Table of Contents
Print
Rename the bookmark
Delete bookmark?
Delete from my manuals?
Login
Sign In
OR
Sign in with Facebook
Sign in with Google
Upload manual
Upload from disk
Upload from URL
Need help?
Do you have a question about the PT-H105 and is the answer not in the manual?
Questions and answers