Table of Contents
Advertisement
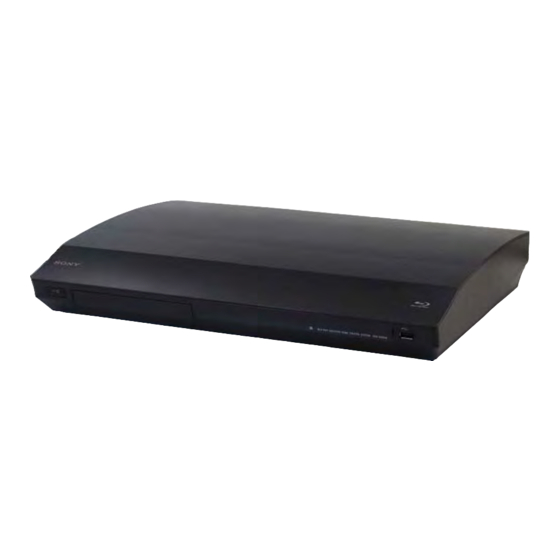
BDV-E780W/E980W/E985W
MANUAL DE SERVIÇO
Ver. 1.2 2011.05
• BDV-E780W/E980W/E985W are composed of following models.
As service manuals are issued for each component model,
please refer to them.
BLU-RAY DISC/DVD receiver
Front speaker
Center speaker
Surround speaker
Subwoofer
Surround amplifi er
Wireless transceiver
Dock for iPod/iPhone
Note 1: As for EZW-RT50 and TDM-iP30, the part number has been described to this service manual.
Note 2: TDM-iP30 for BDV-E985W is attached only to Singapore and Thai models.
SPECIFICATIONS
General
Power requirements
US, Canadian models:
120 V AC, 60 Hz
120 V AC, 50/60 Hz
Taiwan model:
Other models:
220 V - 240 V AC,
50/60 Hz
Power consumption
On: 125 W (BDV-E985W)
On: 130 W
(BDV-E780W/E980W)
Standby: 0.3 W (at the
Power Saving mode)
Dimensions (approx.)
430 mm × 75 mm × 320
mm (17 in × 3 in ×
5
12
/
in) (w/h/d) incl.
8
projecting parts
430 mm × 75 mm × 333
mm (17 in × 3 in ×
1
13
/
in) (w/h/d) (with the
8
wireless transceiver
inserted)
Mass (approx.)
4.1 kg (9 lb 1 oz)
Wireless transceiver (EZW-RT50)
Communication system
Wireless sound
Specification version 1.0
Frequency band
US, Canadian models:
5.736 GHz - 5.814 GHz
Other models:
5.725 GHz - 5.875 GHz
Modulation method
DSSS
Power requirements
DC 3.3 V, 300 mA
Dimensions (approx.)
30 mm × 9 mm × 60 mm
(1
3
3
3
/
in ×
/
in × 2
16
8
(w/h/d)
1
Mass (approx.)
10 g (
/
oz)
2
Design and specifications are subject to change
without notice.
US, Canadian models:
Standby power consumption 0.3W (main unit),
0.13W (surround amplifier).
Over 85% power efficiency of amplifier block is
achieved with the full digital amplifier, S-Master.
Other models:
Standby power consumption 0.3W (main unit),
0.18W (surround amplifier).
Over 85% power efficiency of amplifier block is
achieved with the full digital amplifier, S-Master.
9-893-131-03
Sony Corporation
2011E05-1
Published by Sony Techno Create Corporation
©
2011.05
BDV-E780W
BDV-E980W
HBD-E780W
HBD-E980W
SS-TSB107
SS-TSB108
SS-CTB103
SS-CTB103
SS-TSB106
SS-TSB109
SS-WSB105
SS-WSB105
TA-SA300WR
TA-SA300WR
EZW-RT50
EZW-RT50
TDM-iP30
TDM-iP30
Unpacking
• Front speakers (2)
• Surround speakers (2)
• Center speaker (1)
• Subwoofer (1)
• Speaker cords (3, green/gray/blue) (BDV-E780W)
• Speaker cords (5, red/white/green/gray/blue) (BDV-E980W/E985W)
• Speaker-bottom covers (4) (BDV-E980W/E985W only)
• Bases (4) (BDV-E980W/E985W only)
• Lower parts of the front speakers (4) (BDV-E980W/E985W only)
• Screws (silver) (4) (BDV-E980W/E985W only)
• Screws (black) (12) (BDV-E980W/E985W only)
• FM wire antenna (aerial) (1)
• Video cord (1)
• Remote commander (remote) (1)
• R6 (size AA) batteries (2)
• Calibration mic (1)
• High Speed HDMI cable (1) (BDV-E985W only)
• Dock for iPod/iPhone (TDM-iP30) (1) (Except Saudi Arabian and Taiwan models)
• USB cable (1) (Except Saudi Arabian and Taiwan models)
• Surround amplif er (1)
• Wireless transceivers (4)
• Operating Instructions
• Quick Setup Guide
• Speaker Installation Guide
/
in)
8
• Software Licence Information
• Easy Setup Disc (DVD) (US, Canadian models only)
• Wireless Product Compliance Information (AEP, Italian, UK models only)
BLU-RAY DISC/DVD HOME THEATRE SYSTEM
BDV-E985W
Saudi Arabia Model
HBD-E985W
SS-TSB108
SS-CTB103
SS-TSB109
SS-WSB105
iPhone, iPod, iPod classic, iPod
TA-SA300WR
nano, and iPod touch are
EZW-RT50
trademarks of Apple Inc.,
registered in the U.S. and other
TDM-iP30
countries.
– Refer to next page for accessories list –
US Model
UK Model
BDV-E780W
Canadian Model
Australian Model
BDV-E980W
AEP Model
BDV-E780W/E980W
Singapore Model
Taiwan Model
Thai Model
BDV-E985W
Advertisement
Table of Contents

Related Manuals for Sony HBD-E985W


Summarization of Contents
SPECIFICATIONS
General Specifications
General specifications including power requirements, dimensions, and mass for the Blu-ray system.
Unpacking Instructions
List of items included in the package for the home theatre system.
ACCESSORIES LIST
Included Accessories
Detailed list of all accessories provided with the system, including part numbers and descriptions.
SERVICE MANUAL SPECIFICATIONS
Amplifier Section Specifications
Details audio power specifications, power output, and harmonic distortion.
HDMI Section Specifications
Specifies HDMI connector type, signal format, and supported formats.
SAFETY CHECK-OUT PROCEDURE
AC LEAKAGE TEST
Procedure for performing AC leakage tests on exposed metal parts to ensure safety.
SECTION 2 DISASSEMBLY
2-1. DISASSEMBLY FLOW DIAGRAM
Diagram illustrating the order of disassembly for all major components of the system.
2-2. LEFT/RIGHT PANELS (E1) DISASSEMBLY
Procedure and illustration for removing the left and right side panels of the unit.
2-3. LOADING PANEL ASSY (E1) DISASSEMBLY
Procedure for disassembling the loading panel assembly.
2-4. TOP PANEL BLOCK REMOVAL
Procedure for removing the top panel assembly, detailing screw and connector locations.
2-5. FL BOARD REMOVAL
Procedure for removing the FL (Fluorescent) board, showing connector and screw locations.
2-6. FRONT PANEL BLOCK REMOVAL
Procedure for removing the front panel assembly, indicating screw and claw locations.
2-7. WIRELESS LAN CARD (WLC1) REMOVAL
Procedure for removing the wireless LAN card, referencing network operation checks.
2-8. TOP LID BLOCK REMOVAL
Procedure for removing the top lid block, showing screw and connector locations.
2-9. BD DRIVE (BPX-6) REMOVAL
Procedure for removing the BD drive assembly, including sound sheet and wire connections.
2-10. WS BOARD REMOVAL
Procedure for removing the WS board, showing screw, slot card, and bracket locations.
2-11. AMP BOARD REMOVAL
Procedure for removing the AMP board, detailing wire setting, fan cable, and heat sink.
2-12. SWITCHING REGULATOR (SWR1) REMOVAL
Procedure for removing the switching regulator, showing wire setting and power cord connections.
2-13. MB-141 BOARD REPLACEMENT
Procedure for removing the MB-141 board, detailing wire setting and connector locations.
2-14. OPTICAL PICK-UP BLOCK & WIRE REMOVAL
Procedure for removing the optical pick-up block and associated flat wires.
2-15. HOW TO BEND FFC CABLES
Instructions on how to properly bend FFC cables during disassembly and reassembly.
SECTION 1 SERVICE NOTES
NOTES ON HANDLING OPTICAL PICK-UP BLOCK
Precautions for handling the optical pick-up block and base unit, emphasizing ESD and flexible board care.
NOTES ON REPLACING MB-141 BOARD ICs
Specific notes on replacing IC components on the MB-141 board, including exchange limitations.
OPTICAL DEVICE OR MB-141 BOARD REPLACEMENT
1. Preparation Steps
Steps required before replacing optical devices or MB-141 board, including ESD countermeasures and jigs.
OPTICAL DEVICE PASS-FAIL JUDGMENT
2-1. DRIVE SECTION CHECK FLOW
Flowchart for diagnosing the drive section to determine if optical device repair is necessary.
OPTICAL DEVICE REPLACEMENT FLOW
Replacement Procedure
Step-by-step guide for replacing the optical device, including data backup and service mode operations.
BD DRIVE PARTS REPLACING NOTES
CAPACITOR ELECTRICAL DISCHARGE PROCESSING
Instructions for safely discharging capacitors before checking boards to prevent electric shock.
AMP BOARD IC REPLACEMENT NOTES
NETWORK OPERATION CHECKING METHOD
Procedures to verify wireless and wired LAN connectivity after MB-141 board replacement.
TRAY OPENING PROCEDURE (POWER OFF)
SERVICE POSITION OVERVIEW
Illustrates the internal layout of the unit in the service position for easier access to components.
SECTION 2 DISASSEMBLY
2-1. DISASSEMBLY FLOW DIAGRAM
Diagram illustrating the order of disassembly for all major components of the system.
2-2. LEFT/RIGHT PANELS (E1) DISASSEMBLY
Procedure and illustration for removing the left and right side panels of the unit.
2-3. LOADING PANEL ASSY (E1) DISASSEMBLY
Procedure for disassembling the loading panel assembly.
2-4. TOP PANEL BLOCK REMOVAL
Procedure for removing the top panel assembly, detailing screw and connector locations.
2-5. FL BOARD REMOVAL
Procedure for removing the FL (Fluorescent) board, showing connector and screw locations.
2-6. FRONT PANEL BLOCK REMOVAL
Procedure for removing the front panel assembly, indicating screw and claw locations.
2-7. WIRELESS LAN CARD (WLC1) REMOVAL
Procedure for removing the wireless LAN card, referencing network operation checks.
2-8. TOP LID BLOCK REMOVAL
Procedure for removing the top lid block, showing screw and connector locations.
2-9. BD DRIVE (BPX-6) REMOVAL
Procedure for removing the BD drive assembly, including sound sheet and wire connections.
2-10. WS BOARD REMOVAL
Procedure for removing the WS board, showing screw, slot card, and bracket locations.
2-11. AMP BOARD REMOVAL
Procedure for removing the AMP board, detailing wire setting, fan cable, and heat sink.
2-12. SWITCHING REGULATOR (SWR1) REMOVAL
Procedure for removing the switching regulator, showing wire setting and power cord connections.
2-13. MB-141 BOARD REPLACEMENT
Procedure for removing the MB-141 board, detailing wire setting and connector locations.
2-14. OPTICAL PICK-UP BLOCK & WIRE REMOVAL
Procedure for removing the optical pick-up block and associated flat wires.
2-15. HOW TO BEND FFC CABLES
Instructions on how to properly bend FFC cables during disassembly and reassembly.
SECTION 3 TEST MODES
COLD RESET PROCEDURE
Procedure to reset the unit's RAM data to initial conditions.
DEMO MODE OPERATION
Mode to lock the disc tray, preventing ejection when the sensor is touched.
PANEL TEST PROCEDURE
Procedure to test all segments of the fluorescent indicator tube and display model information.
FACTORY INITIALIZE PROCEDURE
Returns all unit settings to factory defaults, requiring remote commander and TV monitor.
BD SERVICE MODE FUNCTIONS
BD Service Mode Setting Method
Instructions on how to enter the BD service mode using the remote commander and TV monitor.
Main Functions Overview
Overview of the main functions available in the BD service mode, such as Diag, Log, and Factory Initialize.
SERVICE MODE MENU TREE
Service Mode Menu Structure
Hierarchical representation of the service mode menu options available for system diagnostics.
SERVICE MODE TOP MENU
Diag - Device Test
Screen for selecting and performing tests on various devices mounted on the unit's board.
Diag - Video/Audio Test
Performs video and audio tests, including color bar output and tone sound generation.
Diag - Audio Input Test
Screen 1: Select Audio Input Test Category
Selects the category for audio input testing.
Screen 2: Select Input Device
Selects the input device for audio testing after choosing the category.
Diag - HDMI Input Test
Screen 1: Select HDMI Input Test Category
Selects the category for HDMI input testing.
Screen 2: Select Input Device
Selects the input device for HDMI input testing after category selection.
Log - Error Log Display
Screen 1: Log Selection
Interface for selecting the type of log to view, such as Error Log.
Screen 2: Error Log Display
Displays the error log content, with options to navigate pages and copy to USB.
Network Test - Ifconfig Test
Screen 1: Ifconfig Test
Initiates the Ifconfig test to display network settings.
Screen 2: Ping Test
Initiates the Ping test to diagnose network connectivity.
Screen 3: Ifconfig Test Active
Shows the active Ifconfig test results and allows ping retry.
Network Test - Ping Test
Screen 1: Ping Test Interface
Interface for selecting Ping test options.
Screen 2: IP Address Input Mode
Mode for inputting the IP address for ping testing.
Screen 3: Ping Test Active Display
Displays the results of the active ping test.
System Information Display
Screen 1: Basic System Information
Displays basic system information, including drive and wireless device details.
Screen 2: Drive and Wireless Information Menu
Menu to access drive and wireless information, noting potential impact on Version Up function.
DRIVE FUNCTIONS AND TOOLS
Screen 1: Drive Item Selection
Lists functions related to drive operation and diagnostics.
Screen 2: Start OP Data Write
Procedure to initiate the OP data write process.
Screen 3: OP Data Write Result
Displays the result of the OP data write operation, indicating success or failure.
CONFIRMATION ITEMS
1-1. Test Disc Usage
List of test discs used for playback operation confirmation.
1-2. Playback Operation Confirmation
Confirms operation in various signal/output modes using test discs.
2. Networking Confirmation Procedure
Procedure to confirm network connection by checking IP address, subnet mask, and default gateway.
SECTION 4 ELECTRICAL CHECK
FM AUTO STOP CHECK PROCEDURE
Procedure for checking FM auto stop function by inputting signals from a signal generator.
SECTION 5 DIAGRAMS
5-1. BLOCK DIAGRAM - SERVO SECTION -
Block diagram showing the servo section of the Blu-ray Disc/DVD receiver, including signal paths.
5-2. BLOCK DIAGRAM - MEMORY SECTION -
Block diagram illustrating the memory section, showing connections to SD-RAM and NAND flash.
5-3. BLOCK DIAGRAM - HDMI SECTION -
Block diagram of the HDMI section, detailing input selectors, BD decoder, and output paths.
5-4. BLOCK DIAGRAM - MAIN SECTION -
Block diagram of the main section, showing connections between various ICs and modules.
5-5. BLOCK DIAGRAM - AMP SECTION -
Block diagram of the amplifier section, detailing stream processor, power amplifier, and system controller.
5-6. BLOCK DIAGRAM - POWER SUPPLY SECTION -
Block diagram of the power supply section, showing voltage regulators and DC/DC converters.
5-7. PRINTED WIRING BOARD - MB-141 BOARD (SIDE A) -
Printed wiring board layout for the MB-141 board, component side (Lado A).
5-8. PRINTED WIRING BOARD - MB-141 BOARD (SIDE B) -
Printed wiring board layout for the MB-141 board, conductor side (Lado B).
5-9. SCHEMATIC DIAGRAM - MB-141 BOARD (1/12) -
Schematic diagram for the MB-141 board, part 1 of 12, detailing IC pin functions.
Need help?
Do you have a question about the HBD-E985W and is the answer not in the manual?
Questions and answers