Advertisement
Table of Contents
- 1 Important Safety Instructions
- 2 Mounting the Unit to the Wall
- 3 Plumbing Hook-Up
- 4 Electrical Hook-Up
- 5 Commissioning the Heater
- 6 Setting the Temperature
- 7 Basic Troubleshooting
- 8 Periodic Maintenance
- 9 Part Numbers for Fittings, Aerators and Aerator Adaptors
- 10 Repair Parts for "Thermostatic" Units
- Download this manual
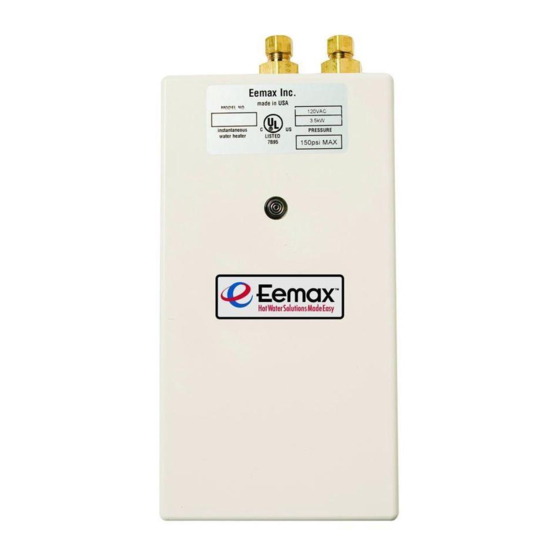
INSTALLATION GUIDE AND OWNER'S
MANUAL
"SINGLE POINT", "FLOW CONTROLLED" and "THERMOSTATIC"
ELECTRIC INSTANTANEOUS WATER HEATERS
BEFORE ATTEMPTING ANY INSTALLATION, MODIFICATION OR SERVICE OF THIS
HEATER, MAKE SURE THE ELECTRICAL POWER IS DISCONNECTED.
Read and understand these instructions thoroughly before attempting the installation or service of this
water heater. Failure to follow these instructions can result in serious injury, death and/or property
damage. The warranty of this water heater will depend upon the proper installation according to these
instructions. Some heaters come supplied with separate faucet aerators. If supplied, the aerator must
be installed in the faucet for optimum performance. This heater must be used to heat water only and
be in a location where it is not subject to freezing temperatures. The manufacturer is not liable for any
damages resulting from improper installation or misuse.
This installation must conform to the latest requirements of the National Electrical Code and all
applicable state and local codes. This information is available through your local authorities. You must
understand these requirements before beginning this installation.
This unit is not required by UL 499 to have a Temperature and Pressure relief valve (T&P). You should
check with local codes to find out if one is required. If it is, it must be installed in the outlet hot water
pipe between the heater and the isolation valve.
IMPORTANT SAFETY INSTRUCTIONS
When using this electrical equipment, basic safety precautions should always be followed, including the
following:
READ AND FOLLOW ALL INSTRUCTIONS
A green terminal (or a wire connector marked "G", "GR, "Ground", or "GROUNDING") is provided within
the control box. To reduce the risk of electric shock, connect this terminal or connector to the
grounding terminal of the electric service or supply panel with a continuous copper wire in accordance
with your local electrical code.
1
Advertisement
Table of Contents

Related Manuals for EemaX EX8208T


Summarization of Contents
Important Safety Instructions
General Warning Before Installation
Ensure electrical power is disconnected before any installation, modification, or service of the heater.
Grounding Procedure
Connect the green terminal to the grounding terminal of the electric service with a continuous copper wire.
General Information
Heater Placement and Use
Locate heater near point of use, below faucet for optimum performance and to avoid voiding warranty.
Heater Types and Features
Explains Single Point, Flow Controlled, and Thermostatic models and their specific features.
Mounting the Unit to the Wall
Unit Placement and Orientation
Mount under sink, close to point of use. Fittings point up for Single Point, down for others.
Mounting Clearance Requirements
Ensure fittings are vertical, below faucet, with minimum 8 inches service clearance opposite fittings.
Securing the Unit to the Wall
Fasten unit using four mounting holes, ensuring circuit board UP arrow faces correctly.
Plumbing Hook-Up
Fitting Compatibility and Warnings
Use supplied brass fittings; never substitute threaded fittings or solder connections to the heater.
Water Supply and Valve Installation
Connect to cold water line, install isolation valves, and purge inlet pipe to remove debris.
Pipe Connection and Leak Check
Connect inlet/outlet pipes, open ball valves, and tighten compression fittings if leaks occur.
Aerator Installation and Performance
Run water to clear air pockets, then install aerator for optimal performance.
Electrical Hook-Up
Power Cable Entry and Strain Relief
Route power cable through knock-out holes using appropriate strain relief fitting.
Wire Connections and Grounding
Connect power leads to terminal block and ground lead to GND connector; grounding is critical.
Final Breaker State
Leave the electrical breaker in the "OFF" position before proceeding to commissioning.
Electrical Specifications
Model Voltage and Power Ratings
Details voltage, kW, amps, and wire size for various Single Point, Flow Controlled, and Thermostatic models.
Commissioning the Heater
Water Flow Verification
Ensure water flows continuously and is free of air pockets before turning on power.
Powering On and Indicator Light
Switch on the electric power supply at the breaker; the power indicator light should activate.
Flow Switch Operation Test
Test flow switch by operating outlet valve; indicator should be ON only when water flows.
Setting the Temperature
Temperature Adjustment via Water Flow
For SP/FC models, adjust temperature by controlling water flow with the outlet valve.
Thermostatic Temperature Control
For Thermostatic models, adjust temperature using the blue shaft on the circuit board.
Basic Troubleshooting
No Heat / Power Indicator Off
Checks for correct mounting, plumbing, power supply, and adequate water flow.
No Heat / Low Temp / Indicator On
Addresses high water flow, incorrect power supply, or a burned-out heating element.
Periodic Maintenance
Cleaning Recommendations
Periodically clean the faucet aerator or filter screen for consistent water flow.
Part Numbers for Fittings, Aerators and Adaptors
Compression Fittings
Lists part numbers for various compression fittings such as nuts and sleeves.
Aerators and Adaptors
Lists part numbers for aerators and adapters for different faucet connection types.
Repair Parts for Single Point and Flow Controlled Units
Component Identification
Identifies key components like the control board, relay, and element cartridge.
Model-Specific Parts List
Lists part numbers for element cartridge, control board, relay, and emergency cut off by model.
Repair Parts for Thermostatic Units
Component Identification
Identifies control board, relay, and heating chamber components for Thermostatic models.
Model-Specific Parts List
Lists part numbers for element cartridge, control board, and relay by Thermostatic model.
Declaration of Conformity
Product Description and Compliance
Declares compliance with EU directives for electrical equipment safety and electromagnetic compatibility.
Referenced Safety and EMC Standards
Lists applicable safety and EMC standards that the product conforms to.
Need help?
Do you have a question about the EX8208T and is the answer not in the manual?
Questions and answers