Table of Contents
Advertisement
Quick Links
Advertisement
Table of Contents

Related Manuals for CONTINENTAL EDISON CECP701FSA


Summary of Contents for CONTINENTAL EDISON CECP701FSA
- Page 1 CECP701FSA Manuel d’instructions de la PLAQUE DE CUISSON INDUCTION...
- Page 2 Cooking Hob CECP701FSA Cooking Zones 4 INDUCTION 220-240V 50/60 Hz Supply Voltage 400 V 50/60 Hz Installed Electric Power 7200 Product Size 590×520×55 D×W×H(mm) 560×490 Building-in Dimensions A×B (mm) Induction Hotplate Appearance...
-
Page 3: Product Introduction
Dear customer: Thank you for purchasing the the induction hotplate our product can serve you many years to your satisfaction. Please read this instructions manual carefully before using and installation, keep it cautiously after reading for future reference. Thank you for your purchase of the induction hotplate again, and wish you to enjoy the pleasure by it. - Page 4 Over- Temperature Protection A temperature sensor equipped can monitor the temperature inside the hotplate. When an excessive temperature is monitored, the induction hotplate will stop operation automatically. Pot Detection When an unsuitable size or non-magnetic pot (e.g. Aluminum), or some other small item (e.g.
-
Page 5: Selection Of Installation Equipment
Selection of installation equipment Drill holes on the table surface according to the sizes shown in the drawing. For the purpose of installation and use, a minimum of 50 mm space shall be preserved around the hole. Be sure the thickness of the table surface is at least 30mm. Please select heat-resistant table material to avoid larger deformation caused by the heat radiation from the hotplate. -
Page 6: Electrical Connection
Note: The safety distance between the hotplate and the cupboard above the hotplate should be at least 760mm. Fix the hob on the table by screw four brackets on the bottom of hob (as shown in figure (4)) after installation. Adjust the bracket position to suit for different table top thickness. -
Page 7: Power Line Connection
Power line connection The socket shall be connected according to the relevant standard or connected to a single-pole breaker. The method of connection is shown in Figure (5): 400V 220-240V 220-240V 220-240V 220-240V 220-240V connet to the main power supply connet to the main power supply connet to the main power supply 220-240V~... - Page 8 Induction Hotplate Appearance Air entry Ceramic plate Control panel Air vent Figure (6)
- Page 9 Schematic Diagram of The Control Panel Heating zone selection key On/OFF lide key Lock Timer key Boost Function key Regulating key Figure (7) Instructions For Use Preparation Before Using: After power on, the buzzer beep once, all the indicators light up for 1 second and then go out, which indicates the induction hotplate enters the state of standby.
-
Page 10: Power Down
POWER UP POWER DOWN Or press the "+" and "-" buttons simultaneously, the power setting immediately chang to 0, and the relevant cooking zone switches off. See the attached table "the max power of each heating zone" for the power specific to each heating zone. - Page 11 Or press the "+" and "-" buttons simultaneously when the relevant heating zone has been selected, the “Boost” function will be cancelled automatically. The power setting immediately chang to 0, and this heating zone switch off at the same time. Timing function Select the relevant cooking zone, and set the power level with the “+”...
- Page 12 Note: 1. In the timing state, the power level of the relevant cooking zone can be changed, and the time set is still valid. 2. Press the timing button without select one cooking zone when the induction hotplate is working, the time-warning function will operate. And the warning time can be set just like the timing function.
- Page 13 Warm Function: This function is designed for keeping food warm automatically. Select the relevant cooking zone, press the "Warm" button, the indicator shows "A", then this relevant cooking zone starts warm function mode. Note: Warm function only works on the 2nd and 3rd cooking zone. Fry Function: This function is designed for frying food automatically.
- Page 14 Selection of heating appliances Iron oil frying pan Stainless steel pot Iron pan Iron kettle Enamel stainless Enamel cooking Iron plate steel kettle utensil You may have multiple appliances suitable for heating. This induction hotplate is able to identify multiple heating appliances, and you can test them according to one of the following methods: 1.
- Page 15 Safety Reminding and Maintenance: Please use a dedicated Indoor use only. Never directly wash the power protection induction hotplate with switch; water so as to avoid dangers. For sealed food such as After being used for a Never have the induction hotplate to work without canned goods, please long...
- Page 16 surface detergents or flammable Do not place rough or cracked, swith off the materials uneven appliances, appliance to avoid the equipment installed which may damage the possibility electric under induction ceramic surface. shock. hotplate. Clean induction Keep electrical If the supply cord is hotplate on a regular appliance out of reach damaged , it must be...
- Page 17 This appliance is labeled in compliance with European directive 2002/96/EC for Waste Electrical and Electronic Equipment (WEEE). By ensuring that this appliance is disposed of correctly, you will help prevent any possible damage to the environment and to human health, which might otherwise be caused if it were disposed of in the wrong way.
-
Page 18: Failure Display And Inspection
Use a scraper suitable for Sweetmeat, melt ceramic glass (to protect glass, a Special adhesive for aluminum silicon product is preferred) to ceramic glass plastics remove residuals Hint: please disconnect power before the cleaning. Failure Display and Inspection If an abnormality comes up, the induction hotplate will enter the protective state automatically and display corresponding protective codes: Troubles Possible reasons... - Page 19 Customer Care Service Before calling the After Sales Service In case the appliance should not work correctly we suggest to: -verify if the plug is correctly inserted in the socket -read the Failure and Display table above In case it is not possible to establish the reason for the bad functioning of the appliance, switch it off, do not try to manumit it and call the After Sales Service.
- Page 20 Cooking Hob CECP701FSA Cooking Zones Plaque de cuisson induction 4 zones et 4 booster 220-240V 50/60 Hz Supply Voltage 400 V 50/60 Hz Installed Electric Power 7200 Product Size 590×520×55 D×W×H(mm) 560×490 Building-in Dimensions A×B (mm) Induction Hotplate Appearance...
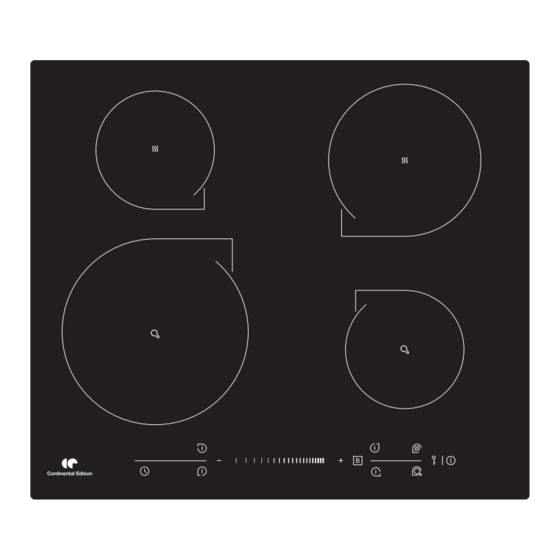
- Page 21 CECP701FSA Figure (1)
- Page 22 Cet appareil n'est pas pré pas prévu pour être utilisé par des personnes(y compris ls enfants) don’t les capacités physiques, sensorielles ou mentales sont réduites,ou des personnes dénuées d'expérience ou de connaissance,sauf si elles ont pu bénéficier,par l'intermédiaire d'une personne responsable de leur sécurité,d'une surveillance ou d'instructions préalables concernant l'utilisation de l'appareil. Ne pas utiliser d'appareil de nettoyage à la vapeur...
- Page 23 Figure (2) mini 5 cm mini 5 mm mini 2 cm Figure (3)
- Page 24 Figure (4)
- Page 25 400V 220-240V 220-240V 220-240V 220-240V 220-240V Connectez à l’alimentation principale Connectez à l’alimentation principale Connectez à l’alimentation principale 220-240V 2+2N~ 400V~ 2-N 220-240V~ Figure (5)
- Page 26 Figure (6)
- Page 27 Schéma du tableau de commande Touche de sélection de zone de chauffage Clé de coulissement Dispositif sécurité Touche Minuteur Booster Clé de fonction Touche de réglage Instructions avant utilisation Marche à suivre préalable : Après avoir allumé les plaques, le signal sonore sonnera une fois et tous les voyants s’allumeront pendant 1 seconde puis s’éteindront, ce qui indique que la touche des plaques entre en état de veille.
-
Page 28: Fonction Booster
A ce moment-là, appuyez sur la touche « + ». L’indicateur affiche alors « 8 ». Si vous appuyez sur la touche « - », l’indicateur affichera « 1 ». Réglez ensuite le niveau de puissance en utilisant les touches « + » et « - » ou le curseur II I I AUGMENTATION DE LA PUISSANCE DIMINUTION DE LA PUISSANCE... - Page 29 Remarque : 1. La fonction Booster fonctionnera pendant seulement 5 minutes, après quoi la zone de cuisson revient automatiquement à son réglage original. 2. La fonction Booster fonctionne sur toutes les zones de cuissons. 3. Lorsque la fonction Booster est en marche, la puissance de la plaque de cuisson située du même côté...
- Page 30 A l’aide des touches « + » et « - », vous pouvez régler les paramètres du minuteur de 0 à 9.59 minutes. - Si vous appuyez une fois sur la touche « + », le temps augmente d’une minute ; Si vous maintenez la touche «...
-
Page 31: Fonction Réchauffer
5. L’affichage de la minuterie affichera d’abord le temps de minuterie de la plaque de cuisson qui s’éteindra en premier. L’affichage digital de la plaque correspondante clignotera en même temps. Une fois que le temps de minuterie écoulée aura expiré, la plaque de cuisson correspondante s’éteindra. L’affichage indiquera alors la plaque qui s’éteindra ensuite, et l’affichage digital de celle-ci se mettra à... - Page 32 Remarque : La fonction « Réchauffer » ne fonctionne que sur les plaques de cuisson 2 et 3. Fonction « Frire » : Cette fonction est conçue pour faire frire de la nourriture automatiquement. Sélectionnez la plaque de cuisson correspondante et appuyez sur la touche «...
- Page 37 F0 -F2 F3-F8 F9 -F IGBT E1/E2 E3/E4 E5/E6...
Need help?
Do you have a question about the CECP701FSA and is the answer not in the manual?
Questions and answers
Bonjour, 2 feux à gauche se mettent en erreur U lors de la mise en route