
Related Manuals for EUTECH INSTRUMENTS CYBERSCAN CON 10 CONDUCTIVITYTDS METER


Summary of Contents for EUTECH INSTRUMENTS CYBERSCAN CON 10 CONDUCTIVITYTDS METER
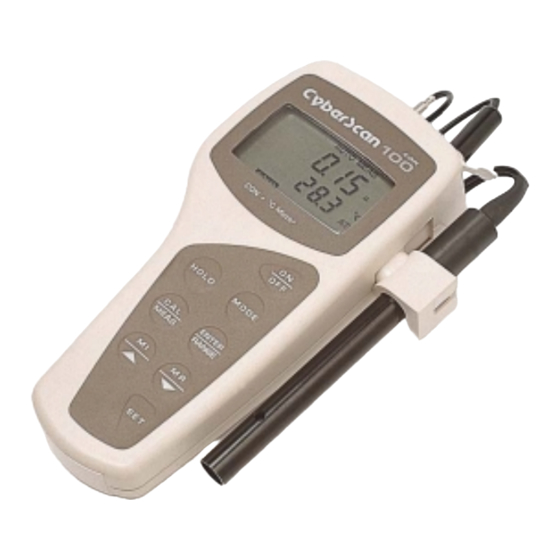
- Page 1 Instruction Manual CyberScan CON 10/100/200 Hand-held Conductivity/TDS/Temperature Meter Technology Made Easy ... 68X075513 09/2001 Rev 3...
- Page 2 Eutech Instruments Authorized Distributor. Eutech Instruments cannot accept any responsibility for damage or malfunction to the meter caused by improper use of the instrument. Remember to fill in the guarantee card and mail it back to your authorized distributor or Eutech Instruments Pte Ltd.
-
Page 3: Table Of Contents
TABLE OF CONTENTS INTRODUCTION DISPLAY AND KEYPAD FUNCTIONS Display Keypad PREPARATION Inserting the Batteries Attaching the electrode holder onto the meter Attaching the electrode onto the electrode holder Connecting the A.C. adapter Connecting the RS 232C cable (only for CyberScan CON 200) CALIBRATION Standard solutions for calibration Preparing the meter for calibration... -
Page 4: Introduction
INTRODUCTION Thank you for selecting Eutech Instruments portable meter. This meter is a microprocessor- based instrument that is designed to be handy, user-friendly and capable of allowing one-hand operation. It has a large customized LCD for clear and easy reading. It also has user-friendly features, all of which are accessible through the membrane keypad. -
Page 5: Display And Keypad Functions
DISPLAY AND KEYPAD FUNCTIONS Display The LCD has a primary and secondary display. The primary display shows the measured conductivity or TDS reading. The secondary display shows the measured temperature. The display also shows error messages, keypad functions and program functions. See Figure 1. Figure 1: Full LCD Screen 1. -
Page 6: Keypad
Keypad The large membrane keypad makes the instrument easy to use. Each button, when pressed, has a corresponding graphic indicator on the LCD. See Figure 2. Some buttons have several functions depending on its mode of operation. Function Powers on and shuts off the meter. When you switch on the meter, the meter starts up in the mode that you last switched off from. - Page 7 CyberScan CON 10 CyberScan CON 100 CyberScan CON 200 Figure 2: Keypad...
-
Page 8: Preparation
PREPARATION Inserting the Batteries Four AAA batteries are included with your meter. Use a Philips screwdriver to remove the two screws holding the battery cover. See Figure 3 below. Lift meter stand to expose battery cover. Remove battery cover. Insert batteries. Follow the diagram inside the cover for correct polarity. Replace the battery cover into its original position using the two screws removed earlier. - Page 9 To connect the Conductivity/TDS electrode with built-in temperature sensor: During this operation, it is important that water does not get onto the BNC connector. Also avoid touching the connector with soiled hands. Slide the electrode connector of electrode over the socket of the meter (BNC connector). Ensure that the slot of the connector is inline with the protrusions of the socket.
-
Page 10: Attaching The Electrode Holder Onto The Meter
Attaching the electrode holder onto the meter The meter has a slot on the side for the attachment of the electrode via the electrode holder. The meter provides a slot on the side of the instrument for the electrode holder. Hold the electrode holder over the slot of the meter. -
Page 11: Attaching The Electrode Onto The Electrode Holder
Attaching the electrode onto the electrode holder Your meter comes complete with an electrode holder. It is designed for easy use and installation. Care must always be taken to avoid use of excessive force in the process of attaching these components. Align the end of the electrode (sensor side) with the hole of the holder. -
Page 12: Connecting The Rs 232C Cable (Only For Cyberscan Con 200)
The data is output in the ASCII format. This format allows the data to be imported by a wide variety of software that read ASCII data (e.g. LOTUS 123 C, Microsoft Excel, etc.). Eutech Instruments also provides software that can capture the data transmitted into an ASCII file for later use. - Page 13 Location of RS 232 port Figure 10: The CyberScan CON 200 RS 232 port 3.5.1 RS 232C Configuration The CyberScan CON 200 meter has a 9-pin female RS 232C connector with the following pin- out: PIN NO DESCRIPTION Transmit Data DSR (Data Set Ready) CTS (Clear to Send) A one-is-to-one connection can be made with a 9-pin RS 232C port of the computer.
- Page 14 CyberScan CON 200 25-pin connector 2 (TxD) --------------------------------------- (RxD) 3 4 (DSR) -------------------------------------- (DTR) 20 5 (GND) -------------------------------------- (GND) 7 7 (CTS) --------------------------------------- (RTS) 4 Refer to Figure 11 for the pin number position. Figure 11: Pin number position of the 9-pin RS 232 port The meter uses hardware handshake i.e.
-
Page 15: Calibration
CALIBRATION Standard solutions for calibration Select conductivity or TDS calibration solution (available from the distributor) which is close to the expected conductivity of the sample that you want to measure. Ensure that the calibration solution which you use comes with a “Temperature vs Conductivity” or a “Temperature vs TDS”... -
Page 16: Calibration Procedure
Calibration procedure 4.3.1 Procedure for conductivity calibration (CyberScan CON 10/100/200) If necessary, press the MODE key to select COND mode. The s indicator appears in the upper right hand corner of the display. Rinse the probe thoroughly with de-ionized water or a rinse solution. Dip the probe into the buffer solution. - Page 17 4.3.2 Procedure for TDS calibration (CyberScan CON 10/200 only) Two methods are available for TDS calibration. The first method (Method 1) applies to both CyberScan CON 10 and 200 meters. Method 1 relies on the availability of a table that shows the TDS values of the TDS calibration buffer solution at various temperatures.
- Page 18 TDS calibration: Method 1 Select the TDS standard solution with a value that is closest to the measurements expected in the sample (in this manual, the KCI standard solution 1413 S is about 706.5 ppm). Check this number by multiplying the conductivity reading by the factor and the result should be the TDS in equivalent units.
- Page 19 Use the ! or " key for CyberScan CON 10, or MI/! or MR/" key for CyberScan 200 to scroll up or down respectively to the value of the standard solution at 25 C. Press the ENTER/RANGE key to confirm the calibration. The CAL indicator will stop flashing and remains on the screen for 3 seconds.
- Page 20 TDS calibration: Method 2 (for CyberScan CON 200 only) Select the TDS standard solution with a value that is closest to the measurements expected in the sample (in this manual, the KCI standard solution 1413 S is about 706.5 ppm at 25 C). Press ENTER key repeatedly until you Pour about 3 cm of the selected sample into two...
- Page 21 Using the MI/! or MR/" key, adjust the value of the primary display until it is the same or close to the selected/calculated value. Confirm the selected value by pressing the ENTER/RANGE key. Exit the SETUP mode and return to the MEAS mode by pressing the CAL/MEAS key upon completion of step 7.
-
Page 22: Measurement
MEASUREMENT This meter is capable of taking measurements with automatic or manual temperature compensation. Automatic temperature compensation only occurs when a temperature sensor is plugged into the meter. If there is no temperature sensor plugged into the meter, the default manual temperature setting is automatically 25 C. -
Page 23: Manual Temperature Compensation
Manual Temperature Compensation IMPORTANT: For manual compensation, you must disconnect the temperature probe. The ATC annunciator will disappear from the LCD. Press the MODE key to select TEMP mode. Press CAL/MEAS enter Temperature calibration mode. The CAL indicator will appear above the primary display. -
Page 24: Taking Measurements
Taking measurements To take readings Rinse the probe with de-ionized or distilled water before use to remove any impurities adhering to the probe body. Press ON/OFF key to switch on the meter. The MEAS annunciator appears on the top center of the LCD. The ATC indicator appears in the lower right-hand corner to indicate Automatic Temperature Compensation. -
Page 25: Memory Functions (In Cyberscan Con 100 & 200 Only)
MEMORY FUNCTIONS (IN CYBERSCAN CON 100 & 200 ONLY) Data Input Press the MI/! key in the measurement (MEAS) mode, to input any data into the memory. The meter will automatically store the displayed data into the memory. Model Parameters CON 100 Conductivity &... -
Page 26: Memory Clear
Press the MR/" once to recall the last data set. NOTE: Memory Recall (MR) is only accessible in the MEAS mode. Press CAL/MEAS key to return to the measurement mode. Press the MR/" key again to recall the next latest data set stored. NOTE: Memory data is retained even if the power of the unit is switched off (even with the batteries removed). -
Page 27: Print Function (In Cyberscan 200 Only)
PRINT FUNCTION (IN CYBERSCAN 200 ONLY) Printing data The CyberScan CON 200 meter is equipped with a key that facilitates the printing of data into the computer in the form of a data file. Using the CyberScan CON 200 meter with the printer To use the CyberScan CON 200 meter directly with a printer, the printer should have either a 9-pin or a 25-pin RS 232 serial port. -
Page 28: Printing Errors
Printing errors The meter displays an error by blinking the printer and error annunciators if the printer is not ready to receive data or if the printer is off. As soon as the printer is ready, the error display will automatically go off. - Page 29 An example of a printout for Printing Measurement Data: Cond: 1.00 mS Temp: 33.2 Date: 07-30-96 Time: 14 : 00 : 09 Cond: 100 uS Temp: 33.2 Date: 07-30-96 Time: 14 : 00 : 11 Cond: 10.0 uS Temp: 33.2 Date: 07-30-96 Time: 14 : 00 : 14...
-
Page 30: Setting Up The Cyberscan (For Cyberscan Con 100/200 Only)
SETTING UP THE CYBERSCAN (FOR CYBERSCAN CON 100/200 ONLY) SETUP program In the SETUP mode in CyberScan CON 100/200 meter, there are four main programs. Each has been divided into several options. The programs and options are elaborated under the following sections: PROGRAM DESCRIPITION... -
Page 31: Program 1: Common Functions
Program 1: Common functions The following 3 options are commonly used: 8.2.1 P1.0: Memory Clear 16 sets of readings can be stored in the meter. Both conductivity and temperature or TDS and temperature readings are stored. Clears all values stored in memory Memory values remain in storage Activation of this option by selecting ON and confirmation of memory clears all memory values. - Page 32 8.2.3 P1.2: Calibration Status Display The meter can be used to a maximum of five different calibrations in its five ranges of measurement. This SETUP program not only allows you to see if a particular range has been calibrated, but indicates the calibrated value. The secondary value shows P1.2. The range number (i.e.
-
Page 33: Program 2: Instruments Setup
Program 2: Instruments Setup 8.3.1 P2.0: Ready selection Activation of the READY option ensures that the READY indicator is displayed when the electrode reading stabilizes. READY options can be switched on or off by pressing the MI/! or MR/" key as indicated by ON or OFF in the display, followed by ENTER/RANGE key. - Page 34 8.3.3 P2.2: Calibration Reset P2.2 provides the option to reset all user selectable functions to the default settings. If you toggle the annunciator to ON using the MI/! or MR/" key, and press ENTER/RANGE key, all data will be reset. RESET clears all calibration data in memory (of both conductivity and TDS).
- Page 35 8.3.5 P2.4: Cell Constant Selection - 0.1 / 1.0 / 10.0 This option allows you to select the cell constant of the electrode supplied has a nominal cell constant of 1.0. This option is important to obtain optimal readings in the various ranges of measurement.
-
Page 36: Program 3: Tds Setup (In Cyberscan Con 200 Only)
Program 3: TDS Setup (in CyberScan CON 200 only) 8.4.1 P3.0 TDS factor The TDS factor for a particular standard solution is a multiplication factor which relates the measurement of conductivity in S/cm to its equivalent reading in ppm/mg/l. This factor is unique for each solution. This option allows the selection of the TDS factor for the solution to be measured. - Page 37 8.4.2 P3.1: TDS units In default, the meter shows TDS measurement unit in ppm. To select the TDS measurement in mg/l, toggle the TDS units using the MI/! or MR/" key. Press enter key to confirm the selection, and the meter scrolls into P4.0. Figure 32: Selecting the TDS unit...
-
Page 38: Program 4: Communication Setup (In Cyberscan Con 200 Only)
Program 4: Communication Setup (in CyberScan CON 200 only) This program allows you to set up the instrument’s communication parameters of the CyberScan CON 200 meter to enable proper communication with the printer or computer of choice. 8.5.1 P4.0: Baud Rate You can select a baud rate of 2.4, 4.8, 9.6 or 19.2 kbps (kilo bits per second). - Page 39 8.5.2 P4.1: Parity Parity check allows the receiving unit to monitor the integrity of the data that the meter transmits. To accommodate for the variances in standards used, three different parity checks have been provided. They are as shown in the table below. The default parity is even (2). Value Parity No parity...
- Page 40 8.5.3 P4.2: Stop Bit The Stop Bit allows the selection of the proper stop bit when transmitting to other peripheral devices (such as printers). You can select the stop bit to be 1 or 2 depending upon the model and make of the peripheral device (the instruction manual of the peripheral device should indicate the number of stop bits used).
-
Page 41: Cybercomm Potrable - Data Acquisition Software (Das For Cyberscan Con 200 Only)
EGA Monitor and above © Windows Operating System ’95 and above Connecting communication RS232C cable Loading CYBERCOMM PORTABLE Figure 36: Insert Eutech Instruments' CD-ROM containing Data Acquisition Software (DAS) into your CD-ROM drive and click on START button and RUN command. - Page 42 Figure 37: Click on 'Browse' button and locate CD-ROM drive Figure 38: Locate the CyberComm Portable Setup program in the CD-ROM under "CyberComm Portable" sub-directory.
- Page 43 Figure 39: Select "Setup" program and click the OPEN button. Figure 40: InstallShield Wizard dialog box appears. Figure 41: Click on Next button.
- Page 44 Figure 42: Key in your name and company name and click NEXT button. Figure 43: To select another Destination Directory to install the program, click on BROWSE button. Otherwise, click NEXT button.
- Page 45 Figure 44: Creating a new program folder. Click on NEXT button. Figure 45: Click on NEXT button.
- Page 46 Figure 46: The CyberComm Portable DAS program is fully installed. Click on FINISH button to end installation.
-
Page 47: Running Cybercomm Portable
Running CyberComm Portable Before running the CyberComm Portable program, please ensure that the RS232 cable is connected between the computer’s serial port and the meter’s port. A 1-meter RS232 cable, 9-pin male to 9-pin female connector (order no. EC-CA01M09F09) is supplied with the CyberScan CON 200 meter. - Page 48 Figure 48: The opening screen will appear as above. BUTTONS & CHECK-BOX Enable Connection – Click this button to enable communication between meter and computer Clear Readings – To clear all data and start all over again Save Readings – To save all data displayed in either *.dat or *.txt format. Time Stamp –...
- Page 49 Figure 49: Under File Menu setting, you can change various parameters. Under ABOUT menu, details of Eutech Instruments' contact information, email address and updates are shown. MENU Communication Settings – To set communication port number, baud rate speed, parity and stop bits protocol Open –...
- Page 50 Figure 50: Communication Settings for computer's Com port. It must match with COM port settings on CyberScan CON 200 meter. Please refer to Section 3.5.1 “RS232C Configuration” for the settings. COMMUNICATION SETTINGS Connecting Use - To select communication port, 1 or 2. Baud Rate - To select different baud rate, 2400, 4800, 9600 or 19200 bps (bits per second).
-
Page 51: Capturing And Printing Data Into Computer Using Cybercomm Portable
Capturing And Printing Data Into Computer Using CyberComm Portable After matching the Communication Settings between your computer using CyberComm DAS and the CyberSCan CON 200 meter, you can now capture data into your computer for analysis and storage purposes. Ensure the 1-meter RS232 communication cable (supplied with the meter) is connected between the computer and the CyberScan CON 200 meter’s Com port. -
Page 52: Trouble-Shooting Guide
Trouble-shooting Guide Problem: Unable to PRINT When press PRINT key on the CyberScan CON 200 meter, the “Print” and “Err” annunciators blink on the meter’s LCD screen as shown in Figure 53. Figure 53: "Print" and "Err" icons blinking POSSIBLE CAUSES SOLUTIONS You have not "ENABLE CONNECTION"... -
Page 53: Troubleshooting & Electrode Care
10 TROUBLESHOOTING & ELECTRODE CARE 10.1 Troubleshooting ERROR INDICATES PROBABLE CAUSE CORRECTIVE ACTION MESSAGE (BLINKING) Invalid key Wrong key press. Select correct key sequence Upper/lower limit INC/DEC keys presses Reselect parameter reached beyond the allowable limits. within limits Incorrect solution Enter the correct conductivity/TDS value TDS or conductivity... - Page 54 ERROR INDICATES PROBABLE CAUSE CORRECTIVE ACTION MESSAGE (BLINKING) Incorrect calibration. Reset calibration and re-calibrate with correct parameters. Wrong temperature Reset Temperature coefficient %. compensation %. Incorrect Wrong TDS factor. Reset TDS factor. readings Dirty electrode. Clean electrode in isopropanol. If electrode is coated with contaminants, clean using soft...
-
Page 55: Electrode Care
10.2 Electrode Care The most important rule to follow is to always keep the electrode clean to ensure accurate measurements. Always take care not to damage the cell. For general cleaning, the use of de-ionized water will be sufficient. Rinse the electrode thoroughly in the de-ionized water. -
Page 56: Additional Information
11 ADDITIONAL INFORMATION What is Conductivity? In general, conductivity is a value that represents how easily electrical charges can be transported through a conductor. Conductors are substances that permit the movement of electrical charge with relative ease. Figure 39 shows a conductivity cell. It is an electrochemical cell for measuring the conductivity of an electrolyte solution. - Page 57 Where R = the resistance in ohms ( ) r = the resistivity ( -cm) A = the surface area of the electrode (cm L = the distance between the electrodes (cm) k = the cell constant (cm The resistivity r is the index of how difficult it is for the current to flow through the solution. This is a constant, determined for each electrolyte.
-
Page 58: Accessories And Calibration Buffer Solutions
12 ACCESSORIES AND CALIBRATION BUFFER SOLUTIONS 12.1 Replacement Meter and Meter Accessories Ordering Code No. Item Deluxe CyberScan CON 200 Portable Conductivity/TDS Meter with RS232C Communication Interface and 16 memory ( S/cm, mS/cm; ppm, ppt, C) EC-CON200/03N complete with 1 pc of conductivity electrode (EC-CONSEN21B), 1 pc of electrode holder (15X000700), 1 pc of communication cable (EC-CAO1M09F09) and 1 pc of Data Acquisition Software in CD-ROM (EC-DA-2000). -
Page 59: Calibration Solutions
12.2 Calibration Solutions Ordering Code No. Item EC-CON-100BT 100 S KCI Calibration Solution *, 480 ml bottle. EC-CON-500BT 500 S KCI Calibration Solution, 480 ml bottle. EC-CON-1413BT 1413 S KCI Calibration Solution, 480 ml bottle. EC-CON1288BT 12.88 mS KCI Calibration Solution, 480 ml bottle. EC-CON2764BT 2764 S KCI Calibration Solution, 480 ml bottle. -
Page 60: Specifications Of Cyberscan Con 10/100/200
13 SPECIFICATIONS OF CYBERSCAN CON 10/100/200 Models CON 10 CON 100 CON 200 0 to 19.99, 199.9, 0 to 19.99, 199.9, 1999 S/cm; Conductivity range 1999 S/cm; 19.99, 199.9 mS/cm 19.99 mS/cm Accuracy 1% Full Scale Resolution 0.05% of Full Scale TDS range 0 to 9.99, 99.9, 0 to 9.99, 99.9,... -
Page 61: Warranty & Return Of Items
If repair or adjustment is necessary and has not been the result of abuse or misuse within the designated period, please return – freight pre-paid – and correction will be made without charge. Eutech Instruments alone will determine if the product problem is due to deviations or customer misuse. - Page 62 For more information on Eutech Instruments products, contact your nearest Eutech Instruments distributor or visit our website listed below: Manufactured by: Distributed by: Eutech Instruments Pte Ltd. Blk 55, Ayer Rajah Crescent, #04-14/24 Singapore 139949 Tel: (65) 6778 6876 Fax: (65) 6773 0863 E-mail: marketing@eutechinst.com...
Need help?
Do you have a question about the CYBERSCAN CON 10 CONDUCTIVITYTDS METER and is the answer not in the manual?
Questions and answers