
Related Manuals for Pego ES24


Summary of Contents for Pego ES24
- Page 1 IMMERSED ELECTRODES HUMIDIFIERS EASYSTEAM Use and Maintenance Manual READ AND KEEP REV. 02‐09...
- Page 2 USER MANUAL Page 2...
- Page 3 Indicates forbidden practices and procedures which could cause damage to the humidifier, injury or malfunctions. Useful tip. Indicates that the PEGO 2 HUMIDIFIER DIVISION customer service centre (phone number given at the end of the manual) should be contacted. USER MANUAL...
-
Page 4: Table Of Contents
CONTENTS INTRODUCTION CHAP. 1 Page 6 General Page 7 Warranty conditions Page 8 Operating principle Page 9 ES series humidifier ID codes Page 10 ES series humidifier technical data Page 11 OEM series humidifier ID codes Page 11 OEM series humidifier technical data Page 12 Overall dimensions Page 13... -
Page 5: Steam Distribution
STEAM DISTRIBUTION CHAP. 8 Page 44 General Page 44 Example of in-duct steam distribution Page 45 Example of in-room steam distribution Page 45 Choosing the distribution pipe Page 46 Condensate recovery APPENDICES CHAP. 9 Page 47 EC DECLARATION OF CONFORMITY Page 49 ES series Spare parts list Page 51... -
Page 6: General
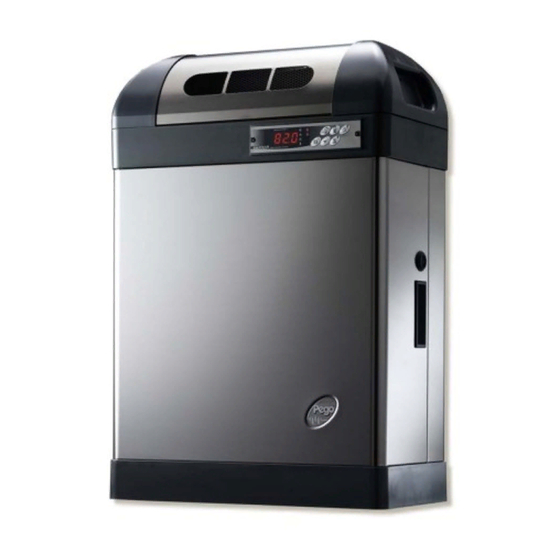
CHAP.1 INTRODUCTION GENERAL Pego EASYSTEAM sunk-electrode humidifiers are the latest family of humidifiers to be released onto the market: they are characterised by outstanding completeness of performance and extremely simple maintenance. The range includes 3 Kg/h and 6Kg/h humidifiers with single-phase power supply and 6 Kg/h, 12 Kg/h, 24 Kg/h and 48 Kg/h humidifiers with 3-phase + neutral power supply;... - Page 7 PEGO S.r.l. declines any responsibility for possible errors or inaccuracies written in this manual as a result of printing or transcription errors. PEGO S.r.l. reserves the right to modify its products as it deems necessary without altering its main characteristics. Each new release of a PEGO user manual replaces all the previous ones.
-
Page 8: Operating Principle
OPERATING PRINCIPLE The sunk-electrode humidifiers in the EASYSTEAM range use the conductivity of potable water to produce steam by boiling. The cylinder electrodes are sunk in the water: a current is generated between the electrodes and this heats the water to boiling point. Current intensity (expressed in amperes) varies according to the quantity of in-cylinder water that is in contact with the electrode surfaces and the conductivity of the water. - Page 9 The supplied steam is managed proportionally to steam production request that the electronic control computes on the basis of functioning selected between the available five described at chap. 2.4. The minimum steam Supplied steam supply is fixed at 20% and it is managed activation Maximum supply...
-
Page 10: Es Series Humidifier Id Codes
ES SERIES HUMIDIFIER ID CODES ES3-M single-phase covered humidifier with steam output capacity of 3 Kg/h, on/off work mode with external enabling, proportional mode with inbuilt humidity switch and 4-20mA humidity sensor, proportional mode with 0-10 V signal ES6-M single-phase covered humidifier with steam output capacity of 6 Kg/h,... -
Page 11: Oem Series Humidifier Id Codes
OEM SERIES HUMIDIFIER ID CODES ES3-M-OEM single-phase custom humidifier complete with electronic kit with steam output capacity of 3 Kg/h, on/off work mode with external enabling, proportional work mode with in-built humidity switch and 4-20mA humidity sensor, proportional operation with 0-10 V signal. -
Page 12: Overall Dimensions
OVERALL DIMENSIONS ES SERIES TYPE ES3-M ES6-M ES12 ES24 ES48 OEM SERIES STEAM GENERATING UNIT ELECTRONIC KIT TYPE ES3-M OEM ES6-M OEM ES6 OEM ES12 OEM ES24 OEM Measurements in mm. USER MANUAL Page 12... -
Page 13: Standard Assembly Kit
Absorbed power in kW Rated current absorption N° 1 ELECTRONIC KIT (for OEM series models only) MASTER 100 (electronic control board with PEGO EASYSTEAM software) SLIM (electronic controller with screen for control and display) TOROIDAL (current absorption sensor) CONNECTOR (connector for cylinder connection) - Page 14 CHAP. 2 INSTALLATION IMPORTANT INFORMATION FOR THE INSTALLER The installation, maintenance and use of the equipment must be performed by qualified personnel capable of executing all the operations required in complete safety. Read this manual carefully before performing any task and follow all directions Install the unit as close as possible to the point at which you wish to emit steam (i.e.
- Page 15 Check that the ON/OFF, 4-20 mA, 0-10 V default setting given on the attached CHECK LIST sheet is applied before starting the humidifier; if the default setting is different from your needs adjust the machine software settings , with the machine on, as indicated at chapter 3 and according to the connections indicated at chap.
- Page 16 INSTALLING THE ES SERIES HUMIDIFIER 1. Remove the humidifier from the packaging: keep it vertical as you do so. Remove the nylon cover bag and check that the unit is in good condition. 2. Fix the humidifier to the wall, preferably 1 m above the ground and perfectly level (fig. 1); use the 4 slots at the rear to insert the fixing screws (fig.
- Page 17 3. Using a screwdriver, release the safety locks at the sides of the front cover (fig. 4, 5 and 6). Fig. 4 Fig. 5 Fig. 6 4. Extract the front cover: grip the two side handles and pull outwards gently (fig. 7). Fig.
- Page 18 6. Connect the water drainage discharge pipe to the manifold (40 mm diameter) and fix it in place with the supplied clip (fig. 9 e 10). Fig. 9 Fig. 10 Only connect the discharge with pipes that are suitable for temperatures of 100 °C and only use pipes with a diameter of at least 40 mm;...
- Page 19 Fig. 13 Fig. 14 Fig. 15 Use only PEGO HUMIDIFIER steam hoses or others that are certified to withstand high temperatures without any internal vulcanisation or release of harmful substances occurring! THE HOSE MUST NOT BE CHOKED, HAVE ANY WATER TRAPS (SIPHONS)
-
Page 20: Es Series Humidifier Electrical Power Connections And Security
Below description of specific connections for each functioning mode. In case it’s needed to connect 4-20mA probes not supplied by PEGO S.r.l. please call the technical dept. to verify hardware compatibility of the probe with humidifier. ON/OFF MODE: This kind of functioning allows steam production in only 2 modes: total lack of production or production at maximum. - Page 21 PROPORTIONAL mode with 0-10Vdc reference signal: This kind of functioning allows steam production proportionally to reference signal 0-10V. Example: a 6V reference signal will lead humidifier to produce 60% of steam referring to software variable Pr. So if Pr= 70% will be 42%. To set the second level variable S9=2 and make a bridge between terminal block 11 and 12, connect 0-10V reference signal to terminals 13 and 14, +V to terminal 13, GND to terminal 14.
- Page 22 PROPORTIONAL mode with 4-20mA humidity ambient probe + limit duct probe (4-20mA): This functioning mode allows steam production in proportional mode, humidifier will regulate automatically the production of steam as per ambient request and the measured value into duct. To set the second level variable S9=3 and make a bridge between terminal block 10 and 11, connect 4-20mA humidity probe signal to terminals 8 and 9, signal RH to terminal 9, +V to terminal 8.
-
Page 23: Wiring Diagrams Es And Oem Series
WIRING DIAGRAMS ES AND OEM SERIES Wiring diagrams models: ES3-M-OEM / ES6-M-OEM ES3-M / ES6-M USER MANUAL Page 23... - Page 24 Wiring diagrams models: ES6-OEM / ES12-OEM / ES24-OEM ES6 / ES12 / ES24 USER MANUAL Page 24...
- Page 25 - Wiring diagram model: ES48 Connector 1 Connector 2 USER MANUAL Page 25...
- Page 26 INSTALLING THE OEM SERIES HUMIDIFIER 1. Remove the humidifier from the packaging: keep it vertical as you do so. Remove the nylon cover bag and check that the unit is in good condition. 2. Fix the humidifier so it is level above the cell or base by inserting the fixing screws in the 4 holes of the support base (fig.
-
Page 27: Oem Series Humidifier Electrical Connection
4. Connect the water inlet line to the ¾ GAS connector of the solenoid valve (fig. 21 and 22). Fig. 21 Fig. 22 Connect up the water inlet using a non-metal pipe (e.g. rubber, PVC, polypropylene, nylon etc.) 5. Connect the steam pipe to the cylinder flange sleeve and fix it in place with the supplied clip (fig. 23 and 24. - Page 28 CHAP. 3 PROGRAMMING DESCRIPTION OF SLIM CONTROLLER 1. The SLIM CONTROLLER is the control unit on the front of the humidifier. It consists of an 8- LED display to visually check values (fig. 25) and 6 keys to adjust display and modify settings (fig. 26).
-
Page 29: Level 1 Programming
LEVEL 1 PROGRAMMING 1. Level 1 programming allows the user to modify 2 important parameters, the proportional band Bp and the steam production percentage Pr. DEFAULT VAR. MEANING VALUES all models Steam production percentage 20 ÷ 100 % 100 % Proportional band 1 ÷... -
Page 30: Level 2 Programming
LEVEL 2 PROGRAMMING 1. Level 2 programming allows the user to modify a number of advanced humidifier settings. These parameters should not be modified without guidance from a PEGO assistance centre or a specialised technician DEFAULT VAR. MEANING VALUES ES3-M... - Page 31 2. To access the second programming level press the UP (t) and DOWN (u) keys and the WATER DISCHARGE key simultaneously for a few seconds. When the first programming variable appears the system automatically goes to stand-by. - Select the variable to be modified by pressing the UP (t) or DOWN (u) keys. - When the parameter has been selected it is possible to: - View the setting by pressing the SET key.
-
Page 32: Single Humidifier Configuration
CHAP. 4 MASTER SLAVE CONFIGURATION SINGLE HUMIDIFIER CONFIGURATION (default configuration) The humidifier is set as "single" (MS=0) and works in autonomous way following the setting given in S9 variable. Humidity sensor MS=0 Ad=0 SINGLE MASTER + SLAVE HUMIDIFIERS CONFIGURATION In this configuration the humidifiers (up to 6 units) work as if they were a one unit producing steam according to a common reference given from Master unit. - Page 33 Master/slave addressing: Parameters MS and Ad setting of various units in this configuration is fixed and follows this rule: Parameters configuration in Master unit: Ad = Address of control Master With control Master + slave1 With control Master + slave1+ slave2 With control Master + slave1+ slave2+ slave3 With control Master + slave1+ slave2+ slave3+ slave4 With control Master + slave1+ slave2+ slave3+ slave4+ slave5...
- Page 34 Functioning description: The unit set as Master talks constantly with connected slaves through RS485 sending them the information about quantity steam to produce (0-100%) and managing various units priorities related to de-concentration discharges or test. Functioning mode of Master/Slave whole of units is set only on Master through variable S9 as the eventual connection of ambient humidity sensor, of duct humidity sensor, of 0-10V reference signal, the ON-OFF enabling and desired humidity value setting.
-
Page 35: Initial Start-Up
CHAP. 5 SWITCHING ON THE HUMIDIFIER INITIAL START-UP 1. Check that default setting is compatible with signal connection; if it is different, set the jumpers correctly before powering up as described on chapter 2.3 and 2.4. 2. Before powering up the humidifier check for correct connection of phases and signal type (humidity sensor, N.O. -
Page 36: Troubleshooting
CHAP. 6 TROUBLESHOOTING EASYSTEAM humidifier in case of any faults alerts the operator through alarm codes, visual and acoustic signaling. Upon the occurrence of an alarm is turned on the display icon , activated the alarm relay, activated the internal buzzer and displayed one of the following alarm codes. Anytime pressing "Mute"... - Page 37 interval FAULTS CAUSE TASKS TO BE CARRIED OUT Water level high, triggering Contact the assistance centre level alarm E1 with high Damaged electronics absorption Block of the humidifier with Functional fault of humidity Verify humidity duct sensor condition E2 alarm duct sensor The humidifier produces not One of phases is interrupted...
-
Page 38: Maintenance
CHAP. 7 MAINTENANCE MAINTENANCE To ensure working safety, correct functioning and an optimal output of EASYSTEAM humidifiers, it is necessary to execute maintenance operations according to following instructions. GENERAL SAFETY RULES Every type of maintenance has to be done exclusively by experienced and qualified technical staff, conscious about necessary safety. - Page 39 MAINTENANCE INTERVENTION FREQUENCY To verify there are not water losses internally the humidifier. after 1 hour of working To verify electrical connections clamping. after 4 weeks of working To verify there are not water losses internally the humidifier. To verify the cylinder state, to remove incrustations and deposits if monthly or every present.
-
Page 40: Changing The Cylinder
CHANGING THE CYLINDER The only part of the humidifier subject to wear is the electrode cylinder. This wears according to how much the machine is used or it is not possible to remove the internal incrustations. The EASYSTEAM range features stainless steel electrodes to maximise durability: however, durability will largely depend on the quality of the water (conductivity and hardness) and on how much the machine is used. - Page 41 3. Unhook the rear retainer spring from the upper steam flange and slide it off (Fig. 30). Fig. 30 4. Raise the upper steam flange, detaching it from the cylinder (fig. 31). Fig. 31 5. Detach the electrical connector from the cylinder (fig. 32) Fig.
- Page 42 7. Insert the new cylinder by repeating the above procedure in reverse order; check that the new cartridge supplied O-rings that they positioned correctly. If necessary to use on O-rings and flanges the lubricating issued with the humidifier for making their insertion easier (fig.
- Page 43 CLEANING THR CYLINDER When presence of incrustations and deposits into the cylinder prevents an adequate passage of current between electrodes or thwarts the water discharge, it is necessary a cleaning operation of cylinder. NEVER CHANGE THE CYLINDER WITH THE MACHINE HOT AND WITH WATER INSIDE IT.
- Page 44 “pendulum” feedback effect. It is advisable to introduce steam by inserting a PEGO distribution lance in the air duct or in front of a ventilation unit (where the steam is introduced directly into a room and not through a duct).
- Page 45 750 mm 650 mm UMILAN4025X800 900 mm 800 mm UMILAN40X1000 1100 mm 1000 mm The PEGO 2 HUMIDIFIER DIVISION can supply custom-sized distribution lances. To request a lance different from those given in the table above indicate. USER MANUAL Page 45...
- Page 46 (fig. 45). The condensate can also be carried to a drain. Recovery is effected by connecting the special hose (PEGO UMITUBODN10) to the 10 mm diameter lance manifold. When routing the recovery hose from lance to humidifier or from lance to drain it is necessary to create a water trap: do this by making a complete turn with a minimum diameter of 200 mm;...
-
Page 47: Ec Declaration Of Conformity
Tel. (+39) 0425 762906 Fax. (+39) 0425 762905 DENOMINAZIONE DEL PRODOTTO / NAME OF THE PRODUCT MOD.: ES3-M ; ES6-M ; ES6 ; ES12 ; ES24 ; ES48 MOD.: ES3-M-OEM ; ES6-M-OEM ; ES6-OEM ; ES12-OEM ; ES24-OEM IL PRODOTTO E’ CONFORME ALLE SEGUENTI DIRETTIVE CE... - Page 48 ES SERIES EXPLODED VIEW USER MANUAL Page 48...
- Page 49 UMIBA01 ABS support base UMISIFONE1 Water drain siphon (exceeding water or deconcentration drain) 400UMSIF01 Complete siphon kit + water drain pipes for ES3-M, ES6, ES6-M 2 + 9 400UMSIF02 Complete siphon kit + water drain pipes for ES12 400UMSIF03 Complete siphon kit + water drain pipes for ES24 e ES48...
- Page 50 OEM SERIES EXPLODED VIEW USER MANUAL Page 50...
- Page 51 Cylinder fixing spring for ES3-M-OEM UMISIFONE1 Water drain siphon (exceeding water or deconcentration drain) 400UMSIF04 Complete siphon kit + water drain pipes for ES3-M-OEM, ES6-OEM, ES6-M-OEM (new version) ES12-OEM 400UMSIF05 Complete siphon kit + water drain pipes for (new version)
- Page 52 Tel. +39 0425 762906 Fax +39 0425 762905 e.mail: info@pego.it – www.pego.it ASSISTANCE CENTRE Tel. +39 0425 762906 e.mail: tecnico@pego.it Dealer: 02.09 Doc. code: M.ES.05 rel. PEGO s.r.l. reserves the right to modify this manual at any time. USER MANUAL Page 52...
Need help?
Do you have a question about the ES24 and is the answer not in the manual?
Questions and answers