
Related Manuals for Pego EASYSTEAM ES-MINI


Summary of Contents for Pego EASYSTEAM ES-MINI
- Page 1 IMMERSED ELECTRODES HUMIDIFIERS EASYSTEAM ES-MINI Use and maintenance manual READ AND KEEP REV. 02-19...
- Page 2 Indicates the operations not to be performed to avoid damage to the humidifier, injury to persons or malfunctions. Indicates a suggestion. Indicates to contact the PEGO after-sales service center indicated on the back of this manual. Instructions for disposal: The humidifier is made up of metal parts and plastic parts. In reference to European Union directive 2012/19/EC issued on 4 July 2012 and the related national legislation, please note that: A.
-
Page 3: Table Of Contents
TABLE OF CONTENTS INTRODUCTION CHAP. 1 Page 5 Generality Page 6 Warranty conditions Page 7 Functioning principle Page 9 ES-MINI Series humidifiers identification codes Page 9 ES-MINI Series humidifiers technical data Page 10 Overall dimensions Page 10 Identification data Page 10 Standard equipment INSTALLATION CHAP. - Page 4 MAINTENANCE CHAP. 7 Page 42 Maintenance Page 42 General and safety Standards Page 42 Maintenance intervals Page 44 Replacement of the cylinder Page 46 Cleaning the cylinder STEAM DISTRIBUTION CHAP. 8 Page 47 Generality Page 47 Example of distribution in air duct Page 47 Example of distribution in ambient Page 48...
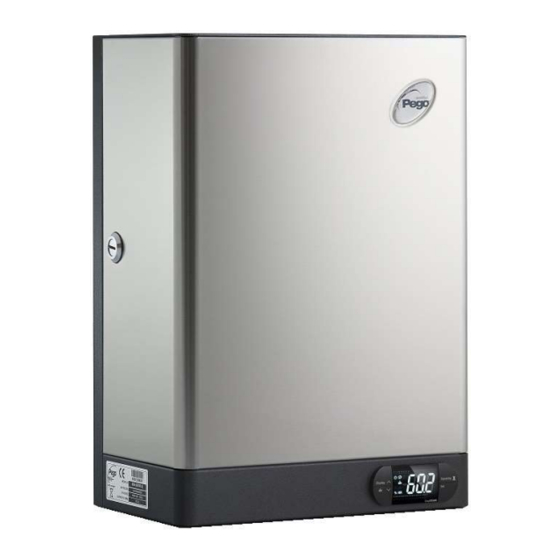
- Page 5 The EASYSTEAM ES-MINI line is also provided with a display for real time viewing of the humidity in the premises to be treated; the current absorbed by the electrodes, the hours of work, various alarms, water charging and discharging as well as all easily settable programming parameters.
-
Page 6: Installation
The intervention service in warranty can be refused when the equipment is modified or transformed. Under no circumstances Pego S.r.l. will be liable for any loss of data and information, costs of goods or substitute services, damage to property, people or animals, loss of sales or earnings,... -
Page 7: Functioning Principle
FUNCTIONING PRINCIPLE The immersed electrode humidifiers of the series EASYSTEAM, exploit the conductivity of water for food use for the production of steam by boiling. In the cylinder, an electric current is triggered between the immersed electrodes; this overheats the water until it is brought to the boiling temperature. - Page 8 The supplied steam is managed proportionally to steam production request that the electronic control calculates depending on the Supplied steam chosen functioning among the eight available, described in chap. 2.4. The Maximum supply minimum steam supply is set at 20% of rated maximum current...
-
Page 9: Es-Mini Series Humidifiers Identification Codes
ES-MINI SERIES HUMIDIFIERS IDENTIFICATION CODES 400ES3MMINI Single-phase humidifier with stainless steel casing, with 3kg/h steam production capacity, integrated electronics with eight selectable operating modes. 400ES6MINI Three-phase humidifier with stainless steel casing, with 6kg/h steam production capacity, integrated electronics with eight selectable operating modes. -
Page 10: Overall Dimensions
OVERALL DIMENSIONS ES-MINI SERIES TYPE 400ES3MMINI 400ES6MINI IDENTIFICATION DATA The appliance described in this manual is provided with a label on the side reporting the identification data of the same: • Manufacturer Name • Code of appliance • Serial Number •... -
Page 11: Main Installation Warnings
CHAP. 2 INSTALLATION MAIN INSTALLATION WARNINGS The installation, maintenance and use of the appliance must be carried out by qualified personnel able to safely perform the requested operations. Carefully read this manual before performing any operations and follow all its indications. Install the appliance as close as possible to the environment where the steam is to be introduced, namely in the position that guarantees the shorter length of the steam tube. -
Page 12: Installing The Es-Mini Series Humidifier
INSTALLING THE ES-MINI SERIES HUMIDIFIER 1. Remove the humidifier from its packaging keeping it upright, remove the protective nylon bag and check the integrity of the appliance. 2. With a screwdriver, unlock the safety locks on the sides of the front cover (fig. 1 e 2). Fig. - Page 13 4. Fix the humidifier to the wall, at least 1 meter from the ground and leveled (fig.4) using the four slots at the back to insert the fixing screws (fig. 5 e 6). Fig. 4 Fig. 5 Fig. 6 USER MANUAL Rev.
- Page 14 5. Connect the water discharge tube to the 32mm diameter sleeve, fixing it with the provided clamping band (fig. 7). Fig. 7 Connect a pipe with a diameter of not less than 32mm and suitable for temperatures not less than 100°C, to the drain hose. This pipe must be firmly clamped to the drain sleeve and have vertical development for at least the first 50cm.
- Page 15 7. Connect the steam tube at the cylinder flange sleeve, fixing it with the provided clamping band (fig. 9). Fig. 9 Use only PEGO HUMIDIFIERS steam tube or other tube with certification that guarantees its use in the presence of high temperatures without internal vulcanization processes and release of harmful substances!
-
Page 16: Es-Mini Series Sensors And Control Signals Connections
OFF writing with normal displaying. Below are the specific connections for every functioning mode. If you want to connect the humidifier with an humidity probes not supplied by PEGO s.r.l., contact the after-sales assistance center to verify the hardware compatibility between the probe and the humidifier. - Page 17 [S9=1] PROPORTIONAL functioning with 4-20mA ambient humidity probe (INTEGRATED HUMIDISTAT): This type of operation involves proportional steam production; the humidifier will automatically regulate the steam production according to the request in the environment depending to the set point. The consent is provided by a humidity probe at 4-20mA (0-100% RH) that, in addition to regulating steam production, allows to show the relative humidity of the environment directly on the humidifier display.
- Page 18 [S9=3] PROPORTIONAL functioning with 4-20mA ambient humidity probe + 4-20mA humidity probe in air duct (INTEGRATED HUMIDISTAT): This type of operation involves proportional steam production; the humidifier will automatically regulate the steam production according to the request in the environment depending to the set point and to the value measured in duct.
- Page 19 [S9=5] PROPORTIONAL functioning with 0-10Vdc ambient humidity probe (INTEGRATED HUMIDISTAT): This type of operation involves proportional steam production; the humidifier will automatically regulate the steam production according to the request in the environment depending to the set point. The consent is provided by a 0-10Vdc humidity probe (0-100%RH) that, in addition to regulating steam production, allows to show the relative humidity of the environment directly on the humidifier display.
- Page 20 [S9=7] Functioning with integrated thermostat (ON/OFF hot call): This type of operation involves the production of steam in only 2 modes: no production or production at full capacity set (Pr parameter) which is activated when the temperature measured by the ambient probe falls below the value of SET POINT-r1 and remains active until the temperature increases and exceeds the SET POINT.
- Page 21 [S9=8] PROPORTIONAL functioning REFERRED TO VALUE SENT ON RS485 (0-100%): This type of operation involves the production of steam proportionally to the value set in register 1537 by means of Modbus-RTU communication. In this operating mode, the commands to force water discharge and produce steam have a time- out of 1 minute;...
-
Page 22: Hum2 Electronic Board Digital Inputs
HUM2 ELECTRONIC BOARD DIGITAL INPUTS On the electronics of the humidifier there are four digital inputs with the following meaning: Digital inputs In1, In2 are in low voltage. Input In1 (clamps 24 and 25): input with configurable meaning based on the second level variable In1. -
Page 23: Ta Inputs For Measuring Current Absorption
To insert the humidifier in an RS485 network with Modbus-RTU protocol, set the parameter MS = 0 (single humidifier operating mode), and follow the diagram below. Refer to the MODBUS-RTU_UMIDMS03 manual (available on our website: www.pego.it) for MODBUS-RTU communication protocol specifications. -
Page 24: Es-Mini Series Electrical Layouts
ES-MINI SERIES ELECTRICAL LAYOUTS 2.11 Electrical layout model: 400ES3MMINI CONSOLE USER MANUAL Page 24 Rev. 02-19... - Page 25 Electrical layout model: 400ES6MINI CONSOLE USER MANUAL Rev. 02-19 Page 25...
-
Page 26: Nano Easysteam Controller Description
CHAP. 3 PROGRAMMING NANO EASYSTEAM CONTROLLER DESCRIPTION The NANO EasySTEAM display is normally placed on the front of the humidifier. It consists of a display with 3 digits and 9 luminous icons, for visual control of the magnitudes, and 4 keys for choose the view and modify the settings (fig. -
Page 27: Combination Of Keys
ALARM PRESENCE ICON LED OFF = No alarm present LED ON = Maximum level alarm, persistent for longer than 1 hour LED Flashing = Alarm present (or maximum level reached) TEMPERATURE MEASUREMENT UNITS ICON LED ON = The display shows the temperature of the ambient probe in °C LED Flashing = The display shows the TEMPERATURE SET in °C ... - Page 28 STATUS LED ON MASTER HUM2 ELECTRONICS On the Master HUM2 electronics, next to the J1 connector there are three signaling leds that allow to know the machine status even in the absence of a display. GREEN LED initialled P (Power): Permanently turned on: power supply Ok and consent is present Lit flashing: power supply Ok but no consent or stand-by...
- Page 29 1ST LEVEL PROGRAMMING 1. The 1st level programming allows the user to modify 2 important parameters: the proportional band Bp and the percentage of steam production Pr. DEFAULT VAR. MEANING VALUES all models Steam production percentage 20 ÷ 100 % 100 % Proportional band 1 ÷...
- Page 30 It is not recommended to modify these parameters without an indication of the PEGO service center or a specialized technician. 2. To access the second level programming menu, press and hold down the UP (), DOWN () and STANDBY keys simultaneously for a few seconds.
- Page 31 Functioning setting set: S9=0 ON-OFF (Enabling ON between clamps 24 and 25) S9=1 (INTEGRATED HUMIDISTAT) PROPORTIONAL WITH 4-20mA PROBE Operation with integrated humidistat. 4-20mA ambient humidity probe connected to analogical input no. 1 (clamps 14-15). S9=2 PROPORTIONAL REFERRED 0-10V EXTERNAL SIGNAL 0-10V reference signal connected to analog input no.2 (clamps 16-17).
- Page 32 Humidity probe calibration -20 % ÷ 20 % (used when S9 = 1, 3, 5, 6) Air duct humidity probe calibration -20 % ÷ 20 % (used when S9 = 3, 4, 6) NTC probe value correction -10.0 ÷ 10.0 °C (used when S9 = 7, 9) Delay in seconds to restart the humidifier.
- Page 33 Setting the functions of the digital output dO4. The less sign indicates the reverse status of the relay. With the exception of settings 1, -1, 2, -2, the relay is deactivated in case of no enabling or it is in stand-by. 4 = Relay excited for essence call 3 = Inlet fan relay (activated with steam production request) 2 = Relay activated when the appliance is in stand-by or for...
- Page 34 Modbus baudrate < Range: 0 ÷ 8 > 4 = 4800 baud 0 = 300 baud 5 = 9600 baud 0 ÷ 8 1 = 600 baud 6 = 14400 baud 2 = 1200 baud 7 = 19200 baud 3 = 2400 baud 8 = 38400 baud Configuration of the Modbus parity check.
-
Page 35: Single Humidifier Configuration
CHAP. 4 HUMIDIFIER MASTER/SLAVE DELL’UMIDIFICATORE SINGLE HUMIDIFIER CONFIGURATION (default configuration) The humidifier is set as "single" (MS=0) and works autonomously according to the setting assigned in variable S9. Humidity sensor MS=0 Ad=0 SINGLE MASTER / SLAVE HUMIDIFIERS CONFIGURATION In this configuration, the humidifiers (up to a maximum of 6 units) function as if they were one machine, producing steam according to the common reference given by the Master unit. - Page 36 Master/Slave addressing: The setting of the MS and Ad parameters of the various units, in this configuration is fixed and follows this rules: Parameters configuration in the Master unit: Ad = Control Master Address MS = with command Master + Slave1 with command Master + Slave1+Slave2 with command Master + Slave1+Slave2+Slave3 with command Master + Slave1+Slave2+Slave3+Slave4...
- Page 37 Description of operation: The unit configured as Master constantly communicates with the connected slaves through the RS- 485 connection, indicating the quantity of steam to be produced (0-100%) and managing the priorities of the various units in relation to discharges for deconcentration or testing. The operating mode of the Master/Slave unit is only set on the Master by means of the variable S9, as well as the possible connection of the ambient humidity probe, the humidity probe in the duct, the 0-10V reference signal, the ON-OFF enablement and the humidity setting.
-
Page 38: First Ignition
CHAP. 5 IGNITING THE HUMIDIFIER FIRST IGNITION 1. Verify that the default setting is compatible with the signal connection made; if different, configure the electronics correctly before powering up as described in chapter 2. 2. Before connecting the humidifier, check the correct connection of the phases and of the type of input signals;... - Page 39 CHAP. 6 DIAGNOSTICS The EASYSTEAM humidifier in case of anomalies warns the operator through alarm codes and visual and acoustic signaling. When an alarm condition occurs, the display icon is activated, the alarm relay is activated (if configured), the internal buzzer is activated and one of the following alarm codes is displayed. At any time, by pressing the "silence"...
- Page 40 Verify the correct configuration of the used Functional anomaly of the ambient probe, set in probe (variable S9 and electrical connections automatic the variable S9. on dedicated clamps). If the problem persists, replace the probe. Check the correct insertion of the cylinder connector to the humidifier.
- Page 41 Water discharge autotest, failed (Prealarm) This alarm does not block the steam production. However, it is necessary to eliminate the cause of Check that the water discharge tube and the the problem before the next test, which is performed bottom of the cylinder are not obstructed and every 10 hours of operation of the electrodes, to that the pump is not faulty or disconnected.
- Page 42 CHAP. 7 MAINTENANCE MAINTENANCE To guarantee operational safety, correct operation and optimal performance of the EASYSTEAM series humidifiers, regular maintenance must be carried out according to the instructions below. GENERAL AND SAFETY STANDARDS Whatever the type of maintenance, it must only be carried out by expert and qualified technical personnel, aware of the necessary safety precautions.
- Page 43 MAINTENANCE OPERATIONS TO BE PERFORMED FREQUENCY Check the absence of water leaks inside the humidifier. After 1 hour of functioning After 4 weeks of Check the tightening of the electrical connections. functioning Check the absence of water leaks inside the humidifier. Check the condition of the cylinder and remove any deposits or Monthly or every 500 limescale if present inside.
- Page 44 REPLACEMENT OF THE CYLINDER The only consumable item of the humidifier is the cylinder, when the electrodes are worn due to functioning or it's not possible to eliminate all the limestone deposit formed within. The EASYSTEAM series is provided with steel electrodes for longer duration that, however, depends on the amount of water (level of conductivity and hardness) and work output to which the humidifier is submitted.
- Page 45 4. Remove the cylinder from the lower flange extracting it upwards (Fig. 13) and remove it from the humidifier (fig. 14). Fig. 13 Fig. 14 5. Carefully clean the seat where the new cylinder will be inserted, checking the integrity of the O-ring inside the seat and that there are no pieces of limestone that could compromise the seal.
- Page 46 CLEANING THE CYLINDER When the presence of limestone and deposits inside the cylinder hinders the sufficient passage of current between the electrodes or hinders the discharge of the water, a cleaning operation of the cylinder is necessary. NEVER EXTRACT THE CYLINDER WITH THE MACHINE HOT AND WITH WATER INSIDE.
- Page 47 It is advisable to introduce the steam with a PEGO steam distributor, inserting it into the air duct or in front of a fan unit where you want to put the steam directly in an environment without an air duct.
- Page 48 This condensation must be drained in order not to obstruct the steam flow. Condensate recovery is performed by connecting the PEGO UMITUBODN10 tube, specific for this type of application, to the 10mm diameter sleeve of the steam distributor, discharging into a water collection well.
- Page 49 DEL FABBRICANTE: THIS DECLARATION OF CONFORMITY IS ISSUED UNDER THE EXCLUSIVE RESPONSIBILITY OF THE MANUFACTURER: PEGO S.r.l. Via Piacentina 6/b, 45030 Occhiobello (RO) – Italy – DENOMINAZIONE DEL PRODOTTO IN OGGETTO / DENOMINATION OF THE PRODUCT IN OBJECT MOD.: 400ES3MMINI MOD.:...
- Page 50 ES-MINI SERIES SPARE PARTS AND EXPLODED DIAGRAM USER MANUAL Page 50 Rev. 02-19...
- Page 51 ES-MINI SERIES SPARE PARTS LIST Ref. Code Description UMISTHT12 Wheel nut cap UMICOCCU ES-MINI/CCU cylinder cover UMIGANCCU ES-MINI/CCU cylinders fixing hook UMIOR7 O-ring for cylinder cover 400UMEL01 Three-phase electrodes and anti-scale filter replacement kit for ES-MINI/CCU cylinders. 5+7+8 400UMEL02 Monophase electrodes and anti-scale filter replacement kit for ES-MINI/CCU cylinders. 400UMEL03 Electrodes and anti-scale filter replacement kit for low conductivity ES-MINI/CCU cylinders.
- Page 52 Tel. +39 0425 762906 Fax +39 0425 762905 e.mail: info@pego.it – www.pego.it AFTER-SALES SERVICE CENTRE Tel. +39 0425 762906 e.mail: tecnico@pego.it Distributor: PEGO s.r.l. reserves the right to make amendments to this user manual at any moment. USER MANUAL Page 52 Rev. 02-19...
Need help?
Do you have a question about the EASYSTEAM ES-MINI and is the answer not in the manual?
Questions and answers