Table of Contents
Advertisement
Quick Links
Printed on 100% recycled paper using
VOC (Volatile Organic Compound)-free
vegetable oil based ink.
Printed in Japan
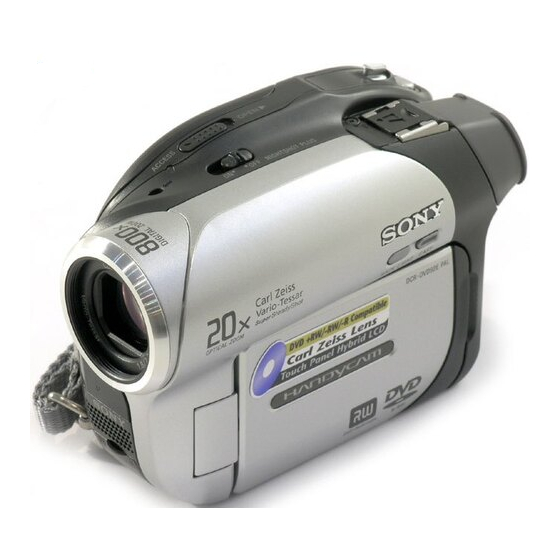
Digital Video Camera Recorder
Operating Guide
DCR-DVD92E/DVD202E/DVD203E/
DVD403E/DVD602E/DVD653E/
DVD703E/DVD803E
© 2005 Sony Corporation
2-587-623-12 (1)
Enjoying with your
10
DVD Handycam
16
Getting Started
Easy
27
Handycam
Recording/
32
Playback
44
Playback on DVD devices
50
Using the Recorded disc
52
Using the Setup items
72
Editing on DVD Handycam
78
Dubbing
82
Using a Computer
87
Troubleshooting
105
Additional Information
Advertisement
Table of Contents

Related Manuals for Sony Handycam DCR-DVD203E


Summarization of Contents
Enjoying with your DVD Handycam
What you can do with your DVD Handycam
Explore the capabilities of your DVD Handycam for recording and viewing images.
A VISUAL INDEX screen that shows the disc contents at a glance
Utilize the visual index for quick scene searching on the disc.
A Slide show that plays back still images, one after another
Enjoy still images as a slideshow, also playable on DVD players.
Using your DVD Handycam
Overview of the basic workflow for preparing, recording, and playback.
Getting Started
Step 1: Checking supplied items
Verify all included accessories and components are present.
Step 2: Charging the battery pack
Learn how to charge the InfoLITHIUM battery pack for the camcorder.
Step 3: Turning the power on, and holding your camcorder
Instructions for powering on the camcorder and holding it correctly.
Step 4: Adjusting the LCD screen and viewfinder
Guidance on adjusting the LCD screen and viewfinder for optimal viewing.
Step 5: Using the touch panel
How to operate the camcorder using the touch-sensitive LCD screen.
Step 6: Setting the date and time
Procedure for setting the camcorder's internal clock and date.
Step 7: Inserting a disc
Instructions on how to properly insert a DVD disc into the camcorder.
Step 8: Selecting the aspect ratio (16:9 or 4:3) of the recording picture (DCR-DVD202E/DVD203E/DVD403E/DVD703E/DVD803E)
Configure the recording aspect ratio for wide or standard screens.
Easy Handycam – using your camcorder with automatic settings
Operate your camcorder with ease
Experience simple operation with automatic settings for optimal performance.
Recording with ease
Guidance on recording movies and still images using Easy Handycam mode.
Playing back with ease
Instructions for playing back recordings in Easy Handycam mode.
Preparation for playing back on a DVD player (Finalizing)
Steps to finalize discs for playback on external DVD players.
Recording/Playback
Recording
Basic instructions for recording movies and still images.
Playback
How to play back recorded movies and still images.
Functions used for recording/playback, etc.
Overview of various functions related to recording and playback.
Read this first
WARNING
Critical safety warning to prevent fire or shock hazards.
CAUTION
Important safety notice regarding potential hazardous radiation exposure.
FOR CUSTOMERS IN THE UNITED KINGDOM
Specific information for customers in the UK regarding the AC adaptor.
ATTENTION
Notice regarding electromagnetic fields affecting camcorder performance.
Notice
Information on handling static electricity and data transfer issues.
For customers in the U.S.A.
FCC compliance statement for devices in the USA.
Regulatory Information
Declaration of Conformity and FCC compliance details.
Read this first (continued)
Notes on the Setup items, LCD screen, viewfinder, and lens
Important notes on setup items, screen, viewfinder, and lens care.
On recording
Tips and precautions before and during recording.
About the disc
Notes on use
Guidelines for handling and inserting discs into the camcorder.
Care and storage of the discs
Recommendations for keeping discs clean and storing them properly.
Playback on DVD devices
Making the disc compatible with playback on DVD players or DVD drives (Finalizing)
Process to finalize discs for playback on other devices.
Playing back a disc on DVD players, etc.
How to play back discs on external DVD players and recorders.
Playing back a disc on a computer with a DVD drive installed
Steps for playing back discs on a computer's DVD drive.
Using the recorded disc (DVD-RW/DVD+RW)
Recording additional scenes after finalizing
How to add more scenes to a finalized disc.
Deleting all of the scenes on the disc (Formatting)
Procedure to format discs for reuse by deleting all scenes.
Using the Setup items
To use the short-cuts of Personal Menu
Utilize custom shortcuts for frequently used setup items.
To use setup items
Access and configure setup items not on the Personal Menu.
CAMERA SET
Adjust camera settings for optimal recording conditions.
STILL SET
Configure settings specifically for still image capture.
PICT.APPLI.
Apply special effects and additional functions to pictures.
DISC SET
Settings for discs (FORMAT/FINALIZE/UNFINALIZE, etc.)
Manage disc settings including format, finalize, and unfinalize.
FORMAT
Format the disc to prepare it for recording.
FINALIZE
Finalize the disc for compatibility with other playback devices.
UNFINALIZE
Unfinalize a disc to allow further recording.
DISC TITLE
Set or change the title for the disc.
STANDARD SET
Settings while recording on a disc or other basic settings (REC MODE/LCD/VF SET/USB SPEED, etc.)
Configure basic settings for recording and camcorder operation.
REC MODE (Recording mode)
Select the image quality and recording time (HQ, SP, LP).
VOLUME
Adjust the audio playback volume.
MULTI-SOUND
Select between dual sound or stereo sound playback.
TIME/LANGU.
(CLOCK SET/AREA SET/LANGUAGE, etc.)
Set the clock, time zone, and display language.
A.SHUT OFF (Auto shut off)
Configure the automatic power-off timer.
AREA SET
Set the local area for correct time zone display.
SUMMERTIME
Enable or disable summertime adjustments.
LANGUAGE
Select the on-screen display language.
Customizing Personal Menu
Deleting a setup item
Remove setup items from the Personal Menu.
Adding a setup item
Add frequently used setup items to the Personal Menu.
Arranging the order of setup items displayed on Personal Menu
Initializing the Personal Menu settings (Reset)
Reset all Personal Menu settings to their default values.
Editing the original data
Deleting images
Remove unwanted images from the disc.
To delete all movies or still images on the disc at the same time
Delete multiple scenes simultaneously.
Dividing a movie
Split a movie into multiple scenes.
Editing on DVD Handycam (DVD-RW:VR mode)
Dividing a movie
Detailed steps for dividing a movie into scenes.
Creating the Playlist
Erasing unnecessary scenes from the Playlist
Remove unwanted scenes from a created playlist.
Editing on DVD Handycam (DVD-RW:VR mode)
Changing the order within the Playlist
Rearrange the sequence of scenes in a playlist.
Creating the Playlist (continued)
Dividing a movie within the Playlist
Split movies directly within the playlist.
Converting all the still images on a disc to a movie file (Photomovie)
Transform still images into a movie slideshow.
Connecting to a VCR or TV
When your TV is connected to a VCR
Connect the camcorder to a VCR for input.
Before referring to the "First Step Guide" on your computer
Viewing and Handling Pictures
Use the Picture Package DVD Viewer to manage images.
Music Video/Slideshow Producer
Create original videos with music and styles using Picture Package Producer2.
Duplicating a disc
Copy recorded discs using Picture Package Duplicator.
About “First Step Guide”
Introduction to the computer-based instruction manual.
About the help function of the software
Accessing detailed help for software applications.
System requirements
Minimum system requirements for installing the software.
Viewing “First Step Guide”
Displaying “First Step Guide”
Instructions on how to open and view the First Step Guide.
For inquires about this software
Contact information for software support.
On Copyrights
Information regarding copyright protection for music contents.
Troubleshooting
Overall operations/Easy Handycam
Troubleshooting general operational issues and Easy Handycam mode.
Buttons do not work.
Solutions for non-responsive camcorder buttons.
Your camcorder gets hot during use for a long period.
Addressing issues related to camcorder overheating.
Troubleshooting (continued)
Batteries/Power sources
Troubleshooting battery and power supply problems.
The power does not turn on.
Steps to resolve issues when the camcorder fails to power on.
The power abruptly turns off.
Diagnosing and fixing sudden power shut-offs.
The CHG (charge) lamp does not light while the battery pack is being charged.
Troubleshooting why the charging indicator light is off.
The CHG (charge) lamp flashes while the battery pack is being charged.
Resolving issues with a flashing charging indicator light.
The power turns off frequently although the remaining battery indicator indicates that the battery pack has enough power to operate.
Addressing power shut-offs despite a seemingly charged battery.
The remaining battery time indicator does not indicate the correct time.
Fixing inaccuracies in the battery time display.
The battery pack is quickly discharged.
Troubleshooting rapid battery drain.
Troubleshooting
A problem occurs when the camcorder is connected to the AC Adaptor.
Resolving issues when the camcorder is connected to AC power.
LCD screen/viewfinder
Troubleshooting problems with the LCD screen and viewfinder.
An unknown picture appears on the screen.
Solutions for unexpected images displayed on the screen.
The picture remains on the LCD screen.
Addressing issues where the image persists on the LCD.
You cannot turn the LCD backlight off.
Troubleshooting inability to turn off the LCD backlight.
The buttons do not appear on the touch panel.
Fixing issues where touch panel buttons are not visible.
The buttons on the touch panel do not work correctly or do not work at all.
Resolving touch panel input malfunctions.
The picture in the viewfinder is not clear.
Steps to improve viewfinder image clarity.
The picture in the viewfinder has disappeared.
Troubleshooting missing viewfinder images.
Troubleshooting (continued)
Disc
Troubleshooting problems related to the DVD disc.
The disc cannot be removed.
Steps to resolve issues when a disc cannot be ejected.
Remaining disc space indicator is not displayed.
Fixing issues with the disc space indicator.
The indicators of the disc type and the recording format on the LCD screen are grayed out.
Troubleshooting grayed out disc indicators.
Recording
Troubleshooting common recording problems.
Pressing REC START/STOP or PHOTO does not record movie/still images.
Resolving failure to record with REC START/STOP or PHOTO buttons.
The ACCESS lamp lights up even when you stop recording.
Understanding why the ACCESS lamp stays on.
The shutter sound is not heard when you record a still image.
Troubleshooting missing shutter sound for still images.
Troubleshooting
The external flash (optional) does not work.
Troubleshooting issues with the external flash.
The actual recording time for movie is less than the expected approximate recording time.
Addressing shorter than expected movie recording times.
The recording stops.
Resolving issues where recording stops unexpectedly.
Adjusting the image during recording
Adjusting image parameters while recording.
The auto focus does not function.
Troubleshooting auto focus system failures.
[STEADYSHOT] does not function.
Resolving issues with the SteadyShot image stabilization feature.
The back light function does not function.
Troubleshooting the backlight function.
A vertical band appears when recording candlelight or electric light in the dark.
Understanding vertical bands caused by low light conditions.
Troubleshooting (continued)
A vertical band appears when recording a bright subject.
Explanation of vertical bands occurring with bright subjects (smear effect).
Tiny spots in white, red, blue, or green appear on the screen.
Troubleshooting screen spots in specific recording modes.
The color of the picture is not correctly displayed.
Resolving incorrect picture color display issues.
The picture appears too bright on the screen, and the subject does not appear on the screen.
Fixing issues where the picture is too bright and subjects are not visible.
The picture appears too dark on the screen, and the subject does not appear on the screen.
Troubleshooting overly dark pictures where subjects are not visible.
Flickering or changes in color occurs.
Resolving flickering or color changes during recording.
Black bands appear when you record a TV screen or computer screen.
Addressing black bands when recording screens.
Remote Commander (Except for DCR-DVD92E/DVD602E)
Troubleshooting issues with the remote commander.
The supplied Remote Commander does not function.
Steps to resolve failure of the remote commander.
Another DVD device malfunctions when you use the supplied Remote Commander.
Resolving conflicts between remote commander and other DVD devices.
Playing back a disc on your camcorder
You cannot play back a disc.
Troubleshooting disc playback failure on the camcorder.
The playback picture is distorted.
Resolving distorted playback images on the camcorder.
“ ” is indicated on an image in the VISUAL INDEX screen.
Interpreting the error indicator in the Visual Index screen.
No sound or only a low sound is heard when playing back a disc.
Troubleshooting audio issues during disc playback.
Playing back a disc on other players
You cannot play back the disc or a disc cannot be recognized.
Resolving issues with disc recognition or playback on other players.
The playback picture is distorted.
Troubleshooting distorted playback images on external devices.
“ ” is indicated on an image in the DVD menu.
Interpreting errors in the DVD menu display.
Troubleshooting (continued)
Playback freezes for an instant between the scenes.
Addressing playback freezing between scenes on devices.
Playback does not move to the previous scene when you press .
Troubleshooting inability to navigate to previous scenes.
Setup items
Troubleshooting issues with camcorder setup items.
Setup items are grayed out.
Resolving setup items being unavailable or grayed out.
You cannot use [PROGRAM AE].
Identifying conflicts when using PROGRAM AE.
You cannot use [SPOT METER].
Identifying conflicts when using SPOT METER.
You cannot use [EXPOSURE].
Identifying conflicts when using EXPOSURE settings.
You cannot use [WHITE BAL.].
Identifying conflicts when using WHITE BAL. settings.
Troubleshooting (continued)
You cannot use [SPOT FOCUS].
Identifying conflicts when using SPOT FOCUS.
You cannot use [SUPER NS] or [SUPER NSPLUS].
Identifying conflicts when using Super NightShot modes.
[COLOR SLOW S] does not operate correctly.
Troubleshooting COLOR SLOW S functionality.
You cannot use [SELF-TIMER].
Identifying conflicts when using SELF-TIMER.
You cannot use [FADER].
Identifying conflicts when using FADER effects.
You cannot use [D.EFFECT].
Identifying conflicts when using Digital Effects.
Troubleshooting (continued)
You cannot use [PICT.EFFECT].
Identifying conflicts when using Picture Effects.
You cannot view [SUR MONITOR].
Troubleshooting issues viewing SUR MONITOR.
You cannot adjust [LCD BL LEVEL].
Resolving inability to adjust LCD backlight level.
Editing (DVD-RW:VR mode)
Troubleshooting editing issues in VR mode.
Unable to edit.
Resolving general editing failures.
Scenes cannot be added to the Playlist.
Troubleshooting failure to add scenes to a playlist.
A movie cannot be divided.
Resolving issues preventing movie division.
A scene cannot be deleted.
Troubleshooting inability to delete playlist scenes.
Dubbing/Connecting to other devices
Troubleshooting dubbing and device connection issues.
Pictures from connected devices are not displayed on the LCD screen or the viewfinder.
Resolving display issues for connected devices.
Pictures from connected devices cannot be zoomed.
Troubleshooting inability to zoom scenes from connected devices.
Troubleshooting (continued)
No sound is heard when playing back a disc.
Resolving no audio issues during disc playback.
You cannot dub correctly using the A/V connecting cable.
Troubleshooting incorrect dubbing with the A/V cable.
Others
Troubleshooting miscellaneous issues.
Unable to finalize.
Resolving failures during the disc finalization process.
You cannot edit or record additional material on a disc using other devices.
Addressing limitations when editing/recording on other devices.
The disc title cannot be changed.
Troubleshooting issues with changing the disc title.
A photomovie cannot be created.
Resolving failures in photomovie creation.
The melody or beep sounds for 5 seconds.
Understanding the 5-second melody or beep sound.
Connecting to a computer (Except for DCR-DVD92E/DVD202E/DVD602E)
The computer does not recognize your camcorder.
Troubleshooting steps when the computer cannot detect the camcorder.
Connecting to a computer (Except for DCR-DVD92E/DVD202E/DVD602E)
An error message appears when you place the supplied CD-ROM in your computer.
Resolving error messages during CD-ROM insertion.
You cannot use the supplied CD-ROM on a Macintosh computer.
Information on Macintosh computer incompatibility with the CD-ROM.
Troubleshooting (continued)
[Cannot start Easy Handycam with USB connected] or [Cannot cancel Easy Handycam with USB connected] appears on the screen of your camcorder.
Resolving Easy Handycam operation errors related to USB connection.
You cannot transfer image data from your camcorder to a computer.
Troubleshooting data transfer failures to the computer.
The images or sound of your camcorder cannot be played back correctly.
Resolving incorrect playback of images or sound on the computer.
You cannot write data from your computer on a disc in your camcorder using the USB cable.
Troubleshooting failure to write data from computer to disc via USB.
Picture Package does not function correctly.
Resolving malfunctions with the Picture Package software.
An error message appears while operating Picture Package.
Addressing error messages during Picture Package operation.
The “First Step Guide” is not displayed correctly.
Troubleshooting display issues with the First Step Guide.
Warning indicators and messages
Self-diagnosis display/Warning indicators
Interpreting self-diagnosis and warning indicators on the screen.
100-0001 (Warning indicator pertaining to files)
Understanding file-related warning indicators.
(Warning indicator pertaining to discs)
Interpreting disc-related warning indicators.
You need to remove the disc*
Warning message indicating the need to remove the disc.
Warning indicators and messages (continued)
(Battery level warning)
Interpreting battery level warnings.
(Moisture condensation warning)*
Warning for moisture condensation inside the camcorder.
(High temperature warning)
Warning indicating high camcorder temperature.
(Warning indicator pertaining to the flash)*
Interpreting flash-related warning indicators.
Description of warning messages
Guidance on responding to on-screen warning messages.
Troubleshooting
Disc movie area full Cannot record movies
Resolving issue when the disc movie area is full.
Scene number full
Troubleshooting when the maximum scene number is reached.
Disc full Cannot record
Steps to take when the disc is full and cannot record.
Movie recording disabled
Troubleshooting movie recording restrictions.
Still recording disabled
Resolving restrictions on still image recording.
Playback prohibited
Addressing playback restrictions on incompatible discs.
Disc finalized Cannot record on disc
Guidance for recording on a finalized disc.
Need to unfinalize
Procedure to unfinalize a disc for additional recording.
Disc error Remove disc
Troubleshooting disc errors and removal.
Format error
Resolving format errors on discs.
Access error
Troubleshooting disc access errors.
Data error
Resolving data reading or writing errors.
Flash
Troubleshooting flash-related recording issues.
Charging… Cannot record still images
Resolving inability to record still images while flash charges.
The strobe cannot charge Not available
Troubleshooting flash strobe charging failures.
Lens cover
Resolving lens cover opening or closing issues.
Easy Handycam
Troubleshooting Easy Handycam operation errors.
Troubleshooting (continued)
Invalid during Easy Handycam operation (p.27)
Resolving invalid operations in Easy Handycam mode.
No recording in Easy Handycam operation (p.27)
Troubleshooting recording failures in Easy Handycam mode.
Other
Miscellaneous troubleshooting topics.
Please connect AC adaptor
Guidance to connect the AC adaptor for critical operations.
Playlist full
Troubleshooting playlist capacity limits.
Cannot divide
Resolving issues preventing division of movies or scenes.
Data protected
Addressing issues with data-protected discs.
Copy inhibit
Troubleshooting copy protection signals.
Disc cover open, accidentally Turn on power again
Resolving disc cover opening issues.
Recovering data Avoid any vibration
Tips for recovering data and avoiding vibration.
Cannot recover data
Troubleshooting data recovery failures.
Using your camcorder abroad
Power supply
Information on using the camcorder's power supply internationally.
On TV color systems
Understanding TV color systems (PAL, NTSC, SECAM) for playback.
Using your camcorder abroad (continued)
Simple setting of the clock by time difference
How to set the local time using time differences.
World time difference
Reference chart for world time zones.
About the “InfoLITHIUM” battery pack
This unit is compatible with an “InfoLITHIUM” battery pack (P series).
Compatibility information for InfoLITHIUM P series battery packs.
What is an “InfoLITHIUM” battery pack?
Explanation of the features and functions of InfoLITHIUM battery packs.
Charging the battery pack
Instructions and recommendations for charging the battery pack.
Effective use of the battery pack
Tips for maximizing battery performance and lifespan.
Remaining battery time indicator
Understanding the battery level indicator and its accuracy.
About the “InfoLITHIUM” battery pack (continued)
How to store the battery pack
Proper procedures for storing the battery pack long-term.
Battery life
Information on battery lifespan and replacement.
Maintenance and precautions
On use and care
General guidelines for using and caring for the camcorder.
When not using your camcorder for a long time
Recommendations for storing the camcorder when unused for extended periods.
Moisture condensation
Information about moisture condensation and its effects.
If moisture condensation has occurred
Steps to take if moisture condensation is detected.
Note on moisture condensation
Additional notes regarding moisture condensation scenarios.
Maintenance and precautions (continued)
How to prevent moisture condensation
Methods to prevent moisture condensation when changing temperatures.
On the LCD screen
Care and precautions for the LCD screen.
To clean the LCD screen
Instructions for cleaning the LCD screen.
On adjustment of the LCD screen (CALIBRATION)
Procedure for calibrating the camcorder's touch panel.
On handling the casing
Guidelines for cleaning and protecting the camcorder casing.
Maintenance and precautions (continued)
WARNING
Critical warning about battery handling and potential explosion.
Caution
Safety caution regarding battery replacement and disposal.
Disposal of Old Electrical & Electronic Equipment (Applicable in the European Union and other European countries with separate collection systems)
Environmental guidelines for disposing of electronic equipment.
Specifications (continued)
Input/Output connectors
Details of camcorder input and output connection ports.
LCD screen
Specifications for the camcorder's LCD screen.
Total number of pixels
Pixel count information for the LCD screen.
General
General technical specifications for the camcorder.
Specifications (continued)
Rechargeable battery pack NP-FP50:DCR-DVD92E/DVD202E/DVD203E/DVD602E/DVD653E/DVD703E
Technical specifications for the NP-FP50 battery pack.
Rechargeable battery pack NP-FP70:DCR-DVD403E/DVD803E
Technical specifications for the NP-FP70 battery pack.
AC Adaptor AC-L25A/L25B
Specifications for the AC-L25A/L25B AC adaptor.
Index (continued)
On trademarks
List of trademarks and registered trademarks mentioned in the manual.
Need help?
Do you have a question about the Handycam DCR-DVD203E and is the answer not in the manual?
Questions and answers