
Related Manuals for NETGEAR MS2110 - Stora NAS Server


Summary of Contents for NETGEAR MS2110 - Stora NAS Server
- Page 1 NETGEAR Stora User Manual NETGEAR, Inc. 350 East Plumeria Drive San Jose, CA 95134 USA 202-10540-01 v1.0 September 2009...
-
Page 2: Technical Support
In the interest of improving internal design, operational function, and/or reliability, NETGEAR reserves the right to make changes to the products described in this document without notice. NETGEAR does not assume any liability that may occur due to the use or application of the product(s) or circuit layout(s) described herein. - Page 3 NETGEAR Stora User Manual Product and Publication Details Model Number: Model MS2110 Publication Date: September 2009 Product Family: Network Storage Product Name: NETGEAR® Stora Home or Business Product: Home Language: English Publication Part Number: 202-10540-01 Publication Version Number: v1.0, September 2009...
-
Page 4: Table Of Contents
Contents About This Manual Conventions and Formats ..........i Revision History . - Page 5 NETGEAR Stora User Manual Stora Application Starting the Stora Application ..................3-2 Logging into the Stora Application ................3-3 Stora Application Landing Page ................3-4 Media Library ........................3-6 Accessing the Media Library ..................3-6 Media Sources ......................3-8 Working with Media Source Folders ..............3-12 Displaying the Folder Options ................3-16 Albums ..........................3-22...
- Page 6 NETGEAR Stora User Manual Changing Account Settings ..................4-15 Help Menu ........................4-19 Index Contents v1.0, September 2009...
-
Page 7: About This Manual
About This Manual The NETGEAR® Stora User Manual describes how to configure and troubleshoot a Stora system. The information in this manual is intended for readers with intermediate computer and networking skills. Conventions and Formats The conventions, formats, and scope of this manual are described in the following paragraphs: Typographical Conventions. -
Page 8: Revision History
NETGEAR Stora User Manual Revision History Version Publication Part Number Description Number Date 202-10540-01 September First publication. 2009 About This Manual v1.0, September 2009... -
Page 9: Getting Acquainted
Chapter 1 Getting Acquainted This chapter provides an overview of the NETGEAR Stora system and covers the unit’s physical features, and initial setup steps. Topics discussed in this chapter include: • “About the Stora” • “File Types” • “Stora Hardware Overview”... -
Page 10: About The Stora
NETGEAR Stora User Manual About the Stora NETGEAR Stora is a highly secure and stable home server that lets you collect, store, manage, share and enjoy your digital media content, including personal photos, music, videos and documents. It is easy to drag and drop digital media to Stora, catalog it into folders, and share it by creating albums. -
Page 11: Premium Features
UPnP-AV, DLNA or Windows Media Connect standards. This way you can view photos through NETGEAR EVA2000 and EVA9000 (9150), as well as an Xbox 360 or PS3 in the living room, while listening to music through a networked sound system in the family room. -
Page 12: File Types
Audio Visual), DLNA (Digital Living Network Alliance) or Windows Media Connect standard. Media players include gaming consoles (Xbox 360 and PS3), digital photo frames, iTunes clients, IP televisions, networked sound systems (Sonos), digital video players (Roku, NETGEAR Digital Entertainer, DLink DSM), and many more. - Page 13 NETGEAR Stora User Manual Mobile Devices With a premium service subscription, you can use a variety of mobile devices to access your Stora. Mobile devices accessing Stora over the Internet will automatically be re-directed to a mobile interface. in turn, Stora will automatically optimize the mobile interface for the device.
-
Page 14: Stora Hardware Overview
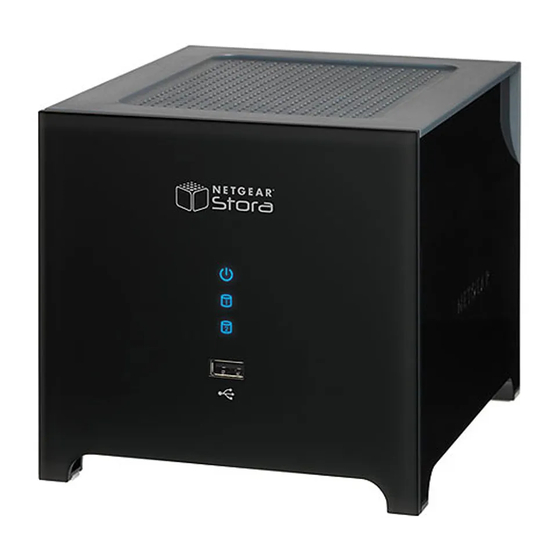
NETGEAR Stora User Manual Stora Hardware Overview This section introduces the Stora hardware components, including displays, ports, buttons, and drive bays. Front Panel The sleek, front panel of the Stora indicates the active/inactive status of the system and can be easily removed to access the disks and disk bays located behind it. -
Page 15: Disks And Disk Bays
NETGEAR Stora User Manual Disks and Disk Bays Located inside the unit behind the front panel are two disk bays that house up to two SATA disks. These disks can be easily installed and removed by pressing the release latches located on the rear panel. -
Page 16: Rear Panel
NETGEAR Stora User Manual Rear Panel The back of the Stora features a power switch, a power cable socket, a gigabit Ethernet port, a reset button, and two disk release latches; one for each disk. 1. Disk Release latches 2. Serial numbers for PC and MAC 3. -
Page 17: Led, Power, Socket, And Connector Descriptions
NETGEAR Stora User Manual LED, Power, Socket, and Connector Descriptions The function of each Stora item is described in the following table: Item Activity Description Power Push button on Turn on the Stora system: Press once. Button back of unit to... -
Page 18: Initial Setup
An electronic copy of the installation guide is also located on the product CD as well as on the NETGEAR web site at http://netgear.com. To setup your Stora, complete these steps: “Check Package Contents”... -
Page 19: Connect The Stora To Your Network
NETGEAR Stora User Manual Connect the Stora to your Network The initial setup completion time is approximately 20 minutes. 1. Connect the Ethernet cable and power cord. Connect one end of the provided Ethernet cable to your router and the other end to the back of the Stora unit. -
Page 20: Configure Your Stora
NETGEAR Stora User Manual Configure your Stora Use the CD that comes with the Stora unit to setup and configure your device and make it ready for storing data. At this time you will also be able to give your unit a unique name, and assign your own user name and password. - Page 21 NETGEAR Stora User Manual 3. Setup Your Stora a. Click Step 1: Set Up Your Stora to set up the Stora so that it can store data The software license agreement will display. b. Click the I Accept box. Figure 1-7 Set up Your Stora and License Agreement...
- Page 22 NETGEAR Stora User Manual 4. Register Your Stora a. Product Key: enter the product key that you noted in Step 1. The product key is located on the Resource CD sleeve, and also on the bottom of the Stora unit.
- Page 23 NETGEAR Stora User Manual 5. Create your account a. User Name: Enter a user name. This will be the name you use to login to the Stora system. Your user name is case-sensitive. b. Display Name: This is a case-sensitive name that guests will see when they view your shared files and photos.
- Page 24 NETGEAR Stora User Manual 6. Router Configuration a. This screen appears when there is a setup problem with your UPnP router, or if your router is not UPnP-capable. Most users with newer routers should not see this message. See “UPnP Port Mapping” on page 1-17 for more information.
- Page 25 NETGEAR Stora User Manual UPnP Port Mapping The following table shows assigned router ports by Stora. Table 1-3. UPnP Port Map Active Protocol Int. Port Ext. Port IP Address 192.168.1.2 192.168.1.2 192.168.1.2 192.168.1.2 192.168.1.2 Incoming Port Requirements -Port 80 and/or 443: For external access to the web interface...
- Page 26 NETGEAR Stora User Manual 7. Summary Screen The summary screen will indicate the IP address the Stora unit will use. It will also automatically check for any software updates that may have occurred since the CD was shipped. a. Click Next.
- Page 27 NETGEAR Stora User Manual 8. Windows Networking Windows Networking allows you to share files and also a printer connected to the Stora. a. Enable private access: check this box if you want to share a printer with the rest of the network, or browse your private files using Windows Network.
- Page 28 You can enter one or more email addresses where you would like to be notified of any updates or messages regarding your NETGEAR Stora unit. These messages will contain update information, error information, and other information needed to keep your system running smoothly.
- Page 29 NETGEAR Stora User Manual 10. Stora Premium Subscription Option During installation you have the option to upgrade your Stora subscription to include Premium features not available with the standard subscription. Table 1-1 on page 1-3 for a list of Premium features.
- Page 30 NETGEAR Stora User Manual 11. Configuration Wizard - Finished When you have successfully configured your Stora system, the Configuration Wizard screen will appear. a. Click the Finish button. When the Setup screen re-displays, the checkbox next to Set Up Your Stora will be checked indicating that you have completed this step.
-
Page 31: Installing A Disk
NETGEAR Stora User Manual Installing a Disk NETGEAR Stora comes with two bays that can accommodate SATA disks. The first bay is the primary storage disk, and the second can be set up as a mirrored backup for your primary disk. -
Page 32: Replacing A Failed Disk
Stora device, an amber LED might indicate a failed disk. The top LED is disk 1; the bottom one is disk 2. Take note of the failed channel. To assure compatibility, check the Hardware Compatibility list on the NETGEAR support site for a list of disks qualified to be used in the Stora. - Page 33 NETGEAR Stora User Manual To Replace the Disk: 1. View the disk status lights to identify which disk has failed. 2. If necessary, unlock the tray lock by moving it to the right, then press the release of the failed disk. The latch pops out.
-
Page 34: Installing The Desktop Applications
NETGEAR Stora User Manual Installing the Desktop Applications NETGEAR Stora comes with additional software applications to help you administer the device. Once you have completed the initial configuration of your Stora device, you have the option to install those applications. - Page 35 NETGEAR Stora User Manual 2. Welcome Screen a. Click Next to continue the installation. Figure 1-21 Desktop Applications Welcome Screen 3. Destination Screen a. Accept the default destination or change locations. b. Click Next to continue the installation. Figure 1-22 Destination Screen...
- Page 36 NETGEAR Stora User Manual 4. Setup Type a. Typical: Recommended setup b. Custom: Choose which applications you want to install. 1-28 Getting Acquainted v1.0, September 2009...
- Page 37 NETGEAR Stora User Manual c. Click Next to continue the installation. Custom Setup Options Figure 1-23 Typical and Custom Setup Options 5. Confirm Program Installation Getting Acquainted 1-29 v1.0, September 2009...
- Page 38 NETGEAR Stora User Manual a. Click Next to continue the installation. Figure 1-24 Program Confirmation 6. Installation Screen a. Click Next to continue the installation. Figure 1-25 Installing Applications 1-30 Getting Acquainted v1.0, September 2009...
- Page 39 NETGEAR Stora User Manual 7. Installation Completed a. Click Next to continue the installation. Figure 1-26 Installation Completed 8. Check mark Confirms Successful Installation of Applications a. Click Next to continue the installation. Figure 1-27 Successful Installation Getting Acquainted 1-31...
-
Page 40: Accessing The Stora
NETGEAR Stora User Manual Accessing the Stora Stora can be accessed in several ways. Depending on your needs and location, you can use one or all of the following methods to access your Stora. Local Area Networking Using default network browsing tools (such as My Network Places), any system connected to your home network will recognize the Stora as a computer in your Workgroup. -
Page 41: Remote Access
NETGEAR Stora User Manual Remote Access Stora data can be accessed over the Internet using any web browser, which means you could take a notebook computer anywhere with wireless network connectivity and securely reach across the Internet to your private data at home. -
Page 42: Resetting Your Stora
NETGEAR Stora User Manual Resetting Your Stora Your Stora system may need to be reset under the following conditions: • When you want to change the name of your Stora system. • When you forget your user id or password. -
Page 43: Documentation And Support
After installing your device, locate the serial number on the label of your product and use it to register your product at http://www.NETGEAR.com/register. Registration is required before you can use our telephone support service. Registration via our website is strongly recommended.For more information about Stora, visit http://kb.netgear.com/app/products/model/a_id/11109. -
Page 44: Stora Agent
Chapter 2 Stora Agent This chapter includes Stora Agent topics including... • “Using the Stora Agent” • “Starting the Stora Agent” • “Stora Agent Menu Options” v1.0, September 2009... -
Page 45: Using The Stora Agent
Start Agent on a PC To start Stora Agent on a PC, navigate to Start > Programs > NETGEAR > Stora Desktop Applications > Stora Agent > Stora Agent. Start Agent on a Mac To start Stora Agent on a Mac, start Finder, browse to Applications >... -
Page 46: Stora Agent Menu Options
NETGEAR Stora User Manual Stora Agent Menu Options Not logged in/Logged in as The label at the top of the menu displays who is currently logged into Stora, or shows Not logged in. This menu option is available on a PC only. - Page 47 NETGEAR Stora User Manual Switch user If someone is logged into Stora, the Switch user menu option logs out the current user, and allows another person to log in. Note that this option will not be available if no one is logged into the system.
- Page 48 Stora Name, User Name and Password, and then click Sign in. Explorer/Mac shows the folders within a network drive. To view Stora Folders on a PC, you can click Start > Programs > NETGEAR > Stora Desktop Applications > Quick Connect > Explore My Stora Folder.
- Page 49 NETGEAR Stora User Manual Open Stora Application The Open Stora application menu option starts the Stora Application. The Stora Application is a fast, sleek and flexible way to administer settings and manage your content using a web browser. Launching the application from the agent opens your browser, prompts you to log in (if necessary), and displays the Stora Application landing page where you can access your folders within the media library, view albums, and set preferences.
- Page 50 NETGEAR Stora User Manual Open Desktop Mirror The Open Desktop Mirror menu option starts the Desktop Mirror application and is used to back up or synchronizes selected folders. Any computer on your home network can use Desktop Mirror to automatically backup files and folders to the Stora.
- Page 51 NETGEAR Stora User Manual Preferences The Preferences menu option allows you to check for software updates to the desktop applications, and displays the name and IP address of the Stora on your home network. See “Preferences” for more information. on page 3-43...
- Page 52 NETGEAR Stora User Manual About The About menu option displays the version number of Stora Agent. Figure 2-10 About the Stora Agent Exit Stora Agent The Exit Stora Agent menu option closes Stora Agent, and removes the icon from the system tray.
-
Page 53: Stora Application
Chapter 3 Stora Application This chapter shows you how to work with and use the Stora Application. • “Starting the Stora Application” • “Logging into the Stora Application” • “Stora Application Landing Page” • “Media Library” • “Working with Media Source Folders” •... -
Page 54: Starting The Stora Application
From the Start Menu On a PC To start the Stora Application on a PC, click Start > Programs > NETGEAR > Stora Desktop Applications > QuickConnect > Navigate to My Stora (www). On a MAC To start the Stora Application on a Mac, start Finder, browse to Applications > Stora Desktop Applications, and then launch the Smart Web shortcut. -
Page 55: Logging Into The Stora Application
NETGEAR Stora User Manual Logging into the Stora Application When you launch the Stora Application, you will be asked to log in using the credentials you set up when you first installed your Stora system. To log in: 1. Select a language. Your language preference may already be set as the default. -
Page 56: Stora Application Landing Page
NETGEAR Stora User Manual Stora Application Landing Page After you launch and login to the Stora Application, the Stora landing page appears. From this screen you have local access to the Albums, Media Library and Preferences areas, as well as the Help menu, which contains a link to the User Manual and Stora support. - Page 57 NETGEAR Stora User Manual Main Menu The main menu appears at the upper right corner of the Landing Page, and shows your display name, gives you access to Help, and allows you to sign out. On subsequent pages, the main menu also contains a Home option, which lets you toggle between other application areas;...
-
Page 58: Media Library
NETGEAR Stora User Manual Media Library The Media Library is used to house and manage all your data. Accessing the Media Library From the Stora application landing page, click Media Library. Note: If you are on one of the other pages, click Home on the Main menu in the upper right corner, and then select Media Library. - Page 59 NETGEAR Stora User Manual Figure 3-6 Media Sources Page of the Media Library Tip of the Day Each time you launch the media library, Stora will provide a Tip of the Day screen, giving helpful tips and tricks for using your system to its fullest potential.
-
Page 60: Media Sources
NETGEAR Stora User Manual Media Sources The Media Sources section shows your FamilyLibrary folders, MyLibrary folders, and MyComputers folders. FamilyLibrary The FamilyLibrary folder comes with the FamilyDocuments, FamilyMusic, and FamilyVideos subfolders. These folders are accessible to all users unless you block their user access. These folders can also be shared with digital music adapters (DMAs) making the content available to media players on the home network. - Page 61 NETGEAR Stora User Manual MyLibrary The MyLibrary folder contains your private subfolders called MyDocuments, MyMusic, and MyPhotos. Each user has their own MyLibrary folders, and only you can access these folders. You can share content within the folders with family, friends or the public by placing the files in an album.
- Page 62 NETGEAR Stora User Manual MyComputers The MyComputers folder contains a folder for each computer using Desktop Mirror. You can download files or folders using the Stora Application, or you can copy and paste them through Stora folders. For added security, you will only be able to access the MyComputers folder if your login credentials were used to configure the backup.
- Page 63 NETGEAR Stora User Manual Albums Albums are created and managed from the MediaLibrary area in the same way as the other folders in the Media Sources area. An album allows you to group related pictures, music, videos and documents from multiple folders.
-
Page 64: Working With Media Source Folders
NETGEAR Stora User Manual Working with Media Source Folders Selecting a Folder Selecting a folder highlights the folder name, and displays its subfolders and files in the Files section. 1. To select a folder, click the folder name. The screenshow shows that the MyMusic folder is selected from MyLibrary media source. - Page 65 NETGEAR Stora User Manual Adding a Folder Adding a folder creates a new subfolder within the current folder. Using subfolders is a good way to keep your content organized. A new folder within FamilyLibrary will be accessible to all users (unless the user's account blocks access).
- Page 66 NETGEAR Stora User Manual Deleting a Folder Deleting a folder removes it and all its files from the Stora. Delete folders carefully! Warning: if you delete a folder, any album that contains a reference to an item within the folder, that item will no longer be available from the album! 1.
- Page 67 NETGEAR Stora User Manual Uploading files Uploading files copies them from your computer to the selected folder. If you upload to your MyLibrary folders, only you have access to them. If you upload a file to a folder within FamilyLibrary, any user with account access permission to this folder will be able to access it.
-
Page 68: Displaying The Folder Options
NETGEAR Stora User Manual Displaying the Folder Options The Stora Application has option commands for working with folders. 1. To display the options from the MediaSource list, move the mouse over a folder. A white arrow will appear beside the name. - Page 69 NETGEAR Stora User Manual Open See “Opening a folder” on page 3-19. Autoplay See “Playing Songs” on page 3-29 and “Playing a Video” on page 3-29. Slideshow Plays all pictures within the folder. See “Running a Slideshow” on page 3-28.
- Page 70 NETGEAR Stora User Manual View Details Viewing details shows information about the selected folder, and allows you to edit it. 1. To view details a. Select the folder b. Display the menu c. Select View Details. The details appear in the Details section, which is displayed beside the Files section.
- Page 71 NETGEAR Stora User Manual Opening a folder Opening a folder shows its subfolders, and displays the subfolders and files in the Files section. 1. To open a folder a. Double-click the folder name. You can also display the menu, and then select Open.
- Page 72 NETGEAR Stora User Manual Copying a Folder Copying a folder puts it in an additional location, along with its subfolders and files, while keeping the original folder. If the new location is within FamilyLibrary, the folder will be accessible to all users (unless the user's account blocks access).
- Page 73 NETGEAR Stora User Manual Renaming a Folder Renaming a folder changes its name. 1. To rename a folder a. Select the folder b. Display the menu c. Select Rename. d. When prompted, enter the new name e. Click Rename. Note: If you rename a folder, and an album contains a reference to a file within the folder, the item will no longer be available from the album.
-
Page 74: Albums
NETGEAR Stora User Manual Albums The Albums section shows the albums you have created using the Media Library, and allows you to edit and share them with other users. An album allows you to group related pictures, music, videos and documents from multiple folders. -
Page 75: Working With Albums
NETGEAR Stora User Manual Working with Albums An album contains references to files, but doesn't contain copies of the files themselves. This way you can have the same file in multiple albums without taking up additional space.Albums are great ways to make specific content accessible from a library without sharing the entire library. - Page 76 NETGEAR Stora User Manual Creating an Unshared Album You can add the contents of a folder to a new album that only you can see. The folder can be shared later using the Details area to modify the settings. 1. To add a new unshared album a.
- Page 77 NETGEAR Stora User Manual Creating a Shared Album You can add the contents of a folder to a new album. The album can be shared with family and media players on the home network, and with friends and the public on the Internet. Images in an album can be shared through RSS, Facebook or Flickr.
- Page 78 NETGEAR Stora User Manual 2. Set the Album Sharing options. a. Share with other family accounts Checking this option allows you to share the albums with others on the Family network. Sharing an album with family makes it available to the other Stora users, unless their account blocks access.
- Page 79 NETGEAR Stora User Manual Share with everyone. Sharing an album with everyone makes it available to the public over the web. The web site URL address will be automatically generated and appear in the album details. If you share an album with everyone, it will automatically be shared with family as well, including users without access to albums shared with family.
- Page 80 NETGEAR Stora User Manual Deleting an Album Deleting an album removes access to its files, but the files themselves remain within the folders in MyLibrary. If you shared the album on Facebook or Flickr, the images will remain on these services.
- Page 81 NETGEAR Stora User Manual Playing Songs Playing songs plays the music within the folder or album, starting with the selected song. Images, videos, documents and songs within subfolders are not played. 1. To play songs, select the album, display the menu, and then select Autoplay. The browser automatically plays each song, and shows the album art and name of the current song.
-
Page 82: Working With Files
NETGEAR Stora User Manual Working with Files Filtering Files - Media Filter Filtering the files specifies which file types will appear. To filter the files, select All Files, Images, Music or Videos in the Media Filter list. The Files section will only display files of the selected type. - Page 83 NETGEAR Stora User Manual Searching for Files and Folders Searching for files and folders checks all the folders you have access to, and displays items with captions, tags or file names that match the search criteria. 1. To run a search, enter text in the Search box, and then click the Search icon.
- Page 84 NETGEAR Stora User Manual Viewing Details 1. To view and edit details, select the file, display the menu, and then select View Details. Alternatively, select the file, and then click the Show Details icon. The details appear in the Details section, which is displayed beside the Files section. Details for all files include the name, size, file type and date.
- Page 85 NETGEAR Stora User Manual Adding a Caption Adding a caption stores a description of the file. The caption will appear when viewing a file within a folder or album, and when an image is shared through Facebook, Flickr or RSS. You can search for a file by entering text from its caption.
- Page 86 NETGEAR Stora User Manual Renaming a file Renaming a file changes its name. You can only rename a file within a folder. 1. To rename a file, start by selecting its folder. 2. Select the file, display the menu, and then select Rename. When prompted, enter the new name, and then click Rename.
-
Page 87: Working With Images
NETGEAR Stora User Manual Working with Images Use as Landing Page Background Using an image as the landing page background causes it to appear on your Landing page. 1. To set the Landing page background, select the image, display the menu and then select Use as Landing Page Background. - Page 88 NETGEAR Stora User Manual Downloading a file The album streams compressed images, music and videos in order to conserve bandwidth and improve performance. An album can be configured to allow those viewing it to download original full-resolution versions of the files. This is especially important if the album contains documents, because the album lists these files but cannot open them.
-
Page 89: Setting Up Contacts
NETGEAR Stora User Manual Setting up Contacts Setting up contacts is setting up your address book, and the contact list for the current album. Each user has their own address book that contains names and email addresses of your friends. You only have to set up the address book once, though you can add and remove contacts at anytime. -
Page 90: Social Media
Media Connect standard. Media players include gaming consoles (Xbox 360 and PS3), digital photo frames, iTunes clients, IP televisions, networked sound systems (Sonos, Logitech), digital video players (Roku, NETGEAR Digital Entertainer, DLink DSM), and many more. 1. To share the album with media players on your home network, select Share with media players. - Page 91 NETGEAR Stora User Manual Sharing with Facebook You can share an album with Facebook. Your Stora will upload the images from the album, and Facebook will add them to a photo album. If you add more images to the album, Stora will automatically upload them to the photo album.
- Page 92 Windows Media Connect standard. Media players include gaming consoles (Xbox 360 and PS3), digital photo frames, iTunes clients, IP televisions, networked sound systems (Sonos, Logitech), digital video players (Roku, NETGEAR Digital Entertainer, DLink DSM), and many more. To share folder with media players, select the folder, display the menu, and then select Share with DMA.
- Page 93 NETGEAR Stora User Manual iTunes Computers can use iTunes to access music stored in the iTunes library on the Stora. These iTunes clients must be connected to the same home network as the Stora. They cannot access the iTunes library remotely across the Internet.
- Page 94 NETGEAR Stora User Manual RAID If you have a single disk in your Stora, your data is not protected against disk failure. By adding a second disk, you can make a mirrored backup and protect your data against disk failure. It is best to use the Stora Application to stop a disk drive before removing it, to ensure maximum data consistency.
-
Page 95: Preferences
NETGEAR Stora User Manual Preferences The administrator can set up user, server and administration preferences. Where noted, some preferences are available to all users. Other preferences require administrator permission. Displaying the Preferences page From the Landing page, click Preferences. From one of the other pages, click Home in the Main menu, and then select Preferences. -
Page 96: User Preferences
NETGEAR Stora User Manual User Preferences User All users can set their user preferences at any time. Figure 3-31 User Preferences - User Area 1. Language The Language list sets the language for the Stora Application user interface. The selection of languages depends on your region. - Page 97 (Xbox 360 and PS3), digital photo frames, iTunes clients, IP televisions, networked sound systems (Sonos, Logitech), digital video players (Roku, NETGEAR Digital Entertainer, DLink DSM), and many more. a. No - New albums will not be shared with media players.
- Page 98 NETGEAR Stora User Manual Diskspace All users can view the amount of space on the Stora. 1. Used - The Used field shows how much disk space is occupied. 2. Free - The Free field shows how much disk space is available.
-
Page 99: Server Preferences
NETGEAR Stora User Manual Server Preferences The Server Preferences area allows you to set the following: • Windows Networking • Registration • Notifications • Network Services • LAN Connection • Data and Time Windows Networking The administrator can control access through Stora Folders to private MyComputers and MyLibrary folders. - Page 100 NETGEAR Stora User Manual Registration You can change the name of your Stora at anytime. 1. Stora Name - The Stora Name box sets the device name for your Stora. The name you choose must be unique. The service provider will automatically ensure the Stora name is unique, and will notify you if you need to try a different name.
- Page 101 NETGEAR Stora User Manual Network Services You can control FTP access to the Stora. For better security, disable FTP access unless you specifically require it. If FTP is enabled, you can use it to upload and download files in the MyLibrary folders.
- Page 102 NETGEAR Stora User Manual LAN Connection 1. Obtain IP address automatically The Obtain IP address automatically list controls whether the Stora obtains a dynamic IP address from the router. The administrator can set IP address information for the Stora. a. Yes - The Stora automatically obtains a dynamic IP address from the router using DHCP.
- Page 103 NETGEAR Stora User Manual Figure 3-38 LAN Connection Preferences Date and Time The administrator can set the date and time for the Stora. 1. Set date and time from the Internet The Set date and time from the Internet list controls where the Stora obtains the date and time.
- Page 104 NETGEAR Stora User Manual 2. Date The Date control sets the current date. Set the date by clicking the Calendar icon and then choosing the year, month and date. The Date control appears if Set date and time from the Internet is set to No.
-
Page 105: Administration
NETGEAR Stora User Manual Administration The Administration area gives access and allows you to: • Add New Users • Edit Users • Shutdown and restart the Stora • Obtain Software Updates • Check RAID disk status Add New User You can add new users to the Stora so that each user in your family can have their own MyLibrary folders. - Page 106 NETGEAR Stora User Manual Selecting the Let user access family folder check box gives the user access to the FamilyLibrary folders, and allows them to view albums that have been shared with family. The default setting grants access. Note: if you disable access to the FamilyLibrary folders, a user can still access them using Windows Explore or Mac Finder through Stora Folders.
- Page 107 NETGEAR Stora User Manual 3. Password The Password box sets the user's password. It must be at least six characters, and one of the characters must be a digit. 4. Confirm Password Re-enter the password in the Confirm Password box.
- Page 108 NETGEAR Stora User Manual Shut down You can shut down or restart the Stora. 1. To shutdown the Stora, click Shutdown. 2. To restart the Stora, click Restart. Figure 3-42 Administration - Shutdown/Restart Software updates You can check for software and firmware updates to the Stora.
- Page 109 NETGEAR Stora User Manual RAID This area allows you to check the status of your disks, and indicates the disk type, size of disk and RAID status. 1. Eject - allows you to safely remove and replace a disk without damaging the disk or losing data.
-
Page 110: Stora Desktop Mirror
Chapter 4 Stora Desktop Mirror This chapter includes topics on system status, alerts, replacing failed disks, and scheduling. • “Desktop Mirror Overview” • “Initial Configuration” • “File Menu” • “View Menu” • “Tools Menu” • “Help Menu” v1.0, September 2009... -
Page 111: Desktop Mirror Overview
2. Alternately, you can start Desktop Mirror from the Start menu on a PC or the Finder on a Mac a. On a PC To start the Desktop Mirror on a PC, click Start > Programs > NETGEAR > Stora Desktop Applications > Desktop Mirror> Desktop Mirror b. -
Page 112: Initial Configuration
NETGEAR Stora User Manual Initial Configuration The first time you launch Desktop Mirror it must be configured. If your computer has multiple users, each user must start Desktop Mirror and configure their backups separately. 1. If required, enter the Stora Name, User Name and Password, and then click Next. - Page 113 NETGEAR Stora User Manual 2. Select the Content you want to backup. By default, the MyDocuments (PC) or Documents (Mac) folder is selected for backup. a. If you do not want your entire MyDocuments folder to be backed up, uncheck the box.
- Page 114 NETGEAR Stora User Manual 3. Set Backup Schedule At this point you can set when you want to back up files, and then click Next. Backup occurs when an interval expires, or at a certain time daily or weekly, or when you start Desktop Mirror.
- Page 115 NETGEAR Stora User Manual 4. At this point you have successfully configured your Stora. a. As an option you can select or deselect Start backing up my folders when I click finish b. Click Finish. The Stora Desktop Mirror window will automatically launch with the folder settings you chose during configuration.
-
Page 116: File Menu
NETGEAR Stora User Manual File Menu Adding Folders to the Backup Adding a folder will include the folder, its files, and its subfolders in the subsequent backups or syncs. 1. There are two ways to add folders to your Stora. -
Page 117: Viewing Files With Folders
NETGEAR Stora User Manual Viewing Files with Folders 1. Once backed up, double-clicking the folder will display the files that are in the folder. Double-click the folder to view the files within the folder Figure 4-7 Viewing Backed up Files Stora Desktop Mirror v1.0, September 2009... -
Page 118: Removing Folders From The Backup
NETGEAR Stora User Manual Removing Folders from the Backup Removing a folder will exclude the folder, its files, and its subfolders from subsequent backups or syncs. 1. Select the folder you want to remove from the backup. 2. There are two ways to remove folders to your Stora. -
Page 119: Quit
NETGEAR Stora User Manual Quit 1. To exit Desktop Mirror, select File > Quit. Figure 4-9 Quit Desktop Mirror Stora Desktop Mirror 4-10 v1.0, September 2009... -
Page 120: View Menu
NETGEAR Stora User Manual View Menu Viewing the Report A report is generated after every backup or restore event. 1. From the Desktop Mirror menu, choose View > View Report. The Backup Activity window appears showing the backup data log. The Backup Activity window will always show the most recent addition to the log at the top of the report. -
Page 121: Tools Menu
NETGEAR Stora User Manual Tools Menu Manual Backups The Desktop Mirror application allows you to manually back up or sync any new or modify folders. To perform manual backups 1. Select the folder(s) you want to backup. You can select multiple folders by holding the Ctrl key while clicking folders. - Page 122 NETGEAR Stora User Manual To cancel a backup in progress 1. During a synchronization, click the “x” box on the status bar. You will see “Process aborted” on the status bar. Click the close box “Process aborted” message on the...
-
Page 123: Restoring All Backed Up Folders
NETGEAR Stora User Manual Restoring All Backed up Folders Restoring backed up folders copies all folders and files back to the computer. To restore files 1. Select Tools > Restore Files and folders on the Stora are added to or replace those on the computer. -
Page 124: Changing Account Settings
NETGEAR Stora User Manual Changing Account Settings Account Settings is located from the Tools menu, and has three tab; Identity, Schedule, and Advanced options. Changing accounts settings lets you modify the device name, user name, password, backup schedule, or mode. - Page 125 NETGEAR Stora User Manual Identity tab You can use the Identity tab under the Tools menu to modify the Stora Name, User Name or Password. 1. Choose Tools > Account Settings > Identity You will need to use this option to change the device name (see “Registration” on page 3-48, or if a user changes their password (see “Edit user”...
- Page 126 NETGEAR Stora User Manual Schedule tab 1. Choose Tools > Account Settings > Schedule Use will need to use this option to modify when to back up or synchronize files. If you select Timed Backup, Desktop Mirror backs up/synchronizes the files automatically.
- Page 127 NETGEAR Stora User Manual Advanced tab 1. Choose Tools > Account Settings > Advanced Use will need to use this option to view the backup folder on the Stora, and to select backup or synchronization mode. Backup mode is the default setting. Desktop Mirror will back up the files in one direction, from the computer to the Stora.
-
Page 128: Help Menu
NETGEAR Stora User Manual Help Menu View Online Help You can access the Stora User Manual online from this menu option. Figure 4-18 Online Help About Stora This menu option provides details about the Stora Desktop Mirror installed on your computer. - Page 129 Index configuration 1-12 configure Desktop Mirror 4-3 access options 1-32 connect to network 1-11 account creation 1-15 Contacts account settings 4-15 add/remove a friend 3-37 add new user 3-53 address book 3-37 Administration 3-53 setting up 3-37 working with 3-37 Agent access 1-32 Albums 2-6, 3-11, 3-22 add files 3-27...
- Page 130 NETGEAR Stora User Manual DMA, sharing 3-40 rename 3-21 selecting 3-12 DNS server 3-50 FTP 3-42 documentation 1-35 enable internet 3-49 enable LAN 3-49 edit user 3-54 eject a disk 1-24 gateway box 3-50 eject button 3-57 email notifications 1-20...
- Page 131 NETGEAR Stora User Manual main menu 3-5 quit 4-10 manual backups 4-12 mapped drives 1-32 Media Library 2-6 RAID 1-25, 3-42, 3-57 Media library rebuild button 3-57 access 3-6 registration 1-14, 1-35, 3-48 media players 1-4, 3-38 remote access 1-33...
- Page 132 NETGEAR Stora User Manual about 2-9 exit 2-9 Stora application landing page 3-4 log into 3-3 main menu 3-5 start 3-2 start from browser 3-2 start from desktop 3-2 start from MAC 3-2 start from PC 3-2 start from Stora agent 3-2...
Need help?
Do you have a question about the MS2110 - Stora NAS Server and is the answer not in the manual?
Questions and answers