Sign In
Upload
Download
Table of Contents
Contents
Add to my manuals
Delete from my manuals
Share
URL of this page:
HTML Link:
Bookmark this page
Add
Manual will be automatically added to "My Manuals"
Print this page
×
Bookmark added
×
Added to my manuals
Manuals
Brands
NETGEAR Manuals
Network Hardware
MR60
User manual
NETGEAR Nighthawk MR60 User Manual
Mesh wifi 6 system
Hide thumbs
Also See for Nighthawk MR60
:
User manual
(130 pages)
1
2
Table Of Contents
3
4
5
6
7
8
9
10
11
12
13
14
15
16
17
18
19
20
21
22
23
24
25
26
27
28
29
30
31
32
33
34
35
36
37
38
39
40
41
42
43
44
45
46
47
48
49
50
51
52
53
54
55
56
57
58
59
60
61
62
63
64
65
66
67
68
69
70
71
72
73
74
75
76
77
78
79
80
81
82
83
84
85
86
87
88
89
90
91
92
93
94
95
96
97
98
99
100
101
102
103
104
105
106
107
108
109
110
111
112
113
114
115
116
117
118
119
120
121
122
123
124
125
126
127
128
129
130
page
of
130
Go
/
130
Contents
Table of Contents
Troubleshooting
Bookmarks
Table of Contents
Table of Contents
Chapter 1 Overview
Router Hardware and LED Overview
Router Hardware Features
Router LED Behavior
Satellite Hardware and LED Overview
Satellite Hardware Features
Satellite LED Behavior
Router and Satellite Labels
Connect Your Router
Place Your Satellite
Sync Your Satellite with Your Router
Chapter 2 Connect to the Network and Access the Router
Connect to the Network
Connect to the Network Using a Wired Connection
Find and Connect to the Wifi Network
Wifi Connection Using WPS
Types of Logins
Use a Web Browser to Access the Router
Automatic Internet Setup
Log in to the Router
Install and Manage Your Mesh System with the Nighthawk App
Change the Language
Chapter 3 Specify Your Internet Settings
Use the Internet Setup Wizard
Manually Set up the Internet Connection
Specify an Internet Connection Without a Login
Specify an Internet Connection that Uses a Login
Specify Ipv6 Internet Connections
Requirements for Entering Ipv6 Addresses
Use Auto Detect for an Ipv6 Internet Connection
Set up an Ipv6 6To4 Tunnel Internet Connection
Set up an Ipv6 Pass-Through Internet Connection
Set up an Ipv6 Fixed Internet Connection
Set up an Ipv6 DHCP Internet Connection
Set up an Ipv6 Pppoe Internet Connection
Use Auto Config for an Ipv6 Internet Connection
Set up an Ipv6 6Rd Internet Connection
Manage the MTU Size
MTU Concepts
Change the MTU Size
Chapter 4 Control Access to the Internet
Enable Access Control to Allow or Block Access to the Internet
Manage Network Access Control Lists
Use Keywords to Block Internet Sites
Block Services from the Internet
Delete Keywords from the Blocked List
Prevent Blocking on a Trusted Computer
Schedule When to Block Internet Sites and Services
Set up Security Event Email Notifications
Chapter 5 Optimize Performance
Use Dynamic Qos to Optimize Internet Traffic Management
Enable Dynamic Qos
Enable or Disable the Automatic Qos Database Update
Manually Update the Dynamic Qos Database
Improve Network Connections with Universal Plug and Play
Enable or Disable AX Wifi
Chapter 6 Manage Network Settings
View or Change the WAN Settings
Set up a Default DMZ Server
Change the Router's Device Name
Change the LAN TCP/IP Settings
Specify the IP Addresses that the Router Assigns
Disable the DHCP Server Feature in the Router
Manage Reserved LAN IP Addresses
Reserve an IP Address
Edit a Reserved IP Address
Delete a Reserved IP Address Entry
Use the WPS Wizard for Wifi Connections
Change the Wifi Password or the Wifi Security
Set up the Router as a Wifi Access Point
Set up a Bridge for a Port Group or VLAN Tag Group
Set up a Bridge for a Port Group
Set up a Bridge for a VLAN Tag Group
Set up an IPTV Port
Manage Custom Static Routes
Set up a Static Route
Edit a Static Route
Delete a Static Route
Enable or Disable Implicit Beamforming
Chapter 7 Manage Your Router
Update the Router and Satellite Firmware
Check for Firmware Updates
Manually Update the Firmware
Manually Update Satellite Firmware
Manually Update Router Firmware
Change the Admin Password
Enable Admin Password Reset
Reset the Admin Password
View Information about the Router and the Internet and Wifi Settings
Display the Statistics of the Internet Port
Check the Internet Connection Status
View and Manage Logs of Router Activity
View Devices Currently on the Network
Monitor Internet Traffic
Manage the Router Configuration File
Back up the Settings
Erase the Settings
Restore the Settings
Remote Access
Set up Remote Management
Use Remote Access
Remotely Access Your Router Using the Nighthawk App
Return the Router or Satellite to Its Factory Default Settings
Use the Reset Button
Erase the Settings
Chapter 8 Manage Port Forwarding and Port Triggering
Manage Port Forwarding to a Local Server
Set up Port Forwarding to a Local Server
Add a Custom Port Forwarding Service
Edit a Port Forwarding Service
Delete a Port Forwarding Entry
Application Example: Make a Local Web Server Public
How the Router Implements the Port Forwarding Rule
Port Triggering
Add a Port Triggering Service
Enable Port Triggering
Application Example: Port Triggering for Internet Relay Chat Port
Triggering
Chapter 9 Use VPN to Access Your Network
Set up a VPN Connection
Specify VPN Service in the Router
Install Openvpn Software
Install Openvpn Software on Your Windows Computer
Install Openvpn Software on Your Mac Computer
Install Openvpn Software on an Ios Device
Install Openvpn Software on an Android Device
Use a VPN Tunnel on Your Windows Computer
Use VPN to Access Your Internet Service at Home
Set up VPN Client Internet Access in the Router
Block VPN Client Internet Access in the Router
Use a VPN Tunnel to Access Your Internet Service at Home
Chapter 10 Troubleshooting
Quick Tips
Sequence to Restart Your Network
Wifi Settings
Network Settings
The Router and Satellite Do Not Sync
Cannot Log in to the Router
Cannot Access the Internet
Troubleshoot Internet Browsing
Troubleshoot Pppoe
Troubleshoot Wifi Connectivity
Troubleshoot Your Network Using the Ping Utility
Test the LAN Path to Your Router
Test the Path from Your Computer to a Remote Device
Chapter 11 Supplemental Information
Factory Settings
Factory Settings for Router Model MR60
Factory Settings for Satellite Model MS60
Technical Specifications
Technical Specifications for Router Model MR60
Technical Specifications for Satellite Model MS60
Advertisement
Quick Links
1
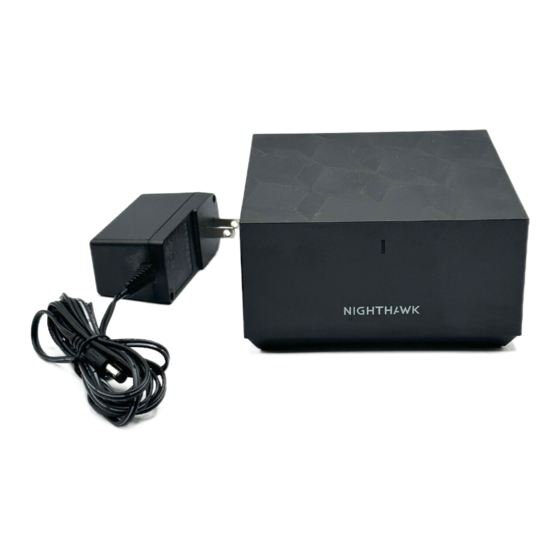
Connect Your Router
Download this manual
User Manual
Nighthawk Mesh WiFi 6 System
Models:
Mesh WiFi 6 Router Model MR60
Mesh WiFi 6 Satellite Model MS60
September 2020
202-12018-04
NETGEAR, Inc.
350 E. Plumeria Drive
San Jose, CA 95134, USA
Table of
Contents
Previous
Page
Next
Page
1
2
3
4
5
Advertisement
Table of Contents
Need help?
Do you have a question about the Nighthawk MR60 and is the answer not in the manual?
Ask a question
Questions and answers
Related Manuals for NETGEAR Nighthawk MR60
Network Hardware NETGEAR MR60 User Manual
(130 pages)
Network Hardware NETGEAR Nighthawk Mesh WiFi 6 System User Manual
(130 pages)
Marine Radar NETGEAR Nighthawk MS60 Quick Start
(2 pages)
Wireless Router NETGEAR MS60 Quick Start
(2 pages)
Wireless Router NETGEAR Nighthawk MK63 Quick Start Manual
(2 pages)
Wireless Router NETGEAR Nighthawk MK63 Manual
(2 pages)
Switch NETGEAR NIGHTHAWK MS60 Quick Start
(2 pages)
Network Hardware Netgear MS2000-100NAS Installation Manual
Installation guide (2 pages)
Network Hardware Netgear MS2110 - Stora NAS Server Installation Manual
Stora install guide (2 pages)
Network Hardware Netgear MS2110 - Stora NAS Server User Manual
Stora user manual (132 pages)
Network Hardware NETGEAR ProSAFE M5300 Series Software Administration Manual
Managed switches (720 pages)
Network Hardware NETGEAR M6100 Series Software Setup Manual
Switches (34 pages)
Network Hardware Netgear M4100 Series ProSAFE Reference Manual
Managed switches cli command (578 pages)
Network Hardware NETGEAR Nighthawk MK62 User Manual
Mesh wifi 6 system (130 pages)
Network Hardware Netgear XAVB1004 Installation Manual
Xavb1004 home theater internet connection kit (2 pages)
Network Hardware Netgear AirCard Quick Start Manual
Mobile hotspot (17 pages)
This manual is also suitable for:
Nighthawk ms60
Nighthawk mk63
Nighthawk mk62
Nighthawk ms60-100eus
Table of Contents
Save PDF
Print
Rename the bookmark
Delete bookmark?
Delete from my manuals?
Login
Sign In
OR
Sign in with Facebook
Sign in with Google
Upload manual
Upload from disk
Upload from URL


Need help?
Do you have a question about the Nighthawk MR60 and is the answer not in the manual?
Questions and answers