
Related Manuals for NETGEAR RND4000v2


Summary of Contents for NETGEAR RND4000v2
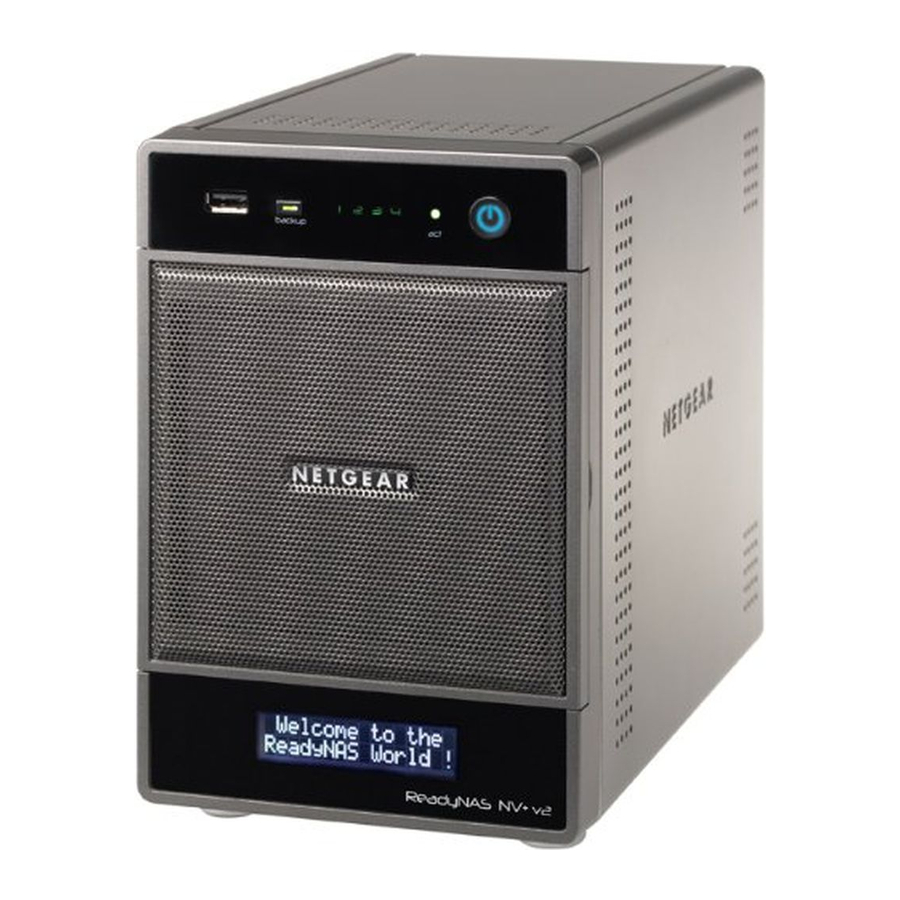
- Page 1 ReadyNAS for Home RAIDiator 5.3 Soft ware M anua l Models: Duo v 2 N V+ v2 350 East Plumeria Drive San Jose, CA 95134 September 2012 202-10896-04...
- Page 2 ReadyNAS for Home RAIDiator 5.3 Support Thank you for choosing NETGEAR. To register your product, get the latest product updates, get support online, or for more information about the topics covered in this manual, visit the Support website at http://support.netgear.com Phone (US &...
-
Page 3: Table Of Contents
Table of Contents Chapter 1 Getting Started Quick-Start Guide ..........7 Additional Documentation . - Page 4 NETGEAR genie ........
- Page 5 ReadyNAS for Home RAIDiator 5.3 Chapter 6 Backup and Recovery Back Up or Restore System Configuration......80 Basic Data Backup Concepts .
-
Page 6: Chapter 1 Getting Started
Getting Started This NETGEAR® ReadyNAS for Home RAIDiator 5.3 Software Manual describes how to configure and manage your ReadyNAS storage system. Your ReadyNAS® storage system relies on the following software applications: • RAIDar. Use this setup utility to find your ReadyNAS system on your local area network and launch Dashboard. -
Page 7: Quick-Start Guide
This manual provides conceptual information about storage systems, detailed instructions about using your system, and recommendations about configuring, managing, and backing up your system. NETGEAR recommends that you read this manual to make the best use of your storage system. -
Page 8: Raidar
ReadyNAS for Home RAIDiator 5.3 RAIDar RAIDar is a software application that you use to discover ReadyNAS storage systems on your network. RAIDar is included on the Resource CD that came with your system. It includes versions for Windows, Mac, and Linux operating systems. It is also available at http://www.readynas.com/duo_nvplus_start. - Page 9 ReadyNAS for Home RAIDiator 5.3 Table 1. RAIDar LED icon descriptions (Continued) LED icon Description The volume is in life-support mode. Life-support mode happens when the volume encounters multiple disk failures and might be dead. The ReadyNAS system blocks it from being marked dead in case someone removed the wrong disk while the system was running.
- Page 10 ReadyNAS for Home RAIDiator 5.3 RAIDar displays a window that lists the ReadyNAS system or systems on your network and provides details about the status of each system it discovers. The default IP configuration is set to DHCP, which is how home routers assign IP addresses by default.
-
Page 11: Setup Wizard
ReadyNAS for Home RAIDiator 5.3 Log in to your system using the default login credentials: • Default user name. admin • Default password. password Both user name and password are case-sensitive. The first time you connect to your ReadyNAS system, a Setup Wizard displays to guide you through initial configuration. - Page 12 ReadyNAS for Home RAIDiator 5.3 When you complete the wizard, Dashboard displays. The following figure shows the Dashboard home screen. Figure 3. Dashboard home screen Click the Configure button to access the screens that let you configure, manage, and monitor your ReadyNAS storage system. When you click the Configure button, the Overview screen displays.
-
Page 13: Language
For example, selecting Japanese allows the ReadyNAS to support files with Japanese names in Windows Explorer. NETGEAR recommends selecting a language based on the region where the device is being used. ... -
Page 14: Administrator Password
ReadyNAS for Home RAIDiator 5.3 Administrator Password The administrator can access any file on the ReadyNAS system, including private home shares. It is important to safeguard the administrator password and to change it regularly to protect your data. Change the Administrator Password Be sure to choose an administrator password that is different from the default password and keep it in a safe place. -
Page 15: Recover Your Administrator Password
You can recover a lost or forgotten administrator password in two ways: • Use the NETGEAR password recovery tool. This web-based tool requires that you enable administrator password recovery on your ReadyNAS storage system before you can use it. For more information, see Change the Administrator Password on page 14. -
Page 16: Register Your System
NV+ v2 Hardware Manual. Register Your System You must register your product before you can use NETGEAR telephone support. If you did not register your ReadyNAS system during the setup wizard process, you can register it using Dashboard or by accessing the NETGEAR Product Registration website directly. - Page 17 The product registration web page displays. If you have never registered a NETGEAR product, click the Continue button. If you have registered a NETGEAR product in the past, enter your email address and password and click the Log in button.
-
Page 18: Chapter 2 Disk Configuration
Disk Configuration This chapter describes how to configure the disks in your ReadyNAS storage system. It contains the following sections: • Basic Disk Configuration Concepts • Manage Disk Configuration... -
Page 19: Basic Disk Configuration Concepts
ReadyNAS for Home RAIDiator 5.3 Basic Disk Configuration Concepts To get the most out of your ReadyNAS storage system, it is helpful to understand some disk configuration concepts. Understanding these concepts is the first step to making good decisions about how to configure, manage, and use your ReadyNAS storage system. You can configure your storage system’s hard disks in various ways. -
Page 20: X-Raid2
ReadyNAS for Home RAIDiator 5.3 X-RAID2 X-RAID2 is a RAID technology that expands automatically and is available only on ReadyNAS systems. With X-RAID2, you do not need to know intricate details about RAID to administer your system. X-RAID2 allows you to add storage space without reformatting your drives or moving your data to another location. -
Page 21: Flex-Raid
ReadyNAS for Home RAIDiator 5.3 The following figure illustrates how X-RAID2 uses new disks. Figure 5. X-RAID2 disk usage 1. Initial storage space 2. Data protection 3. Additional storage space Flex-RAID Flex-RAID technology allows you to choose from among several industry-standard RAID levels: •... -
Page 22: Manage Disk Configuration
ReadyNAS for Home RAIDiator 5.3 Manage Disk Configuration You can use Dashboard to manage the configuration of the hard disks installed in your system. Expand a Volume Dashboard automatically manages volume expansion when you add a disk to your ReadyNAS storage system. This expansion happens in the background while you continue to use your ReadyNAS system. -
Page 23: Change Raid Modes
ReadyNAS for Home RAIDiator 5.3 Table 2. Flex-RAID volume expansion behavior (Continued) Flex-RAID Number of disks Number of Volume expansion behavior format in use currently installed disks added RAID 5 The new disk is added to the existing volume. JBOD A new JBOD volume is created for each new disk. - Page 24 ReadyNAS for Home RAIDiator 5.3 The ReadyNAS Volume Setup screen displays. If you do not select a format within 10 minutes, your system reboots in the same mode that it was previously using. Select the Expandable Volume (X-RAID2) radio button. (Optional) Click a More button to learn more about X-RAID2 or Flex-RAID.
- Page 25 ReadyNAS for Home RAIDiator 5.3 Change from X-RAID2 to Flex-RAID You can reconfigure your system from X-RAID2 mode (the factory default mode) to Flex-RAID mode. To change from X-RAID2 to Flex-RAID: If any data is stored on your system, back up your data. For more information, see the Chapter 6, Backup and Recovery.
- Page 26 ReadyNAS for Home RAIDiator 5.3 If you do not select a format within 10 minutes, your system reboots in the same mode that it was previously using. Select the Flexible Volume (Flex-RAID) radio button. (Optional) Click a More button to learn more about X-RAID2 or Flex-RAID. A pop-up window displays.
- Page 27 ReadyNAS for Home RAIDiator 5.3 WARNING! Setting your ReadyNAS system to its factory defaults erases all data and configuration settings. The process for performing a factory reset reboot varies by storage system. For more information about how to perform a factory reset reboot, see the ReadyNAS Duo v2 and NV+ v2 Hardware Manual.
- Page 28 ReadyNAS for Home RAIDiator 5.3 From the Select the desired RAID level drop-down menu, select a RAID level or JBOD formatting. If you select Auto, your ReadyNAS system automatically assigns a RAID level based on the number of disks that are installed in your system, as follows: Number of installed disks RAID level automatically chosen RAID 0...
-
Page 29: Chapter 3 Shares
Shares This chapter describes how to create, manage, and access shares on your storage system. This chapter includes the following sections: • Basic Share Concepts • Create Shares • Manage Shares • Access Shares Remotely... -
Page 30: Basic Share Concepts
ReadyNAS for Home RAIDiator 5.3 Basic Share Concepts The volume or volumes on your ReadyNAS storage system are divided into shares, which are similar to folders or directories. Data Organization Shares are the way that you group your data. You might want to group your data by type, for example: •... -
Page 31: File-Sharing Protocols
AFP. Your ReadyNAS system supports access your storage system, enable AFP 3.2. this protocol. However, in a mixed Windows and Mac environment, NETGEAR recommends using CIFS only. CIFS Used mainly by Microsoft Windows If Windows users access your (Common Internet File computers and sometimes by Mac OS X storage system, enable this protocol. -
Page 32: Access Rights
ReadyNAS for Home RAIDiator 5.3 Access Rights For each share you create, you can specify the access right to that share for each user. The following table lists access rights options available to you. Table 4. Access rights options Access right Description Read-only The user with this permission can read files on this share, but cannot edit or create... -
Page 33: Manage Shares
ReadyNAS for Home RAIDiator 5.3 Enter the following information about the new share: • Volume. If your system has only one volume, this drop-down menu is dimmed. If you have more than one volume, choose a volume from the drop-down menu. •... -
Page 34: Fine-Tune Share Access
ReadyNAS for Home RAIDiator 5.3 Fine-Tune Share Access Use Dashboard to fine-tune how shares can be accessed. You can enable or disable all file-sharing protocols and grant or restrict access rights for each share and user. For example, you might want to grant a user read/write access rights on one share but read-only access rights on another share. -
Page 35: Reset Permissions For Files And Folders
ReadyNAS for Home RAIDiator 5.3 If you select Users, you can select either the Read Only or Read/Write check box for each user. For example, the figure in step 1 shows that the administrator selected the Read Only check box for user Dixie. This means that all users except Dixie have read/write permission for the backup share. -
Page 36: Delete A Folder
ReadyNAS for Home RAIDiator 5.3 Click the New Folder icon. Enter a folder name and click the Apply button. For more information about file and folder name restrictions, see File and Folder Names on page 30. The file is added. Delete a Folder Use Dashboard to permanently remove a folder from your ReadyNAS system. -
Page 37: Access Shares Remotely
ReadyNAS for Home RAIDiator 5.3 To remove a share: Select Configure > Shares. Highlight a share and click the Remove Share icon. A dialog box displays prompting you to confirm the delete command. Click the Yes button. The share and its contents are permanently removed from your ReadyNAS system. Access Shares Remotely You can remotely access shares on your ReadyNAS system using other network-connected devices like a laptop or tablet. -
Page 38: Access Shares Using Http With Webshare
ReadyNAS for Home RAIDiator 5.3 Enter a user ID and password. You can log in with administrator or user credentials. If you log in as a user, the settings configured by the ReadyNAS system administrator for that user limit your access. Windows Explorer displays the contents of all available shares on your ReadyNAS system. -
Page 39: Access Shares Using A Mac Os X Device
ReadyNAS for Home RAIDiator 5.3 For more information about Rsync terminal program commands, see http://rsync.samba.org. For more information about using an Rsync client application, see the documentation that accompanies the application. Access Shares Using a Mac OS X Device You can access shares on your ReadyNAS system using a network-attached OS X device. ... -
Page 40: Access Shares Using A Linux Or Unix Device
ReadyNAS for Home RAIDiator 5.3 You are prompted to select a volume. Mac OS X calls your ReadyNAS shares volumes. Select a volume or volumes (share or shares) and click the OK button. Finder displays the volume contents in a window. Access Shares Using a Linux or Unix Device You can access shares on your ReadyNAS system using a network-attached Linux or Unix device that supports the SMB file-sharing protocol. -
Page 41: Readydrop
ReadyNAS for Home RAIDiator 5.3 ReadyDROP ReadyDROP allows you to synchronize files in real time between your ReadyNAS storage system and ReadyDROP-enabled remote devices. Any files that you put in a ReadyDROP folder on your ReadyNAS system or on ReadyDROP-enabled remote devices are synchronized automatically, in the background, as long as the devices have Internet access. - Page 42 ReadyNAS for Home RAIDiator 5.3 Add Remote Access Users You must add any user that you want to allow to remotely access your ReadyNAS system (including the ReadyDROP folder) to the Access List. When you invite users, they receive an invitation to create a ReadyNAS Remote account if they do not already have one.
- Page 43 To install ReadyNAS Remote client and enable ReadyDROP on remote devices: Using the device from which you want to remotely access a ReadyNAS system, visit the ReadyDROP portal at https://readydrop.netgear.com/. Download the appropriate client software for your operating system and install it according to your operating system’s instructions.
- Page 44 ReadyNAS for Home RAIDiator 5.3 Access Shares Using ReadyNAS Remote To access shares using ReadyNAS Remote: Click the ReadyNAS Remote icon and choose Login from the drop-down menu. The ReadyNAS Remote icon blinks while the device is connecting and displays as blue when it is connected.
- Page 45 ReadyNAS for Home RAIDiator 5.3 To manage files using the ReadyDROP portal: Visit the ReadyDROP portal at https://readydrop.netgear.com/. You are prompted to enter your ReadyNAS Remote account credentials. Enter your ReadyNAS Remote user name and password and click the Log in button.
- Page 46 ReadyNAS for Home RAIDiator 5.3 (Optional) To copy a folder from your computer, drag a file to the portal window and drop it. Note: Your browser must support drag-and-drop capability. (Optional) To browse for files, follow these steps: a. Click the browse icon The Upload file dialog box displays.
- Page 47 ReadyNAS for Home RAIDiator 5.3 Use your remote device operating system’s standard interface to add, delete, or edit files in the ReadyDROP folder. Changes are synchronized with your ReadyNAS system and all other ReadyDROP-enabled devices. Shares...
-
Page 48: Chapter 4 Users And Groups
Users and Groups This chapter describes how to create and manage user and group accounts. It contains the following sections: • Basic User and Group Concepts • User and Group Account Limitations • User and Group Management Modes • Local Users Mode... -
Page 49: Basic User And Group Concepts
User and Group Account Limitations You can create up to 32,000 user accounts on your ReadyNAS storage system. However, creating many accounts on your system can degrade its performance, so NETGEAR recommends that you create and maintain only those accounts you need, preferably fewer than 100. - Page 50 • Your Active Directory server and your ReadyNAS system must have the same time set on their system clocks. NETGEAR recommends that you choose your domain controller as your NTP server to ensure that time settings are the same. •...
-
Page 51: Local Users Mode
ReadyNAS for Home RAIDiator 5.3 Local Users Mode Use Local Users mode to manually create, manage, and delete user accounts and groups on your ReadyNAS storage system. This section assumes that your ReadyNAS system is currently in Local Users mode. For more information about changing user and group management modes, see User and Group Management Modes... -
Page 52: Edit User Accounts
ReadyNAS for Home RAIDiator 5.3 Enter the following information for the new user: • UID. Required. The UID is a unique user ID number assigned to each user. By default, the ID number is automatically set, but you can manually enter a number if you prefer. -
Page 53: Delete User Accounts
ReadyNAS for Home RAIDiator 5.3 Delete User Accounts Use Dashboard to delete user accounts. Files on your ReadyNAS system that are owned by the deleted user might become inaccessible. When you delete a user, your ReadyNAS system deletes that user’s private home share and its contents. ... -
Page 54: Create Groups
ReadyNAS for Home RAIDiator 5.3 Create Groups Use Dashboard to create a group. To create a group: Click Configure > Security > Groups and click the New Group button. The New Groups dialog box displays. Enter a name in the Name field and click the Create button. The group is added to your system. -
Page 55: Edit Groups
ReadyNAS for Home RAIDiator 5.3 Edit Groups Use Dashboard to edit a group. To edit a group: Click Configure > Security > Groups and highlight the group that you want to edit. The right pane populates with information about this group. The Secondary Members section includes a list of all users on your ReadyNAS system. -
Page 56: Delete Groups
ReadyNAS for Home RAIDiator 5.3 Delete Groups Use Dashboard to delete a group. To be eligible for deletion, a group cannot contain any primary members. For more information about moving users to a different group, see Edit User Accounts on page 52. For more information about deleting users, see Delete User Accounts on page 53. -
Page 57: Chapter 5 System Management
USB storage devices. It contains the following sections: • System Overview • Power • Update Firmware • Monitor • Network Settings • Add-ons • NETGEAR genie Note: For information about backing up the system configuration, see Back Up or Restore System Configuration on page 80. -
Page 58: System Overview
ReadyNAS for Home RAIDiator 5.3 System Overview Use Dashboard to manage the configuration of your ReadyNAS storage system. When you click the System tab, the Overview screen displays: You can click to expand each section in this screen. Set the Clock To enable your ReadyNAS system to time-stamp your files correctly, ensure that your ReadyNAS system time and date settings are accurate. -
Page 59: Manage File-Sharing Protocols And Services
The Date and Time Settings dialog box displays. From the Time Zone drop-down menu, select the correct time zone for your location. So that your files are correctly time-stamped, NETGEAR recommends choosing the time zone where your ReadyNAS storage system is physically located. -
Page 60: Upnp Discovery Service
ReadyNAS for Home RAIDiator 5.3 Click a button to toggle a file-sharing protocol between enabled and disabled. A pop-up menu displays that lists the settings specific to that file-sharing protocol. Edit the settings as needed and click the Apply button. For descriptions of the file-sharing protocols, see File-Sharing Protocols on page 31. -
Page 61: Power
ReadyNAS for Home RAIDiator 5.3 When TiVo devices are detected on your LAN, they show as a list in the ReadyDLNA Settings. When prompted, enter the Media Access Key provided by your TiVo box: Select the Activate check box and click Apply. After you activate the TiVo box, you can set the archive path and schedule. -
Page 62: Manually Shut Down The System
ReadyNAS for Home RAIDiator 5.3 Select the check boxes for the features that you want to use: • Enable disk spin-down. Allow the hard disk drive to spin-down when inactive, based on the number of minutes you specify. • Enable Power Timer. Schedule when the ReadyNAS system is on and off. •... -
Page 63: Ups
RAIDiator 5.3.1 • RAIDiator 5.3.2 You can update the firmware on your ReadyNAS system remotely from the NETGEAR website or manually from a local drive. The update process changes only the firmware; it does not modify your data. System Management... -
Page 64: Update Firmware Remotely
ReadyNAS for Home RAIDiator 5.3 NETGEAR recommends that you back up your data, especially data that cannot be replaced, before you perform a firmware update. Update Firmware Remotely If your ReadyNAS system has Internet access, the remote method is easiest. - Page 65 ReadyNAS for Home RAIDiator 5.3 For more information about the USB ports on your ReadyNAS system, see the ReadyNAS Duo v2 and NV+ v2 Hardware Manual. Select Configure > System > Settings and click Update to expand that section. Click the Install Firmware button. The Update Firmware dialog box displays prompting you to navigate to the firmware file.
-
Page 66: Network Settings
ReadyNAS for Home RAIDiator 5.3 Network Settings The acronym NAS in ReadyNAS is short for network-attached storage. Your local area network (LAN) is an integral part of managing and using your ReadyNAS storage system. Connecting your ReadyNAS storage system to the Internet expands your ability to access data stored on your ReadyNAS system when you are away from it. - Page 67 IP address and network mask. If you select the Obtain an IPv4 address automatically check box, NETGEAR recommends that you set the lease time on the DHCP server or router to a value of at least one day.
-
Page 68: Dns
ReadyNAS for Home RAIDiator 5.3 a. In the IPv4 Address field, enter an IP address for your ReadyNAS system that is valid in your local area network. For more information, see the documentation that accompanies your router or your network administrator. b. -
Page 69: Host Name And Workgroup
You can change the hostname to one that is easier to remember and recognize. A workgroup is a set of computers on a LAN. Assigning devices to a workgroup can make it easier to manage multiple network-attached devices. If you do not specify a workgroup, the default workgroup NETGEAR is used. System Management... - Page 70 ReadyNAS for Home RAIDiator 5.3 To change the host name or workgroup: Select Configure > System > Overview. In the Network section, click the General Settings configure icon. (Optional) Enter a new host name in the Host Name field. The host name must be unique on your LAN.
-
Page 71: Usb Storage Devices
ReadyNAS for Home RAIDiator 5.3 USB Storage Devices You can connect USB disk and flash drives to your ReadyNAS system. USB disk and flash drives that you connect to your ReadyNAS system must use the FAT32 or NTFS file system. ... -
Page 72: Monitor
ReadyNAS for Home RAIDiator 5.3 Monitor Use Dashboard to monitor the status of your ReadyNAS storage system. System Information The Dashboard home screen provides a snapshot of your system status. More detailed information is available on the Info screen. To view system status: Select Configure >... -
Page 73: Alerts
ReadyNAS for Home RAIDiator 5.3 Alerts System events such as a fan failure, a hard disk failure, a quota violation, or low disk space generate email alert messages, if you provide an email address for alert notices. Your storage system divides system events into two categories, mandatory and optional. Mandatory events always generate email alert messages. -
Page 74: System Logs
Your ReadyNAS storage system is preconfigured to generate email alert messages when mandatory and optional system events occur. You can determine which optional system events generate alerts. NETGEAR recommends that you keep all alerts enabled; however, if you are aware of a problem, you might disable an alert temporarily. -
Page 75: Add-Ons
Add-ons are applications for your ReadyNAS storage system. You can add a wide variety of features and services to your ReadyNAS system by installing add-ons from NETGEAR and other developers. Some add-ons appear on the Available Add-ons tab in Dashboard. Other add-ons, called standalone add-ons in this manual, are available from http://readynas.com/addons... -
Page 76: Find And Install Add-Ons Using Dashboard
ReadyNAS for Home RAIDiator 5.3 To manage installed add-ons: Select Configure > Add-ons > Installed. Click the icon for an add-on. The Add-on Manager dialog box displays. (Optional) Use the links and buttons to manage the add-on. The buttons and links in the Add-on Manager dialog box vary by add-on. Find and Install Add-ons Using Dashboard You can use Dashboard to find and install add-ons. -
Page 77: Install Standalone Add-Ons
ReadyNAS for Home RAIDiator 5.3 Follow the prompts, if any, to install the add-on. Some add-ons require you to reboot your ReadyNAS system to complete the installation. A dialog box displays when the add-on installation finishes. Click the OK button. Install Standalone Add-ons Standalone add-ons are applications for your ReadyNAS system that do not appear on the Available Add-ons tab in Dashboard. -
Page 78: Netgear Genie
ReadyNAS for Home RAIDiator 5.3 NETGEAR genie NETGEAR genie is a store that contains applications you can add to your ReadyNAS storage system. To access the NETGEAR genie store: Select Configure > System > Genie Apps. You are prompted to log in to your NETGEAR genie account. -
Page 79: Chapter 6 Backup And Recovery
Backup and Recovery If your data is important enough to store, it is important enough to back up. Data can be lost due to a number of events, including natural disaster (for example, fire or flood), theft, improper data deletion, and hard drive failure. By regularly backing up your data, you can recover your data if any of these situations occur. -
Page 80: Back Up Or Restore System Configuration
ReadyNAS for Home RAIDiator 5.3 Back Up or Restore System Configuration In addition to backing up data, you can back up and restore your ReadyNAS system’s system configuration settings. To back up or system configurations: Select Configure > System > Settings and expand the Backup section. Select the check boxes for the settings that you want to back up. -
Page 81: Back Up Your Readynas System With Vault
ReadyNAS for Home RAIDiator 5.3 Note: RAID configuration of disks is not a substitute for backing up data. RAID configuration protects you only from data loss if a disk fails. For more information about the protection that RAID configuration offers, see RAID on page 19. -
Page 82: Back Up Data Onto A Local Device
ReadyNAS for Home RAIDiator 5.3 To set up a ReadyNAS Vault backup job: Select Configure > Backup > Vault: If necessary, select the Enable ReadyNAS Vault Support check box. By default, the Enable ReadyNAS Vault Support check box is selected. Log in to your ReadyNAS Vault account. - Page 83 ReadyNAS for Home RAIDiator 5.3 You can also back up files from your ReadyNAS system onto a local device as shown in the following figure. Backup source Backup destination Figure 9. Backing up data from a ReadyNAS system to a USB drive By default, all backup jobs are scheduled to run every day.
- Page 84 ReadyNAS for Home RAIDiator 5.3 The New Backup Job dialog box displays: In the Name field, enter a name for the new backup job. The name you choose can have a maximum of 255 characters. In the Source drop-down menu, select the source that has the data that you want to back From the Destination drop-down menu, select a backup destination.
- Page 85 (Optional) Select the Remove the contents of the backup destination check box. Selecting this check box erases the destination path contents before the backup is performed, which NETGEAR does not recommend for recovery jobs. WARNING! When using this option, ensure that you have correctly identified your backup source and backup destination.
-
Page 86: Manage Backup Jobs
ReadyNAS for Home RAIDiator 5.3 Your settings are saved and this job displays in the left pane. If you cleared the Enable button in step 8, you must manually start the job. If you selected the Enable check box in step 8, this backup job will run according to the schedule you established. -
Page 87: Delete A Backup Job
ReadyNAS for Home RAIDiator 5.3 Delete a Backup Job Deleting a backup job permanently removes it from your ReadyNAS system. To delete a backup job: Select Configure > Backup. The backup jobs you previously created display in the left pane. Highlight the job you want to delete. -
Page 88: View A Backup Log
ReadyNAS for Home RAIDiator 5.3 View a Backup Log You can use Dashboard to view the full logs of completed backup jobs or the partial backup logs of jobs that are in progress. In addition to backup logs, your ReadyNAS system also maintains system logs. For more information, see System Logs on page 67. -
Page 89: Time Machine
ReadyNAS for Home RAIDiator 5.3 (Optional) To add a backup job, follow these steps: a. Click the Append button and follow these steps: b. Select a backup job from the drop-down menu and click the Append button. The Backup Button screen refreshes and the new job is listed. (Optional) To delete a backup job from the Backup button sequence, follow these steps: a. - Page 90 ReadyNAS for Home RAIDiator 5.3 A pop-window displays that lists available disks, including your ReadyNAS system. Select your ReadyNAS system and click the Use for Backup button. In the Name field, enter ReadyNAS. In the Password field, enter the password you created in step 4 and click the Connect button.
-
Page 91: Recover Backed Up Data From Readynas Vault
ReadyNAS for Home RAIDiator 5.3 Recover Backed Up Data from ReadyNAS Vault If you need to retrieve a lost file or folder, click the Access Your Files tab and use the built-in explorer to view your ReadyNAS host name under My ReadyNAS. If you have multiple ReadyNAS systems using the same account, they show up as separate entries here. - Page 92 ReadyNAS for Home RAIDiator 5.3 You can also use Dashboard to create a backup job to restore data to your ReadyNAS system that you backed up to another network-attached device as shown in the following figure Recovery destination Recovery source Figure 11.
- Page 93 ReadyNAS for Home RAIDiator 5.3 The New Backup Job dialog box displays. In the Name field, enter a name for the new recovery job. The name you choose can have a maximum of 255 characters. From the Source drop-down menu, select a restore source on your ReadyNAS system. Depending on how your ReadyNAS system is configured, these options vary.
- Page 94 Ensure that the Remove the contents of the backup destination check box is clear. Selecting this check box erases the destination path contents before the backup is performed, which NETGEAR does not recommend for recovery jobs. WARNING! When using this option, ensure that you have correctly identified your backup source and backup destination.
- Page 95 ReadyNAS for Home RAIDiator 5.3 d. (Optional) Select the After backup is complete, change ownership of files in the backup destination check box. Your ReadyNAS system attempts to maintain original file ownership whenever possible. However, you can automatically change the ownership of the backed-up files to match the ownership of the share.
-
Page 96: Appendix A Notification Of Compliance
This transmitter must not be co-located or operating in conjunction with any other antenna or transmitter. FCC Declaration Of Conformity We, NETGEAR, Inc., 350 East Plumeria Drive, San Jose, CA 95134, declare under our sole responsibility that these products comply with Part 15 of FCC Rules. - Page 97 • Consult the dealer or an experienced radio/TV technician for help. Modifications made to the product, unless expressly approved by NETGEAR, Inc., could void the user's right to operate the equipment. Canadian Department of Communications Radio Interference Regulations...
-
Page 98: Index
Index disk configuration changing Flex-RAID formats Access List changing from Flex-RAID to X-RAID2 access rights changing from X-RAID2 to Flex-RAID expanding volumes Active Directory managing additional documentation diskless systems add-ons available installed managing preinstalled standalone Ethernet administrator password expanding volumes, volume expansion changing recovering alerts... - Page 99 MAC address registration Mac OS X device share access Remote Access user monitor system logs remote share access system status setup wizard NETGEAR genie shares network settings access rights DHCP server accessing remotely Ethernet accessing using HTTP (Webshare) host name...
- Page 100 ReadyNAS for Home RAIDiator 5.3 technical support time and date settings Time Machine TiVO setup trademarks troubleshooting DHCP disabled on router DHCP not working on router dynamic IP address changes too quickly incorrect IP address IP address typo lost administrator password RAIDar does not detect ReadyNAS system reconnecting after losing static IP address static IP address changed...
Need help?
Do you have a question about the RND4000v2 and is the answer not in the manual?
Questions and answers