Table of Contents
Advertisement
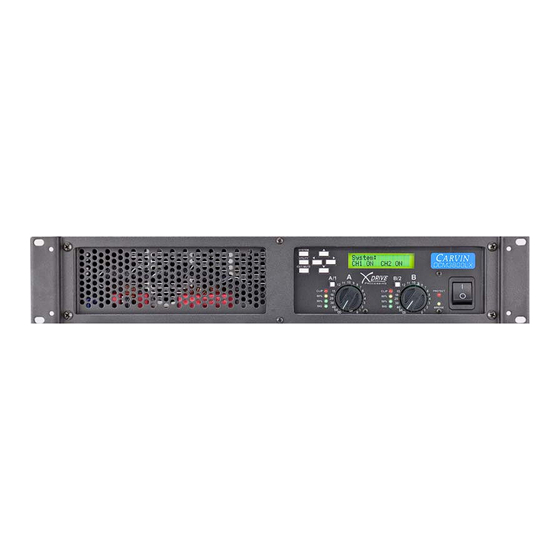
DCM-Lx Series Operation Manual
Concert audio has to be uncompromising, reliable and efficient. Carvin power
amps have made their mark serving top artists and concert venues for decades.
The DCM-Lx series power amps with CARVIN's X-Drive™ signal processing
incorporate the flexibility of digital control with the exceptional sound and
durability of DCM power. Take full control of your amps from the front panel or via
USB to Microsoft™ / Mac™ laptops using the Xdrive™ software with highly
effective processing for live use or installations. All models incorporate large heat
sinks, high headroom power supplies and lightweight aluminum main frames - all
backed by a solid 3 year warranty. Exceptional sound and reliability combined
with the flexibility of DSP and ultra-light weight make the DCM-Lx a valuable
addition to any rack system.
GETTING STARTED: An easy way to get familiar with the features of the DCM-Lx
is to download the free Xdrive™ software on your computer. Just run the software
and press the blue button with the product name. The control window will appear:
DCM2000Lx
DCM3800Lx
DCM2004Lx
Advertisement
Table of Contents

Related Manuals for CARVIN XDrive DCM3800Lx


Summarization of Contents
Safety and Warranty Information
Limited Warranty Details
Details the 3-year warranty, service responsibilities, and exclusions for Carvin DCM power amps.
Service and Support Information
Provides contact information for service in the USA and outside the USA.
Equipment Maintenance Guidelines
Offers advice on cleaning and protecting the unit from environmental factors.
Introduction to DCM-Lx Amplifiers
Front Panel and Connectivity
Describes the front panel display, controls, and input/output connectors.
Amplifier Construction and Quality
Details the build quality, chassis, circuit boards, and safety certifications of the amplifier.
High Power Topology Explanation
Explains the switch-mode power supply, headroom, and AC generator friendliness.
Efficient Cooling System
Covers the heat transfer system, aluminum heat sinks, and cooling fans.
Rear Panel Layout and Connections
AC Power Requirements
Explains power requirements, cord connection, and circuit breaker considerations.
Input Connectors Overview
Details the XLR and 1/4" TRS input connectors and their functions.
Ground Lift Switch Functionality
Describes the function of the ground lift switch for resolving ground loop issues.
Output Connectors and Configurations
Covers speaker connection types, bridging, and bi-amping options.
USB Port for Control and Updates
Explains the USB port for software control and firmware updates.
Front Panel Controls and Indicators
Volume Controls and Navigation
Covers channel attenuators, system/utility buttons, and navigation arrow keys.
Status Indicators (LEDs)
Explains the SIG, CLIP, PROTECT, and BRIDGE LEDs indicating amp status.
Channel Select and Mute Buttons
Details channel select buttons and the EXIT/MUTE button for menu navigation and output muting.
System Menu Operations
Quick Setup Configuration
Guides on using Quick Setup to configure system routing and crossover parameters for different amp models.
Flat Channel Settings
Resets input or output channel parameters and crossovers to a flat, wide-open state.
Copy Channel Settings
Allows copying channel settings from one input or output to another.
Bridging Channels for Power
Explains how to combine amps for increased power output for a single output.
Load Speaker Presets
Enables loading optimized speaker presets for specific Carvin loudspeakers to output channels.
Edit System Name
Describes how to edit the system name for saved configurations.
Save System Configuration
Explains how to save complete setups into memory locations for later recall.
Load System Configuration
Details how to recall complete setups from memory locations.
Reset System to Flat State
Resets all input and output parameters and crossovers to a flat state.
Utility Menu Settings
Delay Units Selection
Allows selection of delay time units (Seconds, Feet, or Meters).
Delay Time Memory Availability
Displays remaining memory for delay assignments.
Input Sensitivity Adjustment
Adjusts input level required for maximum output, with selectable Vrms values.
Turn On Mute Configuration
Configures whether all outputs are muted at power-on.
Security Lockout and Password
Enables or disables setting changes via a password.
Password Change Procedure
Provides instructions for changing the security lockout password.
Unit ID Configuration for USB
Explains setting a unique ID for controlling multiple devices via USB.
Firmware Version and Updates
Displays the current firmware version and how to update it.
Channel Settings and Parameters
Input Graphic EQ Adjustment
Adjusts the incoming signal's frequency response using a 30-band graphic equalizer.
Output Gain Level Control
Sets the output level for each channel to balance speaker levels.
Output Channel Configuration
Output Source Routing
Determines which inputs are routed to specific outputs.
Output Phase Adjustment
Adjusts the phase of individual components or corrects out-of-phase wiring.
Low/High Pass Filter (Crossover)
Sets crossover points, determining frequencies sent to selected outputs.
Output Processing Features
Output Limiter Settings
Controls peaks in amplifier output to prevent distortion or clipping.
Output Delay Time
Adds delay to an output to time-align drivers or account for distance.
Parametric EQ and Frequency Chart
Parametric EQ (PEQ 1-4) Adjustment
Allows independent EQ adjustment for each output using four bands.
Frequency Chart Manipulation
Enables direct manipulation of Parametric EQs from the frequency chart.
Computer Setup and Software
Software Minimum Requirements
Specifies the operating system requirements for Windows and Mac.
Xdrive Software Installation
Provides step-by-step instructions for downloading and installing the Xdrive software.
USB Connection and Xdrive Software
Establishing USB Connection
Guides on turning on devices, connecting USB cable, and running the Xdrive software.
Device Recognition and Control
Explains how the software recognizes connected devices and enables remote control.
Computer Control Interface Overview
System Load/Save Functionality
Explains saving and uploading complete setups as systems on the computer.
System Name Editing
Describes how to type a new name for the system preset in the software.
Sync Settings to Software/Hardware
Details transferring settings between the computer screen and the DCM-Lx.
Uploading Firmware Updates
Guides on downloading and uploading new firmware to the DCM-Lx hardware.
Input Settings via Software
Input Load/Save Settings
Allows loading preset input settings or saving them to your computer.
Input Select for EQ
Selects inputs A, B, (C, D) to display Graphic EQ settings.
Copy/Paste Output Settings
Enables copying output settings from one output to another.
Reset Input Graphic EQ to Flat
Sets all GEQ frequency bands to flat "0" for the selected input.
Graphic EQ Adjustment Controls
Allows boosting or cutting frequency bands by dragging graphic EQ faders.
Router Matrix and Frequency Chart
Bridge Channels Configuration
Combines amplifier channels for a single high-power output.
Output Mute Control
Allows muting or un-muting individual output channels.
Routing Input Sources to Outputs
Selects the signal source(s) for each output channel.
Output Naming Convention
Allows custom naming for each output channel.
Frequency Chart Display
Displays the frequency response of each amp output.
Adjusting PEQs via Frequency Chart
Enables direct manipulation of Parametric EQs using nodes on the frequency chart.
Output Settings Configuration
Output Load/Save Settings
Allows loading preset output settings or saving them to your computer.
Output Channel Select
Selects specific output channels to view and configure their settings.
Copy/Paste Output Settings
Copies output settings from one output to another.
Reset Output Settings to Flat
Resets Output GAIN, PEQs, and HPF/LPF to default values.
Phase Flip Setting
Flips the phase of the output signal by 180 degrees.
Limiter Threshold Adjustment
Sets the threshold for the output limiter to control peaks.
Output Delay Time Setting
Sets the delay time for the output, with options for mS, Ft, or M.
Gain Level Adjustment
Sets the output level from +12dB to -68dB.
Parametric EQ (PEQ) Settings
Adjusts GAIN, FREQUENCY, and BANDWIDTH for each of the four parametric EQ bands.
High/Low Pass Filter Setup
Sets crossover frequencies and filter types (Butterworth, Bessel, Linkwitz-Riley).
Manual Setup Procedures
2-Way Biamp Manual Setup
Step-by-step guide for setting up a 2-way bi-amplification system.
Parallel Output Configuration
Instructions for setting up parallel outputs for full-range signal distribution.
Amplifier Specifications
Input and Output Specifications
Details input impedance, connectors, frequency response, and output power ratings.
Digital Signal Processing Features
Lists DSP capabilities including EQ, phase, filters, limiter, and delay parameters.
System and General Specifications
Covers input sensitivity, security, memory, USB, dimensions, weight, and power.
Need help?
Do you have a question about the XDrive DCM3800Lx and is the answer not in the manual?
Questions and answers